We like to create a Hybrid deployment between Exchange on-premises and Office 365. To do…
An Azure Active Directory call was made to keep object in sync
Adding an alias to a mailbox shows the error: Error executing request. An Azure Active Directory call was made to keep object in sync between Azure Active Directory and Exchange Online. However, it failed. Detailed error message: Unable to update the specified properties for on-premises mastered Directory Sync objects or objects currently undergoing migration. DualWrite (Graph) RequestId: 21a9bbca-d90a-4bff-b759-9a4c826c639c The issue may be transient and please retry a couple of minutes later. If issue persists, please see exception members for more information.
In this article, you will learn why this happens and the solution for an Azure Active Directory call was made to keep object in sync between Azure Active Directory and Exchange Online.
Table of contents
Introduction
Let’s look at when the error shows up: Error executing request. An Azure Active Directory call was made to keep object in sync between Azure Active Directory and Exchange Online. However, it failed.
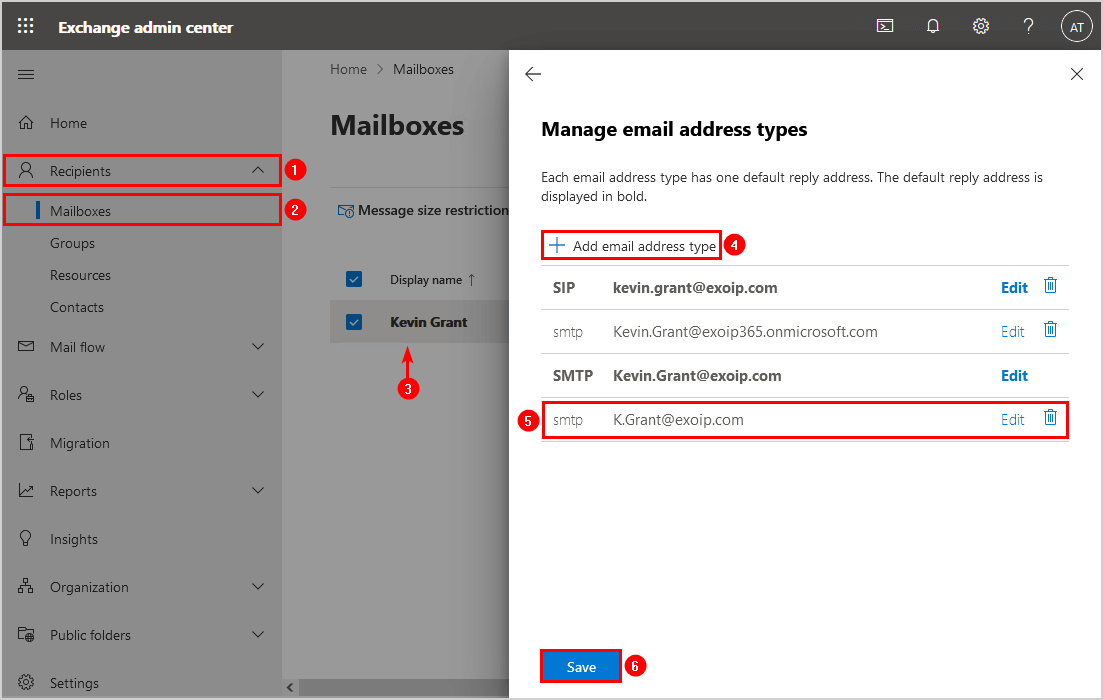
- Sign in to Exchange admin center
- Expand Recipients and click on Mailboxes
- Select the Mailbox
- Click on Add email address type
- Fill in the Email address
- Click on Save
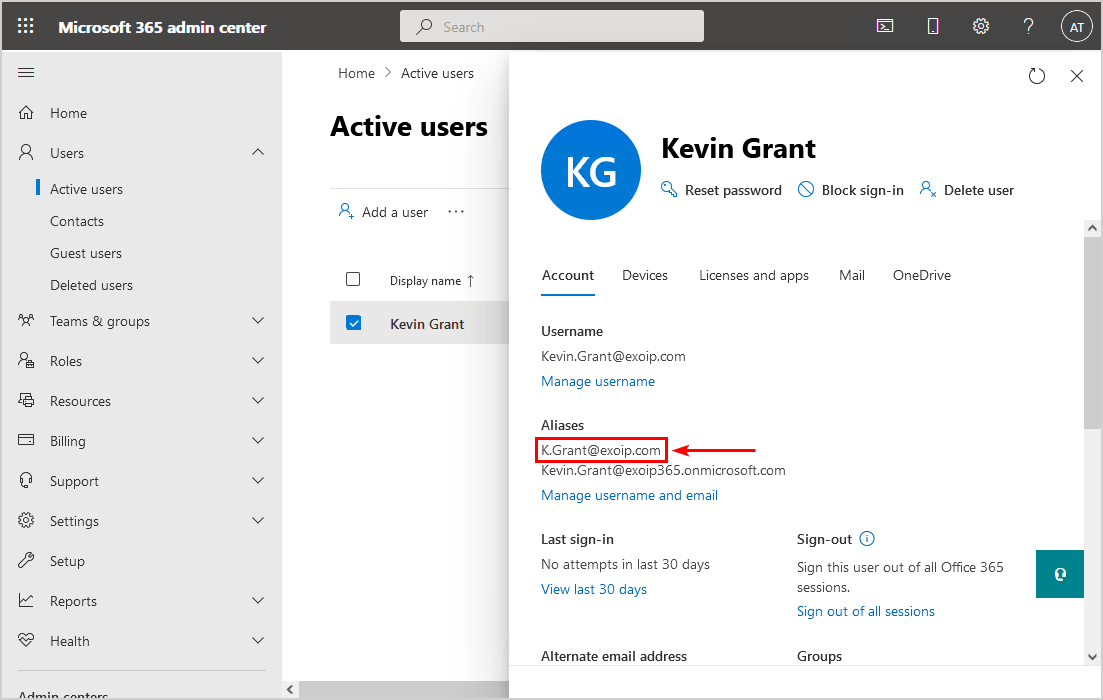
In our example, we did add the alias address: K.Grant@exoip.com.
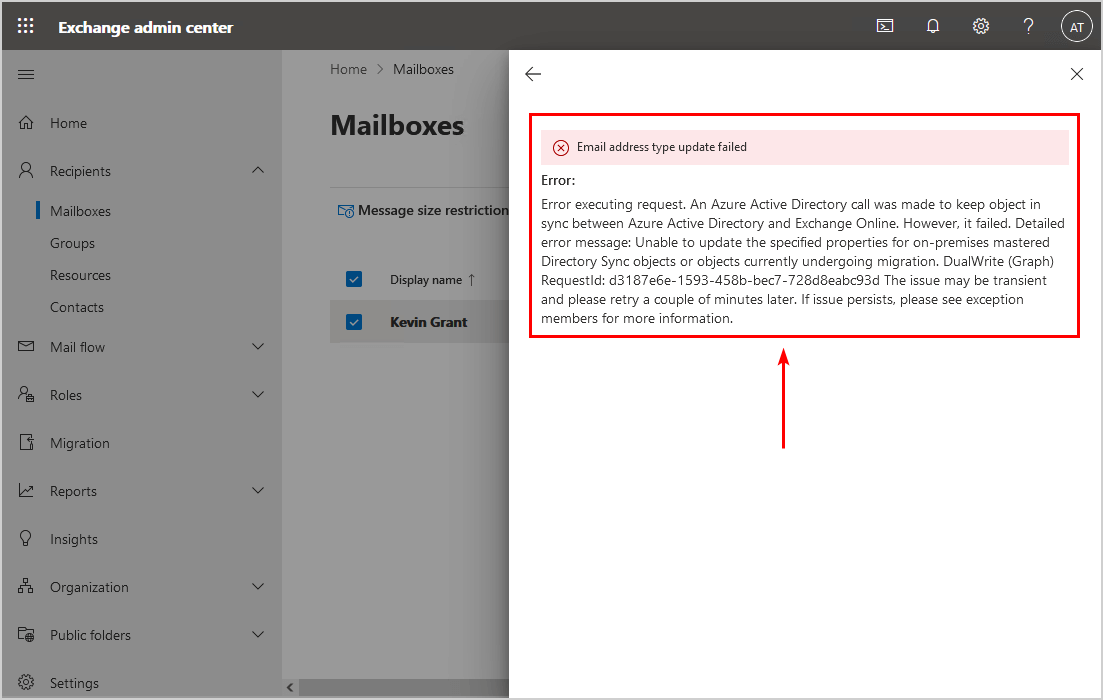
The email address type update failed, and the error shows:
Error
Error executing request. An Azure Active Directory call was made to keep object in sync between Azure Active Directory and Exchange Online. However, it failed. Detailed error message: Unable to update the specified properties for on-premises mastered Directory Sync objects or objects currently undergoing migration. DualWrite (Graph) RequestId: 21a9bbca-d90a-4bff-b759-9a4c826c639c The issue may be transient and please retry a couple of minutes later. If issue persists, please see exception members for more information.
User is synchronized with your local Active Directory
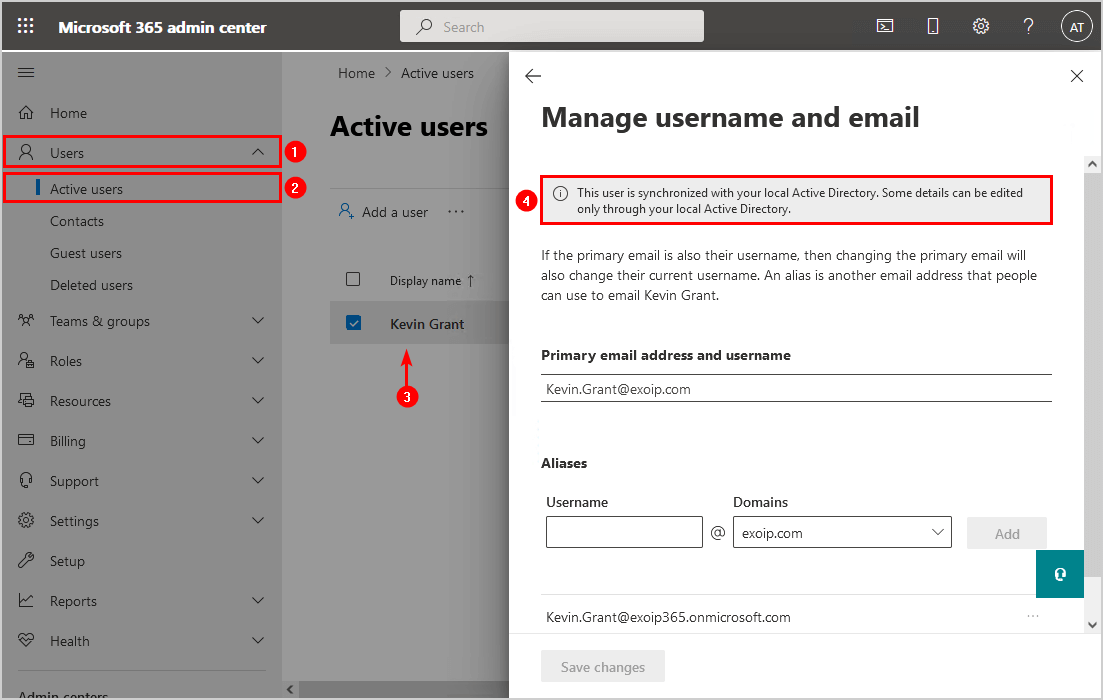
Let’s have a look at the user in Microsoft 365 admin center, follow these steps:
- Sign in to Microsoft 365 admin center
- Expand Users and click on Active users
- Select the User
- Click on Manage username and email
You can’t add an alias address, and the Add button is greyed out. That’s because the user is synchronized with your local Active Directory, and you have to add the aliases on-premises and not in the cloud.
Solution for an Azure Active Directory call was made to keep object in sync
The solution is to add the alias address in Exchange Admin Center on-premises. After that, sync with Azure AD Connect, and it will show the alias address in the cloud. Suppose you don’t see the mailbox on-premises; there are couple more steps involved. Let’s look at that below.
Office 365 mailbox not showing on-premises
Read more in the article Office 365 mailbox not showing in Exchange Hybrid on-premises.
Run Exchange Management Shell as administrator and run the following three cmdlets.
Step 1. Run Enable-MailUser cmdlet to mail-enable the user that isn’t already mail-enabled.
[PS] C:\>Enable-MailUser -Identity "Kevin.Grant@exoip.com" -ExternalEmailAddress "Kevin.Grant@exoip365.mail.onmicrosoft.com"

Name            RecipientType
----            -------------
Kevin Grant     MailUser
Do you get an error after running the above cmdlet? Read the article ExchangeGuid is mandatory on UserMailbox.
Step 2. Run Enable-RemoteMailbox cmdlet to link the cloud mailbox in the cloud-based service for the existing user in the on-premises Active Directory.
[PS] C:\>Enable-RemoteMailbox "Kevin.Grant@exoip.com"

Name            RecipientTypeDetails     RemoteRecipientType
----            --------------------     -------------------
Kevin Grant     RemoteUserMailbox        ProvisionMailbox
Step 3. Force sync Azure AD Connect with PowerShell.
PS C:\> Start-ADSyncSyncCycle -PolicyType DeltaAdd email address in Exchange admin center
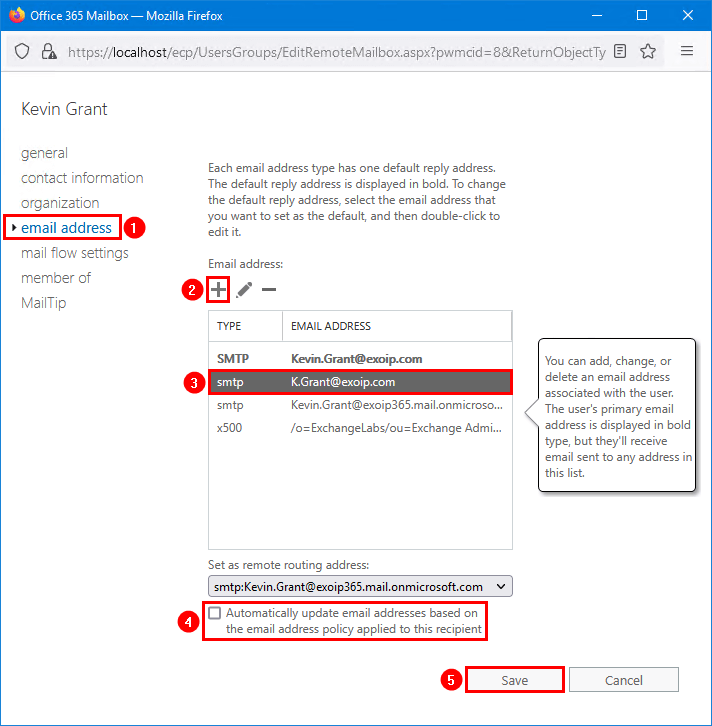
Add the email address to the mailbox in Exchange on-premises:
- Sign in to on-premises Exchange Admin Center
- Double-click the mailbox to open properties
- Click on email address
- Add the email address
- Uncheck the box Automatically update email addresses based on the email address policy applied to this recipient
- Click on Save
After adding the alias address, Force sync Azure AD Connect with PowerShell.
PS C:\> Start-ADSyncSyncCycle -PolicyType DeltaThe alias address shows up in the Microsoft 365 admin center.
Everything looks great!
Read more: Send from Alias in Office 365 »
Conclusion
You learned why the error An Azure Active Directory call was made to keep object in sync between Azure Active Directory and Exchange Online shows up. The solution to this problem is to add the alias address from on-premises Exchange Server.
If the mailbox isn’t shown on-premises, run both the Enable-MailUser and Enable-RemoteMailbox cmdlets against the on-premises Active Directory user. After that, the Office 365 mailbox shows up in the on-premises Exchange Server. As of last, add the alias address to the mailbox from Exchange on-premises.
Did you enjoy this article? You may also like Send from Alias in Office 365. Don’t forget to follow us and share this article.
What Others Are Reading


Hi Ali, love your tutorials.
We’re in the process of decommissioning our Exchange on Prem, but keeping it as an SMTP Relay. How do I stop the hybrid, to allow us to create mailboxes online, without having to go through the above?
Hi Ali, I have a case that the user changed the ALIAS in ExchangeOnPremise but the Email Address in ExchangeOnline for the default domain forexample.onmicrosoft.com continues to present the address with the old alias. In this case, since it is an address that does not exist in OnPremise, it cannot be changed on that side, but since it is a synchronized object, it does not allow it to be done directly in ExchangeOnline. Any suggestions for this type of issue?. I did a DELTA synchronization with AzureAD but after a while, see that this address is still not updated in userx.forexample.onmicrosoft.com in ExchangeOnline.
For those of you who have made changes in Exchange On-Prem (changed the SMTP default address/alias) and it looks fine in On-Prem AD and Exchange, but won’t update in Exchange Online, do this:
Jump into AD, the account, Attribute editor. Scroll down and there will be two places where it lists your email address and aliases. Make sure the one you want to be the new/default address is set as SMTP and the others as smtp. Once you set your required address as SMTP either wait or do a Start-ADSyncSyncCycle -PolicyType Delta
Give it a few minutes and Exchange online will update and show your correct address for that account 😉
Can confirm this fixed my issue.
O365 user created via Onprem but directly as an office 365 mailbox. The default SMTP address was incorrect using the onmicrosoft.com address and I was unable to change it. The user was not visible in EAC on prem.
Following the guide above made the user visible on prem, made the changes and confirmed it appears in EXO.
What lead me to find this article was the user reported the below error:
Your message couldn’t be delivered because there is a partner connector configured that matched the message’s recipient domain. The connector had either the RestrictDomainsToIPAddresses or RestrictDomainsToCertificate set.
Thank you for the thorough explanation and resolution.
I have got the same error but my setup differs. There is no on premise Exchange only Active Directory with users synced to Azure AD through Azure AD Connect. I have added the proxy addresses to the on-premise user but these did not show up in Azure or in EAC after triggering a sync. The domains are owned and registered in azure ad as well as in EAC. I am out of ideas right now…
My fault: you have to add the prefix smtp: to the email addresses. Capital letters SMTP: for the primary email address.
ALI TAJRAN,
I found your post and I thought I finally found the answer ive been looking for. However. I do not have an on-premise Exchange. In fact I do not use Exchange but I still get the same exact error you get when I try to edit the proxyaddress. I have a student whose name changed 5 years ago but the “initial domain” email address still has the old username (oldname@ourdomain.org.onmicrosoft.com). Any idea how I can edit this email?
Thank you
I believe you should open Exchange Online at admin.exchange.microsoft.com, find and select the mailbox in question. In the General tab for the selected mailbox, look for ’email addresses’ and click the ‘manage email address types’. Click ‘Add email address type’ and enter the email address you want to be users default primary email address, e.g. John. In the dropdown list to the right, chose the domain you want to use, e.g. contoso.com Now you have John@contoso.com
Check ‘make this the reply address’ check box and click OK. All done.
If the drop down list for domains does not show the domain you want to use, you need to add and verify this domain at https://admin.microsoft.com/Adminportal/Home#/Domains