How to find Azure AD Connect server? Sometimes you want to identify on which server…
Assign Microsoft 365 licenses with group-based licensing
What is an excellent way to manage and assign Microsoft 365 licenses? If you have a small organization with a few users, you can assign Microsoft 365 licenses directly to the user. If you manage a large environment and want structure, your best way is to assign Microsoft 365 licenses with group-based licensing. In this article, you will learn how to configure group-based licensing.
Table of contents
Assign Microsoft 365 license directly to user
If you don’t have many users in the organization, you can assign the Microsoft 365 license directly to the user:
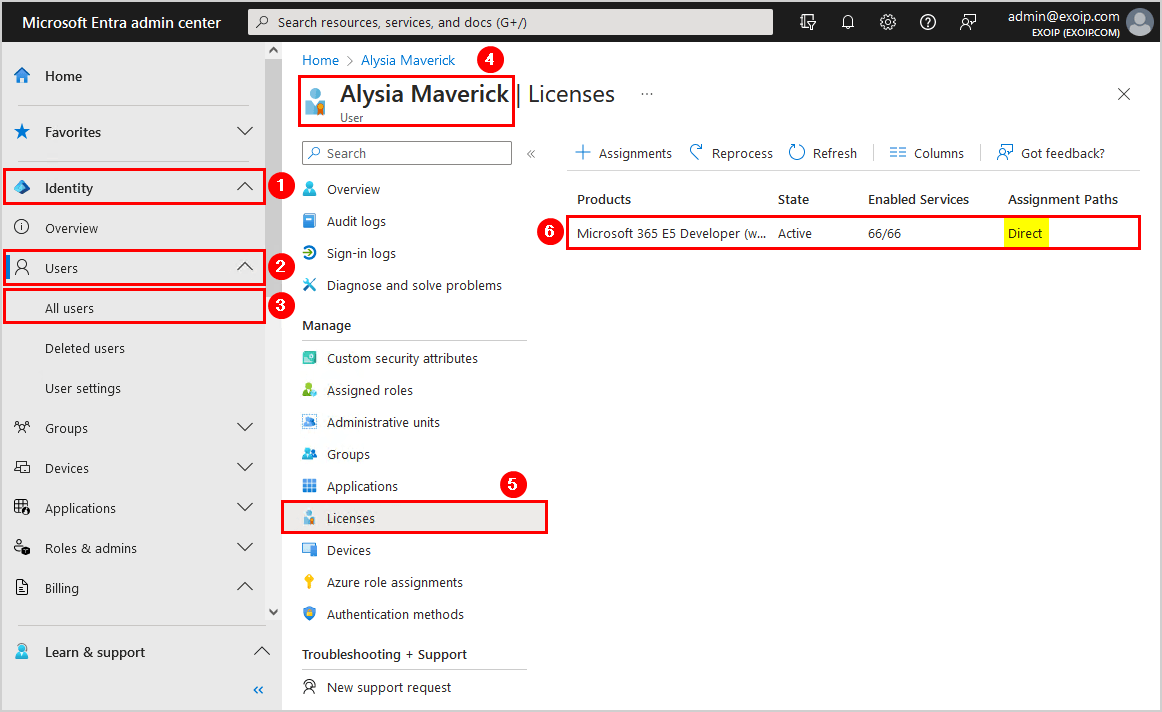
- Sign in to Microsoft Entra admin center
- Expand Identity > Users > All users
- Click on the user
- Select Licenses
- Click + Assignment
- Select the License
- Check which license options you want to assign to the user
- Click Save
When you assign a Microsoft 365 license directly to a user, the Assignment Paths column shows that it’s Direct assigned.
A better situation is to create groups, and manage the Microsoft 365 licenses from there. How will that work? Let’s see in the next step.
Microsoft Entra ID group-based licensing
Microsoft Entra ID includes group-based licensing, which allows you to assign one or more product licenses to a group. Microsoft Entra ID ensures that the licenses are assigned to all members of the group. Any new members who join the group are assigned the appropriate licenses. When they leave the group, those licenses are removed. This licensing management eliminates the need for automating license management via PowerShell to reflect changes in the organization and departmental structure on a per-user basis.
Read more: What is group-based licensing in Microsoft Entra ID?
Microsoft Entra ID group-based licensing requirements
You must have one of the following licenses to use group-based licensing:
- Paid or trial subscription for Microsoft Entra ID P1 and above
- Paid or trial edition of Microsoft 365 Business Premium or Office 365 Enterprise E3 or Office 365 A3 or Office 365 GCC G3 or Office 365 E3 for GCCH or Office 365 E3 for DOD and above
How to configure group-based licensing in Microsoft Entra ID
Go through the below steps to set up group-based licensing in Microsoft Entra ID:
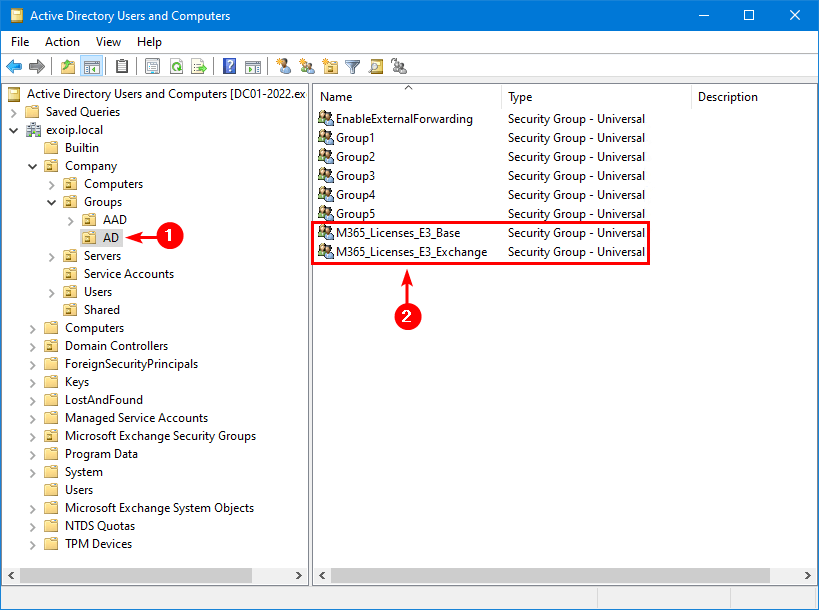
1. Create security groups on-premises
We recommend you create a base group, which you will assign the must-have Microsoft 365 products. Create other groups for products that not everyone needs to use.
If you have everything in the cloud, create the security groups in Microsoft Entra ID. Suppose you have a Hybrid environment, create the groups in on-premises AD.
In this example, we will create two groups in Active Directory Users and Computers:
- M365_Licenses_E3_Base
- M365_Licenses_E3_Exchange
The security groups will look as below.
2. Sync security groups to Microsoft Entra ID
- Sign in on the Azure AD Connect server
- Start the Azure AD Connect application
- Verify in Azure AD Connect that the OU where you placed the security groups is enabled for syncing

- Wait a maximum of 30 minutes, and it will synchronize the objects or speed up the process and Force sync Azure AD Connect by running the below command
Start-ADSyncSyncCycle -PolicyType Delta3. Verify security groups in Microsoft Entra ID
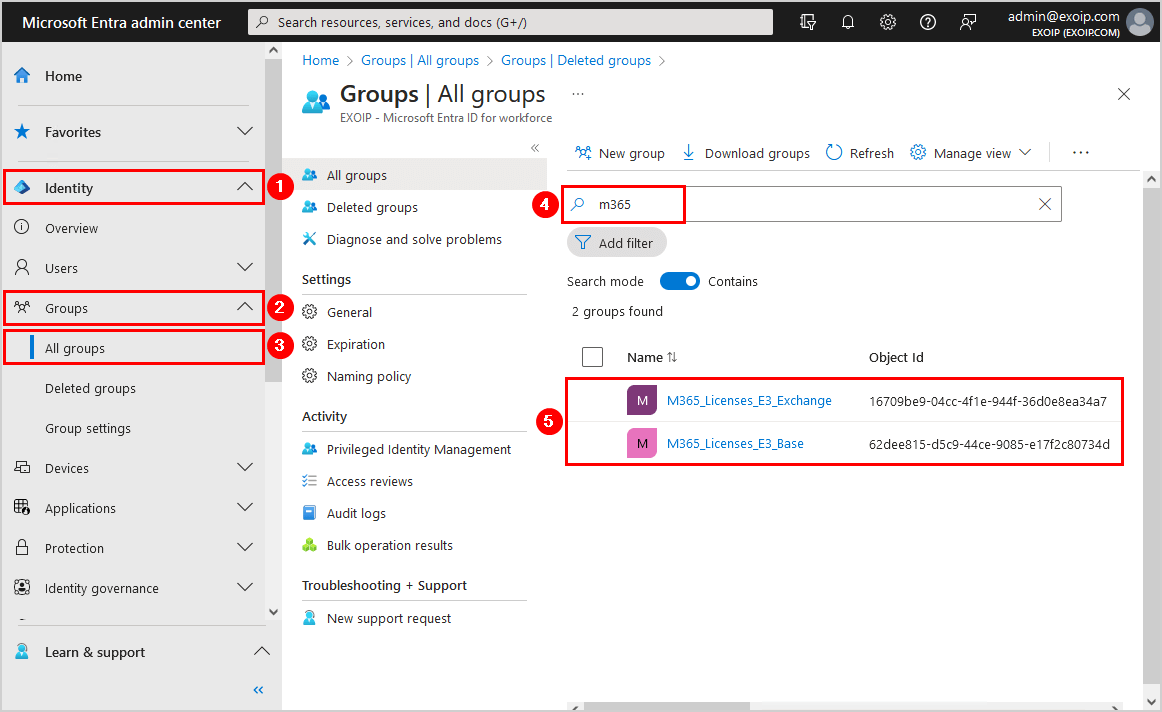
To verify that the security groups appear in Microsoft Entra ID, follow the below steps:
- Expand Identity > Groups > All groups
- Search for the on-premises security groups
- Verify that the on-premises security groups appear in the list
4. Assign Microsoft 365 licenses to group
To assign a Microsoft 365 license to a group, follow these steps:
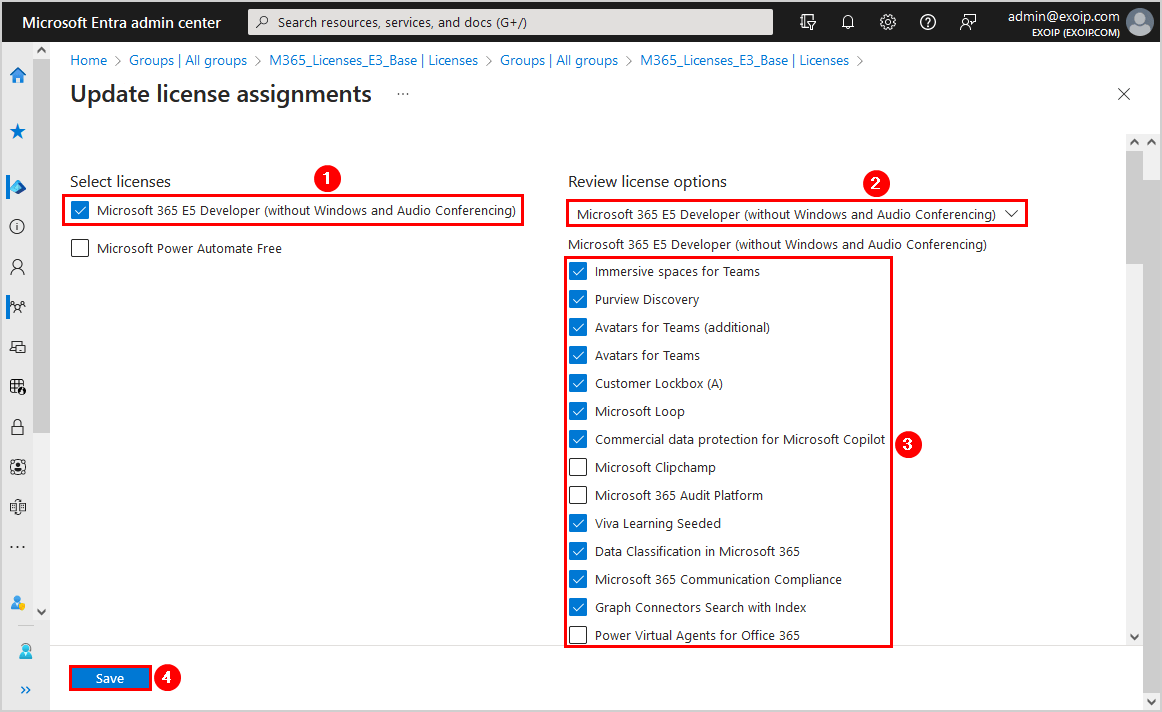
- Click on the group
- Click Licenses > + Assignments
In our example, it’s the group M365_Licenses_E3_Base.
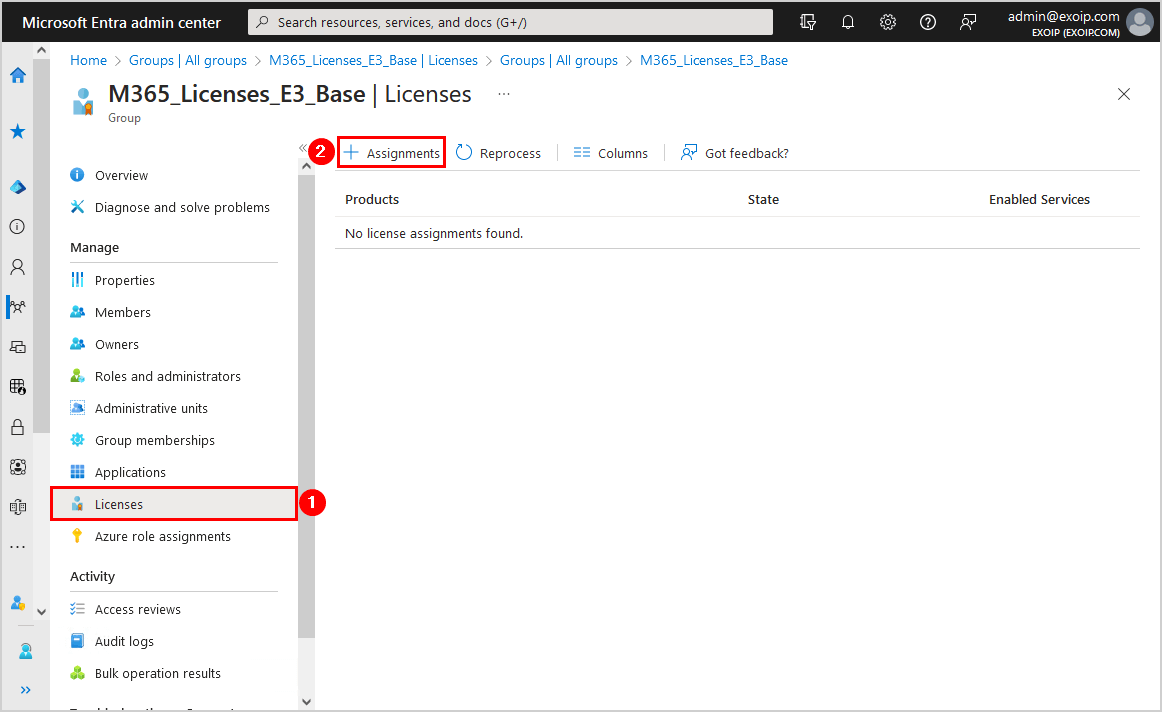
- Select the license
- Check which license options you want to assign to the group
- Click Save
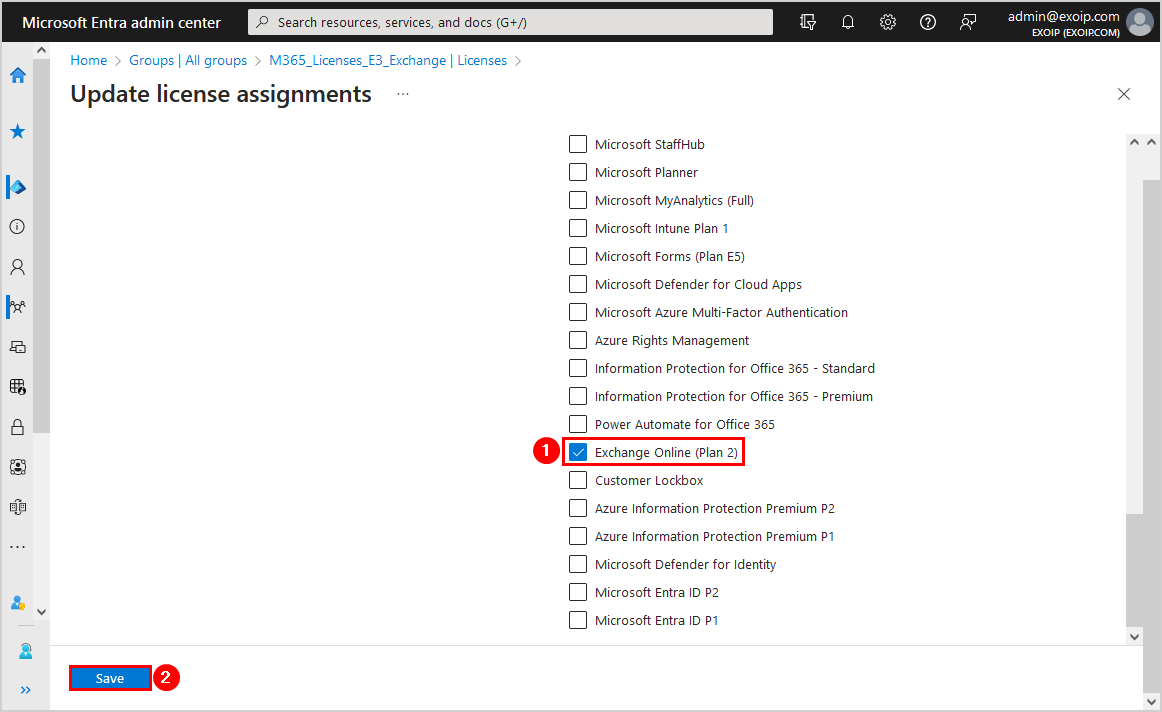
- Do the same, but this time add the group M365_License_E3_Exchange
- Select the license option Exchange Online (Plan 2)
- Click Save
5. Add user to security group
To add the user to the security group, follow the below steps:
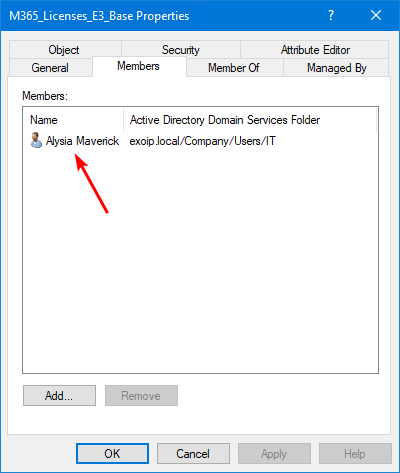
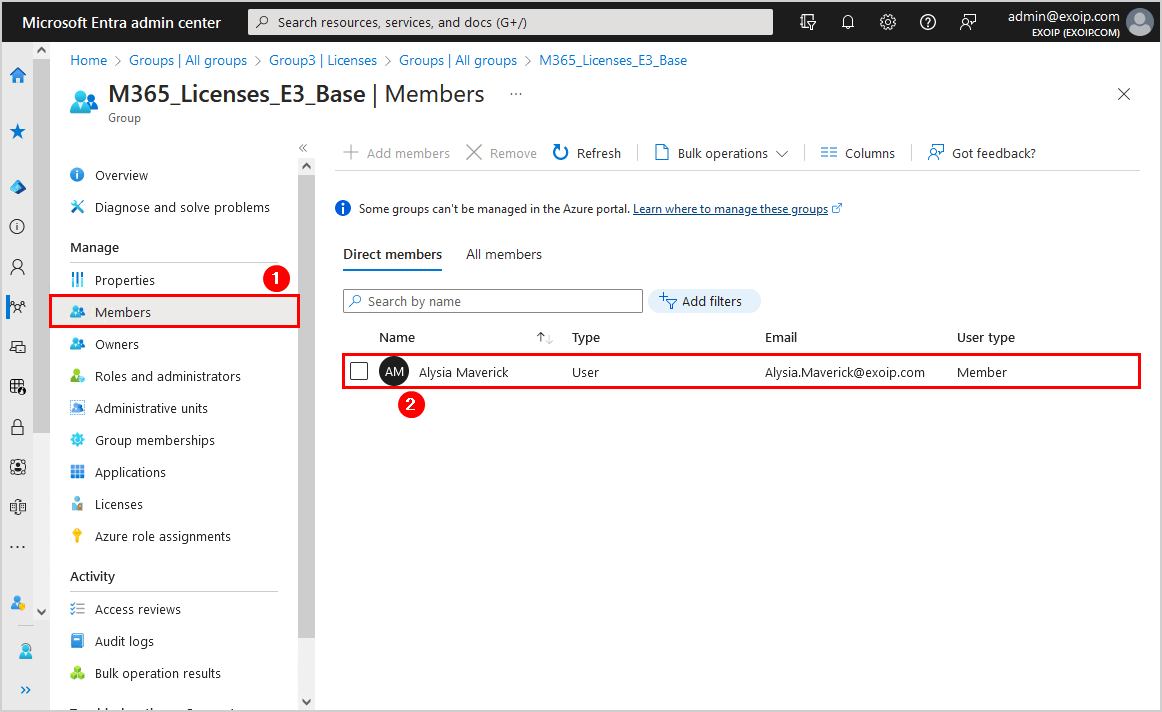
- Start Active Directory Users and Computers
- Add a user to the group M365_License_E3_Base
- Force sync with Microsoft Entra ID
Start-ADSyncSyncCycle -PolicyType Delta- Click on Members and verify you see the synced user in the list
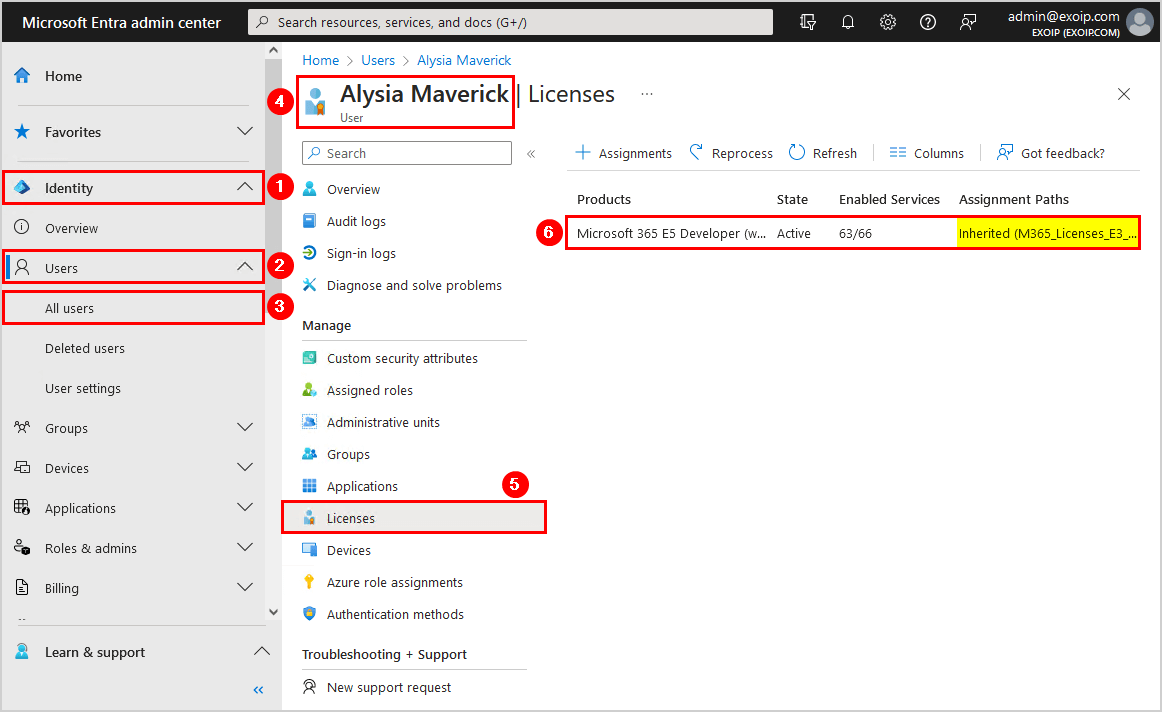
6. Verify license assignment paths
- Expand Identity > Users > All users
- Click on the user
- Select Licenses
- Verify that Inherited (group name) appears in the column Assignment Paths
Note: An excellent method to check the Assignment Paths is with PowerShell. Read more in the article Check Microsoft 365 user license is direct assigned or inherited from group.
Everything looks great!
You can assign Microsoft 365 licenses in bulk by adding all the users to the security group on-premises.
In the next article, we will look at Exchange Hybrid test plan.
Conclusion
You learned how to assign Microsoft 365 licenses with group-based licensing. This setup will help user management and licensing for every organization significantly. There are no more challenges when assigning licenses, and everything is organized in groups.
Did you enjoy this article? You may also like the Exchange Hybrid course. Don’t forget to follow us and share this article.
What Others Are Reading

Hi,
I am looking for a similar Group based licensing, but for cloud only accounts.
Can you suggest a way in which we can do that through Dynamic Grouping?
Hi Paresh,
You can check below document where Dynamic grouping is explained also you need to create Security group with “Membership type” is “Dynamic user”
Docs: https://learn.microsoft.com/en-us/azure/active-directory/enterprise-users/groups-dynamic-membership
I did not had this configured. Now I do. This will help a lot. Thanks.
Your attention to detail is perfect. Great work as always.
Just what I needed. So much easier to manage.
Thanks!
Hi,
I ask out of curiosity .
1. I created a group “Communication_Basic” with Business Basic licenses with plan: Exchange, MS Teams and SharePoint
2. I added user to that group and after while he got Business Basic license with Exchange, Teams and SP.
And question is –
3. If I want assign another (additional) license for user – for example Whiteboard – the group assign licenses won’t override this and remove that licenses?
Greetings,
Przemek
Hi Przemek,
You can’t assign the “Whiteboard” license directly to the user because the licenses section is greyed out and shows the message:
“This is inherited by group-based licensing and can’t be changed here. Manage group-based licenses in the Azure portal.”
It’s best for you to:
1. Create a new security group. For example, give it the name “Communication_Whiteboard”.
2. Assign the license “Whiteboard” to the group that you created in step 1.
3. Assign the security group to the user.
The user will have “Communication Basic” assigned licenses and “Communication_Whiteboard” assigned license. These are the licenses for Exchange, MS Teams, SharePoint, and Whiteboard.
It’s the same example as I did in the article. Only I used Exchange Online instead of Whiteboard.
Thanks for reply. Great blog by the way