How to migrate Azure AD Connect to a new server? You have Azure AD Connect…
Enable Azure MFA application name for extra security
Every organization knows that security is essential and needs to be solid. Nowadays, every organization enables MFA and thinks that they are protected and done. Well, hold your horses because that’s not the case. What if a user gets an MFA prompt and accidentally accepts it when clicking on it? That’s when show application name in Azure AD plays a role and makes MFA push notifications more secure. In this article, you will learn how to enable MFA application name in Microsoft Authenticator app for sign-in security purposes.
Table of contents
Enable Azure MFA
Configuring MFA in Azure/Microsoft 365 is a prerequisite, and there are two methods:
Note: It’s recommended to configure Azure AD Multi-Factor Authentication instead of per-user MFA.
Azure MFA application name
Show application name in push and passwordless notifications is a feature in Azure AD. When a user receives a passwordless phone sign-in or MFA push notification in Microsoft Authenticator, they’ll see the name of the application that requests the approval where the sign-in originated from.
Note: Azure MFA application name in Azure AD is flexible and can be targeted to a single user, multiple users, all users, and groups.
Let’s look at how to configure MFA application name and how it looks.
Enable Azure MFA application name
To enable application name in Azure AD, follow these steps:
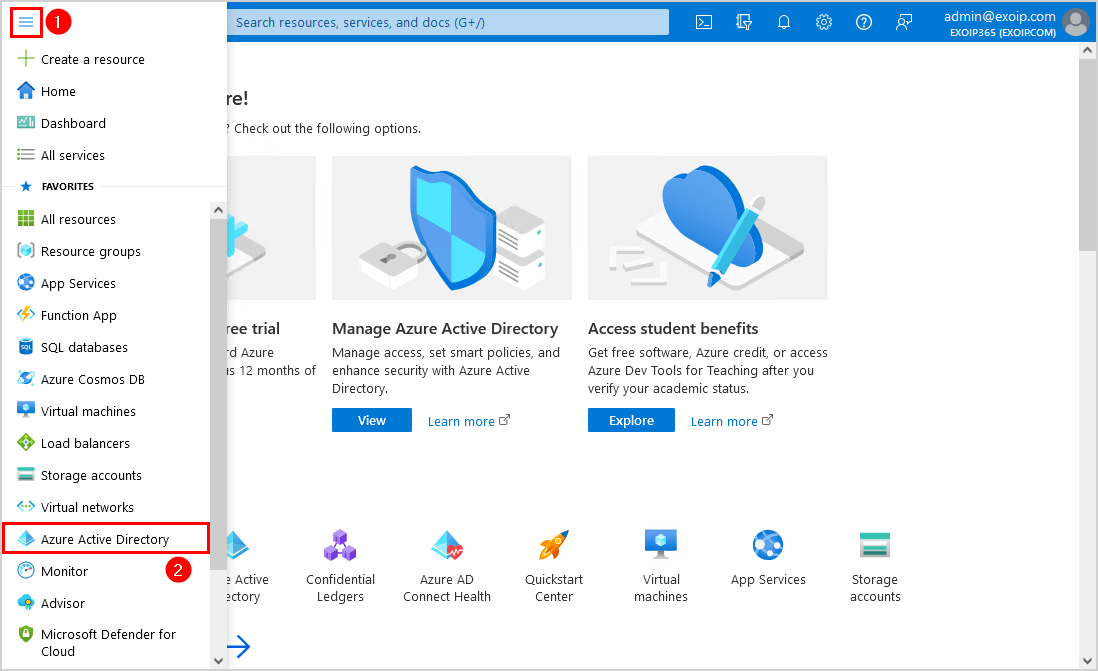
Step 1. Sign in to Microsoft Azure Portal.
Step 2. Click on Menu > Azure Active Directory.
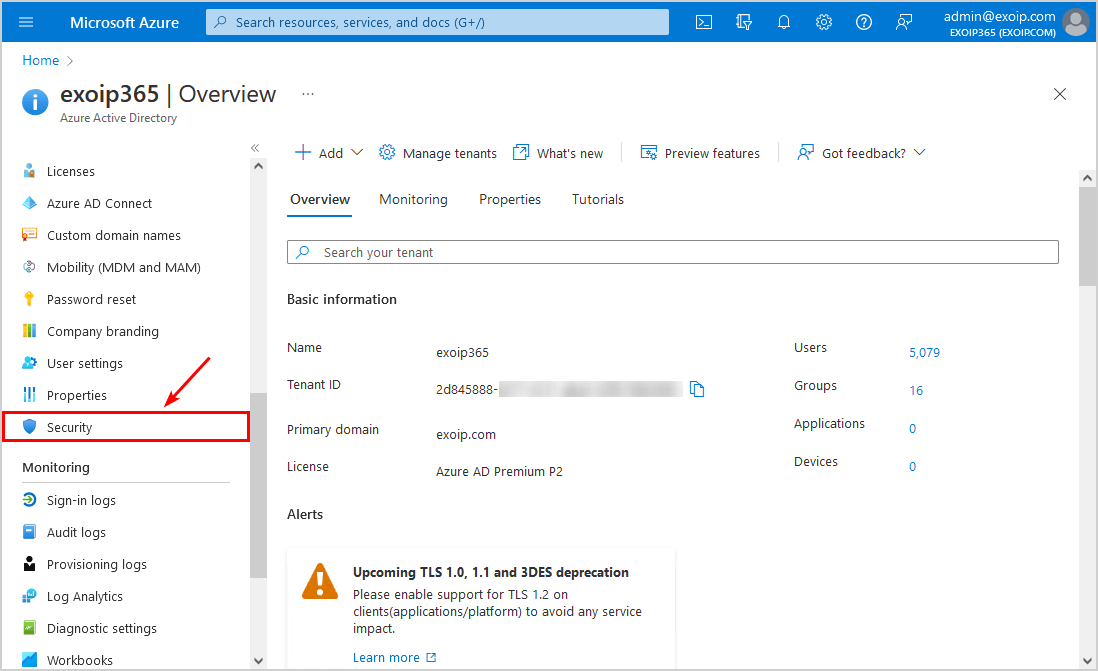
Step 3. Click on Security.
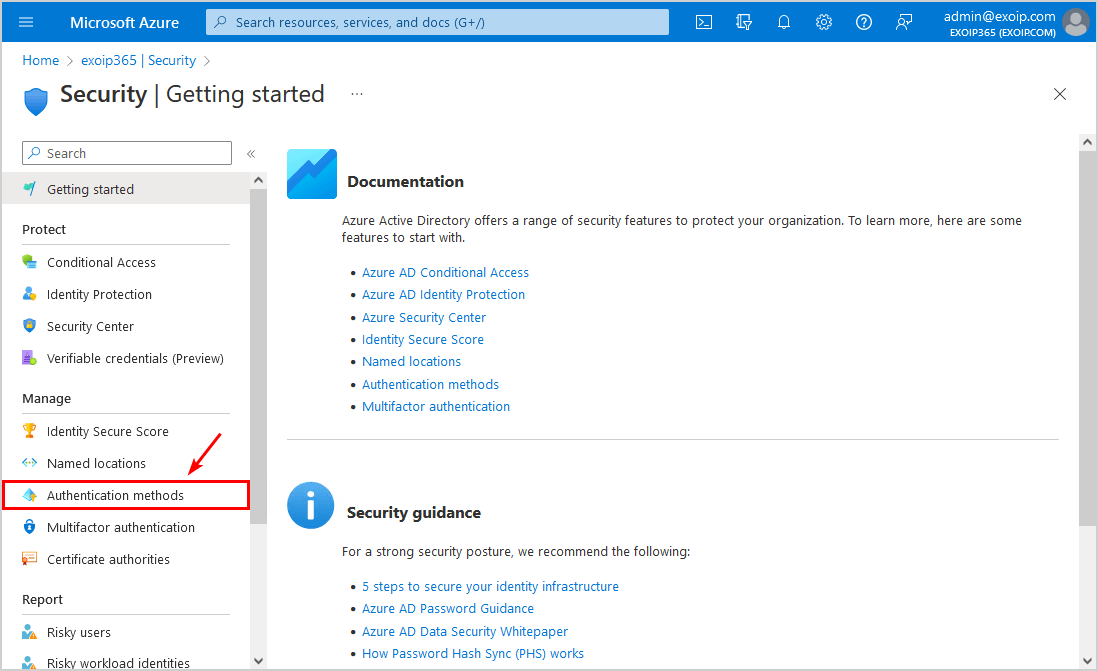
Step 4. Click on Authentication methods.
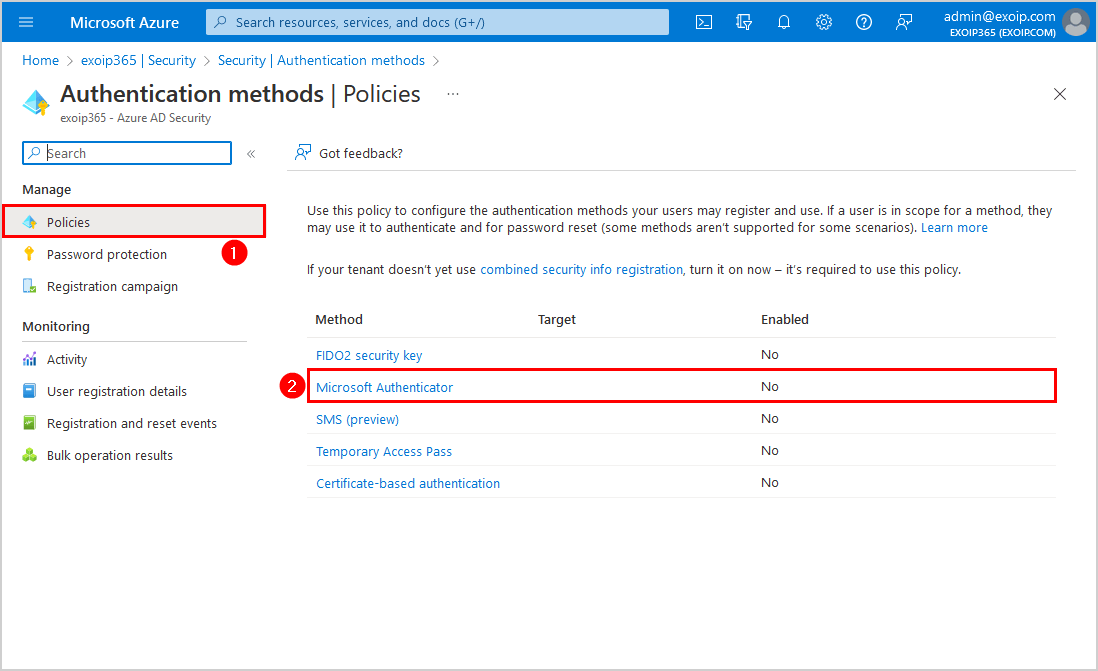
Step 5. Click on Policies > Microsoft Authenticator.
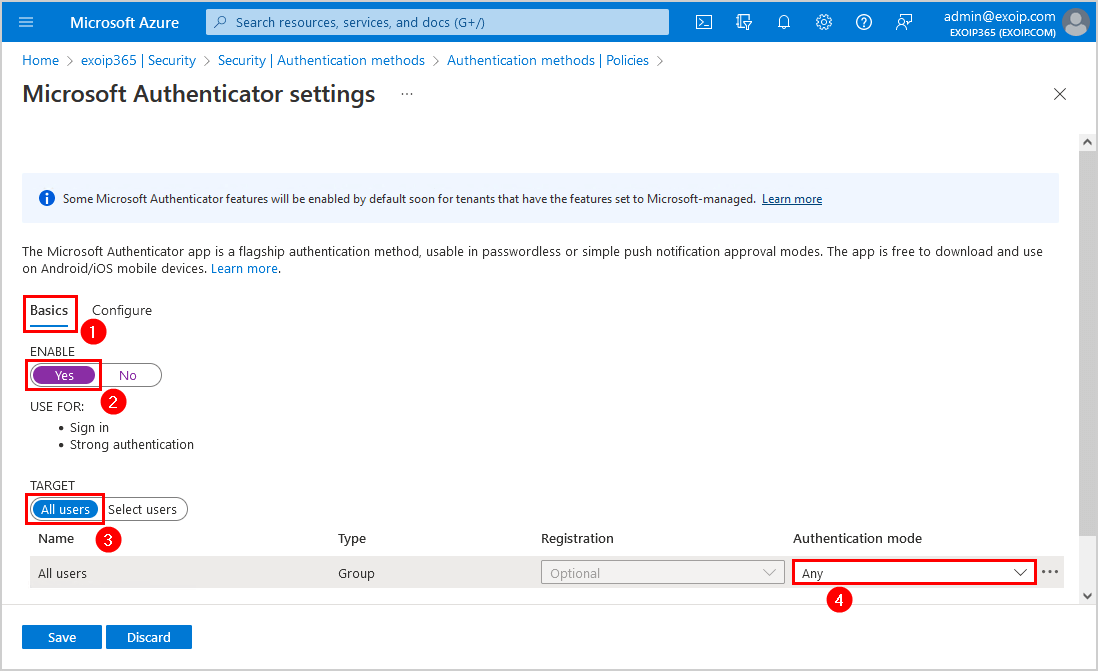
Step 6. Click on the Basics tab and configure the below settings:
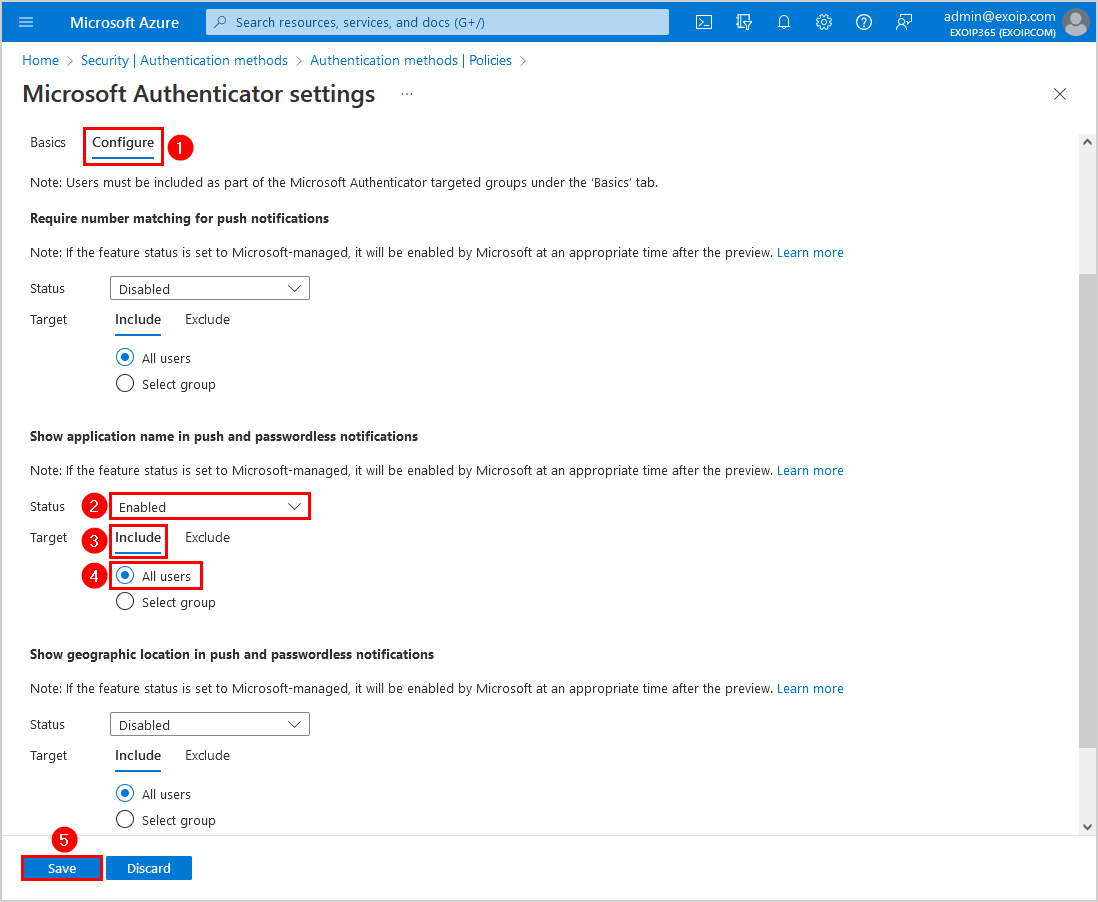
Step 7. Click on the Configure tab and configure the below settings for Show application name in push and passwordless notifications. Don’t forget to Save.
- Status: Enabled
- Target: Include – All users
Note: Two more features are available on the Microsoft Authenticator settings configure page. You should enable these features for security improvements. Read more in Enable Azure MFA number matching and Enable Azure MFA geographic location.
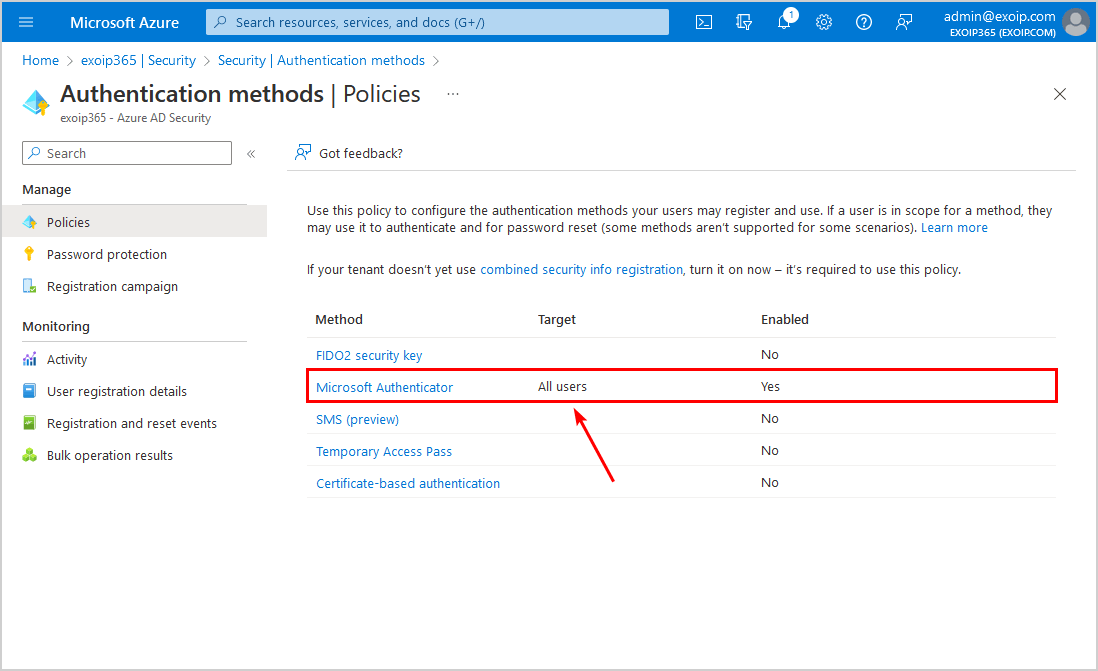
Step 8. Confirm that Microsoft Authenticator shows the target that you have set and the status enabled.
In the next step, you will test that everything works as you expect.
Verify Azure MFA application name
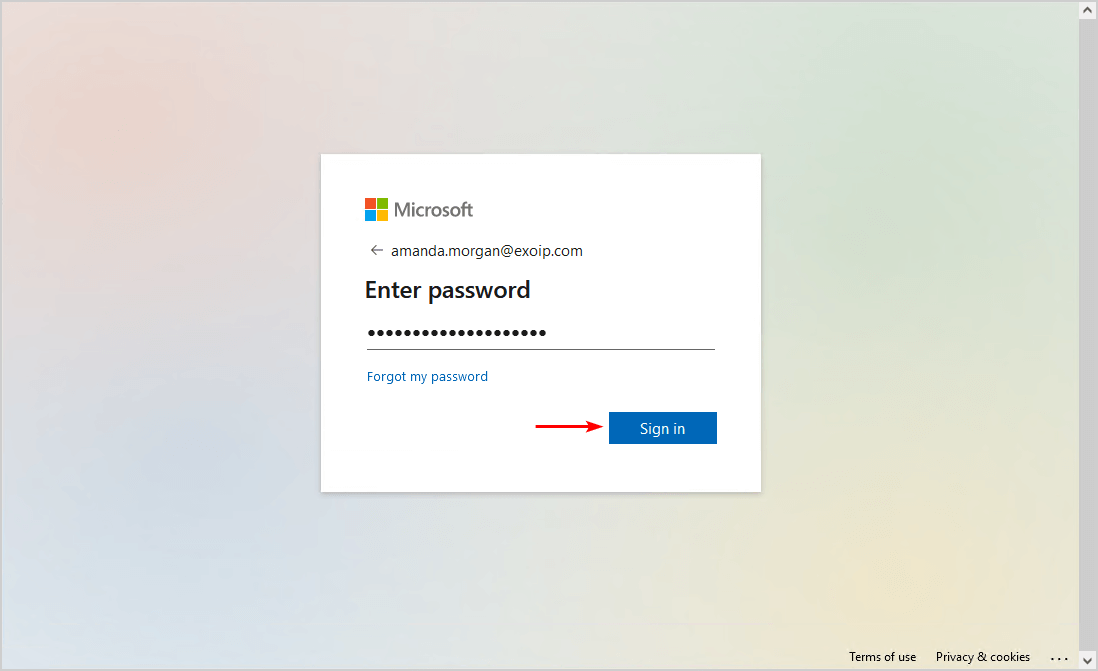
To test that Azure MFA application name works, follow the below steps:
Sign in to Microsoft 365 portal.
Note: You need to have MFA enabled on the account you like to test and not sign in from a network that is excluded from MFA.
The approve sign in request message appears.

The app name appears in the Microsoft Authenticator app to sign in. Tap on Approve.
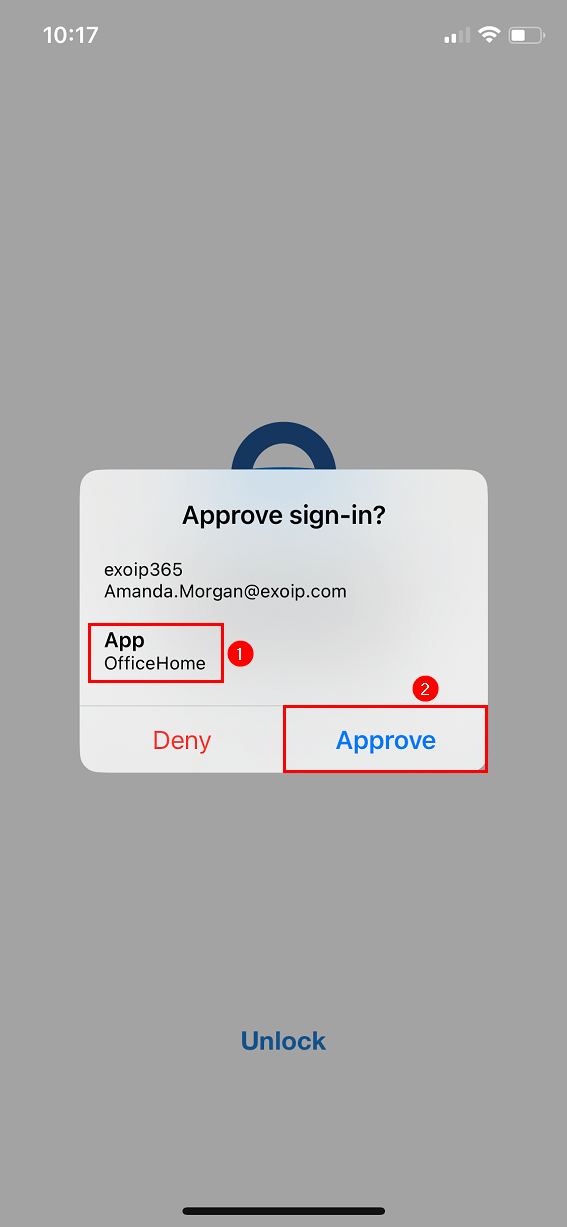
You will successfully sign in to the portal.
That’s it! You successfully did configure MFA application name in Azure AD for the users.
Read more: Move from remember MFA on trusted device to Conditional Access sign-in frequency »
Conclusion
You learned how to enable Azure MFA application name and improve sign-in security. It’s essential to enable the feature for all users. You can first select a group and see how they deal with it so you can update the documentation before you send it to the users and enable it for all the users.
Did you enjoy this article? You may also like Migrate Azure AD Connect to new server. Don’t forget to follow us and share this article.
What Others Are Reading

This Post Has 0 Comments