Every organization knows that security is essential and needs to be solid. Nowadays, every organization…
Bulk create Office 365 mailboxes in Exchange Hybrid
How to bulk create Office 365 mailboxes for existing AD users in Exchange Hybrid configuration? Good to know is that creating mailboxes in Exchange Hybrid needs to be run from Exchange on-premises. You can run a command to create an Office 365 mailbox for an existing AD user. But what if you want to create an Office 365 mailbox for a list of users?
Table of contents
Before you start to bulk create Office 365 mailboxes
In a previous article, we explained how to create an Office 365 mailbox in Exchange Hybrid configuration. Please read through it, as it will simplify the below process.
You will understand how to:
- Create Office 365 mailboxes
- Test hybrid mail flow in both organizations
- Test GAL visibility in both organizations.
After you read the above, let’s jump right into the first step.
Note: Good to know is that you need to create the mailbox from the on-premises Exchange environment. If you create the mailbox directly in Exchange Online, you will get mail flow issues.
How to create Office 365 mailboxes in Exchange Hybrid
To bulk create Office 365 mailboxes in an Exchange Hybrid configuration, follow the below steps.
1. Create AD users
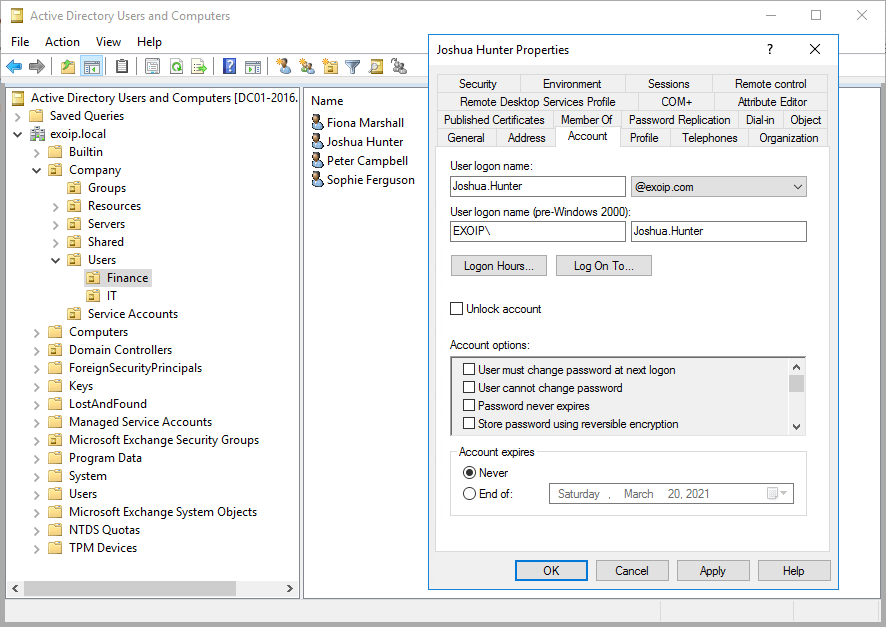
In the organization, we make use of templates. We copy that template and create new users. In this example, there are four AD users created without a mailbox. The users are present in the Organizational Unit Finance.
Add the Exchange Online license to the user. In our example, we will make the user member of the security group that contains the Exchange Online license. That’s because we have set up group-based licensing in Microsoft Entra ID. You don’t have to assign an EXO (Exchange Online) license right now, and it’s fine to do that later.
Note: Remember that you can’t send and receive an email if you don’t have an EXO license.
Open one of the user properties and verify the account details.
2. Create CSV file
Create a CSV file with the user’s SamAccountName. Copy the same as below.
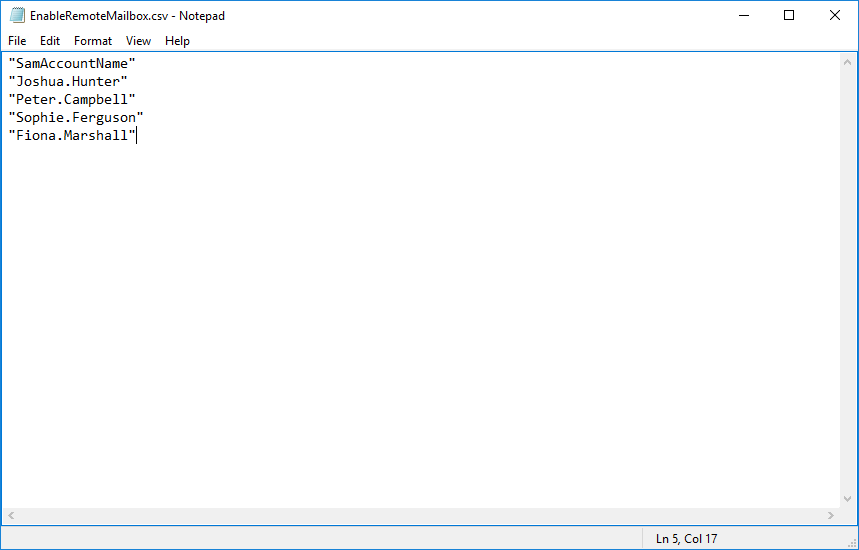
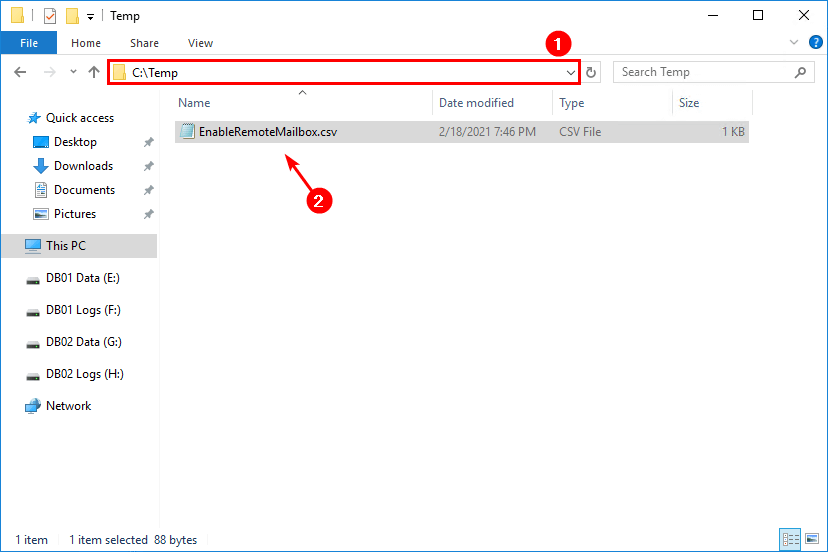
Save the CSV file in C:\temp with the name EnableRemoteMailbox.csv.
3. Bulk create Office 365 mailbox
Run Exchange Management Shell as administrator in the on-premises organization. Import the file EnableRemoteMailbox.csv that you did create earlier.
[PS] C:\>$Users = Import-Csv "C:\Temp\EnableRemoteMailbox.csv"Verify that you get the CSV input when you enter the $Users variable.
[PS] C:\>$Users

SamAccountName
--------------
Joshua.Hunter
Peter.Campbell
Sophie.Ferguson
Fiona.Marshall
Create Exchange Online mailbox for existing users in local AD. Make use of the Enable-RemoteMailbox cmdlet. Change the tenant information to yours. In this example, it’s exoip365.mail.onmicrosoft.com.
Note: The proxy address will always be @tenant.mail.onmicrosoft.com.
The output shows the mailbox creation.
[PS] C:\>$Users | ForEach-Object {Enable-RemoteMailbox $_.SamAccountName -RemoteRoutingAddress ($_.SamAccountName+'@exoip365.mail.onmicrosoft.com')}

Name                     RecipientTypeDetails        RemoteRecipientType
----                     --------------------        -------------------
Joshua.Hunter            RemoteUserMailbox           ProvisionMailbox
Peter Campbell           RemoteUserMailbox           ProvisionMailbox
Sophie Ferguson          RemoteUserMailbox           ProvisionMailbox
Fiona Marshall           RemoteUserMailbox           ProvisionMailbox
Do you get an ExchangeGuid is mandatory on UserMailbox error after running the above command? Read the article Enable-RemoteMailbox ExchangeGuid is mandatory on UserMailbox.
4. Force Azure AD connect to sync
Wait for the Azure Active Directory synchronization or sign in to Azure AD Connect server and force sync Azure AD connect with PowerShell.
PS C:\> Start-ADSyncSyncCycle -PolicyType DeltaVerify Office 365 mailboxes
It’s always essential to verify your work and that the mailboxes are successfully created in Exchange Online.
[PS] C:\>$Users | ForEach-Object {Get-RemoteMailbox -Identity $_.SamAccountName} | ft Name,PrimarySmtpAddress,RecipientType*,Remote*
Name PrimarySmtpAddress RecipientType RecipientTypeDetails RemoteRoutingAddress RemoteRecipientType
---- ------------------ ------------- -------------------- -------------------- -------------------
Joshua Hunter Joshua.Hunter@exoip.com MailUser RemoteUserMailbox SMTP:Joshua.Hunter@exoip365.mail.onmicrosoft.com ProvisionMailbox
Peter Campbell Peter.Campbell@exoip.com MailUser RemoteUserMailbox SMTP:Peter.Campbell@exoip365.mail.onmicrosoft.com ProvisionMailbox
Sophie Ferguson Sophie.Ferguson@exoip.com MailUser RemoteUserMailbox SMTP:Sophie.Ferguson@exoip365.mail.onmicrosoft.com ProvisionMailbox
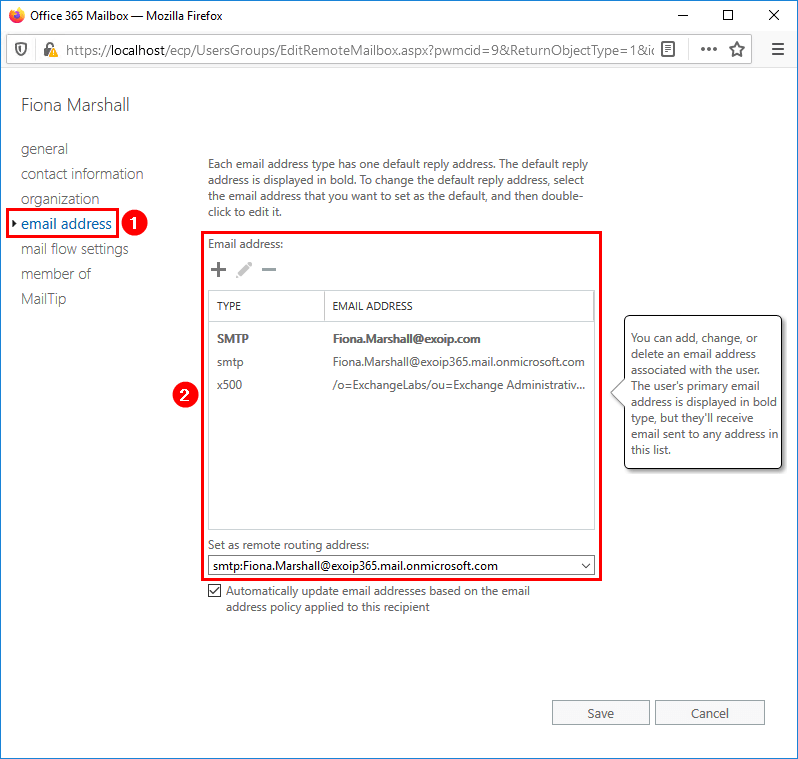
Fiona Marshall Fiona.Marshall@exoip.com MailUser RemoteUserMailbox SMTP:Fiona.Marshall@exoip365.mail.onmicrosoft.com ProvisionMailboxVerify in the on-premises Exchange admin center that the mailbox type will show as Office 365. If you have a mailbox on-premises, it’s the mailbox type User.
Double-click on a user and click in the menu on email address. You will see:
- A smtp with <user>@tenant.mail.onmicrosoft.com.
- The remote routing address <user>@tenant.mail.onmicrosoft.com.
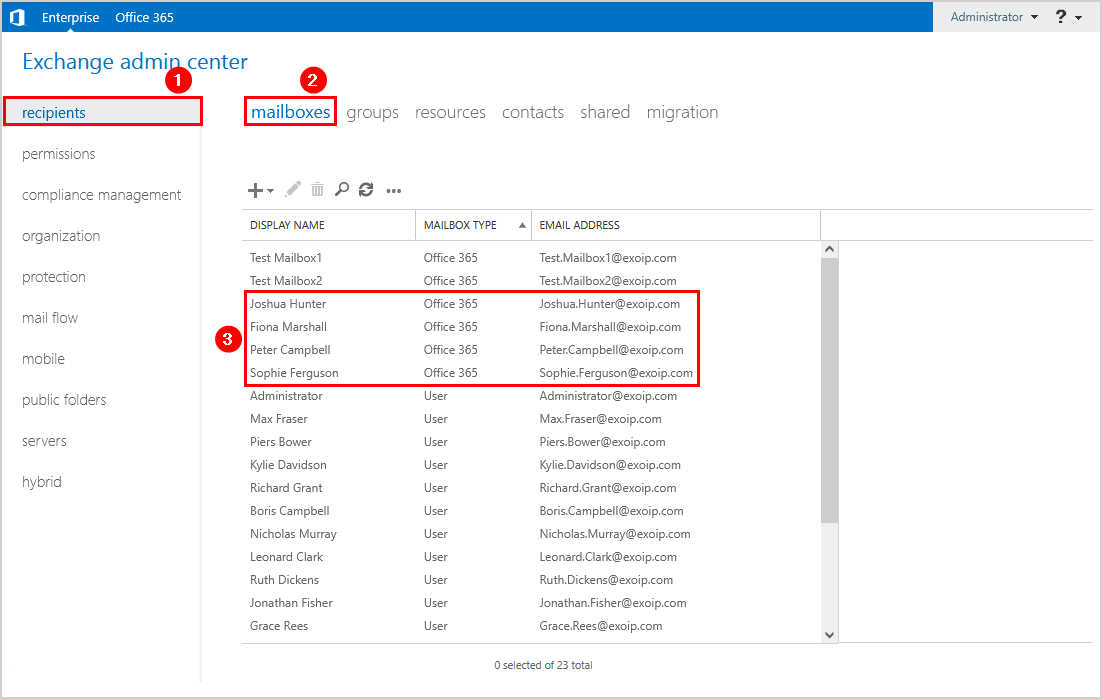
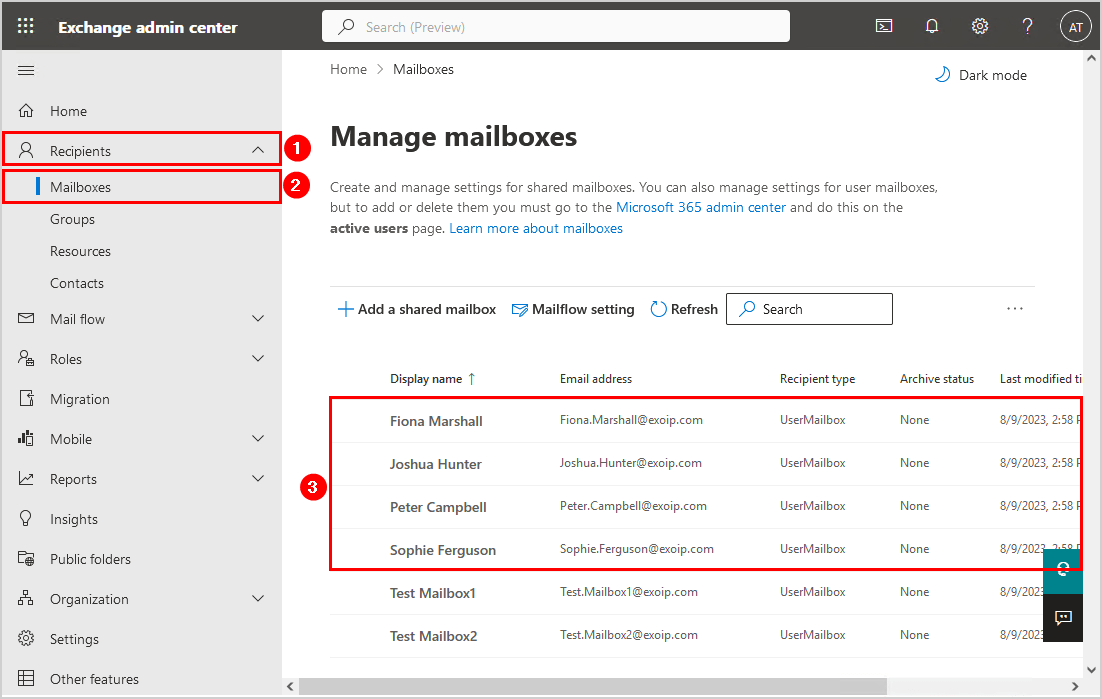
Sign in to the Exchange admin center with your Microsoft 365 admin credentials.
Go to Recipients > Mailboxes and verify that the Office 365 mailboxes appear in the list.
Note: You will only see Office 365 mailboxes in Microsoft 365 Exchange admin center. The on-premises mailboxes are not shown on Microsoft’s cloud servers.
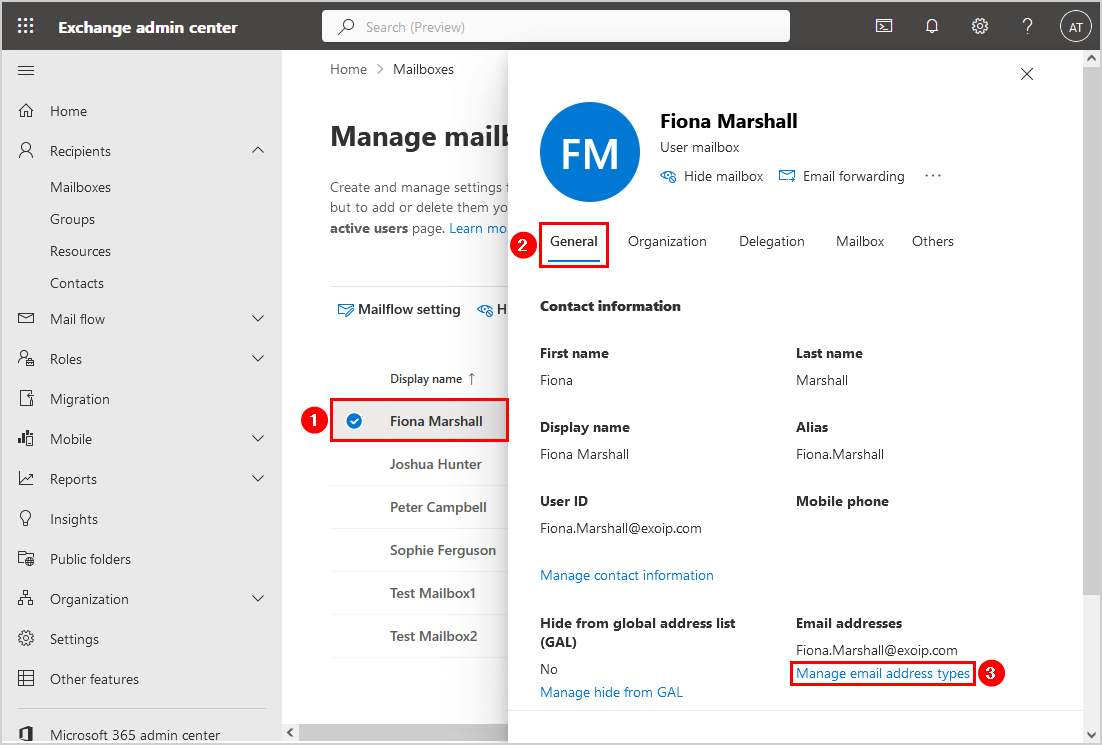
Click on the Office 365 mailbox. Select General and click on Manage email address types.
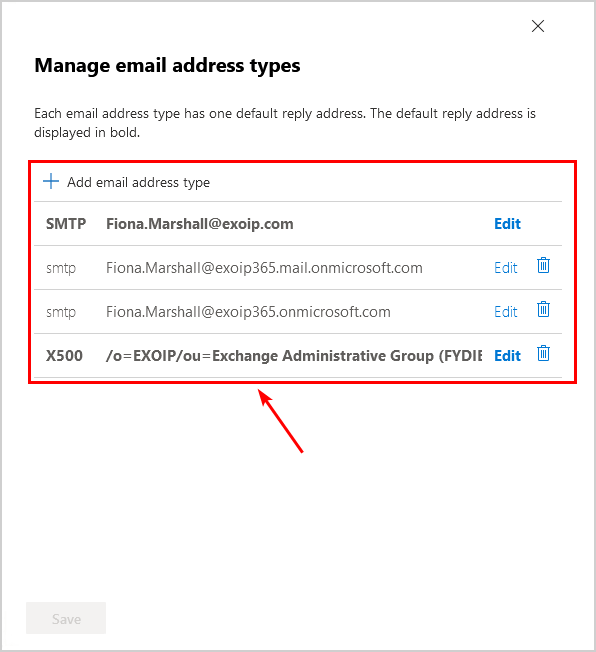
There is no remote routing address option in the cloud, and you will see two smtp onmicrosoft.com email addresses:
- smtp:<user>@tenant.mail.onmicrosoft.com
- smtp:<user>@tenant.onmicrosoft.com
Everything looks great! Did this help you to bulk create Office 365 mailboxes for existing AD users?
Read more: Get users that have Out of Office enabled in Exchange »
Conclusion
You learned how to bulk create Office 365 mailboxes in Exchange Hybrid configuration. It’s important that you create mailboxes from the on-premises environment. First, create a CSV file with the AD user’s SamAccountName. Next, enable Office 365 mailboxes from Exchange Management Shell. As of last, double-check and verify that the mailboxes are created.
Did you enjoy this article? You may also like List mailboxes in Exchange database with PowerShell. Don’t forget to follow us and share this article.
Hola Ali,
me uno a la consulta de Santosh, para agregar .externo y ademas que el SMTP sea el principal. ejemplo:
Original smtp: jpazg@dominio.com
Nuevo SMTP: jpazg.externo@dominio.com
Hi Ali,
Thank you for this useful article..
After the creation of bulk mailboxes (in most cases where users are Consultants), there’s a need to the email addresses of each of them to accomodate firstname.lastname.EXT@domain.com
Right now, we disable the email policy and edit the Primary mail address to add in the .EXT to them..
is there a way to do this in bulk via such a script? Would be really helpful
Thanks,
Santosh