How to disable Microsoft 365 stay signed in prompt? We all have seen it when…
Configure SPF record for Office 365
In the previous article, we did add a new domain to Office 365. The next step is to configure the SPF record for Office 365. At the moment, there are a couple of Exchange Server on-premises running in production, and the domain’s SPF record is configured for Exchange Server on-premises.
This article aims to merge the Office 365 SPF record with the existing SPF record. This way, nothing will happen to the production environment, and we will make the environment ready for Office 365.
Table of contents
SPF record information
SPF is a protocol that helps to reduce spam via email. An SPF record is set in the DNS zone of the domain name. Receiving mail servers can check for the presence of an SPF record. This check verifies that the server from which an email is being sent has permission to do so. The server that has permission to send emails on behalf of the domain name is listed in the SPF record.
Important: You should always set up an SPF record, even if you don’t send emails from that domain name. The SPF record will look like v=spf1 -all. Once set up, no server has permission to send emails from that domain.
Find Office 365 SPF record
To get the Office 365 SPF record, follow these steps:
1. Sign in to Microsoft 365 admin center
2. Click on Settings > Domains
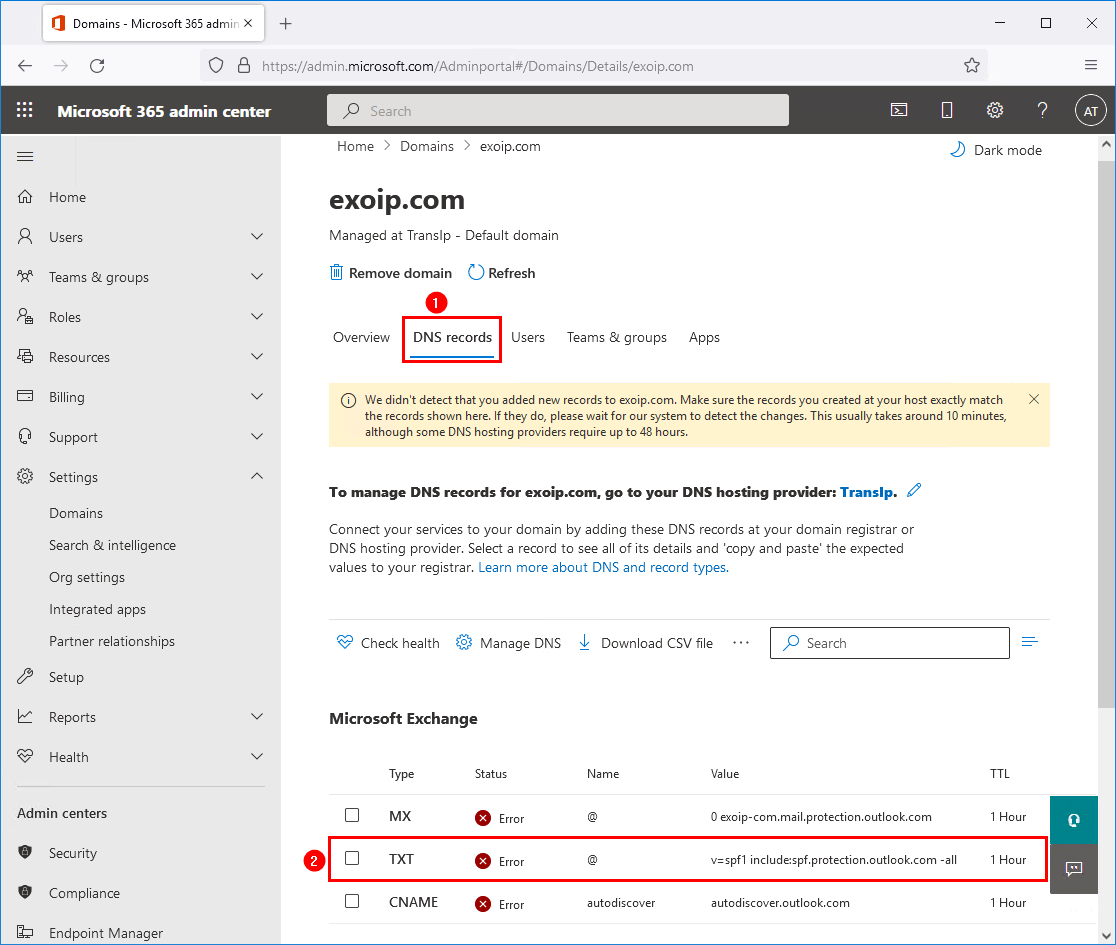
3. Click on the domain you want to configure the SPF record for.
In this example, it’s the domain exoip.com.

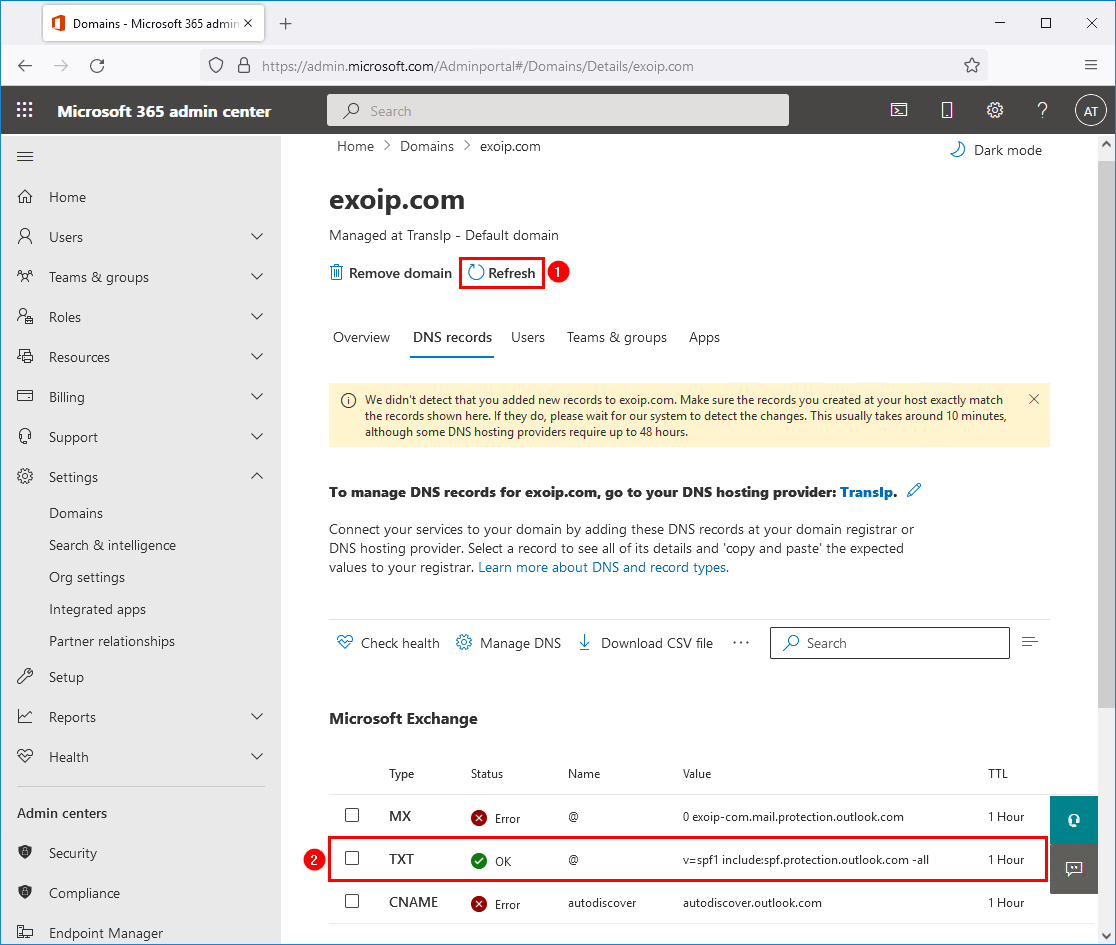
4. Click on the tab DNS records, and down below, there are three records for Exchange Online:
- MX
- TXT
- CNAME
The one that we are interested in for now is the TXT record, which is the SPF record for Exchange Online.
5. Click on the TXT record.
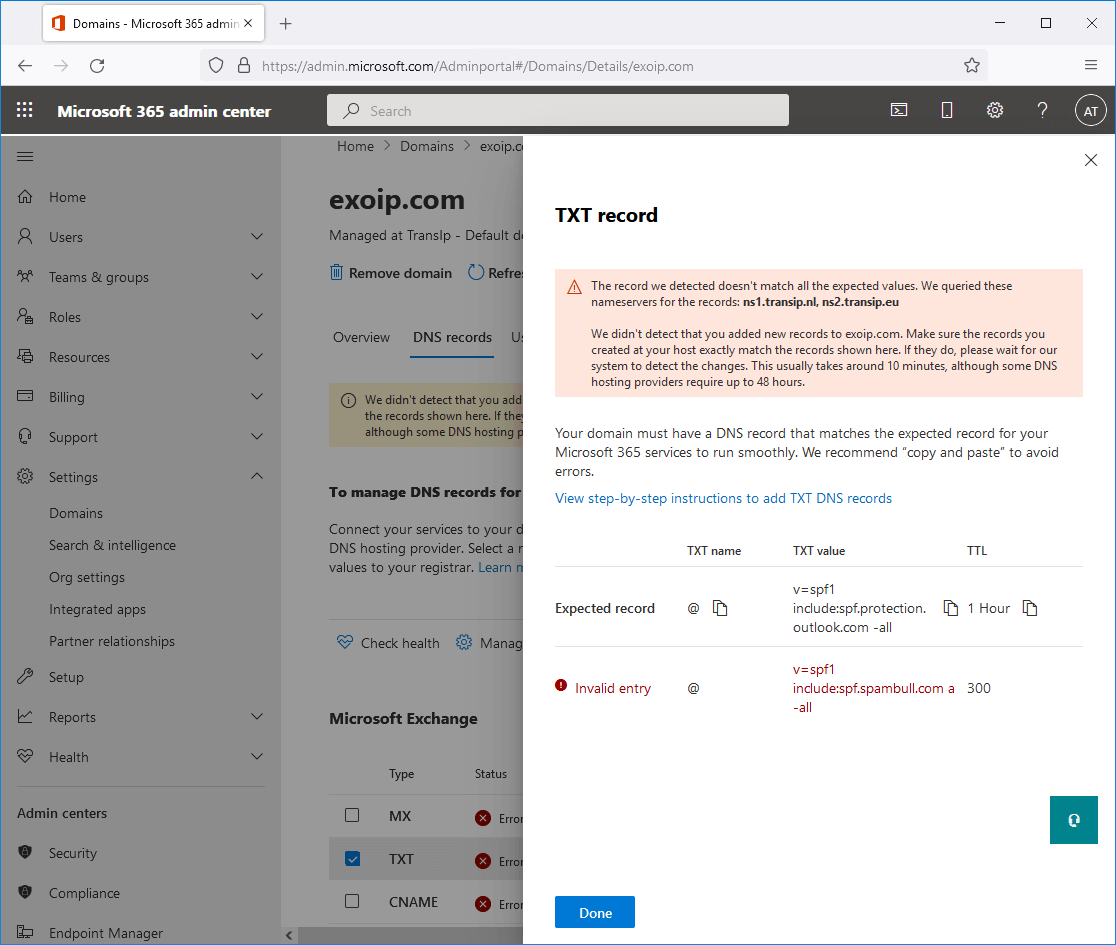
The domain already has an SPF record configured, v=spf1 include:spf.spambull.com a -all. The SPF record tells that the SpamBull spam filter and A record is an approved sender for the domain. Therefore, email coming from the SpamBull spam filter and A record is authorized, and everything else is not.
The message shows Invalid entry because we don’t have the include:spf.protection.outlook.com statement in our SPF record. We want to merge the Exchange Online SPF record into the existing exoip.com domain SPF record. That’s why we will only copy the include statement, include:spf.protection.outlook.com, to the clipboard.
Add SPF record for Office 365
To add the SPF record for Office 365 in your domain’s registrar, follow the below steps:
1. Sign in to the domain’s registrar and open the domain DNS settings.
In our example, the domain exoip.com.
2. Find the TXT record value for SPF, which starts with v=spf1.
In our example, the SPF value is v=spf1 include:spf.spambull.com a -all.
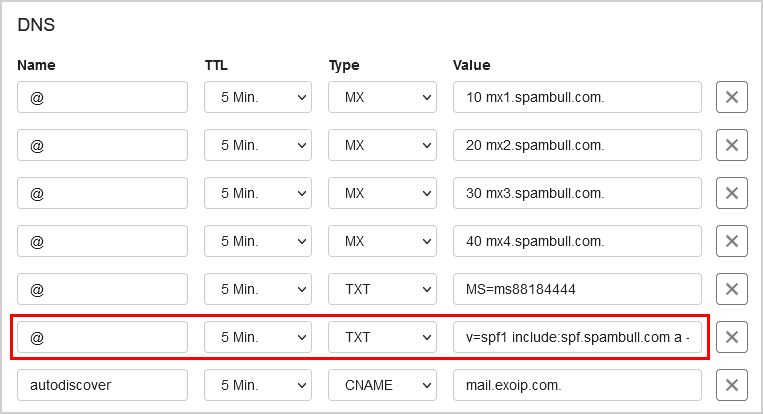
3. Edit the existing SPF record and paste the include statement include:spf.protection.outlook.com. The effect is that it will also authorize Exchange Online servers to send emails for the exoip.com domain name.
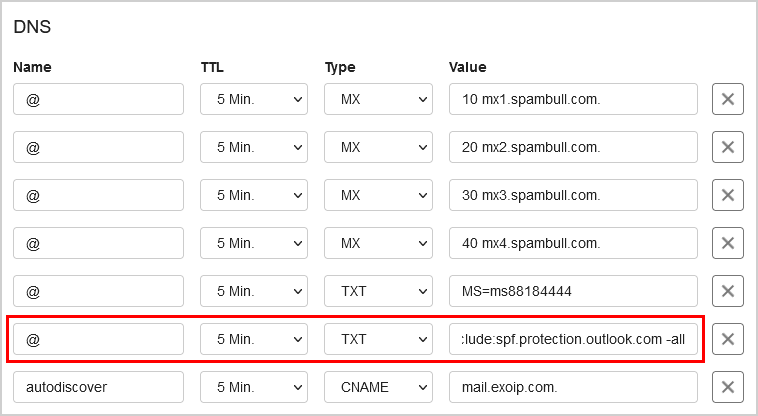
The TXT record value for SPF looks like v=spf1 include:spf.spambull.com a include:spf.protection.outlook.com -all.
The change can take up to 24 hours, but most of the time, this will resolve within 5-15 minutes.
Verify Office 365 SPF record
To verify the Office 365 SPF record, follow these steps:
1. Click on Refresh to refresh the page.
2. Verify that the TXT status changed from Error to OK.
3. Click on the TXT record.
4. The expected record shows that the record is Correct.
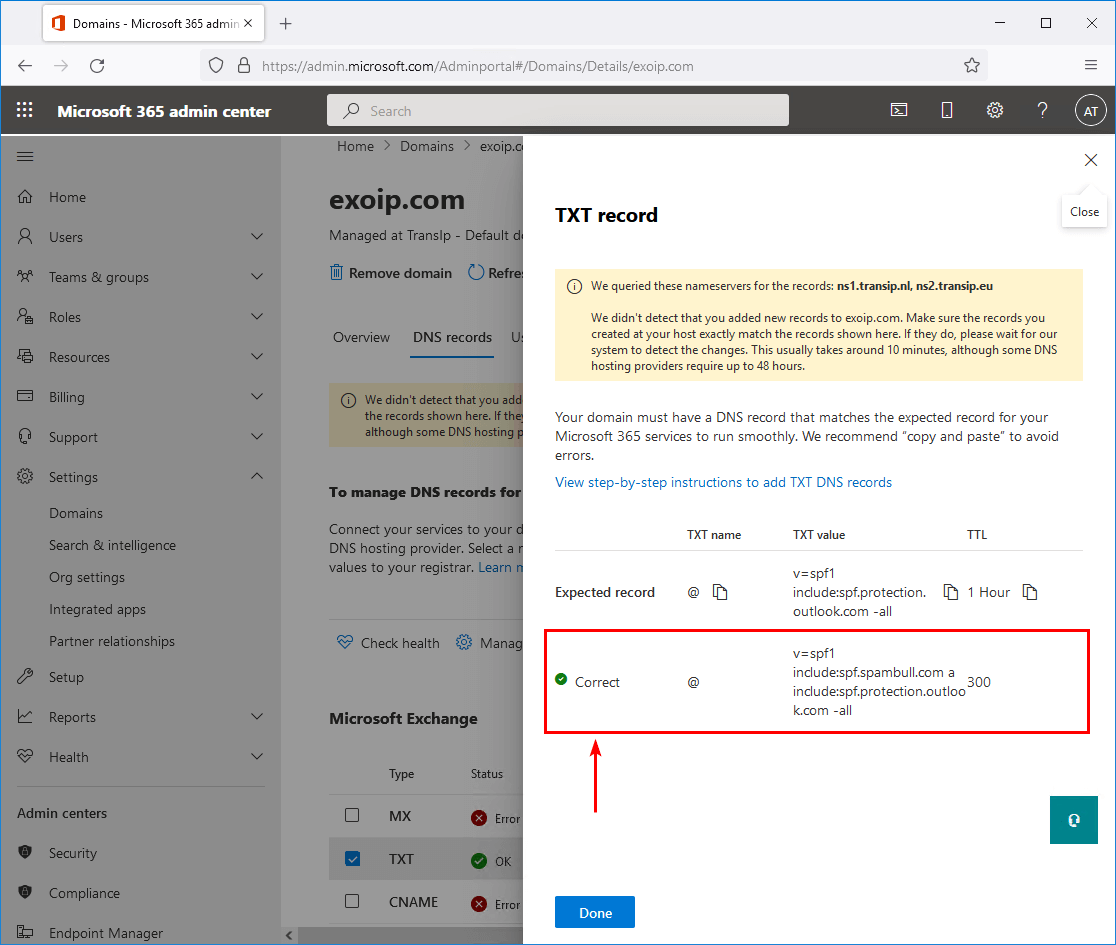
We did configure the SPF record for Office 365 successfully. Exchange on-premises and Exchange Online are both authorized to send emails from the domain.
In the next article, we will configure the DKIM record for Office 365.
Conclusion
You learned how to configure the SPF record for Office 365. Sign in to the Microsoft 365 admin portal and copy the Exchange Online SPF record include statement, include:spf.protection.outlook.com.
Sign in to the domain’s registrar and paste the include statement to the existing SPF record. After that, wait for 5 to 15 minutes before verifying the SPF record in Microsoft 365 admin portal. The Exchange Online TXT record will show as OK. It means that it’s correct, and you’re good to go!
Did you enjoy this article? You may also like Copy members from one AD group to another. Don’t forget to follow us and share this article.
What Others Are Reading


This Post Has 0 Comments