How to find total number of mailboxes in Exchange 2013/2016/2019? It is always good to…
Copy receive connector to another Exchange Server
There are times that you need to copy a receive connector to another Exchange Server. Think about installing another Exchange Server. The receive connectors will not copy automatically. That’s too bad. The only option is to create a receive connector and configure the settings. In this article, you will learn how to copy a receive connector to another Exchange Server with PowerShell.
Table of contents
Information
In a previous article, we described:
- Export remote IP addresses from Exchange receive connector
- Import remote IP addresses to Exchange receive connector
Sometimes, you only want to do a quick receive connector copy. With PowerShell, we can automate the process and copy the receive connector. It will save us time which we can spend on other tasks.
Before we start
In our example, we have two Exchange Servers:
- Exchange Server EX01-2016 (copy receive connector from)
- Exchange Server EX02-2016 (copy receive connector too)
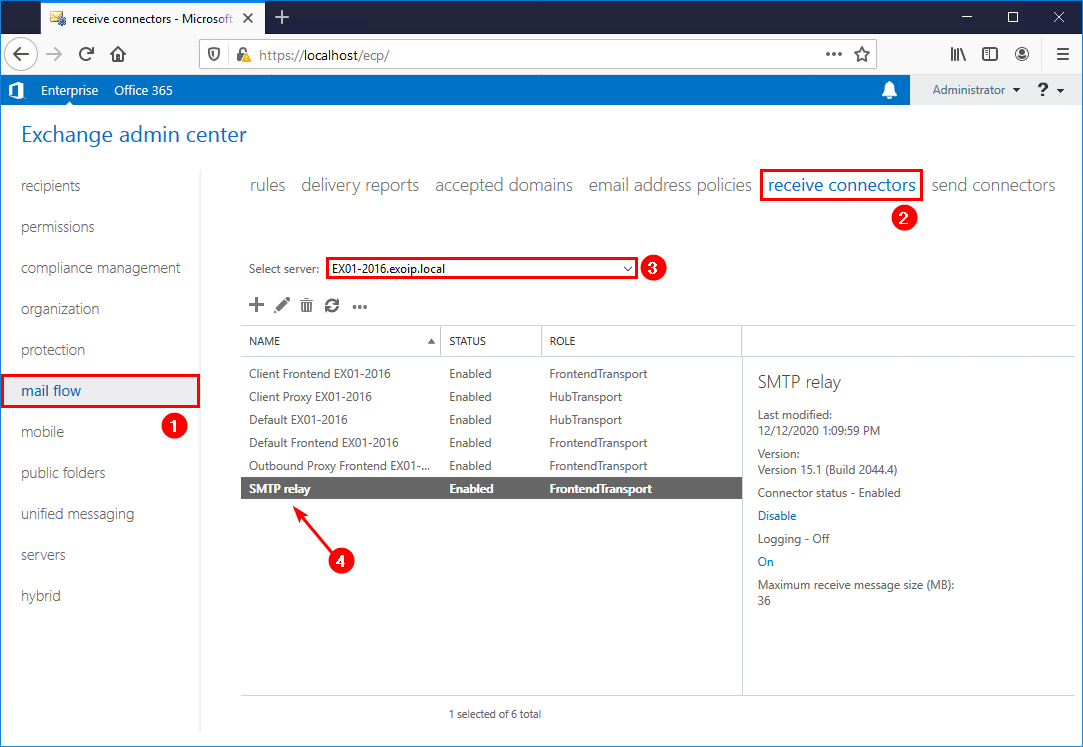
Sign in to Exchange Admin Center. Click mail flow in the feature pane and click on receive connectors in the tabs.
Exchange Server EX01-2016 with the SMTP relay receive connector.
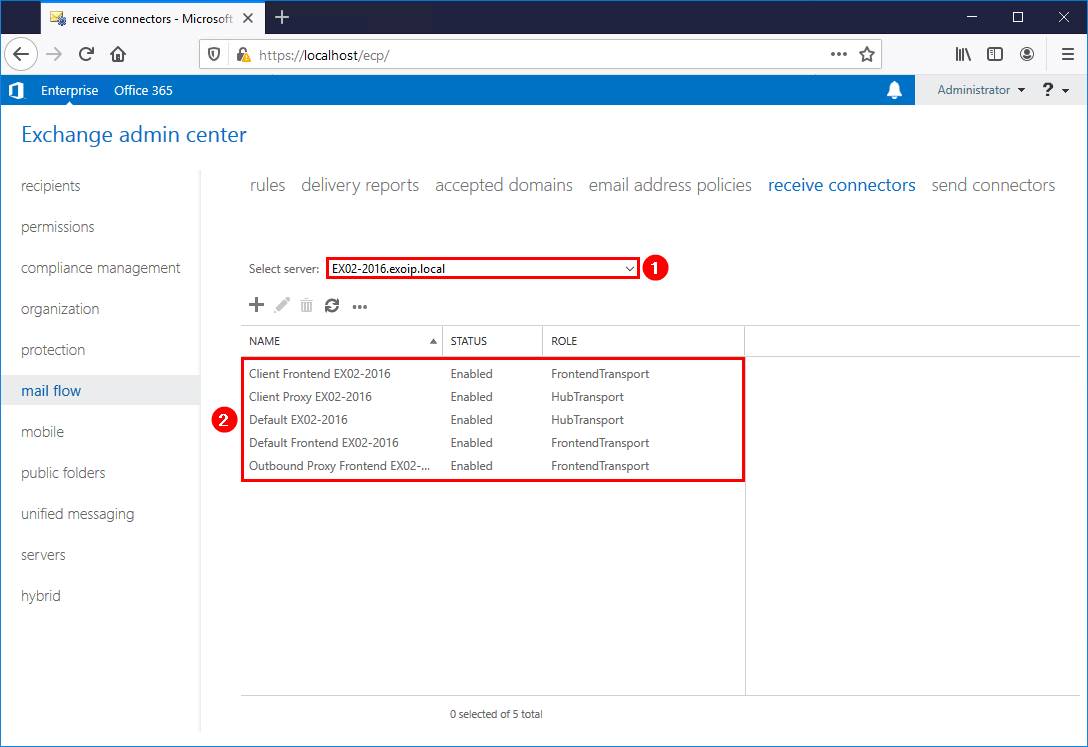
Exchange Server EX02-2016 without an SMTP relay receive connector.
In the next step, we will first get the receive connector IP addresses. After that, we will create a new receive connector and copy the remote IP addresses over.
Copy receive connector to another Exchange Server with PowerShell
Use the Get-ReceiveConnector cmdlet and list the receive connector IP addresses on the EX01-2016 Exchange Server.
[PS] C:\>(Get-ReceiveConnector -Identity "EX01-2016\SMTP relay").RemoteIPRanges | Sort-Object | Format-Table

LowerBound    UpperBound    Netmask CIDRLength   RangeFormat Size Expression
----------    ----------    ------- ----------   ----------- ---- ----------
192.168.1.70  192.168.1.80                              LoHi ::b  192.168.1.70-192.168.1.80
192.168.1.75  192.168.1.80                              LoHi ::6  192.168.1.75-192.168.1.80
192.168.1.99  192.168.1.99                     SingleAddress ::1  192.168.1.99
192.168.1.174 192.168.1.174                    SingleAddress ::1  192.168.1.174
192.168.1.221 192.168.1.221                    SingleAddress ::1  192.168.1.221
192.168.1.222 192.168.1.222                    SingleAddress ::1  192.168.1.222
192.168.1.234 192.168.1.234                    SingleAddress ::1  192.168.1.234
192.168.1.235 192.168.1.235                    SingleAddress ::1  192.168.1.235
192.168.1.240 192.168.1.240                    SingleAddress ::1  192.168.1.240
Run the cmdlet to copy the receive connector to another Exchange Server.
[PS] C:\>New-ReceiveConnector -Name "SMTP relay" -Server "EX02-2016" -Usage Custom -TransportRole FrontEndTransport -PermissionGroups AnonymousUsers -Bindings 0.0.0.0:25 -RemoteIPRanges (Get-ReceiveConnector "EX01-2016\SMTP relay").RemoteIPRanges

Identity             Bindings     Enabled
--------             --------     -------
EX02-2016\SMTP relay {0.0.0.0:25} True
In the next step, we will verify our work.
Verify copied receive connector
Let’s check the receive connectors on the Exchange Server EX02-2016 and confirm that the IP addresses are identical.
[PS] C:\>(Get-ReceiveConnector -Identity "EX02-2016\SMTP relay").RemoteIPRanges | Sort-Object | Format-Table
LowerBound UpperBound Netmask CIDRLength RangeFormat Size Expression
---------- ---------- ------- ---------- ----------- ---- ----------
192.168.1.70 192.168.1.80 LoHi ::b 192.168.1.70-192.168.1.80
192.168.1.75 192.168.1.80 LoHi ::6 192.168.1.75-192.168.1.80
192.168.1.99 192.168.1.99 SingleAddress ::1 192.168.1.99
192.168.1.174 192.168.1.174 SingleAddress ::1 192.168.1.174
192.168.1.221 192.168.1.221 SingleAddress ::1 192.168.1.221
192.168.1.222 192.168.1.222 SingleAddress ::1 192.168.1.222
192.168.1.234 192.168.1.234 SingleAddress ::1 192.168.1.234
192.168.1.235 192.168.1.235 SingleAddress ::1 192.168.1.235
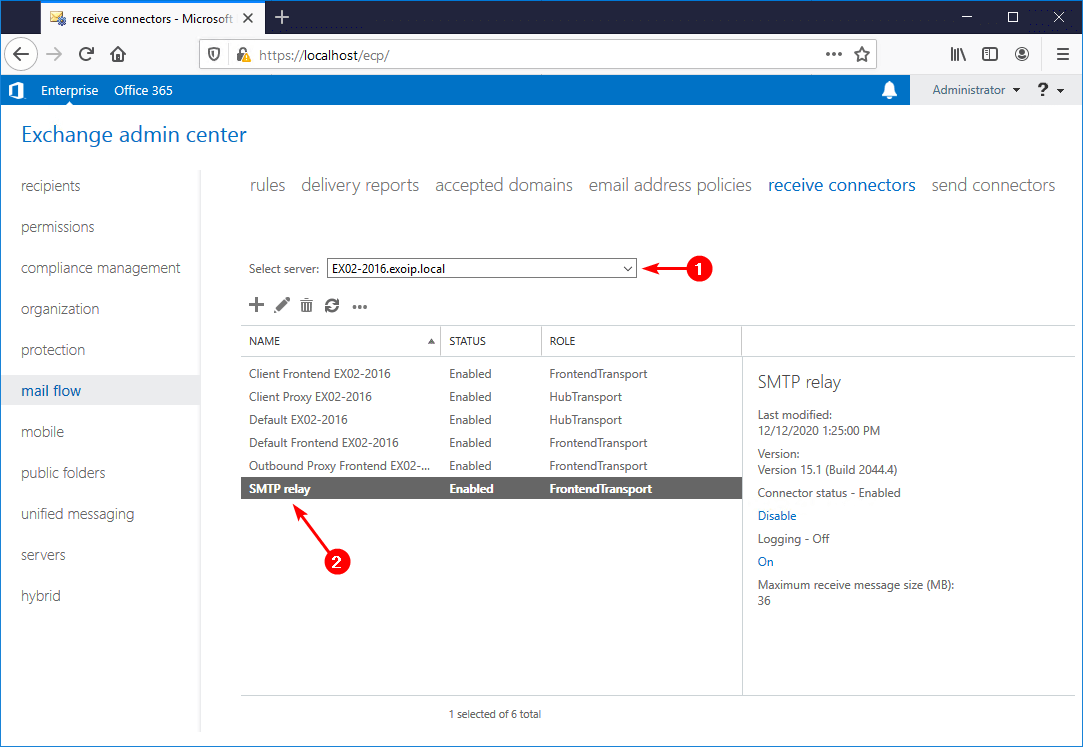
192.168.1.240 192.168.1.240 SingleAddress ::1 192.168.1.240In Exchange Admin Center, verify that the receive connector shows up under the Exchange Server EX02-2016.
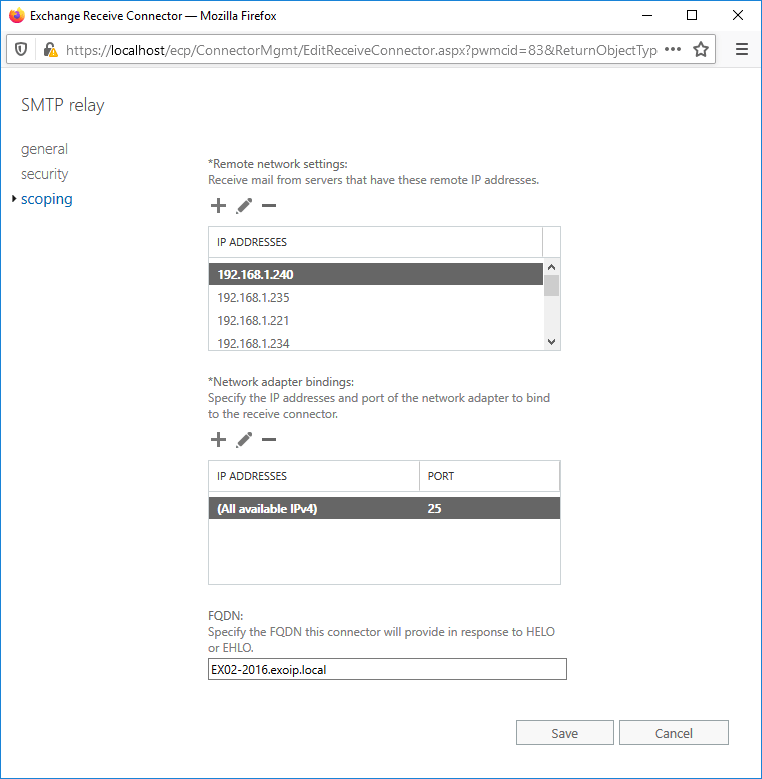
Double-click on the receive connector SMTP relay and verify the remote IP addresses.
The receive connector copy is a success. Did this save you some time?
Allow anonymous SMTP relay
Did you copy an anonymous SMTP relay receive connector? You have to grant MS-Exch-SMTP-Accept-Any-Recipient permissions to the Anonymous Logon Account on the receive connector. It will enable the relay to send mail out of the organization. More information by Microsoft.
[PS] C:\>Get-ReceiveConnector "EX02-2016\SMTP relay" | Add-ADPermission -User 'NT AUTHORITY\Anonymous Logon' -ExtendedRights MS-Exch-SMTP-Accept-Any-Recipient

Identity             User                 Deny  Inherited
--------             ----                 ----  ---------
EX02-2016\SMTP relay NT AUTHORITY\ANON... False False
Read more: How to configure Exchange Server after installation »
Conclusion
You learned how to copy the receive connector to another Exchange Server. Run the command to create a new receive connector and copy the remote IP addresses from another receive connector that you specify. This approach is excellent if it’s a one-on-one receive connector IP addresses copy.
Did you enjoy this article? You may also like Exchange 2016 ECP redirects to Exchange 2010 ECP. Don’t forget to follow us and share this article.
What Others Are Reading

Hi Ali
Thank you for your articles, it is very helpful
I would like to know what the configurations are of the default receive connectors and if those were created automatically or had to be created manually, and how the default receive connectors should look as default
Thank you
Thank you. I’m always happy when I have an issue or question and I see that there is an ‘Alitajran.com’ article that’s available. Great work.
I agree on that. Ali is a great help for all of us!!!
I second that, great help!
Thanks !
Hi, amazing content! I’m glad I found your site.
I’m about to add a second server to my organization and I was wondering if I can rename our internal SMTP relay connector. It’s named “Internal Relay serverName”. By serverName I mean the current exchange server name ie. EX01\Internal Relay EX01.
The reason I ask is, if I follow your instructions I will end up with a receive connector on the second exchange server with the name EX02\Internal Relay EX01, right? Its probably cosmetics but I rather have a generic name so that its not confusing to other admins.
Thank you.
Glad to hear, Axel.
You can fill in a receive connector name for the new SMTP relay connector. For example, in this article, the new receive connector name is “SMTP relay”.
In your case:
1. Create the new SMTP relay and give it the name “Internal Relay”
2. Rename the receive connector on the first Exchange Server from “Internal Relay EX01” to “Internal Relay”
After the above changes, the receive connector name “Internal Relay” will be shown on both Exchange Servers.
Thank you!
Great article.
You remain the go to guy for Exchange related advice.
Here’s a script that really copies a receive connector including all properties. Extend to your own needs, tested on Exchange 2010 -> 2013/2016
Thanks for sharing, Carsten. I adjusted your script because it gave errors after running and made it easier to read.
Pls will it work for migration of receive connectors from Exchange server 2010 to exchange server 2016?
Your site has been an amazing well of knowledge sir! Keep up the great work!
Question, will the above, “copy receive connector to another server” work coming from 2010 to 2016?
Cheers!
JJ
Glad to hear, Jeremy.
It should work. If it doesn’t, do it in two steps:
1. Export remote IP addresses from Exchange receive connector
2. Import remote IP addresses to Exchange receive connector
Just what I was searching for. It worked great. It saved me a lot of time!!! Thank you so much for all your posts.
absolute awesome post and your other articles are great as well