We like to start an application that we just installed on Windows Server. After starting…
Create Central Store for Group Policy Administrative Templates
How to create a Central Store for Group Policy Administrative Templates? If you have multiple domain controllers, it’s better to have a Central Store for Group Policy Administrate Templates. The Group Policy Central Store location is shared and in one place. It’s easier to update Group Policy Central Store and keep the ADMX/ADML files central. No more updating multiple domain controllers.
Table of contents
Information
If you have an Active Directory, you already did use Group Policy Management. Within the Group Policy Management, you can create Group Policy Objects and assign them to users and computers. The local computer is used for Group Policy by default. But, you can use the Central Store instead:
- One location to update
- Easier to manage Administrative Template files
Retrieve Group Policy Administrative Templates
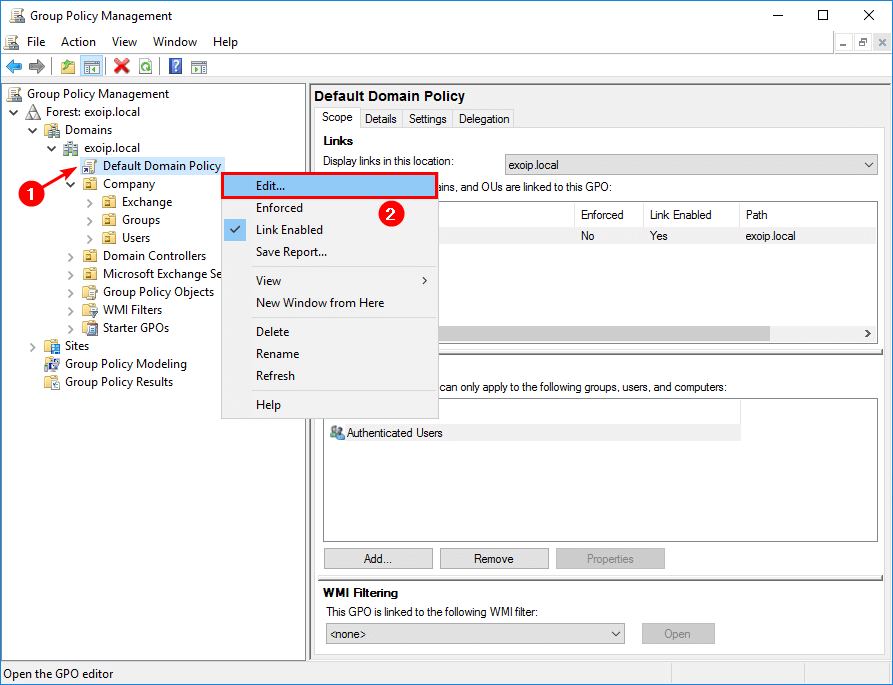
Before you start, it’s good to check if you already make use of the Central Store. Start Group Policy Management. Edit a Group Policy Object, for example, the Default Domain Policy.
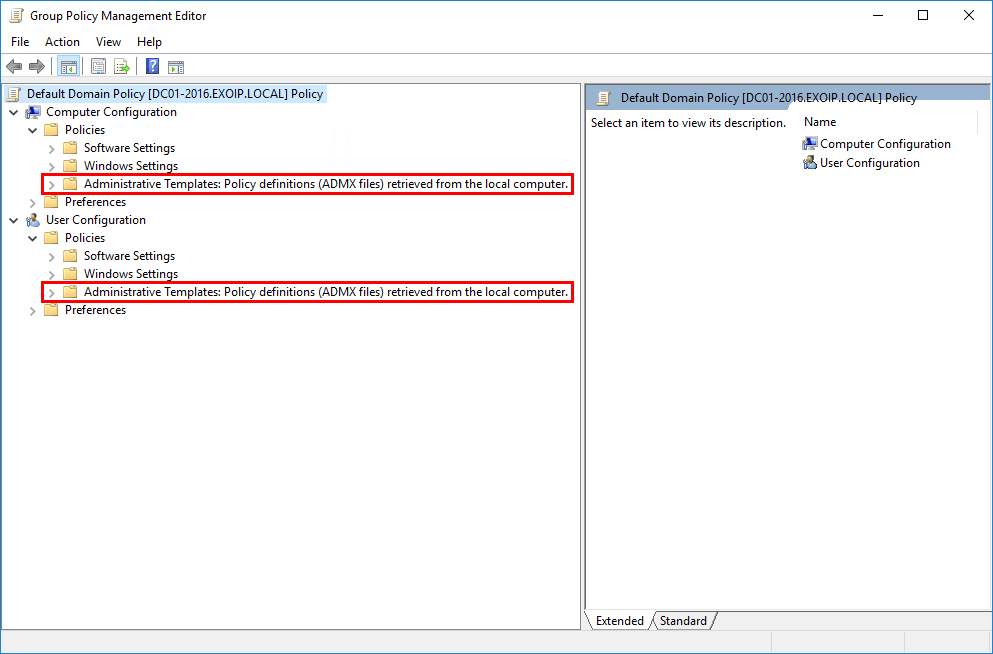
In the Group Policy Management Editor, expand one of the following or both:
- Computer Configuration > Policies
- User Configuration > Policies
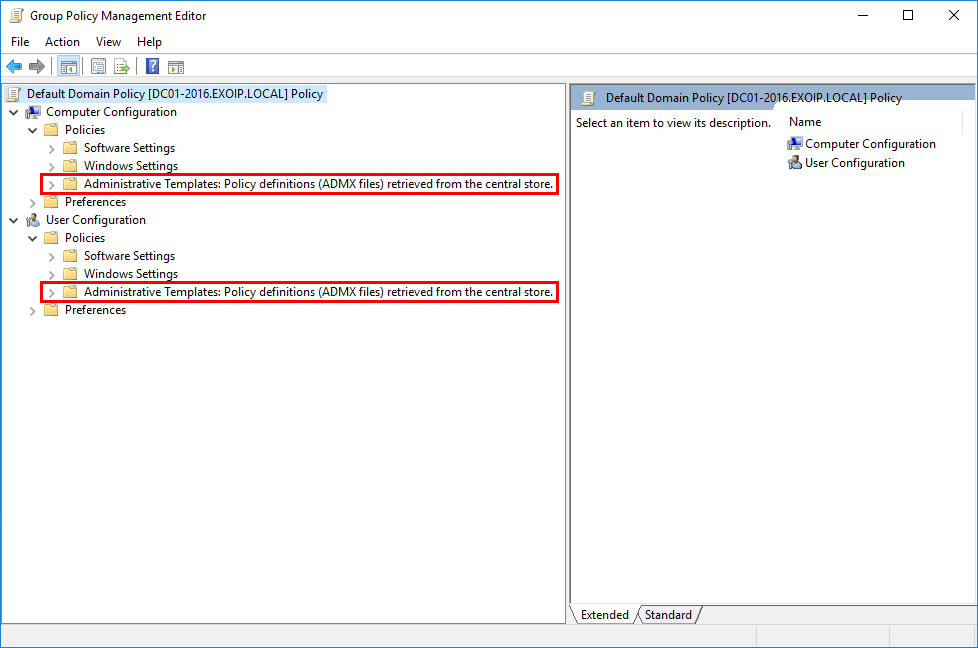
The Administrative Templates will show one of the following:
- Policy definitions (ADMX files) retrieved from the local computer
- Policy definitions (ADMX files) retrieved from the central store
If it did show that the Policy definitions retrieved from the central store, you already are using the Central Store. In our example, it’s using the local computer and not the Central Store.
Create Group Policy Central Store
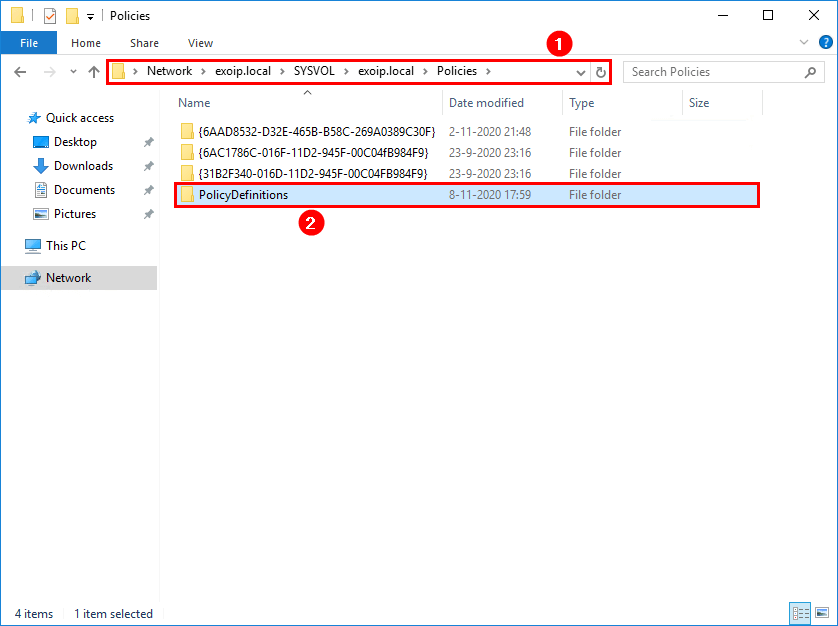
Go to the path \\FDQN\SYSVOL\FQDN\Policies. Change both the FQDN to yours. In our example, it’s \\exoip.local\SYSVOL\exoip.local\Policies. You can also use copy and paste the path C:\Windows\SYSVOL\sysvol\%UserDNSDomain%\Policies.
We can see that there are policies configured, which are the three folders at the top. Create a new folder with the name PolicyDefinitions.
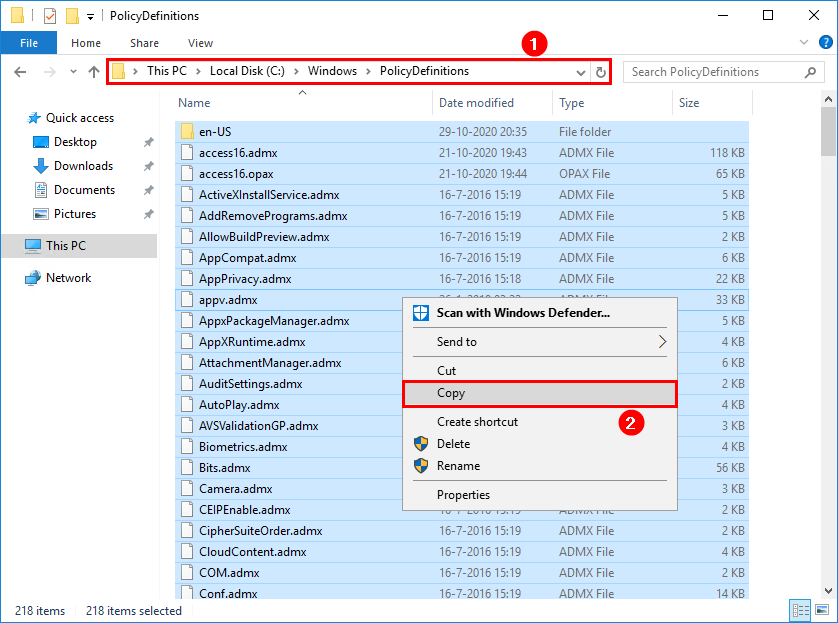
Go to the local PolicyDefinitions folder C:\Windows\PolicyDefinitions. Select all the files and copy the content from the local computer PolicyDefinitions folder.
If you have policies configured, nothing will happen when copying files to the Central Store. The policies will stay in place.
Paste the files to the newly created PolicyDefinitions folder, which is the Group Policy Central Store location.

Verify Group Policy Central Store
Start Group Policy Management and edit the Default Domain Policy. Expand the Computer and User Configuration > Policies folder. It shows us Policy definitions (ADMX files) retrieved from the central store.
Update Group Policy Central Store
Download Administrative Template files and paste them into the location. Instead of placing the ADMX and ADML files on the local computer, you will put them in the Central Store. If you get a dialog box that the destination has files with the same names, click replace the files in the destination. You want to keep the settings up to date with new ones. Don’t remove the files but replace the files. Otherwise, you might get problems with already configured policy settings.
Now, what happens when you update settings in the local group policy? The answer is that nothing will happen. From now on, the Group Policy will take the settings from the Central Store.
What we recommend you to do is to rename the local PolicyDefinitions folder to PolicyDefinitions_use_central_store. Add a folder with the name to use the Central Store.
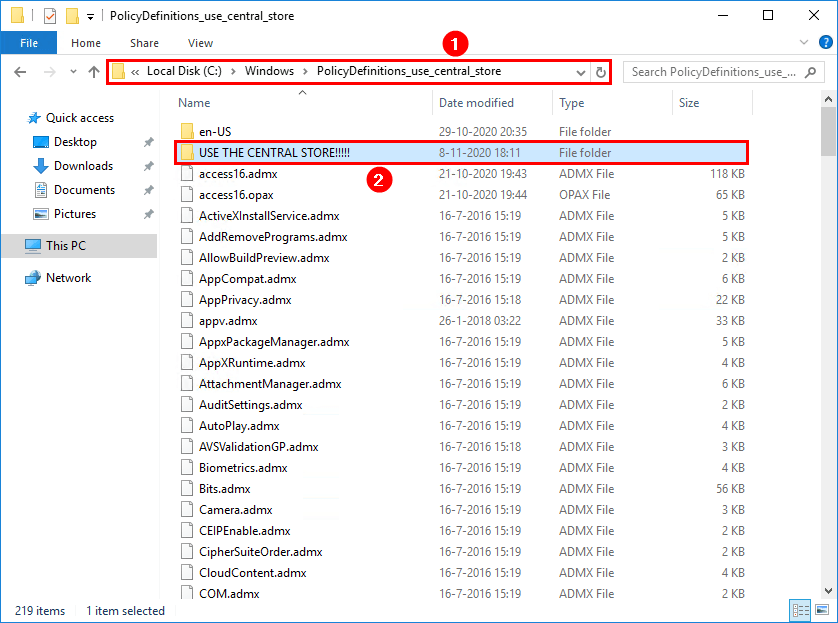
By doing the above, other administrators will know that they have to use the Central Store when they like to update Administrative Templates.
Keep reading: Create email address policy in Exchange Server »
Conclusion
In this article, you learned how to create a Central Store for Group Policy Administrative Templates. Copy the ADMX and AMDL files from the local store to the Central Store. From now on, download Administrative Templates, and place them in the Central Store. If it asks you to replace the file, click yes to all. It will ensure that you keep the settings up to date and the old settings are still in place.
Did you enjoy this article? If so, you may like Let’s Encrypt unable to install certificate (0x80070520). Don’t forget to follow us and share this article.
This Post Has 0 Comments