How to install FREE Let's Encrypt certificate in Exchange Server? After configuring the internal and…
Create send connector in Exchange
After installing Exchange Server, what is next? One of the steps is to create a send connector in Exchange Server to send emails out on the internet. That’s because there is no send connector configured by default in Exchange. This article will teach you how to create a send connector in Exchange with Exchange Admin Center (EAC). Not only that, but you will also learn how to add a send connector in Exchange with PowerShell.
Table of contents
Create send connector in Exchange with EAC
To create a send connector in Exchange admin center, follow these steps:
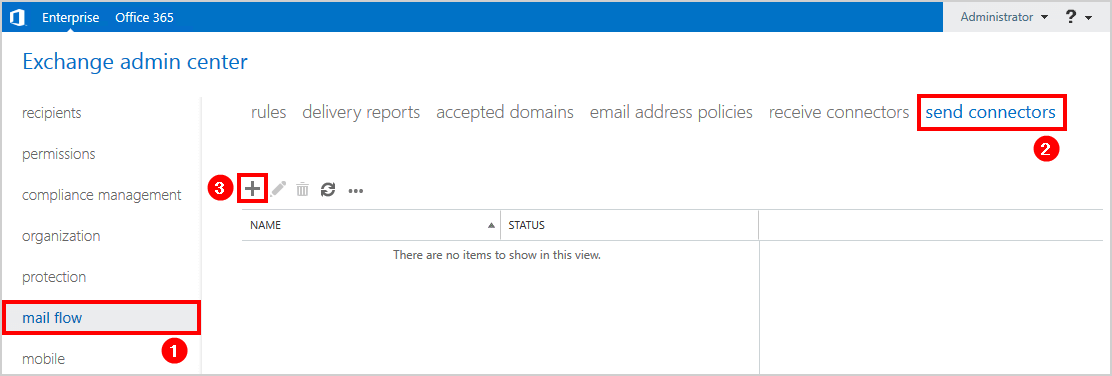
1. Sign in to Exchange Admin Center as an administrator or with an account with the privileges to add a send connector in Exchange Server.
2. Click mail flow > send connectors.
3. Click the plus icon to create the first send connector.
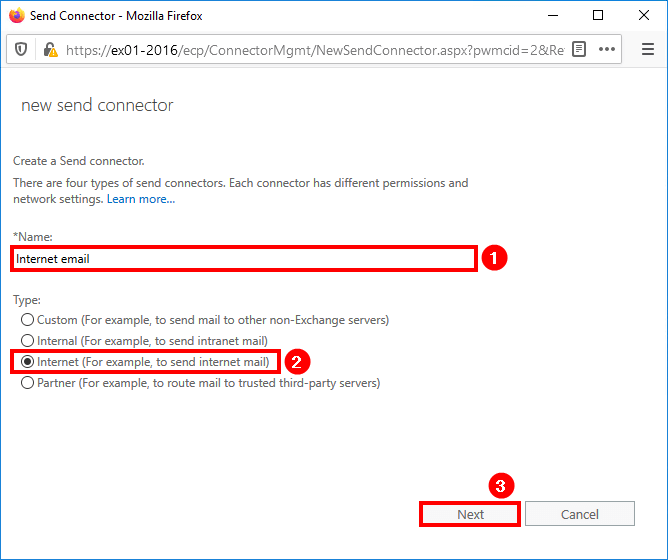
4. Type a friendly name such as Internet email.
5. Select type: Internet (For example, to send internet mail).
6. Click Next.
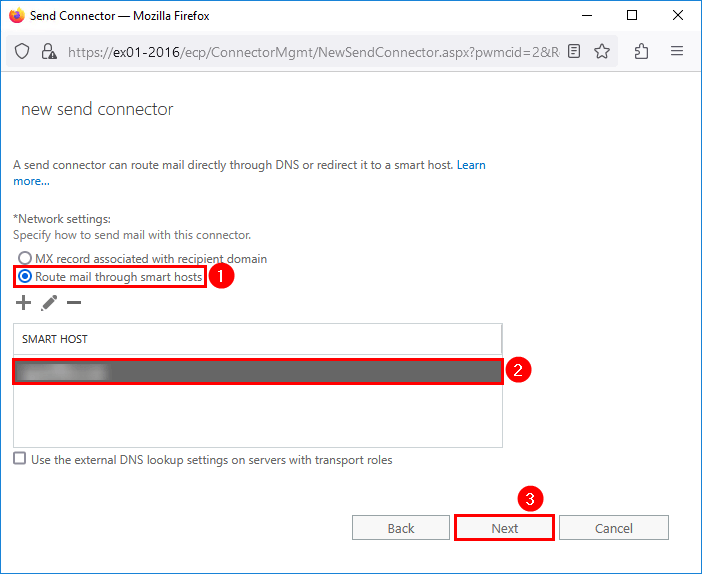
7. Select Route mail through smart hosts
8. Click the + icon.
9. Add the SpamBull smart host URL.
Note: Always use a spam filter to protect your Exchange Server organization from incoming and outgoing spam. The one we recommend is the SpamBull cloud spam filter.
10. Click Save.
11. Click Next.
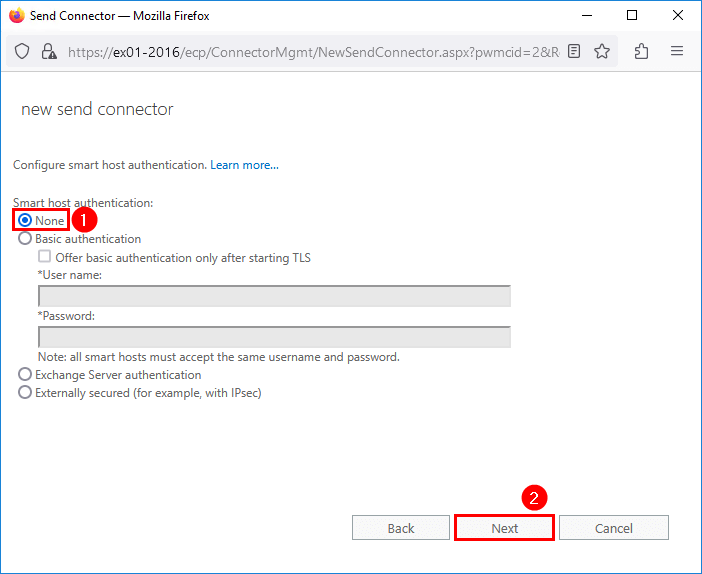
12. If you are using an IP outgoing user, leave None. If you are using an Authenticating user, select Basic Authentication > Input the Outgoing User name and Password.
13. Click Next.
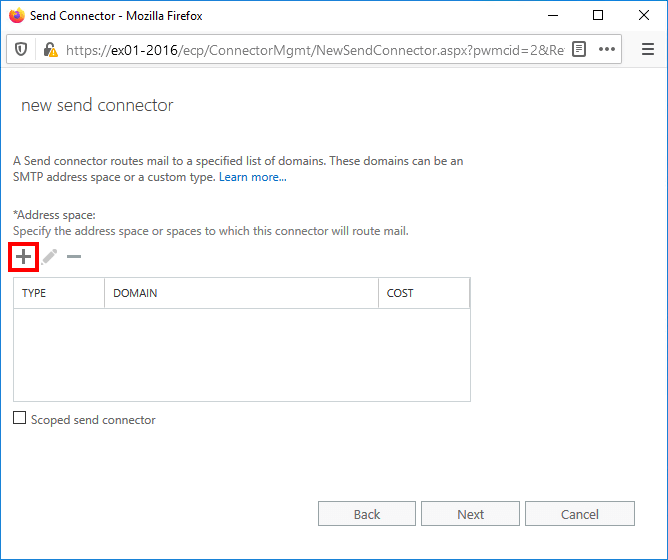
14. Click the + icon to specify the address space.
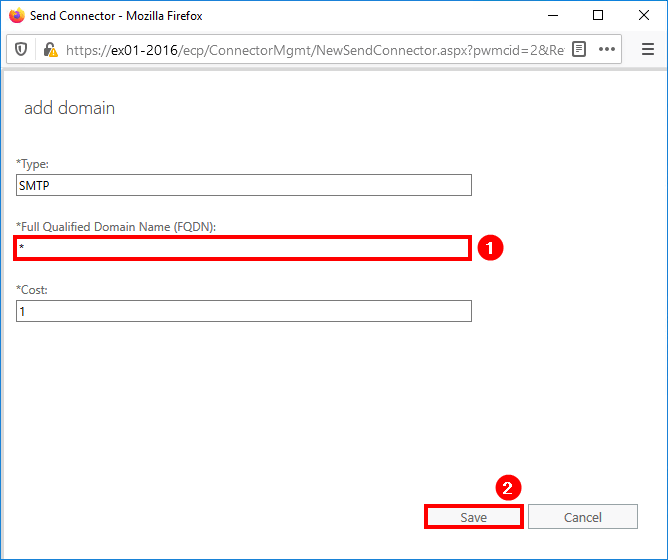
15. Type * (asterisk) in the Full Qualified Domain Name (FQDN) field. This value indicates that the send connector applies to messages addressed to all external domains.
Keep the Cost at number 1. The less the number, the higher the priority.
16. Click Save.
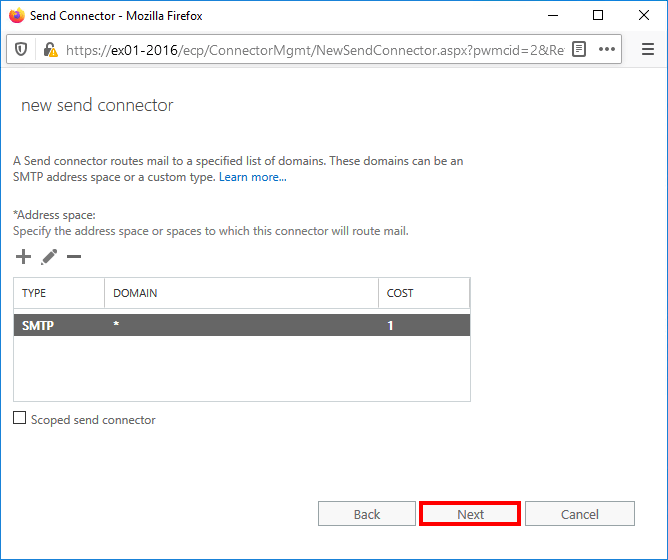
17. Click Next.
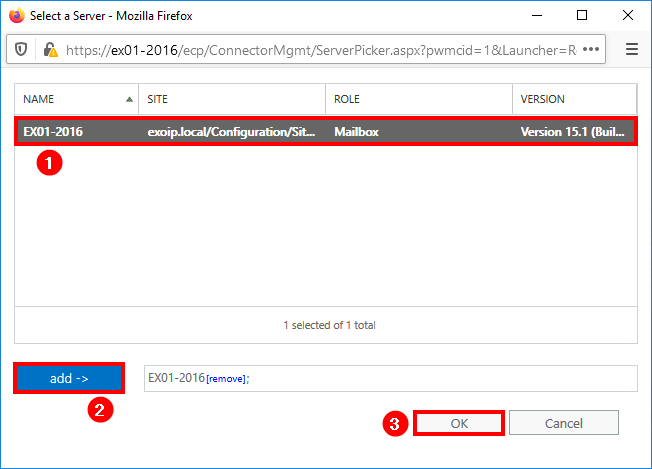
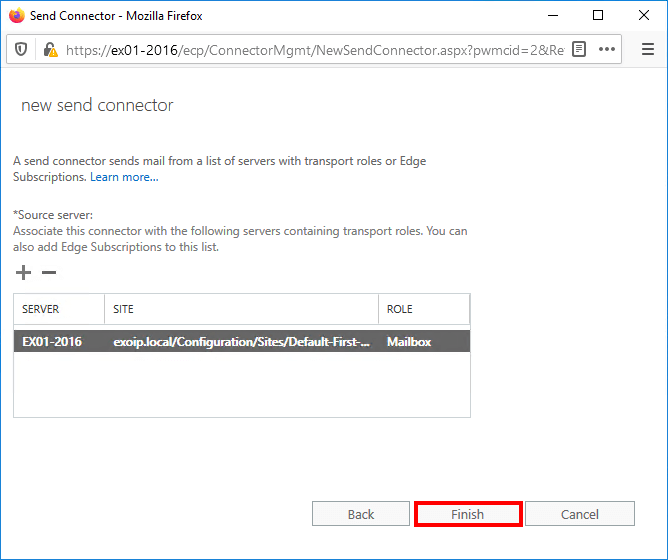
18. Click the + icon to specify the source server.
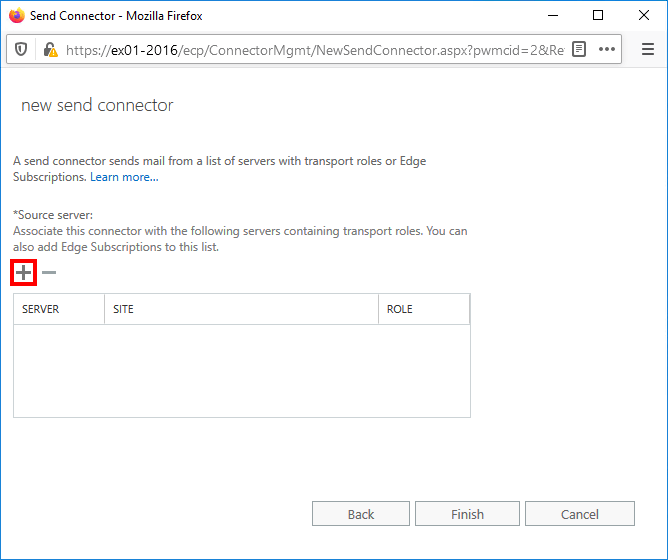
19. Select the Exchange Server. If you have more than one Exchange Server, select them.
20. Click add.
21. Click OK.
22. Click Finish.
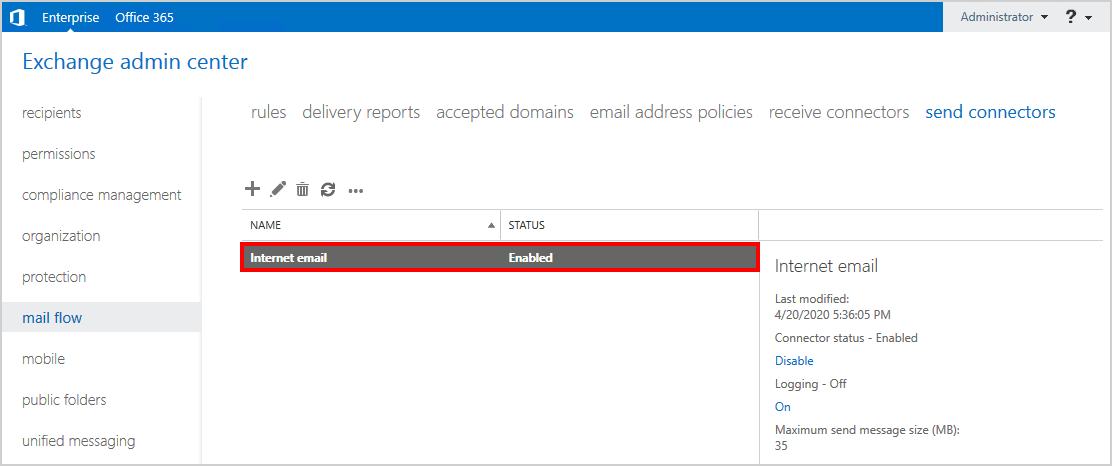
23. The send connector named Internet email appears in the list, and it’s enabled.
If you like to disable the send connector, click the Disable link in the details pane. You don’t have to remove the send connector.
What if we like to add a send connector with PowerShell? Read more in the next step.
Create send connector in Exchange with PowerShell
To create a send connector in Exchange Server with PowerShell, follow the below steps:
1. Run Exchange Management Shell as administrator.
2. Run the New-SendConnector cmdlet. Change the server name and smart host URL to yours.
[PS] C:\>New-SendConnector -Name "Internet email PS1" -Usage "Internet" -SourceTransportServers "EX01-2016" -AddressSpaces ("SMTP:*;1") -IsScopedConnector $False -UseExternalDNSServersEnabled $false -SmartHosts smarthosturl.com

Identity       AddressSpaces Enabled
--------       ------------- -------
Internet email {SMTP:*;5}    True
It’s quicker to create a send connector with PowerShell.
Get send connectors in Exchange with PowerShell
Run the Get-SendConnector cmdlet to find the configured send connectors in Exchange with PowerShell.
There are two send connectors configured and enabled in our example.
[PS] C:\>Get-SendConnector | Format-Table Identity, AddressSpaces, SourceTransportServers, MaxMessageSize, Enabled

Identity          AddressSpaces SourceTransportServers MaxMessageSize           Enabled
--------          ------------- ---------------------- --------------           -------
Internet email    {SMTP:*;1}    {EX01-2016}            35 MB (36,700,160 bytes)    True
Internet email PS {SMTP:*;1}    {EX01-2016}            35 MB (36,700,160 bytes)    True
Did this help you to create a new send connector in Exchange Server? Remember to test the send connector with a simple test to verify that the outgoing mail works.
Keep on reading: Exchange namespace design and planning »
Conclusion
You learned how to create a send connector in Exchange Server. You learned how to create a send connector in Exchange with EAC and PowerShell. Configuring a new send connector in Exchange with PowerShell is faster. Don’t forget that you can disable the created send connector instead of removing it. That’s an excellent way if you like to troubleshoot and test send connectors.
Did you enjoy this article? You may also like Add Exchange Server to existing send connector. Don’t forget to follow us and share this article.
What Others Are Reading


hi,
I have a problem sending emails to 1 particular domain with the error: “Must issue STARTTLS”.
I checked my email encryption with online TLS checker, looks like I can send email using TLS 1.2 with no problems.
But when I test receiving, I’m getting message “TLS is not an option for this server”.
Send connector Log shows error illegal message (here is part of the log) after my exchange server sends Certificate (which is legit Certificate by GeoTrust).
2023-12-04T07:28:11.386Z,To Internet,08DBF496A2B65D82,18,172.24.1.227:25341,45.9.44.12:25,*,,TLS negotiation failed with error IllegalMessage”.
By the way I have registry TLS settings on the Exchange server in line with your recommendations after running Exchange HelathChecker.
Any suggestions?
Hi.
I’m wondering if it’s possible to create an external connector for sending to an account that is equal to domain name. We have internal and external services, and internal is only for domain users. But we have created an external account for an external employee. In our previous server we used a gmail account for sending from domain and then redirect the message from gmail to our external ISP.
Do you know if it’s possible to ommit this method and sending directly?
Can you specify which Send connector is used by user/group or mailbox database?
Hi can you explain how create an edge send connector with authentication?
I use :
New-SendConnector -Name “EdgeSync – Site-A to Internet” -Usage Custom -AddressSpaces SMTP:*;100 -DNSRoutingEnabled $false -SmartHosts 192.168.10.1 -SmartHostAuthMechanism None -SourceTransportServers EdgeSubscriptionName
But i’d use -SmarthostAuthMechanism BasicAuth and -AuthenticationCredential but i don’t kown how insert AuthCred.
TKS A LOT