You want to synchronize your on-premises users with Office 365. Before you do that, ensure…
Create shared mailbox with same alias
Creating a new shared mailbox in the Microsoft 365 admin portal shows a message that the email address is not available because it’s already in use by another mailbox. Why is this happening, and what is the solution to this error? In this article, we will look at how to create a shared mailbox with the same alias in a Microsoft 365 tenant.
Table of contents
Introduction
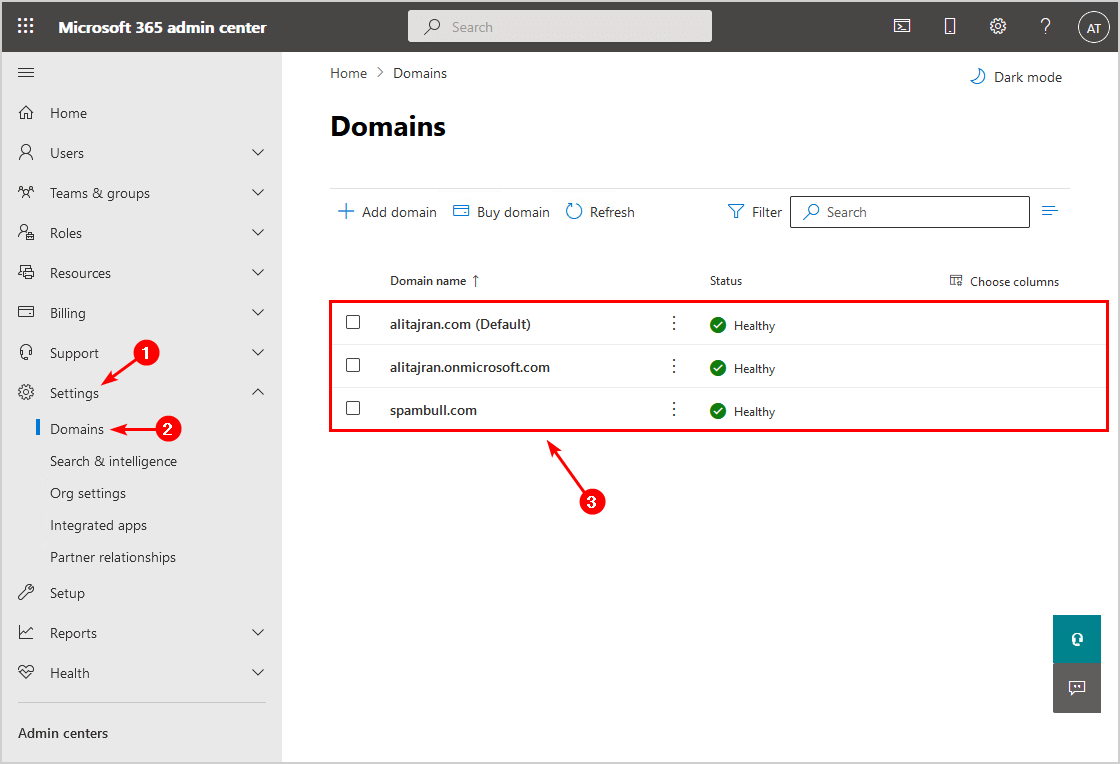
We have a domain alitajran.com in Microsoft 365, and we did add another domain spambull.com.
The onmicrosoft.com domain is by default created by Microsoft.
The domains look like this:
- alitajran.com
- alitajran.onmicrosoft.com
- spambull.com
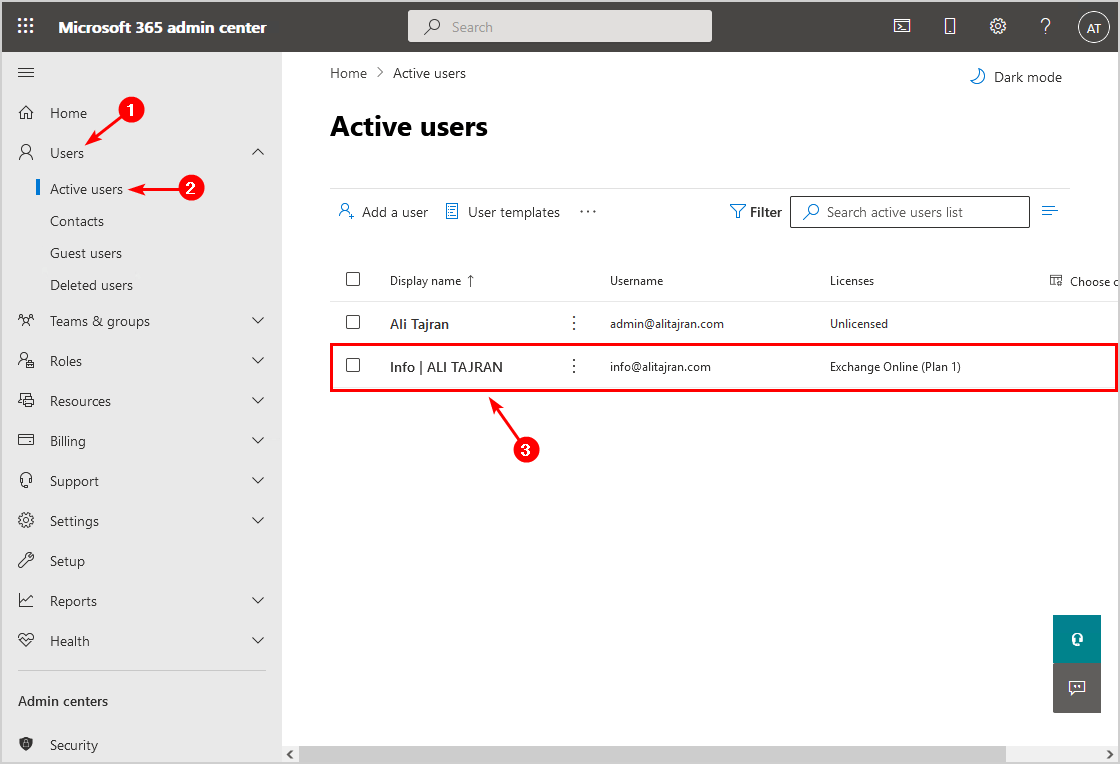
Looking at the Active users, there is only one mailbox active with an Exchange Online license: info@alitajran.com.
Email address not available because it’s used
We like to add the info@spambull.com shared mailbox. But, we do get the message:
Email address not available because it’s used by “mailbox”.

Why do we see the message that the email address is unavailable because another mailbox is already in use? The domain spambull.com is different than alitajran.com. In our understanding, we should be able to have an info@alitajran.com and info@spambull.com email address.
Let’s try with PowerShell.
Proxy address is already being used
Let’s try to create a shared mailbox with the same alias but different domain in PowerShell.
Run PowerShell as administrator and connect to Exchange Online PowerShell.
PS C:\> Connect-ExchangeOnlineRun the New-Mailbox cmdlet and create a shared mailbox.
PS C:\> New-Mailbox -Name "Info | SpamBull" -Alias "info" -Shared -PrimarySMTPAddress "info@spambull.com"
The proxy address "SMTP:info@alitajran.com" is already being used by the proxy addresses or LegacyExchangeDN. Please choose another
proxy address.
    + CategoryInfo          : NotSpecified: (0:Int32) [New-Mailbox], WLCDManagedMemberExistsException
    + FullyQualifiedErrorId : [Server=VI1P195MB0301,RequestId=b9cf69d2-177a-475a-9474-558d955bd644,TimeStamp=03/11/2021 20:14:59] [F
   ailureCategory=Cmdlet-WLCDManagedMemberExistsException] C9D7D671,Microsoft.Exchange.Management.RecipientTasks.NewMailbox
    + PSComputerName        : outlook.office365.com
The output shows that the proxy address SMTP:info@alitajran.com is already in use. But, we did enter info@spambull.com and not info@alitajran.com as the primary SMTP address. What’s happening?
Solution to create shared mailbox with same alias
The solution to creating a shared mailbox with the same alias is to create a unique alias for the new shared mailbox. Let’s see it in action step by step to have a clear understanding.
Run New-Mailbox cmdlet and change the alias. In our example, we did change the alias from info to info2.
PS C:\> New-Mailbox -Name "Info | SpamBull" -Alias "info2" -Shared -PrimarySMTPAddress "info@spambull.com"

Name                      Alias           Database                       ProhibitSendQuota    ExternalDirectoryObjectId
----                      -----           --------                       -----------------    -------------------------
Info | SpamBull           info2           EURP195DG037-db182             49.5 GB (53,150,2... 6af3713c-1547-418a-b307-51dc784a0cc3
Run Get-Mailbox cmdlet to get the information. The alias shows as info2, and the UserPrincipalName shows the domain alitajran.com.
PS C:\> Get-Mailbox "Info | SpamBull" | select Name,Alias,UserPrincipalName

Name            Alias UserPrincipalName
----            ----- -----------------
Info | SpamBull info2 info2@alitajran.com
Run Set-Mailbox cmdlet and use the MicrosoftOnlineServicesID parameter to set the UserPrincipalName.
PS C:\> Set-Mailbox "Info | SpamBull" -MicrosoftOnlineServicesID "info@spambull.com"
WARNING: UserPrincipalName "info2@alitajran.com" should be same as WindowsLiveID "info@spambull.com", UserPrincipalName should remain
as"info@spambull.com".
Verify that the UserPrincipalName shows the correct domain.
PS C:\> Get-Mailbox "Info | SpamBull" | select Name,Alias,UserPrincipalName

Name            Alias UserPrincipalName
----            ----- -----------------
Info | SpamBull info2 info@spambull.com
Let’s look at the shared mailbox alias addresses and add the EmailAddresses parameter. Read more on how to find email addresses with PowerShell.
PS C:\> Get-Mailbox "Info | SpamBull" | select Name,Alias,UserPrincipalName,EmailAddresses

Name            Alias UserPrincipalName EmailAddresses
----            ----- ----------------- --------------
Info | SpamBull info2 info@spambull.com {smtp:info2@alitajran.onmicrosoft.com, smtp:info2@alitajran.com, SMTP:info@spambull.com}
Remove the alias addresses that have info2 as the alias name.
PS C:\> Set-Mailbox "Info | SpamBull" -EmailAddresses @{remove="info2@alitajran.onmicrosoft.com","info2@alitajran.com"}In the last step, we will verify the shared mailbox.
Verify shared mailbox with same alias
Check the shared mailbox in PowerShell.
PS C:\> Get-Mailbox "Info | SpamBull" | select Name,Alias,UserPrincipalName,EmailAddresses

Name            Alias UserPrincipalName EmailAddresses
----            ----- ----------------- --------------
Info | SpamBull info2 info@spambull.com {SMTP:info@spambull.com}
Verify the shared mailbox in Microsoft 365 admin center.
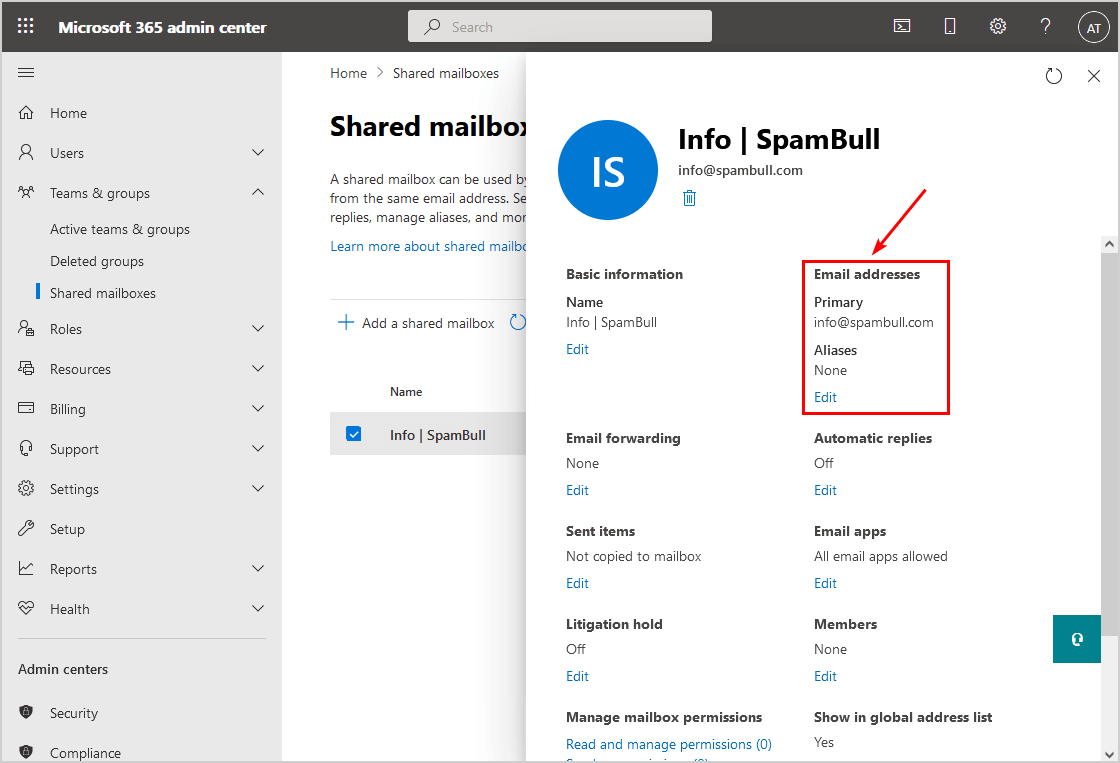
Shared mailbox with the same alias is created successfully. Did it work for you?
Keep reading: Get shared mailbox size in Office 365 with PowerShell »
Conclusion
You learned why you get the message email address not available because it’s already used. The solution is to create the email address in Exchange Online PowerShell. After that, you can see that the shared mailbox is ready to use with your specified name.
Did you enjoy this article? You may also like How to get mailbox size greater than in Microsoft 365. Don’t forget to follow us and share this article.
What Others Are Reading

Thx, for this nice workaround and sharing.
Wow wow wow, you saved my ass with this tutorial. Great work.
It worked great, thank you!
Hi Ali, thanks for this – seems weird MS haven’t fixed this yet. The issue seems caused by MS defaulting the UPN to the default domain on the tenant, regardless of you trying to create a mailbox on any of the other domains you have added.
As an alternative to the powershell option, in your example, once you create the info2@ mailbox, you can go to https://entra.microsoft.com/#view/Microsoft_AAD_UsersAndTenants/UserProfileMenuBlade/ select the new user, edit properties, then change the user principle name field and email. The email part can also be changed at https://admin.exchange.microsoft.com/#/mailboxes/:/MailboxDetails/.
Thanks.
Thanks for letting us know, Barry.
You have saved my bacon! Thanks so much for the great tutorial 🙂
Thanks very much, nice workaround – Worked great!