The Microsoft Exchange Server Auth Certificate is installed when you install an Exchange Server, and…
Create user mailbox in Exchange Server
Create user mailbox in Exchange Server for existing AD users or new users to send and receive emails. Have a read in the course Exchange Server before creating a user mailbox in Exchange Server. In this article, you will learn how to create a user mailbox in Exchange Server.
Table of contents
Create user mailbox in Exchange Server
To create a user mailbox in Exchange Server, follow the below steps:
- Sign in to Exchange Admin Center.
- Click recipients in the feature pane and click the mailboxes tabs.
- Click the + icon in the toolbar and click on User mailbox.
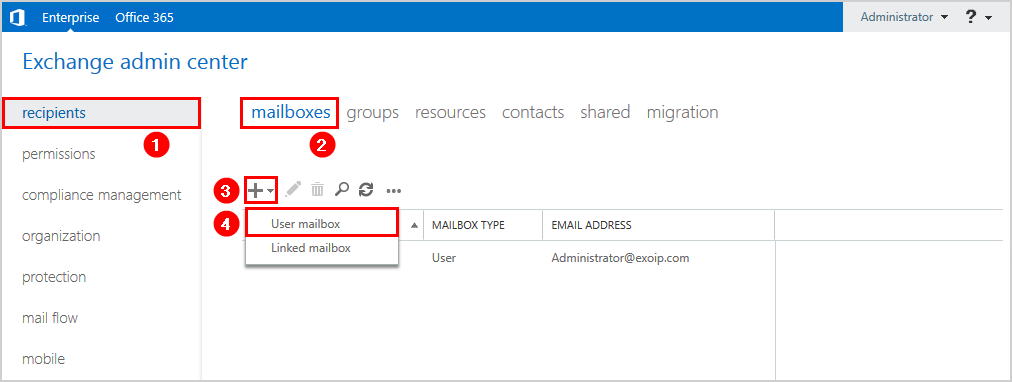
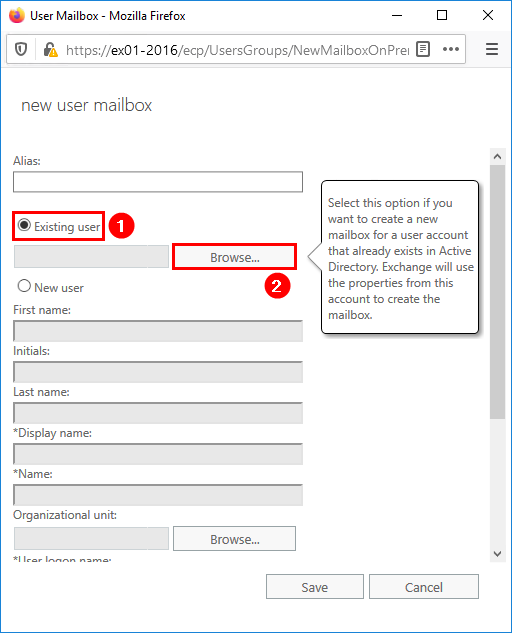
- Select Existing user and click Browse to find the user that already is created in Active Directory (AD). If you don’t have the user created in AD, select New user and fill in the fields. That will create a new user in AD, including a mailbox.
Note: When you create a new user mailbox in Exchange, you also create the corresponding Active Directory simultaneously. Or, you can create a new mailbox for an existing Active Directory account that doesn’t have an associated mailbox. This is known as mailbox-enabling an existing user.
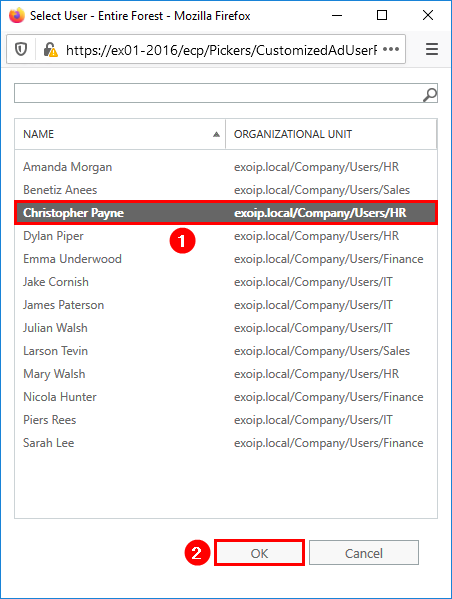
- Select the user from the list and click OK.
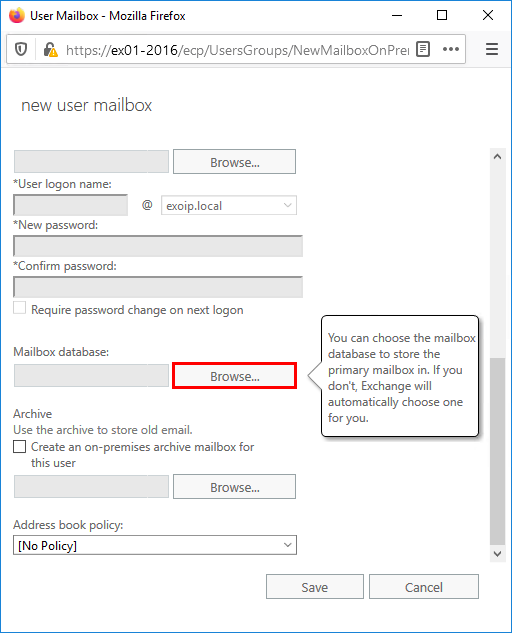
- Click More options…
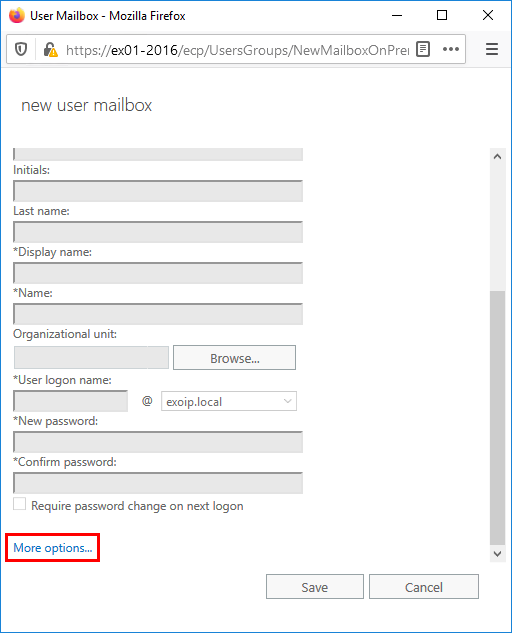
- If you have more than one database to choose from, click Browse.
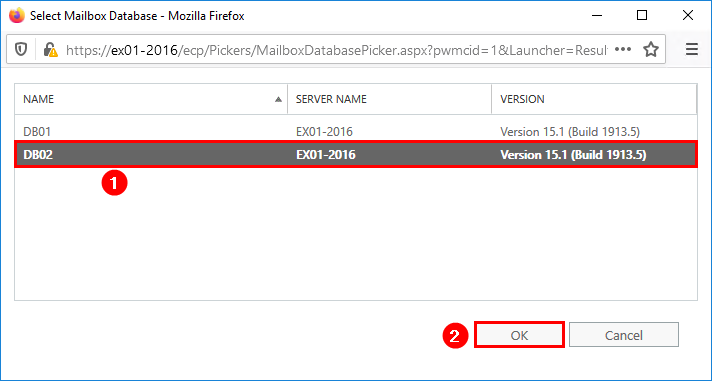
- Select the database and click OK.
In our example, we can choose from two mailbox databases. We like to create the user mailbox in the DB02 mailbox database.
Note: Do you need to create a mailbox database? Read the article create mailbox database in Exchange Server.
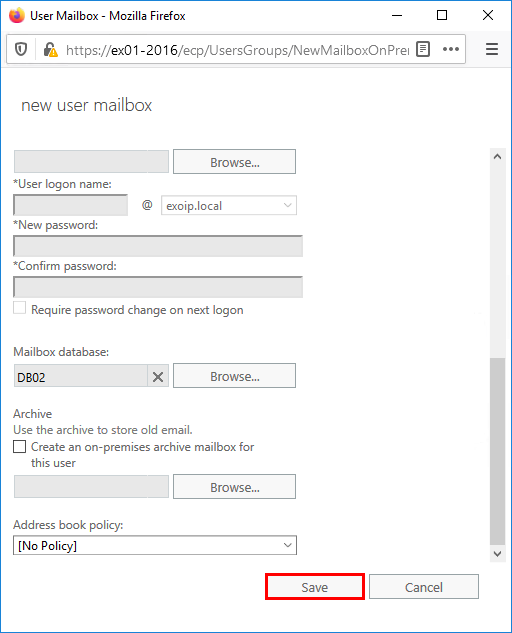
- Click Save.
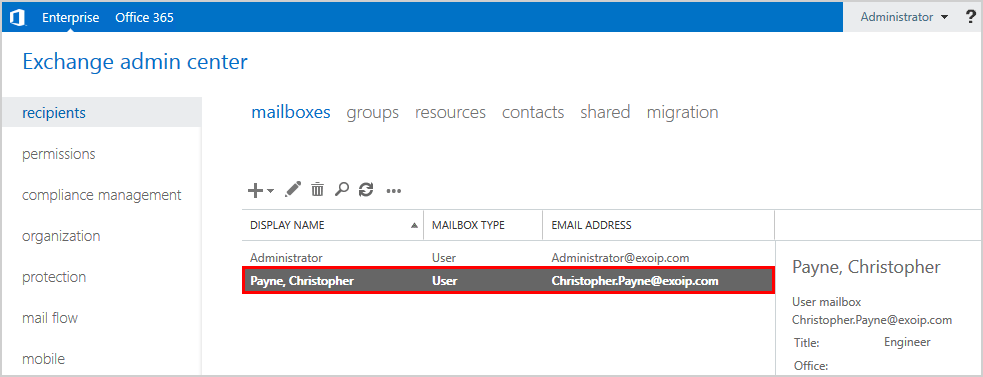
- The user mailbox is created successfully and appears in the mailboxes list.
Check mailbox database location
Add the database column if you like to know which database is configured for each mailbox.
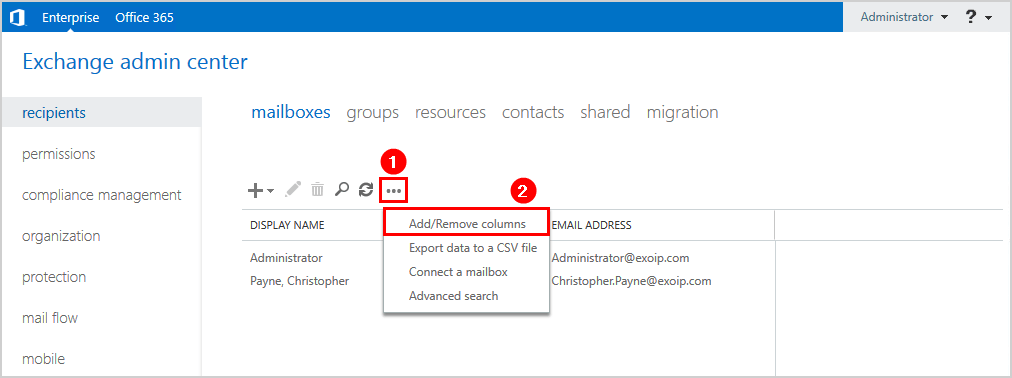
- Click the More … icon.
- Click Add/Remove columns.
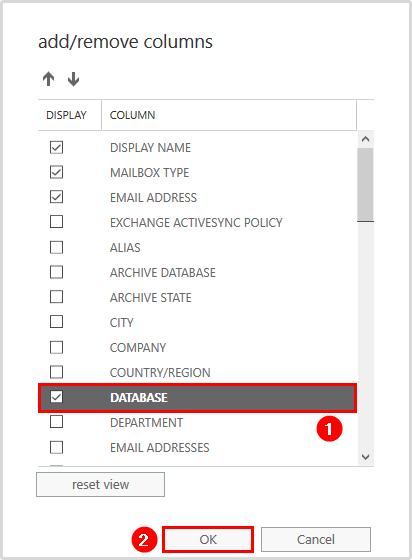
- Check the checkbox DATABASE. Click OK.
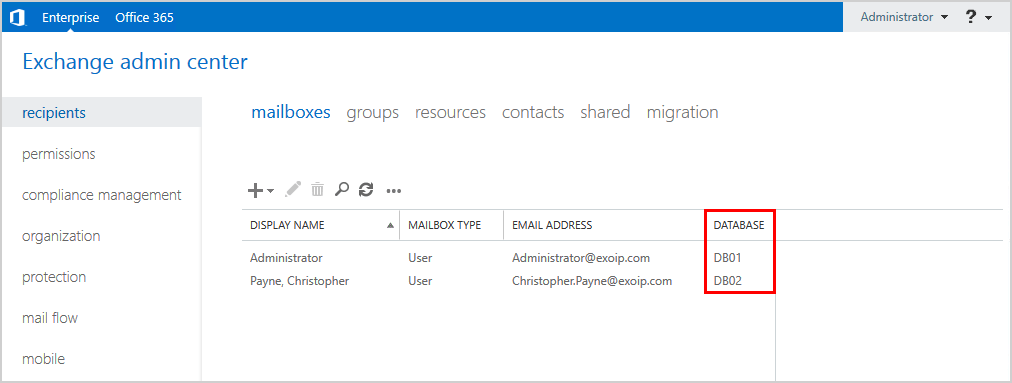
- Have a look again at the mailboxes list. This time, you will see each mailbox configured in which mailbox database.
Create user mailbox in Exchange Server with PowerShell
PowerShell is an excellent method to speed it up when creating a mailbox for an existing user or a new user:
- Start Exchange Management Shell as administrator.
- Get the AD user first.
Get-User "Payne, Christopher"If the output shows the RecipientType value User, no mailbox has been created for the user. If it shows the value UserMailbox, it means there is already a mailbox present.
- Create a mailbox for the existing AD user with the Enable-Mailbox cmdlet.
Get-User "Payne, Christopher" | Enable-Mailbox- Create the user mailbox in a specific mailbox database using the -Database parameter.
Get-User "Payne, Christopher" | Enable-Mailbox -Database "DB02"- Verify the mailbox creation.
Get-Mailbox "Payne, Christopher" | ft Name, DatabaseNote: Do you like to create mailboxes in bulk? Read the article Create bulk mailboxes in Exchange Server with PowerShell.
Did this help you to create a user mailbox in Exchange Server?
Read more: List mailboxes in Exchange database with PowerShell »
Conclusion
You learned how to create user mailbox in Exchange Server. The Exchange Admin Center and PowerShell are excellent methods to create mailboxes in Exchange Server. The advantage of PowerShell is that it’s faster.
First, open the Exchange Admin Center (EAC) or Exchange Management Shell. Next, create a mailbox for an existing user in Active Directory or create a new user, including mailbox. If you have more than one mailbox database, you can choose the mailbox database. As last, verify the mailbox creation.
Did you enjoy this article? You may also like Add Exchange Server to existing send connector. Don’t forget to follow us and share this article.
What Others Are Reading

Dear Mr.Tajran
Hope you fine , I have upgraded my exchange server from 2010 to 2016
after that i can not delete distribution groups
I get this error from ecp console :
Active Directory operation failed on SRV-DC01.domain.net. This error is not retriable. Additional information: Access is denied. Active directory response: 00000005: SecErr: DSID-03152CA3, problem 4003 (INSUFF_ACCESS_RIGHTS), data 0
then I directly tried from Active directory to delete that , but I got : You don’t have sufficient priviledge to delete, or this object is protected from accidental deletion.
* I unchecked the “protect object from accidental deletion”
* There is no user in my distribution group
* I gave full permission to my domain admin account and Exchange trusted subsystem user
* I have tried this command: Remove-DistributionGroup in exchange PowerShell run as admin , with several parameters
However i still get the error and I cant delete Ditribution group , But i can creat one.
I would really appreciate if you could help me .