When a user deletes items from the Deleted Items default folder by using the Delete,…
Enable IPv6 in Exchange Online
IPv6 is not enabled by default in the Microsoft 365 tenant for Exchange Online. You like to configure inbound email in Exchange Online to support IPv6. There is also no option right now to enable it. But does that mean it’s not possible? In this article, you will learn how to enable IPv6 for Exchange Online in Microsoft 365.
Table of contents
Point MX record to Exchange Online
Ensure that you update MX records to Exchange Online before you start.
Check Exchange Online IPv6 inbound status
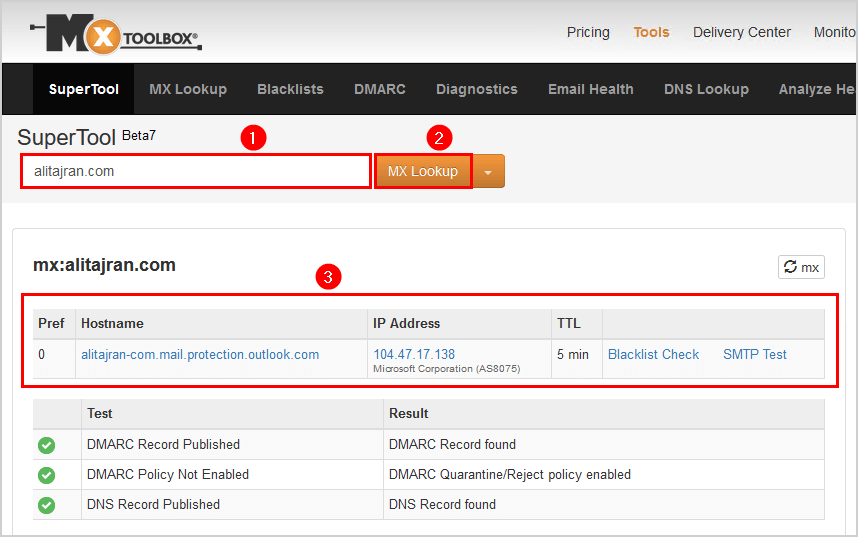
To check Exchange Online IPv6 inbound status, follow these steps:
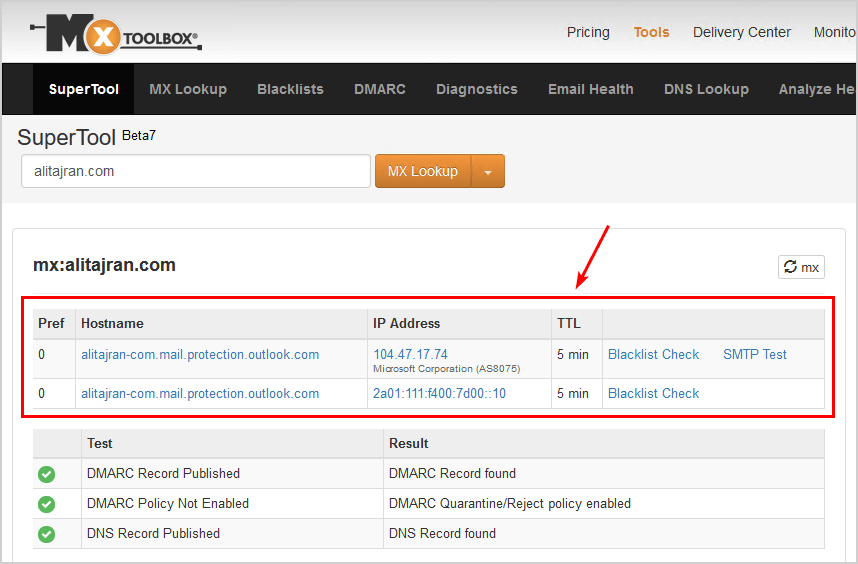
- Go to MXToolBox
- Fill in the domain
- Click on MX Lookup
The below screenshot shows that the Exchange Online MX record is added but can’t resolve to IPv6 and only resolves to the IPv4 address.
Note: If IPv6 support is enabled, you will see two IP addresses for Exchange Online. One IPv4 and one IPv6 address.
Another way to test is with the SMTP Email Test Tool:
- Go to SMTP Email Test Tool
- Enter the domain
- Select the option IPv6
- Click on Run Email Tool
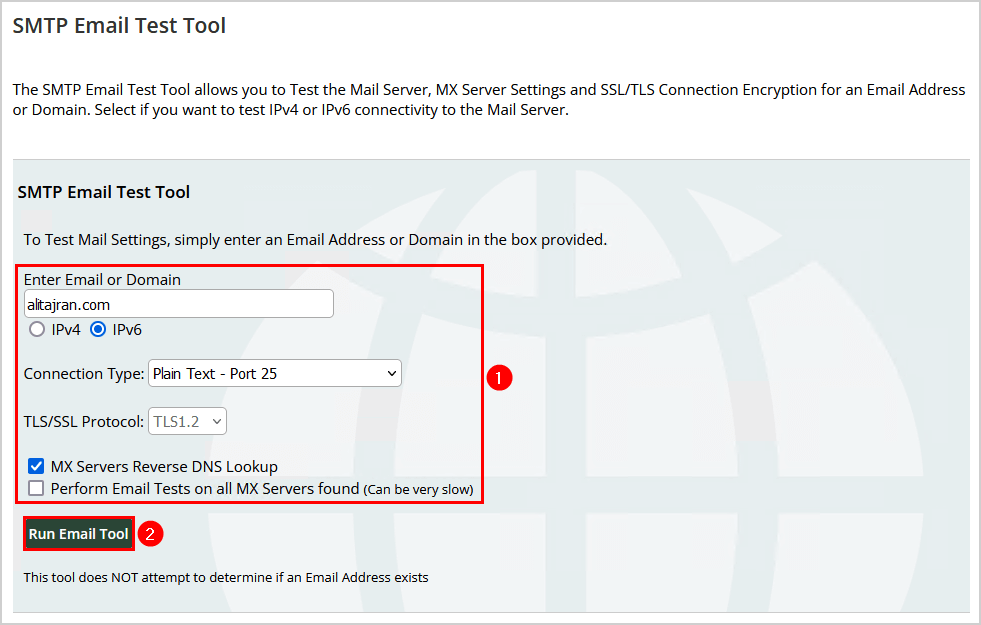
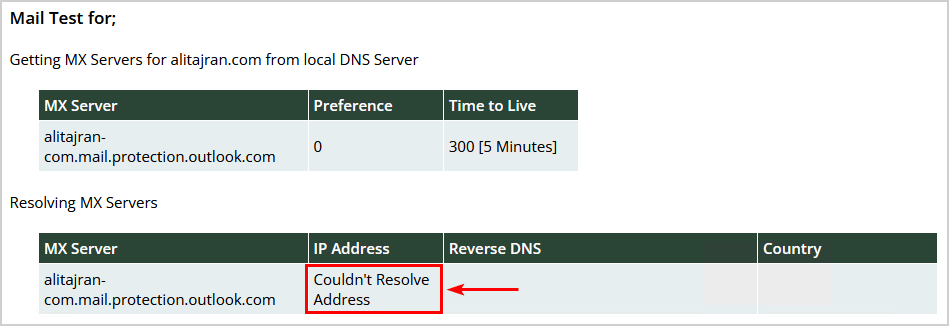
The below screenshot shows that the Exchange Online MX record is added but can’t resolve to IPv6 and only resolves to the IPv4 address.
Let’s look at the next step of enabling IPv6 in Exchange Online.
Add Exchange Online IPv6 inbound support
Before your organization can receive anonymous inbound email over IPv6, an admin needs to contact Microsoft support and ask for it.
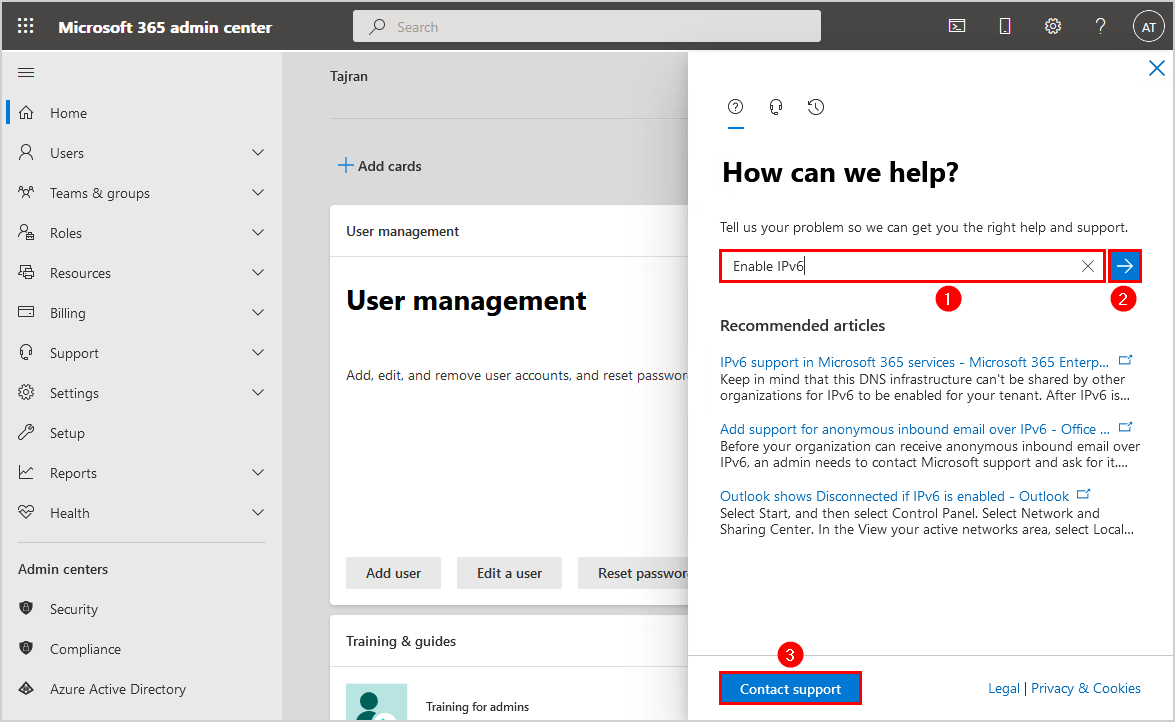
Create a service request in Microsoft 365 admin center:
- Sign in to Microsoft 365 admin center
- Click on Help & support
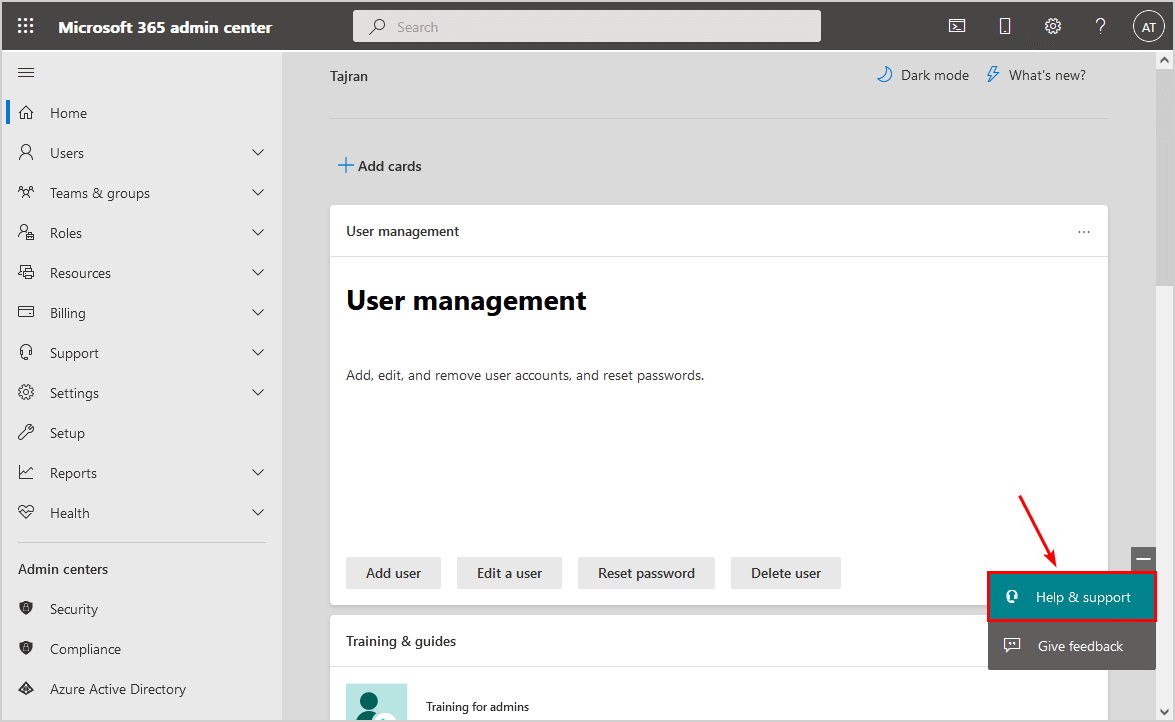
- Type Enable IPv6
- Press Enter
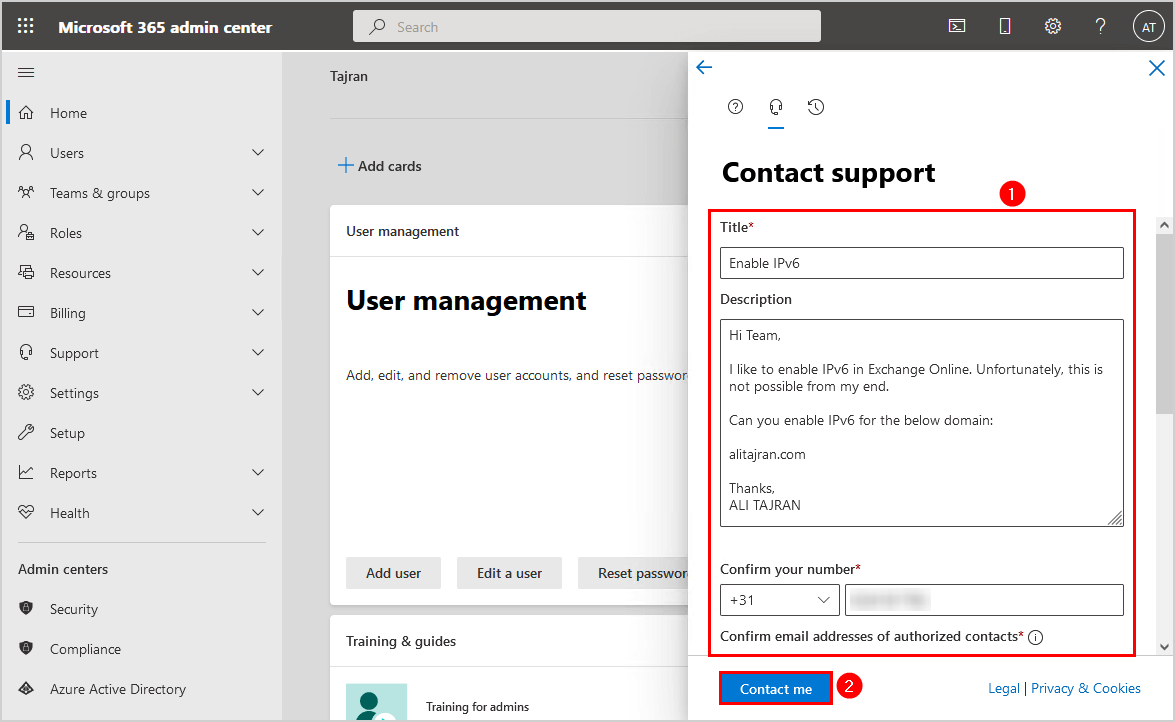
- Click on Contact support
- Fill out the support ticket
- Click Contact me
Note: You can specify which domain you want to enable IPv6 for in Exchange Online.
Wait for Microsoft to enable IPv6 for the domain in Exchange Online and send you a confirmation.
Verify Exchange Online IPv6 inbound status
To verify Exchange Online IPv6 inbound status with MXToolBox, follow these steps:
- Go to MXToolBox
- Fill in the domain
- Click on MX Lookup
The below screenshot shows that the Exchange Online MX record is added and resolves both to IPv4 and IPv6 addresses.
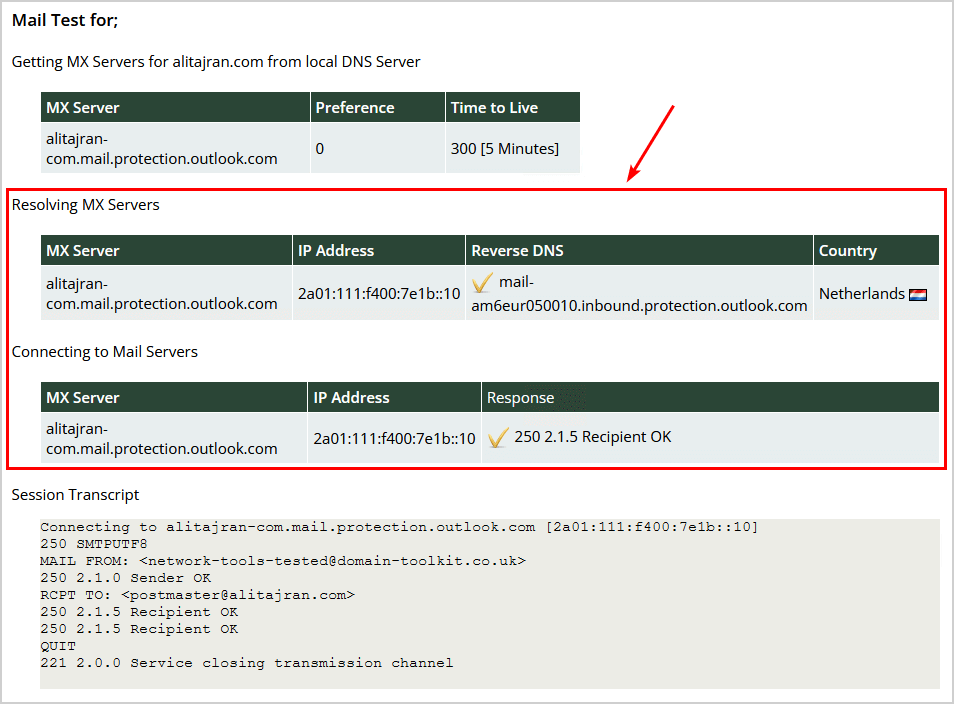
To verify Exchange Online IPv6 inbound status with SMTP Email Test Tool, follow these steps:
- Go to SMTP Email Test Tool
- Enter the domain
- Select the option IPv6
- Click on Run Email Tool

The below screenshot shows that the Exchange Online MX record is added and resolves both to IPv4 and IPv6 addresses.
Read more: How to Allowlist domain in Microsoft 365 »
Conclusion
You learned how to enable IPv6 in Exchange Online. The only way is to raise a service request with Microsoft and ask them to enable IPv6 for the domain(s) in Exchange Online. Use MXToolBox or another SMTP test tool to verify that IPv6 is successfully enabled for the domain in Exchange Online.
Did you enjoy this article? You may also like Get Exchange Online mail traffic report with PowerShell. Don’t forget to follow us and share this article.
What Others Are Reading

How long does it take Microsoft to enable IPv6?
Further you must approve this nonsense before MS enables IPv6:
Microsoft 365 organizations with Exchange Online mailboxes and standalone Exchange Online Protection (EOP) organizations without Exchange Online mailboxes support anonymous inbound email over IPv6. The source IPv6 email server must meet both of the following requirements:
• The source IPv6 address must have a valid reverse DNS lookup (PTR) record that allows the destination to find the domain name from the IPv6 address.
• The sender must pass either SPF verification (defined in RFC 7208) or DKIM verification (defined in RFC 6376)
It can take up to 48 hours for Microsoft to enable IPv6 on the domain(s).