Configure the ReFS volume before or after installing Exchange Server 2013/2016/2019. It's important to configure…
Exchange HTTPS high availability with Kemp load balancer
It’s time to configure Exchange Server high availability because we did install a second Exchange Server in the domain. A great way is to set up Exchange HTTPS high available with a load balancer. This article will teach you how to load balance Exchange Servers HTTPS (port 443) with Kemp load balancer.
Table of contents
Introduction
HTTPS and SMTP are both network layer protocols to transfer information between hosts. SMTP will transfer emails between mail servers, while HTTPS is used to transfer secure communication over a network.
We will load balance Exchange Server for the protocols:
- HTTPS (Hypertext Transfer Protocol Secure) (this article)
- SMTP (Simple Mail Transfer Protocol)
Important: Read the article Exchange high availability namespace design and planning before proceeding.
An architecture view of load balancing HTTPS connection with Kemp load balancer is shown below in the diagram.

Before you start, read the articles:
Configure Exchange HTTPS high availability
To configure Exchange HTTPS high availability on the Kemp LoadMaster, follow the below steps.
1. Install Microsoft Exchange template
It’s good that Kemp provides templates to configure the load balancer. It will make it a bit easier than doing it all by yourself.
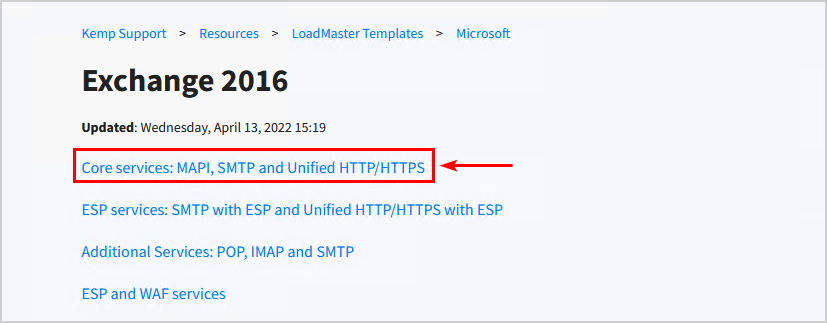
Visit the Kemp documentation page to download the Exchange template.
Choose the template that suits your Exchange Server version.
We will choose Exchange 2016 because we have Exchange Servers 2016 running in the environment.

Download Core services: MAPI, SMTP and Unified HTTP/HTTPS and save the .tmpl file on the machine.
Sign in to Kemp Loadmaster load balancer.
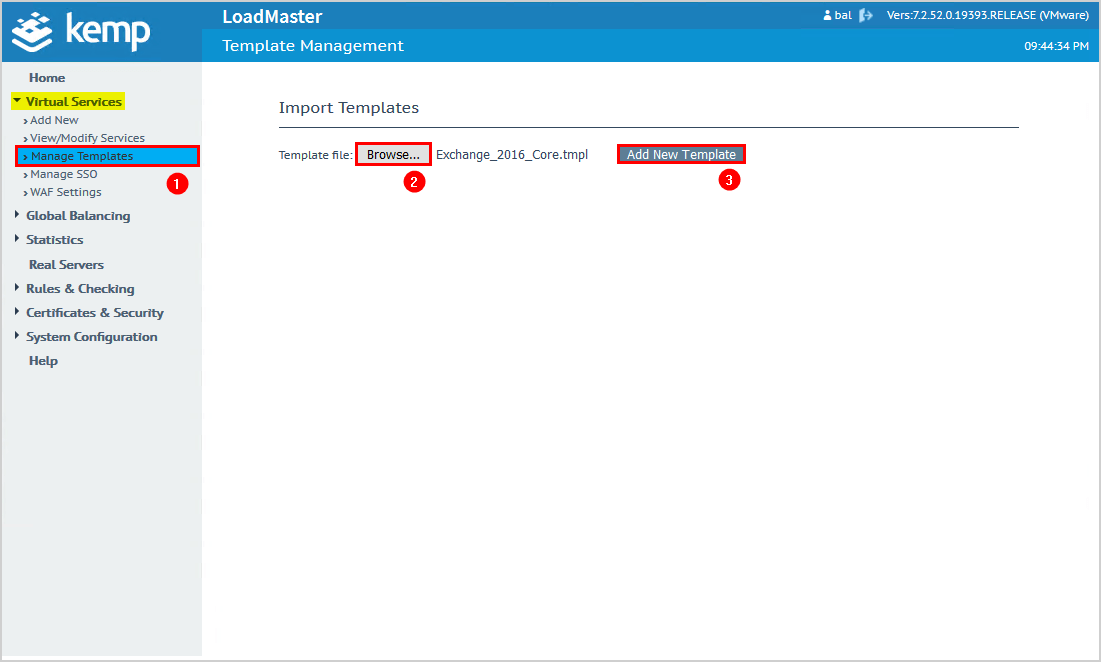
On the left menu, click on Virtual Services > Manage Templates.
Click Browse and select the template that you downloaded in the previous step.
Click Add New Template.
Kemp LoadMaster did add the templates. You can click the delete button if you want to delete a template.

2. Create new virtual service
Click on Add New in the menu.
Select from the dropdown menu Exchange 2016 HTTPS Reencrypted.
Specify the Virtual Address. In our example, it’s 192.168.1.54.
Click Add this Virtual Service.
Make sure that the IP address is not taken by another device. If you already have an old load balancer and want to replace it with Kemp LoadMaster, you can keep using the same IP address. The HTTPS connection will go through Kemp LoadMaster.

Click on SubVSs and then on Modify.
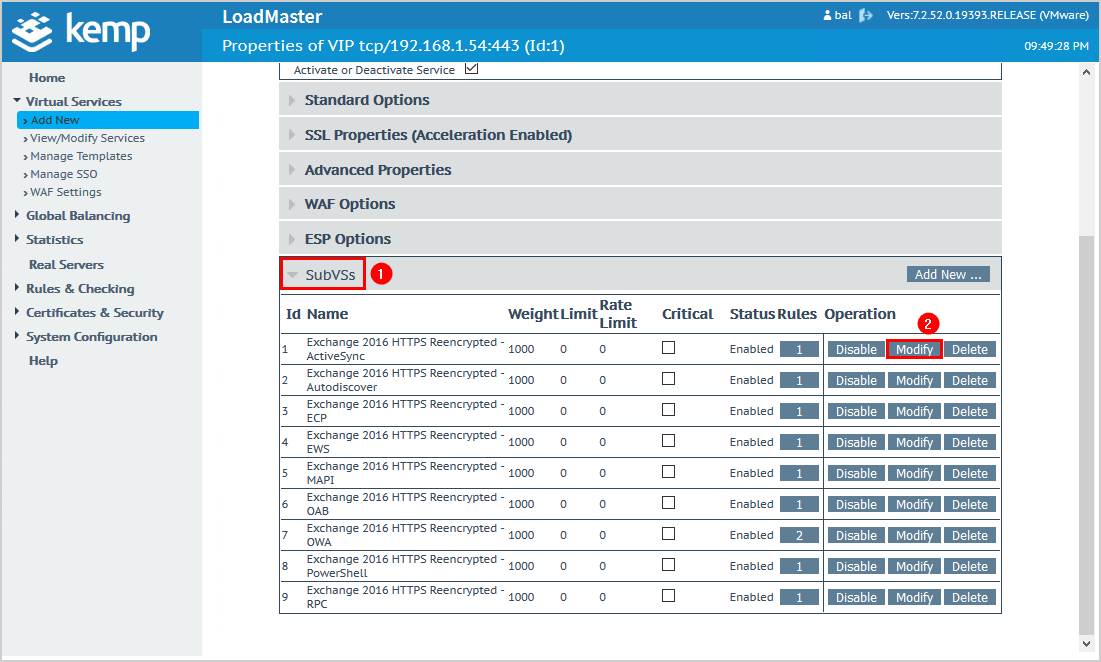
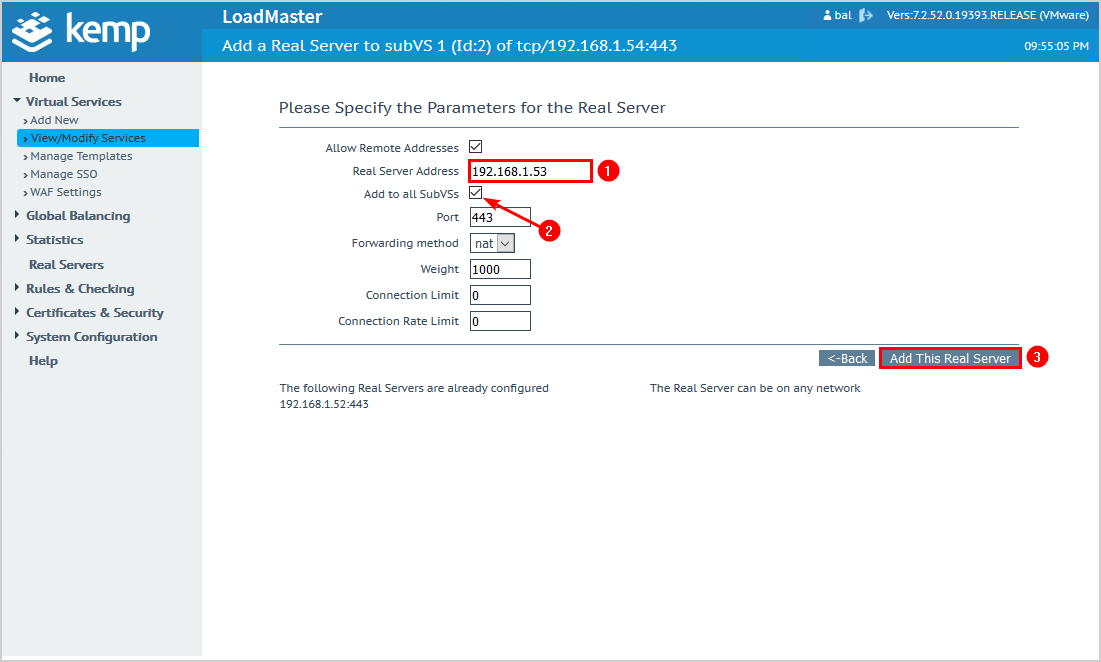
Click on Add New.

Add the Exchange Server IP address.
Check the checkbox Add to all SubVSs.
Click on Add This Real Server.
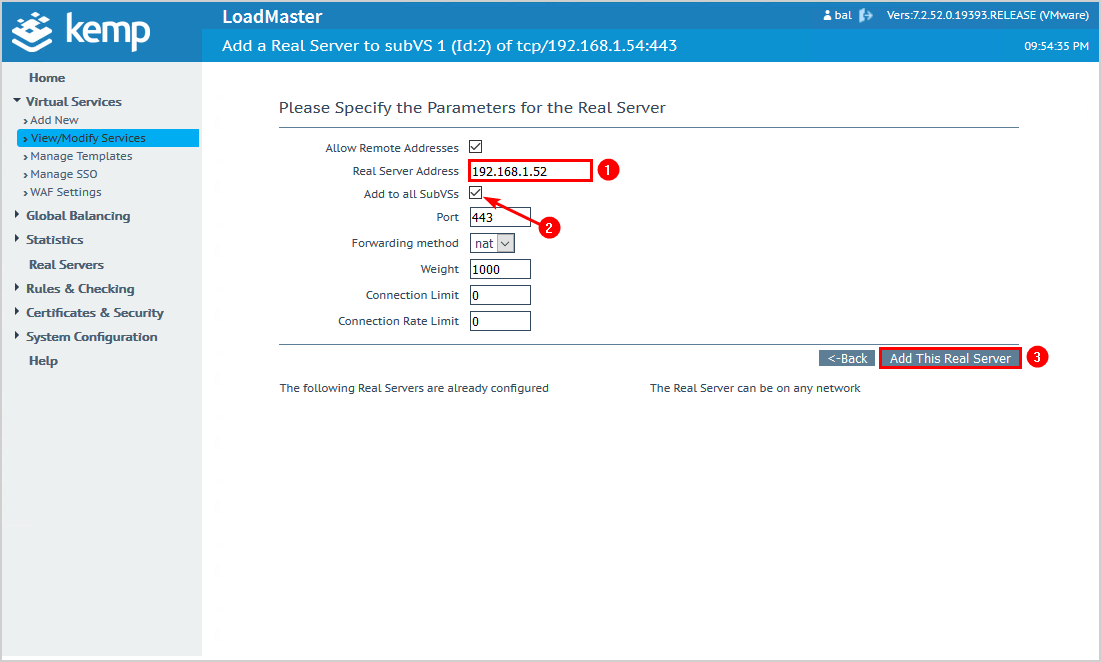
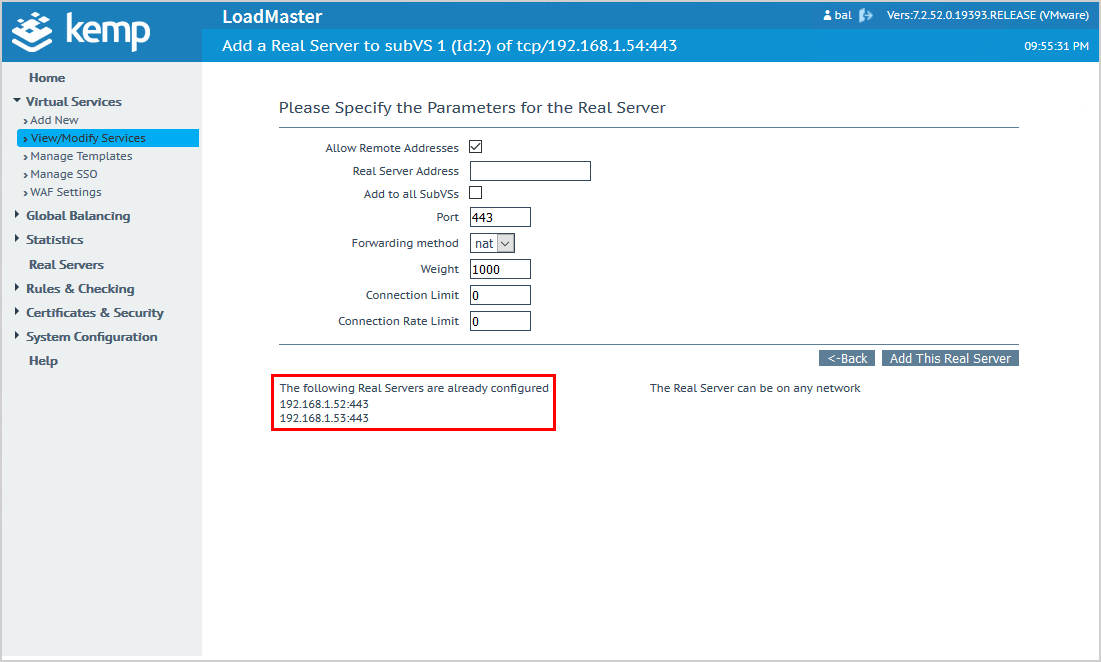
Add the second Exchange Server IP address.
Check the checkbox Add to all SubVSs.
Click on Add This Real Server.
If you have more than two Exchange Servers, add them with the same steps.
You can see which Exchange Servers you added.
3. Import certificate
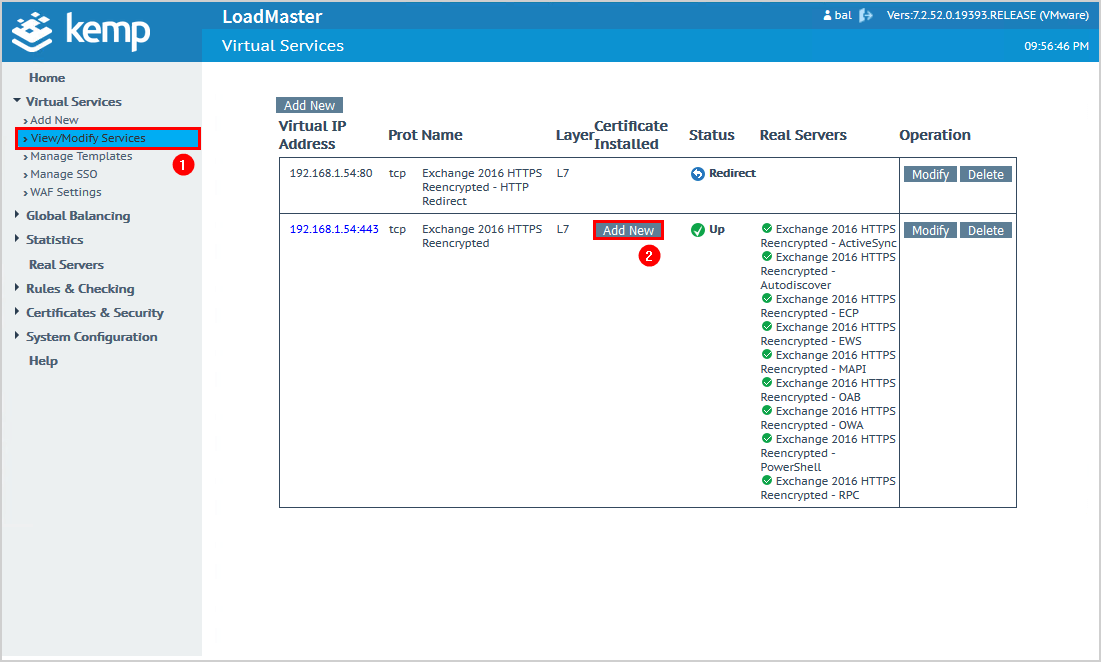
Click on View/Modify Services on the menu.
Click on Add New.
Note: The first line shows that port 80 (HTTP) redirects to port 443 (HTTPS). Kemp automatically redirects HTTP to HTTPS.
Click Import Certificate.
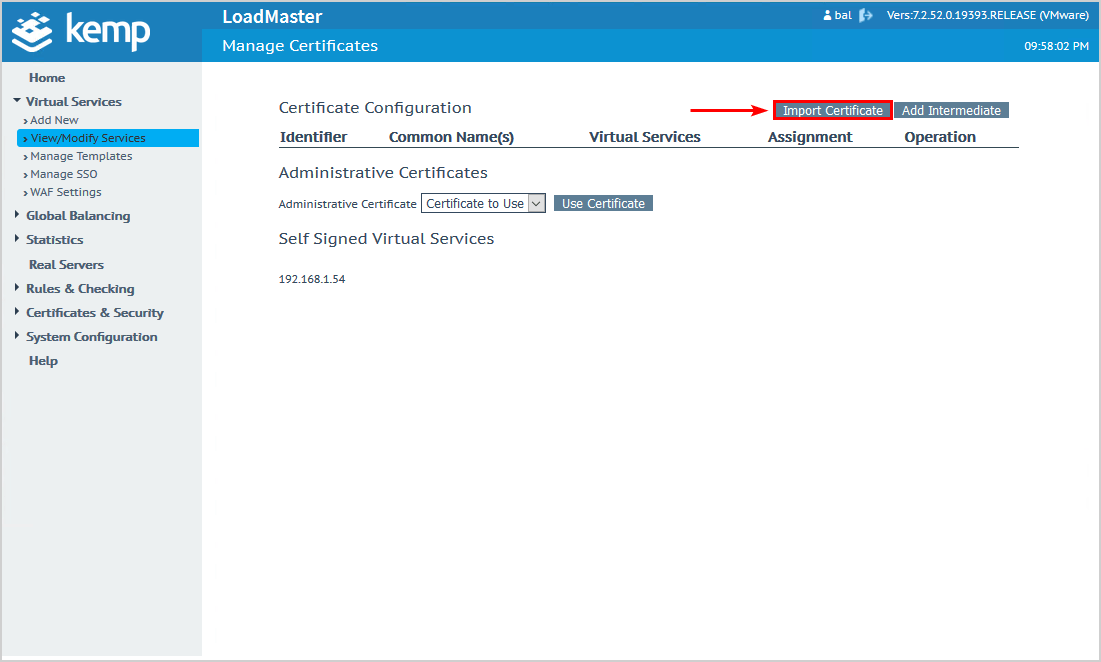
Browse to the Exchange certificate. This will be your SAN certificate or wildcard certificate. We recommend you export the certificate from Exchange Server and browse to that certificate.
Fill in the certificate password.
Give the certificate a name you can remember.
Click Save.

From Available VSs, click the arrow to move the virtual IP address to Assigned VSs.
Click Save Changes.
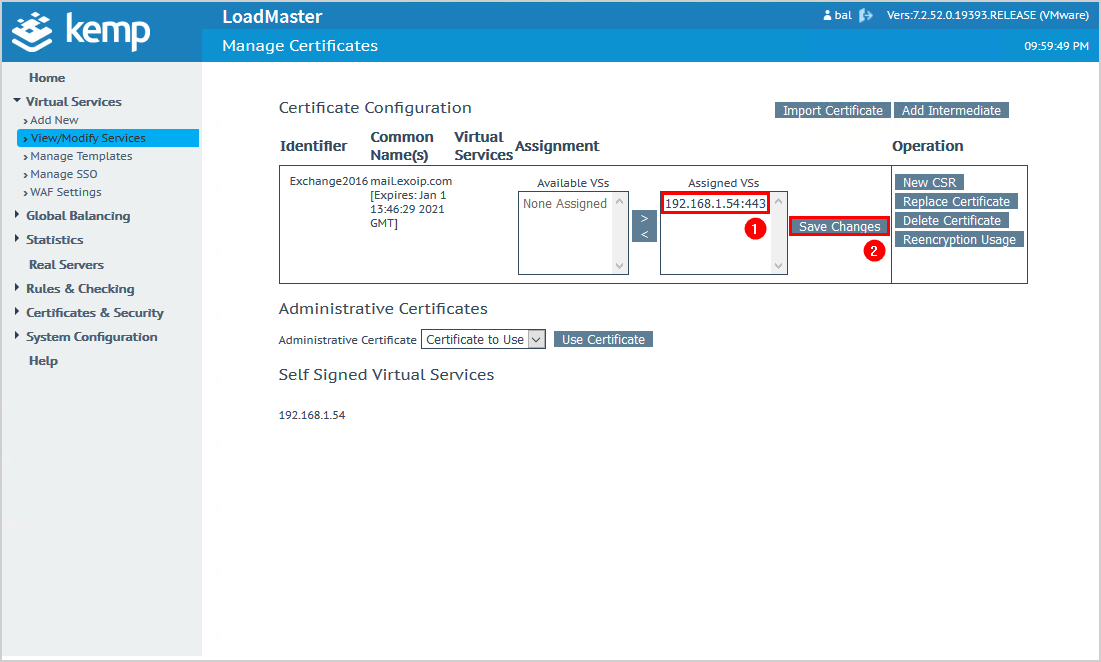
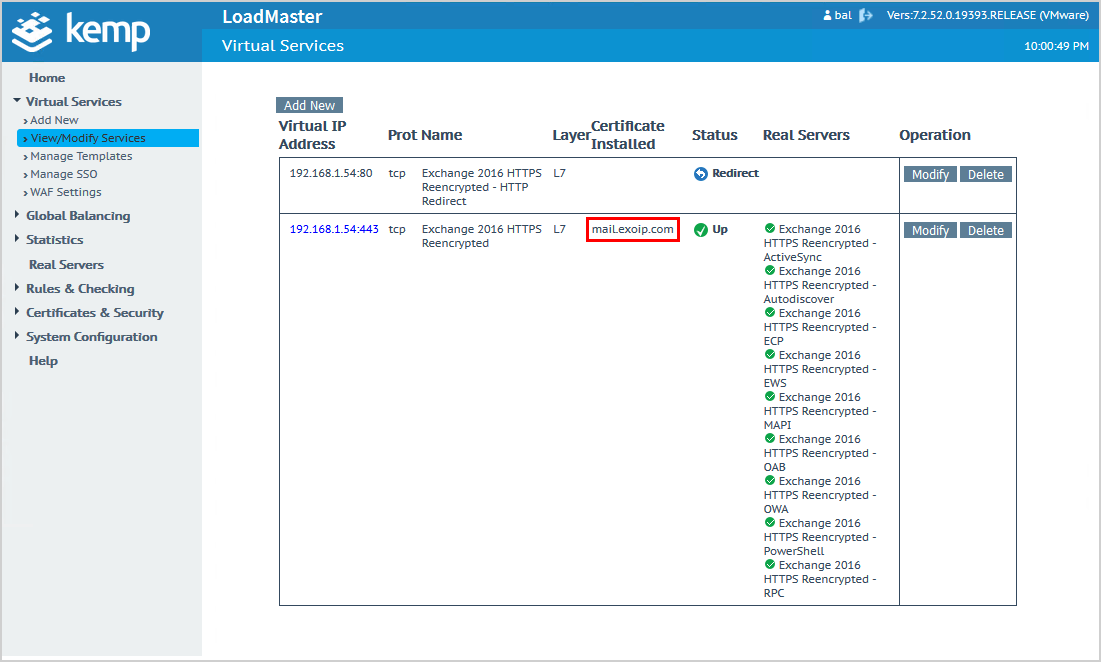
You can confirm and check that the certificate is installed.
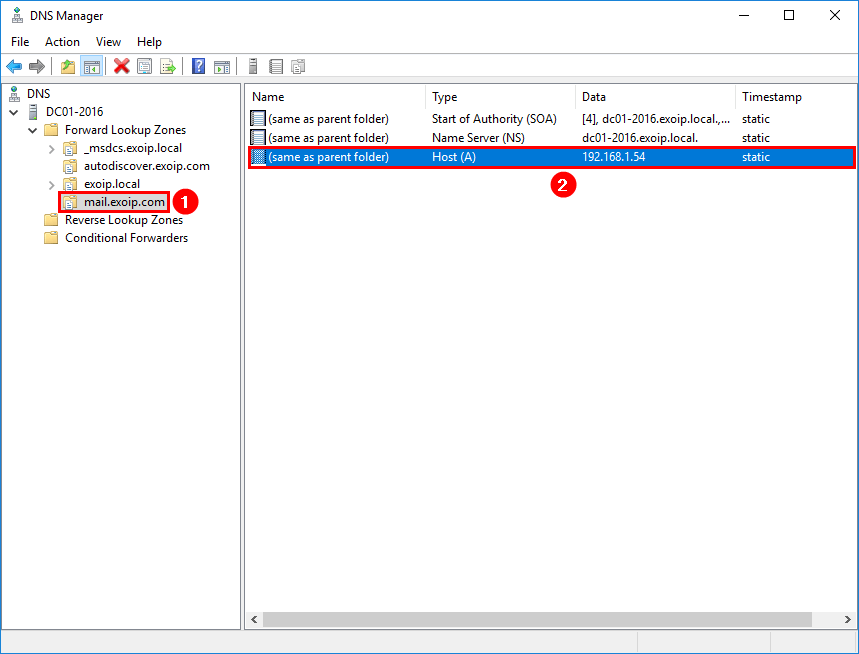
4. Edit internal DNS
Change the internal DNS mail host record to the virtual address.
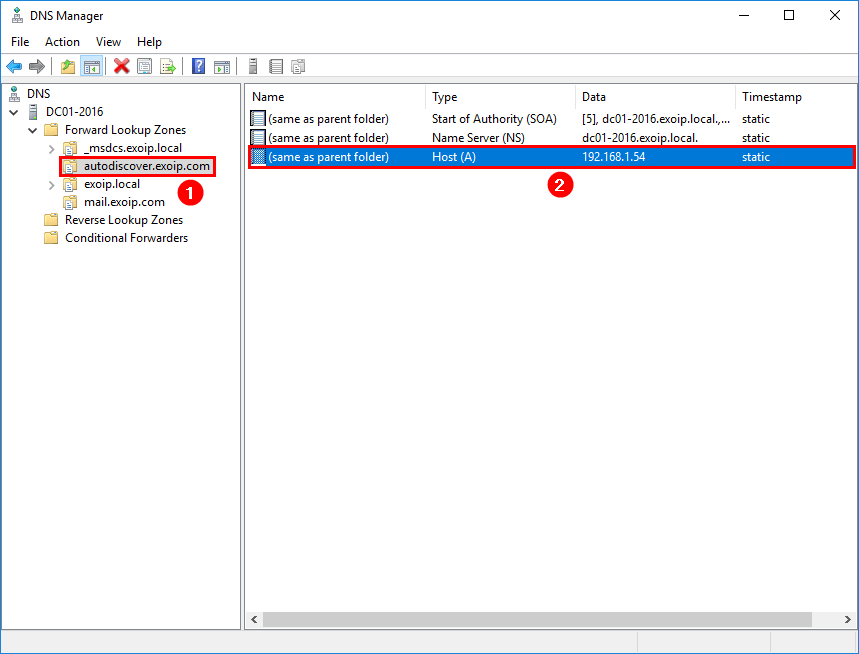
Change the internal DNS autodiscover host record to the virtual address.
In our example, we set the IP address 192.168.1.54 as the virtual address in the previous step. So we will add that IP address to the internal DNS.
5. Edit firewall VIP
In the firewall, change the VIP with protocol HTTPS (443) to the Kemp virtual address. In our example, the IP address 192.168.1.54.
6. Check real time statistics
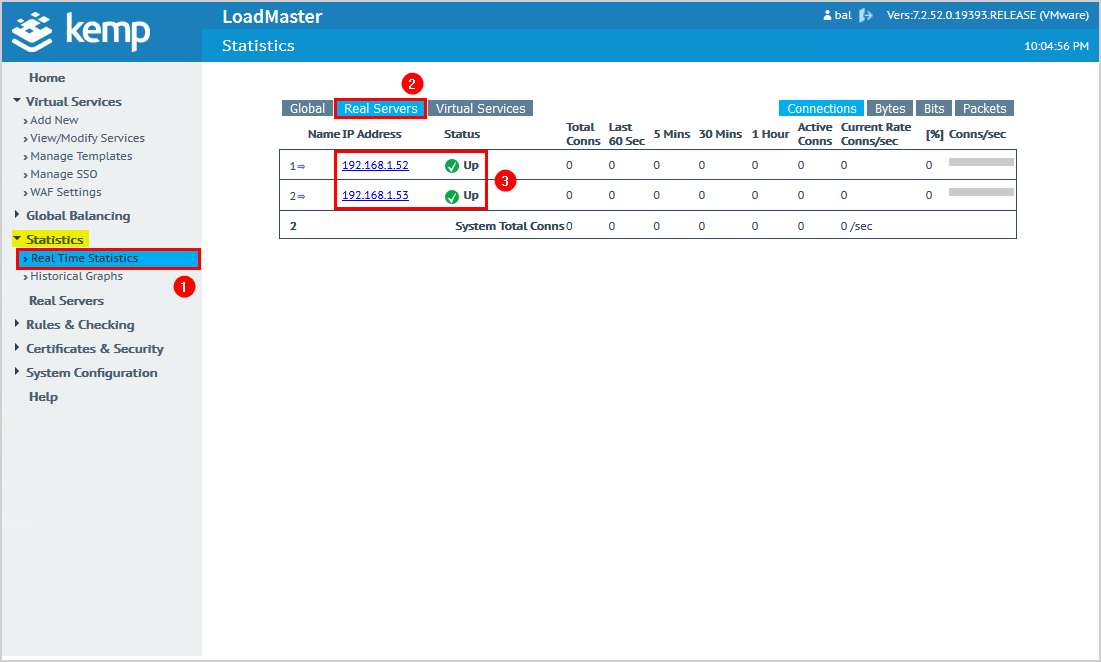
Click Statistics > Real Time Statistics in the menu.
Click Real Servers.
The Exchange Servers status shows that they are up.
First, make sure to ping the hostname or do a NsLookup. It needs to resolve to the virtual address.
Note: It depends on the TTL of these records on how long it will take to resolve.
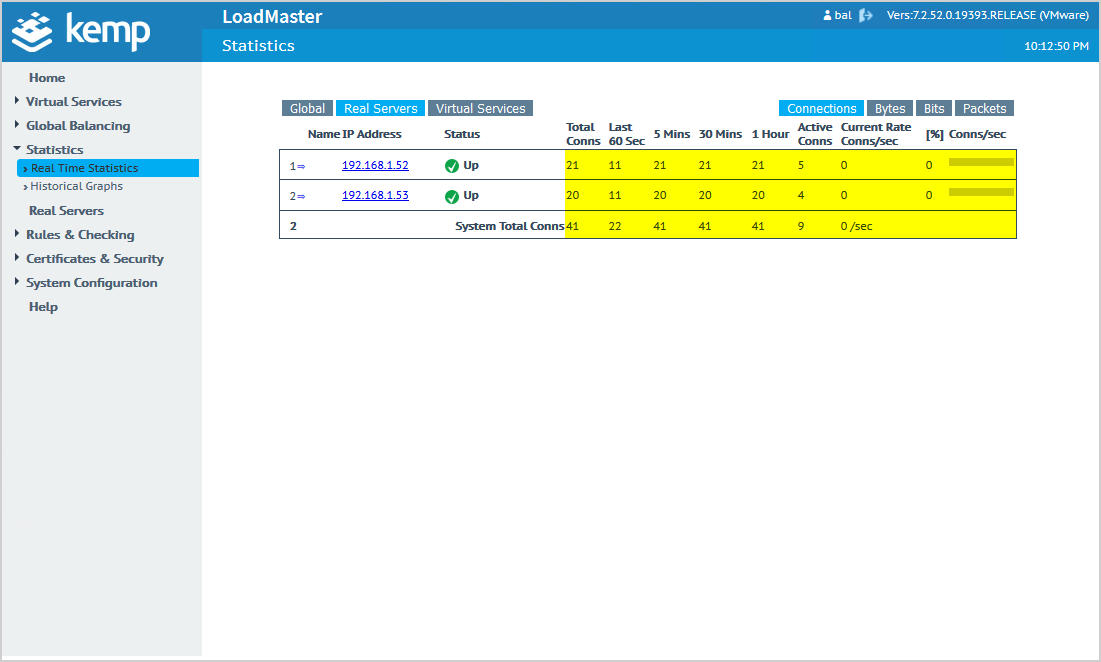
After confirming it resolves, start Outlook on a computer or browse to Outlook Web Access (OWA). You will see that the connections start to show numbers.
Test and verify that it works
It’s always good to test the load balancer and check if it works as expected.
Disable the network card on one of the Exchange Servers and check the statistics. The real time statistics will show the Exchange Server status Down.
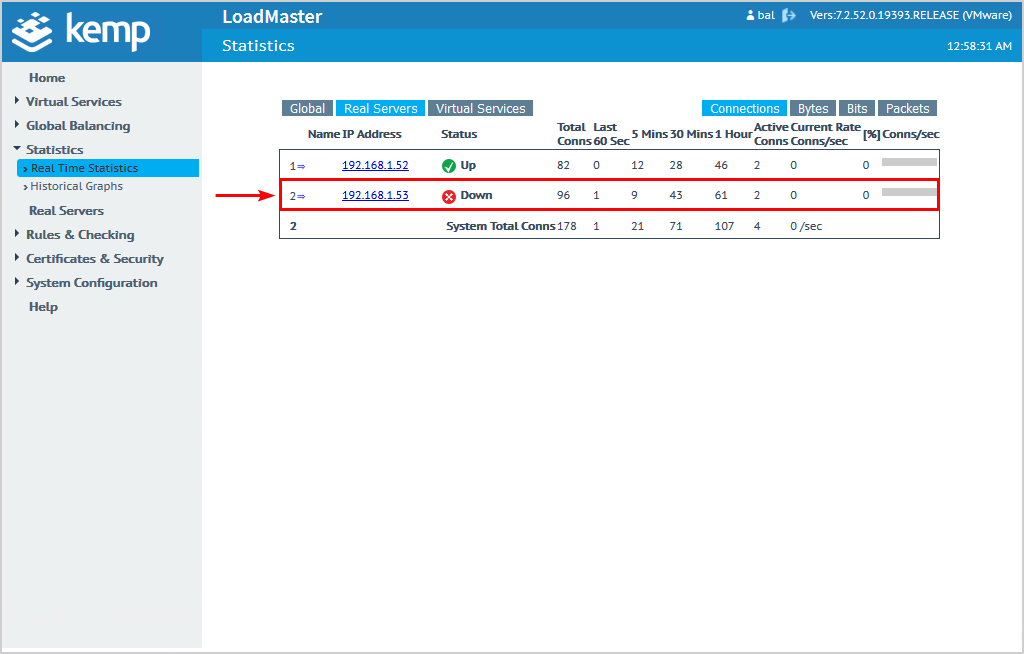
Have a look at your Outlook client or OWA, and that the connection is still available without any hiccups. Don’t forget to enable the network card on the Exchange Server to bring it back up.
We did successfully configure Exchange HTTPS high availability with Kemp load balancer. In the next article, we will configure Exchange SMTP high availability.
Keep reading: Let’s Encrypt unable to install certificate (0x80070520) »
Conclusion
You learned how to configure Exchange HTTPS high availability with Kemp load balancer. First, download the templates from Kemp’s documentation page. After loading the templates, configure HTTPS load balancing with Kemp LoadMaster by following the steps. Finally, test Exchange HTTPS load balance by connecting with Outlook or OWA, and verify that it works by checking the statistics.
Did you enjoy this article? You may also like Exchange Server setup operation didn’t complete. Don’t forget to follow us and share this article.
Thank you for this article, How can I restrict acces to Exchange Config Panel (ECP) when using Kemp LB ?
When I initially set my load balancer up, I added my certificate before adding the virtual service for HTTPS and my HTTPS load balancing refused to work. I may have avoided the issue if I had followed the exact order of operations listed above, regardless I wanted to share my fix… I was able to get things working by doing two things. The first item may not have been important, but I wanted to list it anyway just in case.
1.) I exported my wildcard certificate from my Exchange server, with the private key, and made sure to include Intermediate certificates, then imported that certificate and used it instead of the one I had ‘on file’. I did this because I wasn’t sure the cert I had on file included intermediate certs or not.
2.) I logged in to the Web GUI for the Kemp Load Balancer, went to Certificates & Security>SSL Certificates, I assigned my new cert to the HTTPS virtual service and saved my changes. Things still did not work. Then I noticed a ‘Reencryption Usage’ button to the right of the new certificate in the ‘Operation’ column. In there I found that the cert was not assigned to the Reencryption Virtual Service. As soon as I assigned it and saved my changes everything started working normally.
Hopefully this helps someone!
– Jonathan K.