Why do we want to uninstall Windows Defender on Windows Server 2016/2019/2022? We are installing…
Export AD ACL permissions with PowerShell
An Active Directory ACL permissions report is excellent to look at when you need to tighten an account for security. In addition, such a report can work fantastic when you want to compare AD ACL permissions between accounts. This article will show how to export AD ACL permissions to CSV and HTML with PowerShell.
Table of contents
Introduction
Do the user accounts in the organization have the correct AD permissions? For security reasons, it’s good to check and:
- Gain control over who has access to what
- Lock down excessive permissions
- Minimize the risk of a breach
- Ensure compliance
The ADACLScan.ps1 PowerShell script is a tool with GUI used to create reports of access control lists (DACLs) and system access control lists (SACLs) in Active Directory. The script is entirely written in PowerShell.
The PowerShell script got a lot of features, which is great. However, the features that we like to use is:
- Export AD ACL permissions to CSV
- Export AD ACL permissions to HTML
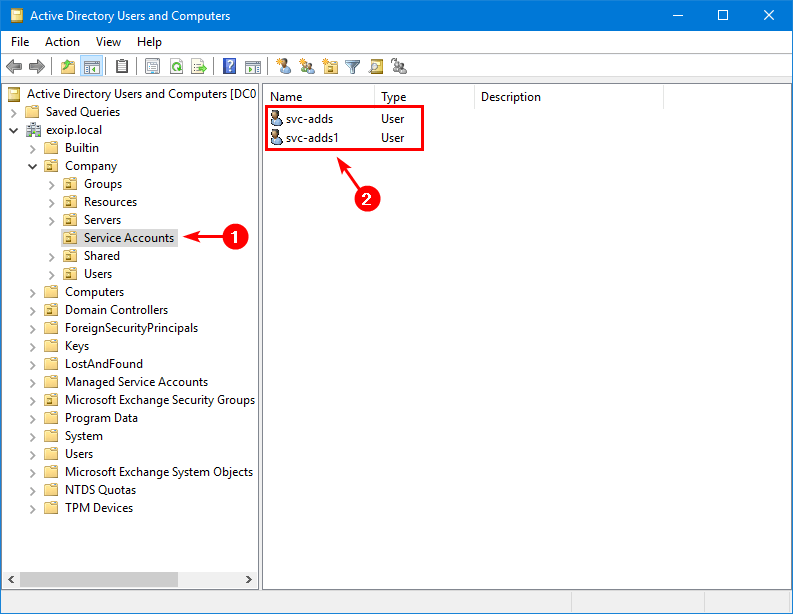
Let’s get the AD ACL permissions from two service accounts. The service accounts are svc-adds and svc-adds1.
Prepare ADACLScan PowerShell script
Create two folders on the C:\ drive:
- Temp
- Scripts
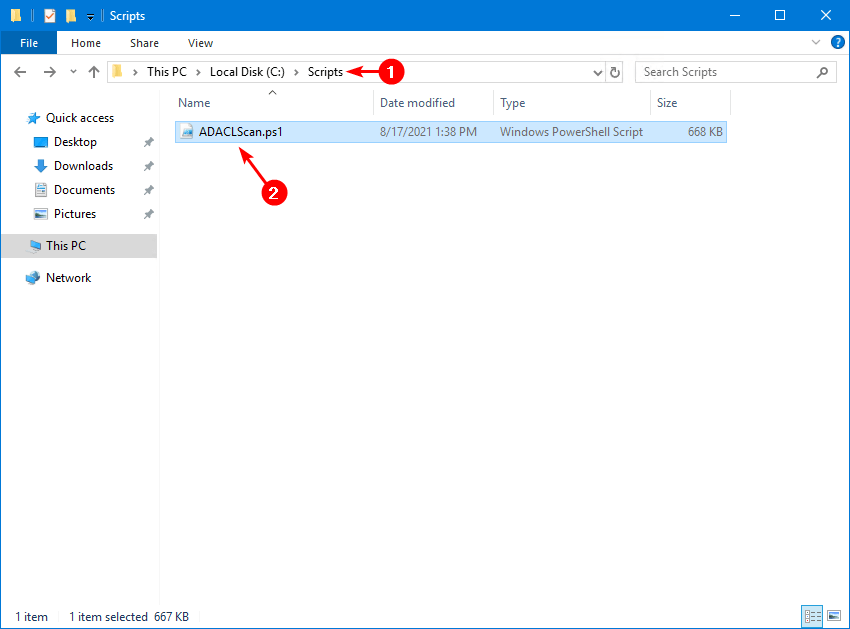
Download the ADACLScan.ps1 PowerShell script (direct) or (GitHub). Place it in C:\scripts folder. We will export and save the ACL permissions to the C:\temp folder.
Run ADACLScan PowerShell script
Run PowerShell as administrator. Next, change the path to the scripts folder. After that, run the script ADACLScan.ps1.
PS C:\> cd c:\scripts\
PS C:\scripts> .\ADACLScan.ps1
The AD ACL Scanner window will show up.
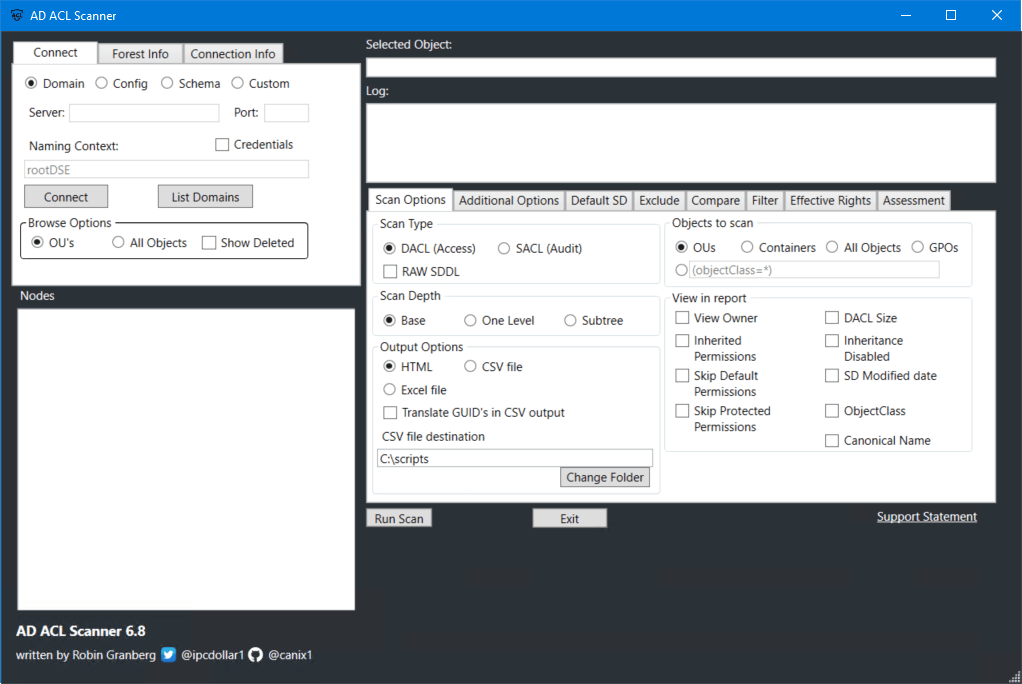
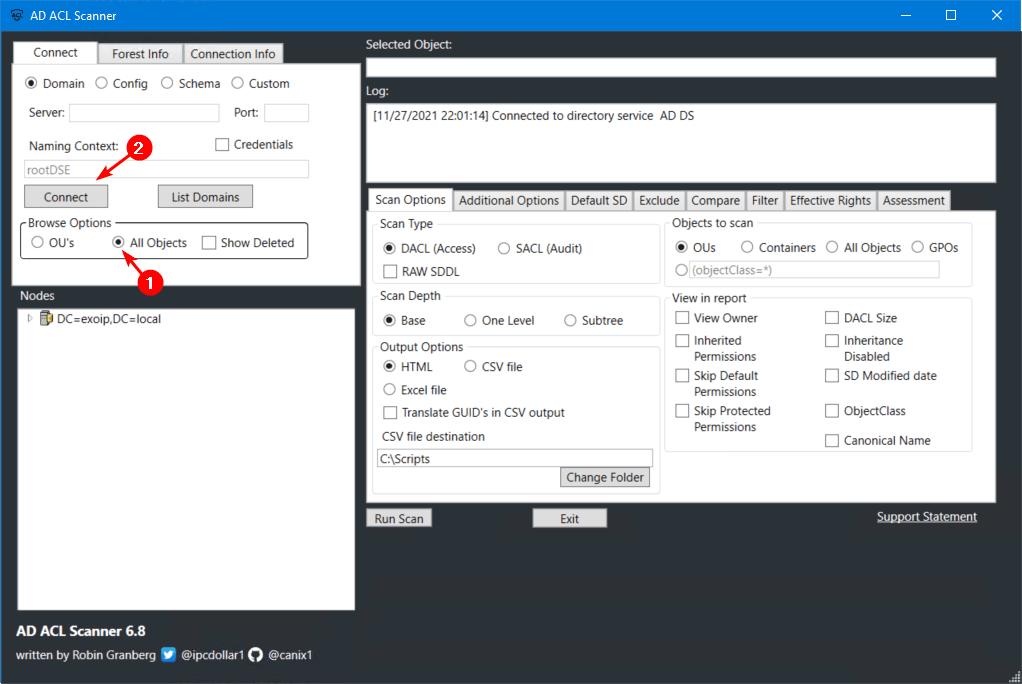
In the AD ACL Scanner window, click on All Objects > Connect.
In the next steps, we will look at how to export AD ACL permissions.
Export AD ACL permissions with PowerShell
You can export the AD ACL permissions with PowerShell script to:
- HTML
- CSV file
- Excel file
Export AD ACL permissions to CSV file
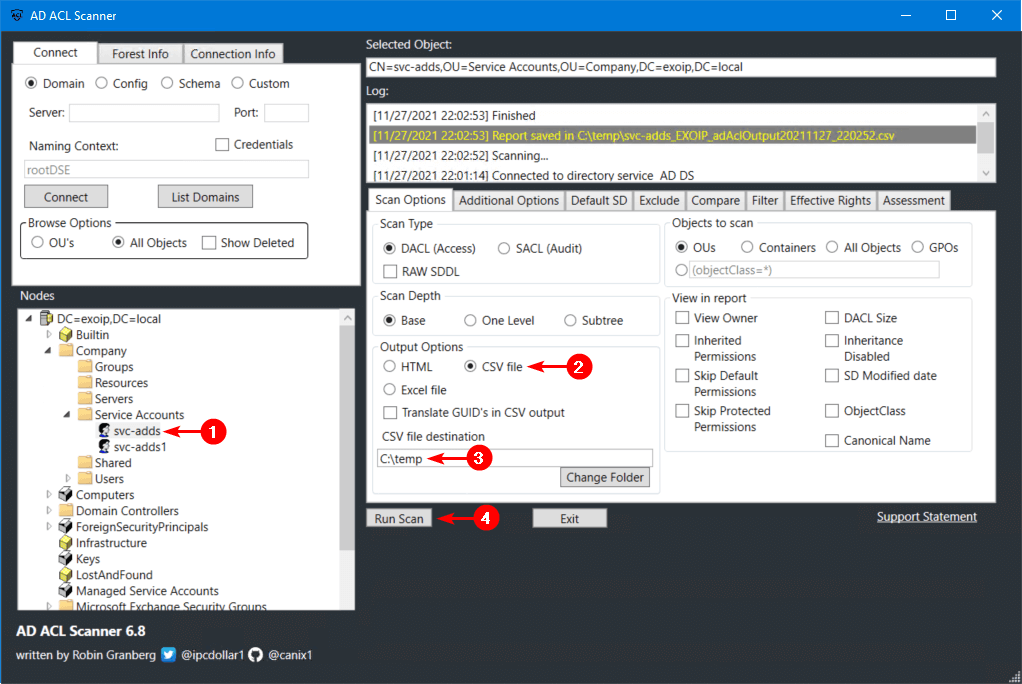
Navigate to the user account. Click CSV file and fill in the CSV file destination C:\temp. Click Run Scan.
In our example, it’s the user account svc-adds.
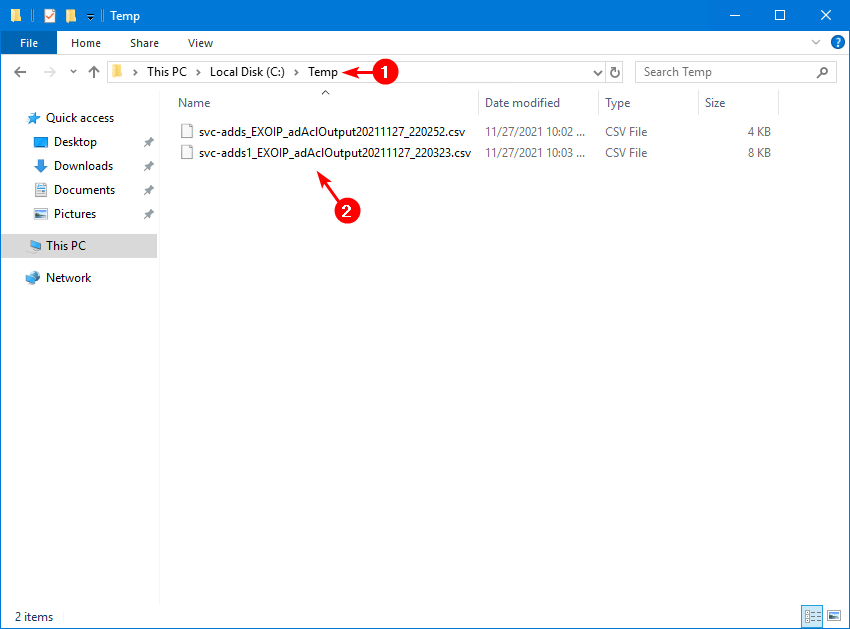
Let’s do another AD ACL export to CSV file, but this time from svc-adds1 user account.

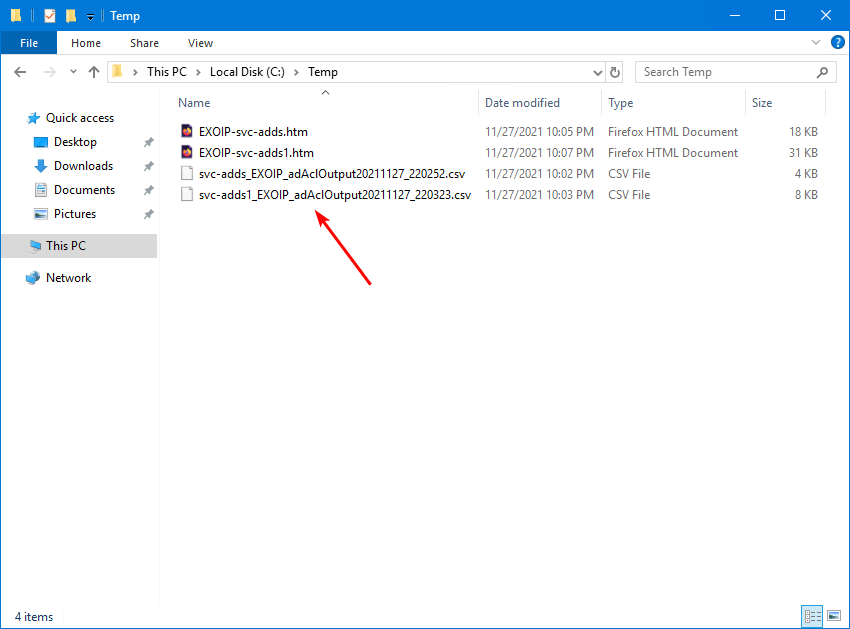
There will be two CSV files in the C:\temp folder.
Export AD ACL permissions to HTML file
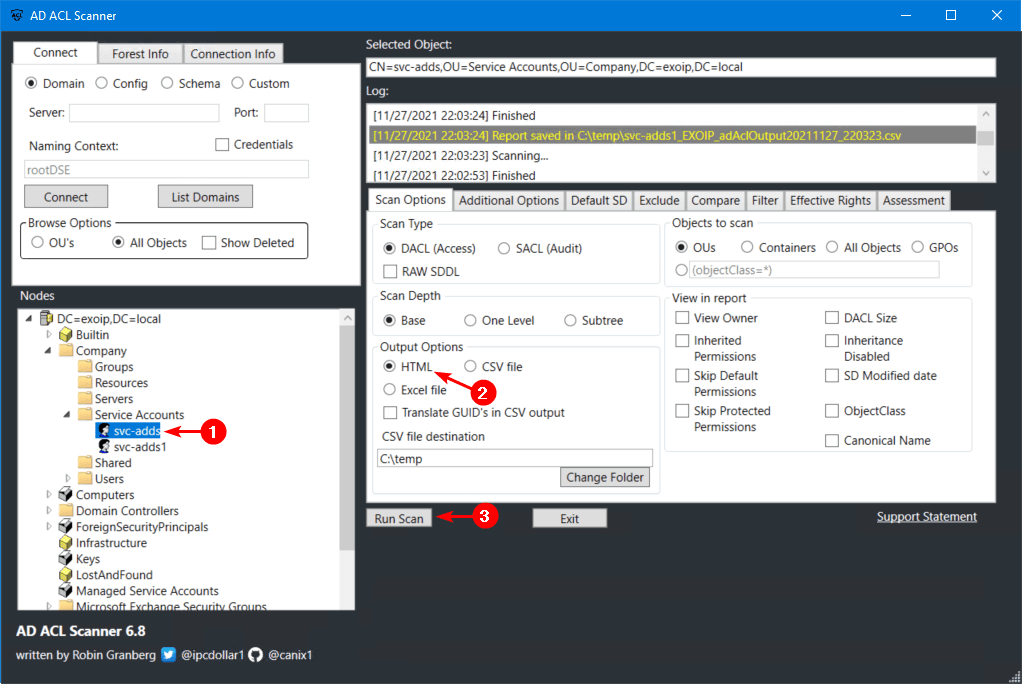
Navigate to the user account. Click HTML. Click Run Scan.
Click Export.
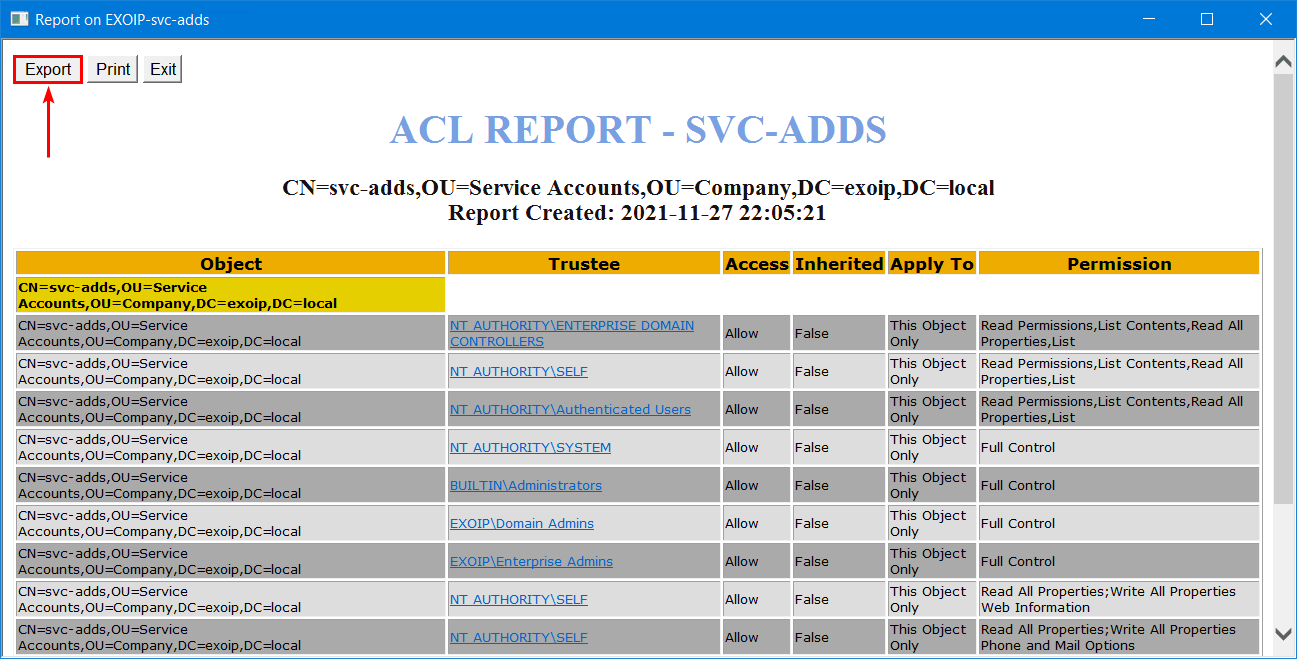
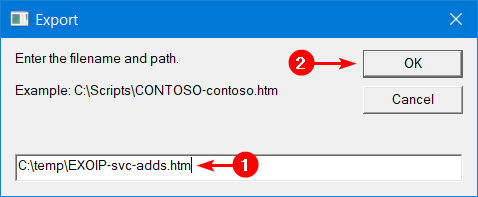
Fill in the file and path name, C:\temp\accountname.htm. Click OK.
There will be two HTML files in the C:\temp folder, apart from the CSV files.
Open the ACL report HTML file (svc-adds).

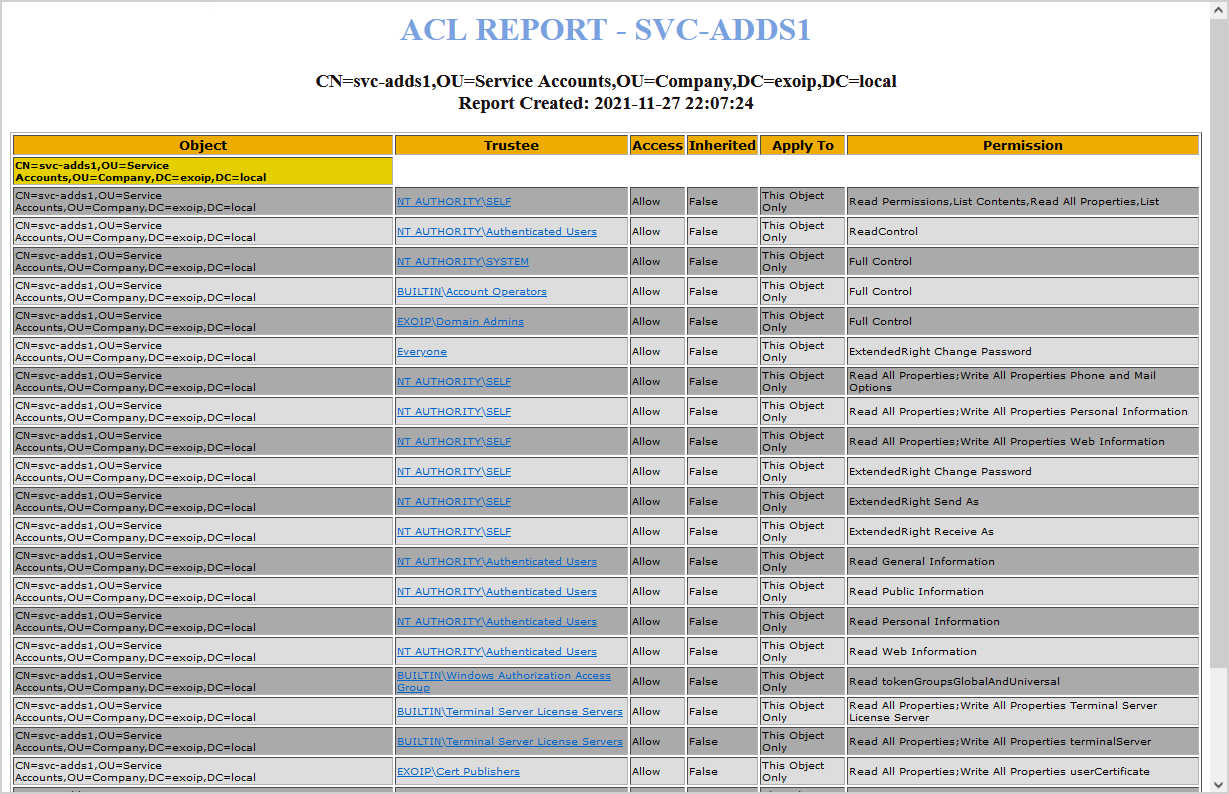
Let’s open the second ACL report HTML file (svc-adds1).
That’s it!
Read more: Create AD DS Connector account »
Conclusion
You learned how to export AD ACL permissions to CSV file with PowerShell. The ADACLScan.ps1 PowerShell script is what you need to export ACL permissions. It’s a great script that works like it’s intended to do.
Did you enjoy this article? You may also like KRBTGT account password reset. Don’t forget to follow us and share this article.
What Others Are Reading

One of the best AD ACL utilities I’ve ever found. What would make it even better is if it could show permissions to actual properties of an AD object.
Nice work!!