There are times that you need to convert MBR to GPT. The main difference between…
Export AD users to CSV with PowerShell
We want to export AD users information to CSV with PowerShell. Why do we need to list the AD users with PowerShell? For example, we want to know if every AD user has the correct mobile phone number in Active Directory. That’s because the service desk looks up the information in Active Directory before they make a call. In this article, you will learn how to export Active Directory users to CSV file with PowerShell.
Table of contents
Information export AD users PowerShell script
The Export-ADUsers.ps1 PowerShell script will run against the distinguishedName that you set. After that, it will export the report to CSV file. You can open the CSV file with Microsoft Excel or any other application that supports the CSV file extension.
The script will gather the following information per user:
- First name
- Last name
- Display name
- User logon name
- User principal name
- Street
- City
- State/province
- Zip/Postal Code
- Country/region
- Job Title
- Department
- Company
- Manager
- OU
- Description
- Office
- Telephone number
- Other Telephone
- Mobile
- Pager
- Notes
- Account status
- User created date
- Last logon date
Export Active Directory users to CSV with PowerShell
Let’s go through the steps and export Active Directory users to CSV file with PowerShell.
Step 1: Prepare export AD users PowerShell script
Download and place Export-ADUsers.ps1 PowerShell script on the Domain Controller C:\scripts folder. If you don’t have a scripts folder, create one.
Ensure that the file is unblocked to prevent any errors when running the script. Read more in the article Not digitally signed error when running PowerShell script.
Another option is to copy and paste the below code into Notepad. Give it the name Export-ADUsers.ps1 and place it in the C:\scripts folder.
<#
    .SYNOPSIS
    Export-ADUsers.ps1

    .DESCRIPTION
    Export Active Directory users to CSV file.

    .LINK
    alitajran.com/export-ad-users-to-csv-powershell

    .NOTES
    Written by: ALI TAJRAN
    Website:    alitajran.com
    LinkedIn:   linkedin.com/in/alitajran

    .CHANGELOG
    V1.00, 05/24/2021 - Initial version
    V1.10, 04/01/2023 - Added progress bar, user created date, and OU info
    V1.20, 05/19/2023 - Added function for OU path extraction
#>

# Split path
$Path = Split-Path -Parent "C:\scripts\*.*"

# Create variable for the date stamp in log file
$LogDate = Get-Date -f yyyyMMddhhmm

# Define CSV and log file location variables
# They have to be on the same location as the script
$Csvfile = $Path + "\AllADUsers_$LogDate.csv"

# Import Active Directory module
Import-Module ActiveDirectory

# Function to extract OU from DistinguishedName
function Get-OUFromDistinguishedName {
    param(
        [string]$DistinguishedName
    )

    $ouf = ($DistinguishedName -split ',', 2)[1]
    if (-not ($ouf.StartsWith('OU') -or $ouf.StartsWith('CN'))) {
        $ou = ($ouf -split ',', 2)[1]
    }
    else {
        $ou = $ouf
    }
    return $ou
}

# Set distinguishedName as searchbase, you can use one OU or multiple OUs
# Or use the root domain like DC=exoip,DC=local
$DNs = @(
    "OU=Sales,OU=Users,OU=Company,DC=exoip,DC=local",
    "OU=IT,OU=Users,OU=Company,DC=exoip,DC=local",
    "OU=Finance,OU=Users,OU=Company,DC=exoip,DC=local"
)

# Create empty array
$AllADUsers = @()

# Loop through every DN
foreach ($DN in $DNs) {
    $Users = Get-ADUser -SearchBase $DN -Filter * -Properties *

    # Add users to array
    $AllADUsers += $Users

    # Display progress bar
    $progressCount = 0
    for ($i = 0; $i -lt $AllADUsers.Count; $i++) {

        Write-Progress `
            -Id 0 `
            -Activity "Retrieving User " `
            -Status "$progressCount of $($AllADUsers.Count)" `
            -PercentComplete (($progressCount / $AllADUsers.Count) * 100)

        $progressCount++
    }
}

# Create list
$AllADUsers | Sort-Object Name | Select-Object `
@{Label = "First name"; Expression = { $_.GivenName } },
@{Label = "Last name"; Expression = { $_.Surname } },
@{Label = "Display name"; Expression = { $_.DisplayName } },
@{Label = "User logon name"; Expression = { $_.SamAccountName } },
@{Label = "User principal name"; Expression = { $_.UserPrincipalName } },
@{Label = "Street"; Expression = { $_.StreetAddress } },
@{Label = "City"; Expression = { $_.City } },
@{Label = "State/province"; Expression = { $_.State } },
@{Label = "Zip/Postal Code"; Expression = { $_.PostalCode } },
@{Label = "Country/region"; Expression = { $_.Country } },
@{Label = "Job Title"; Expression = { $_.Title } },
@{Label = "Department"; Expression = { $_.Department } },
@{Label = "Company"; Expression = { $_.Company } },
@{Label = "Manager"; Expression = { (Get-AdUser $_.Manager -Properties DisplayName).DisplayName } },
@{Label = "OU"; Expression = { Get-OUFromDistinguishedName $_.DistinguishedName } },
@{Label = "Description"; Expression = { $_.Description } },
@{Label = "Office"; Expression = { $_.Office } },
@{Label = "Telephone number"; Expression = { $_.telephoneNumber } },
@{Label = "Other Telephone"; Expression = { $_.otherTelephone -join ";"} },
@{Label = "E-mail"; Expression = { $_.Mail } },
@{Label = "Mobile"; Expression = { $_.mobile } },
@{Label = "Pager"; Expression = { $_.pager } },
@{Label = "Notes"; Expression = { $_.info } },
@{Label = "Account status"; Expression = { if (($_.Enabled -eq 'TRUE') ) { 'Enabled' } Else { 'Disabled' } } },
@{Label = "User created date"; Expression = { $_.WhenCreated } },
@{Label = "Last logon date"; Expression = { $_.lastlogondate } } |

# Export report to CSV file
Export-Csv -Encoding UTF8 -Path $Csvfile -NoTypeInformation #-Delimiter ";"- Line 54,55,56: Edit the target distinguishedName. You can have one OU or multiple OUs (in this example).
Step 2: Get distinguished name
You need to add the distinguished name value in the PowerShell script. Follow the below steps to get the distinguished name in Active Directory:
- Start Active Directory Users and Computers
- Right-click the target OU and click Properties
- Go to the Attribute Editor tab
- Find the attribute distuingedName in the attributes list
- Double-click to open the string and copy the value
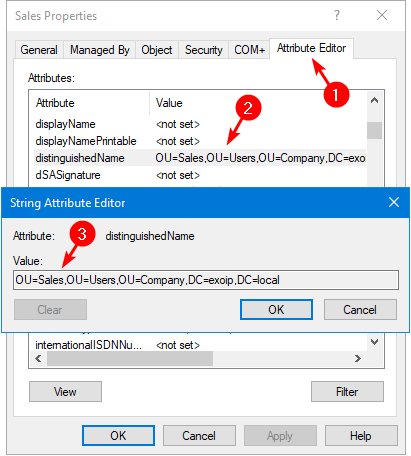
Note: If you don’t see the Attribute Editor tab, click in Active Directory Users and Computers in the menu bar on View and enable Advanced Features.
Step 3: Run export AD users PowerShell script
Run PowerShell as administrator. Change the path to the scripts folder. Run the PowerShell script to export AD users to CSV file. Wait till it completes.
PS C:\> cd c:\scripts
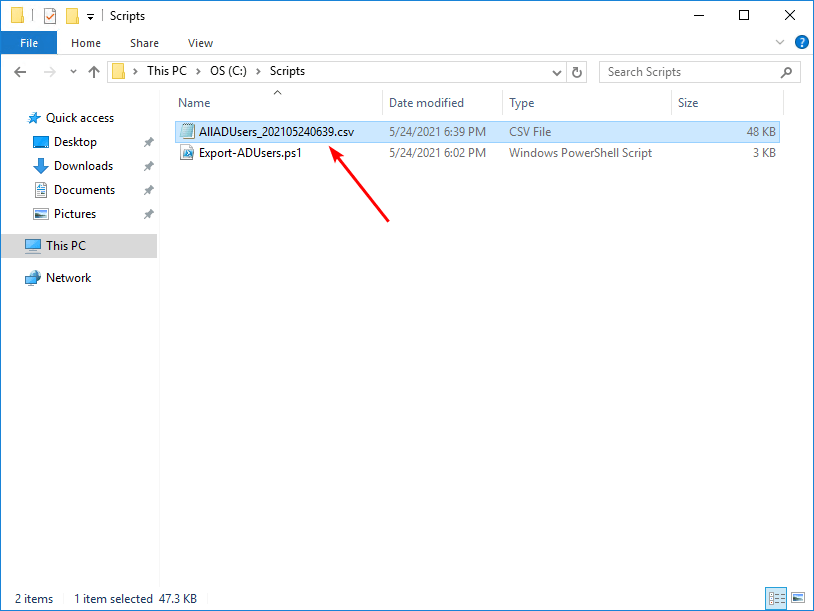
PS C:\scripts> .\Export-ADUsers.ps1Step 4: Open AD users report CSV file
Go to the scripts folder and verify that you see the AllADUsers_ file.
Open the CSV file with your favorite application. In our example, it’s Microsoft Excel.
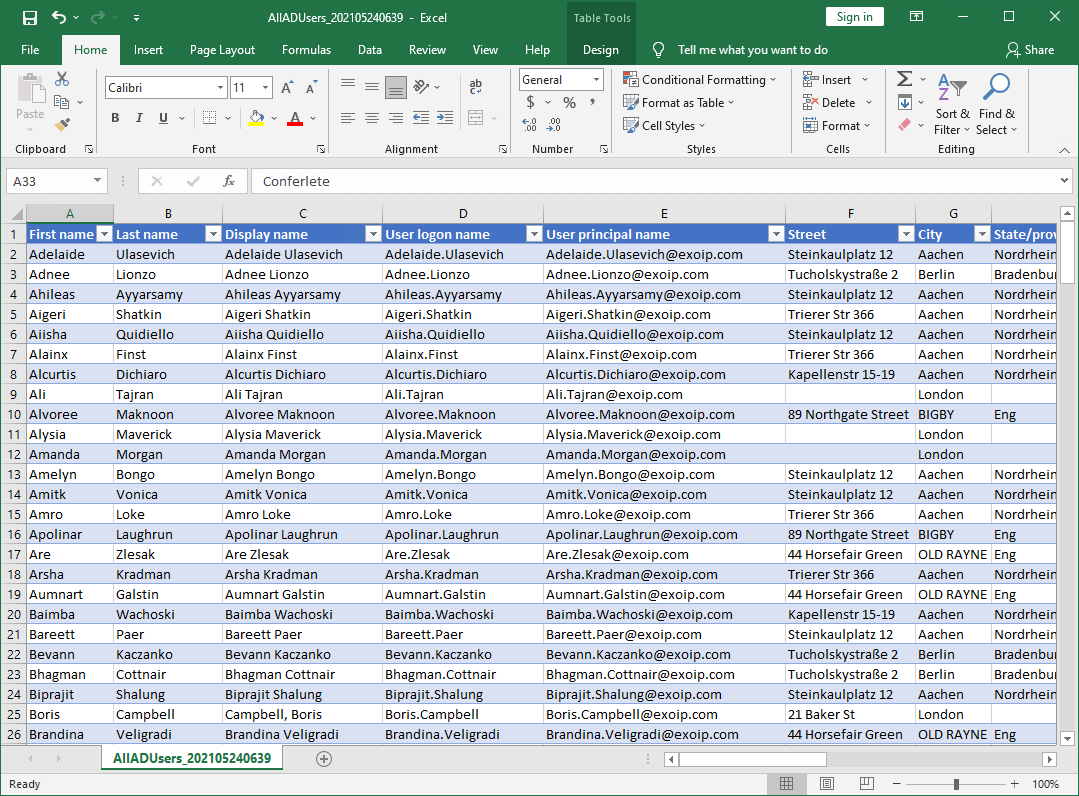
Everything looks great!
Read more: Remove users from group with PowerShell »
Conclusion
You learned how to Export AD users to CSV with PowerShell. There is a lot of information in every user account. With PowerShell, you can have a custom report that will suit your needs.
Did you enjoy this article? You may also like Get Organizational Units with PowerShell. Don’t forget to follow us and share this article.
What Others Are Reading


Is there a way to export only by title?
I am using the root domain, and it works; however, I am only trying to export by specific title and/or description. For example “sales” or “Finance”
This script is great by the way!
Thanks
How can we export with extension attribute 12 and 13 ?
Like User name and Designation in Arabic
Thank you so much; my big problem is solved with the help of this blog.
Hello,
how can i add “pager” field to this script?
Thanks.
I added the “pager” attribute to the script.
Hi Ali,
Great script.
Can you please guide me on how to import the AD users from exported CSV file? Updated the CSV file like number, manager, address, etc. I will not add any user and will not change the password.
Please guide me.
Thank you.
RA
Excellent script. Thank you for making it so systematic. I used the OU label
One can set the current folder as the folder where the output is running
$filename = “ADUsers-$(Get-Date -Format yyyyMMdd-HHmm).csv”
$rundir = Get-location # current running dir
$filepath = $rundir.Path +”\”+$filename
________
Then the export should be
Export-Csv -Encoding UTF8 -Path $filepath -NoTypeInformation #-Delimiter “;”
It is useful when running the script as a task and powerShell starts in the folder where the task resides. If you have several tasks each with a script in its folder it’s worth picking the working folder for dumping results
It’s also easier to recycle in another script when one needs a dump file
– I only have to change “ADUsers” above with “ServerInventory” for example. Or if I were more catholic than the pope – this is how to build a csv name (only the $stem variable should be changed ):
$stem = ADUsers
$filename = “$Stem-$(Get-Date -Format yyyyMMdd-HHmm).csv”
$rundir = Get-location # for current running dir
$filepath = $rundir.Path +”\”+$filename
May I ask if it’s possible to add an extra line after @{Label = “Last logon date”; Expression = { $_.lastlogondate } }| where we get the “MemberOf” (groups) information, but only the CN property?
“So I have the following script but it lists the full name of the AD group. (e.g. CN=GroupName,OU=OUName,DC=DomainName,DC=com) How do I specify only the group’s name, so that it lists only the name itself. The part after CN=. I tried $group.Name but no such luck.
This is awesome! Saved me a lot of time. One question, we have a little over 2,000 user accounts and quite a bunch of service accounts. Is there a way to pull the ones only if there is a first and last name? Our Service accounts only have display name but no first and last name.
Thank you for the scripts.
How can we integrate memberof property to put friendly group name on each line for each user?
Our manager would like to sort on a user name, and see all groups, line by line.
I added memberof to the script and it gives one line of all groups user is a member of separated by colon.
Trying to make it friendlier. 🙂
Hello,
the script works for me, but with some issues, i get a csv file, but its not formated but only each user seperated per line in one field. Can you help there? This is also an error message while executing.
PS C:\Scripts> C:\Scripts\Export-ADUsers_StLi.ps1
Get-ADUser : Verzeichnisobjekt nicht gefunden
In C:\Scripts\Export-ADUsers_StLi.ps1:26 Zeichen:14
+ $Users = Get-ADUser -SearchBase “$DN” -Filter * -Properties *
+ ~~~~~~~~~~~~~~~~~~~~~~~~~~~~~~~~~~~~~~~~~~~~~~~~~~~~
+ CategoryInfo : ObjectNotFound: (:) [Get-ADUser], ADIdentityNotFoundException
+ FullyQualifiedErrorId : ActiveDirectoryCmdlet:Microsoft.ActiveDirectory.Management.ADIdentityNotFoundException,Microsoft.ActiveDirectory.Management.Commands.GetADUser
This error often means that a distinguishedName is incorrect. Verify that the distinguishedName you’re providing to the $DNs variable is correct.
Fantastic, very usefull thank very much for share.
Merhaba,
Çok teşekkürler, çok faydalı oldu.
Sayenizde istediğim gibi yapıyı çekebildim.
Sağlıkla kalın.
Very useful and informative. Thanks for the comments in the script and actually the whole script.
thanks a lot man!
Thanks for this great scipt.
The intention was actually to do an export from Azure, but I’m not a powershell guru, and your script has most of the properties I need. Only miss the attributes UserType and Directorysynced
Can these attributes also be found in Active Directory ?
Thanks
Steve
Glad you find the script useful, Steve.
You should connect to Microsoft Graph PowerShell and retrieve the user type and directory synced status. I wrote a script that will show you these values.
Read more: Export Azure AD users to CSV with PowerShell.
Thank you for the Script. please confirm how to sort so records are arranged by OU and not alphabetically when exported.
Change line 84 in the script to:
for some reason it returned all accounts as disabled, it is not getting the checkbox onformation
can you help?
I had to run it in an admin shell otherwise it returned a lot of my users as disabled even though they were enabled.
Great script! Thank you!!
Hi Ali,
Great article.
I am working on an audit document and needed an easy powerfull way to to export all AD users.
Your script helped me perfectly!
Take care!
how can we use this script for the import process in a new active directory domain?
Read more in the article Import AD users from CSV with PowerShell.
Great Script does as intended and the formatting is excellent!
Would be great to see a method on how to import all these fields back into AD if you wanted to see a bulk update on fields
Read more in the article Import AD users from CSV with PowerShell.