How to add an Exchange Online license to a mailbox in Exchange Hybrid? You have…
Export Office 365 mailbox to PST
We have to export an Office 365 mailbox to PST file. An excellent way to accomplish this task is to use the Microsoft 365 compliance center and export the Office 365 mailbox to PST. Microsoft provides the compliance center, and it’s free. So why not use that instead of paying for a third-party tool to export Office 365 mailboxes to PST files. In this article, you will learn how how to export a PST file from Office 365.
Table of contents
Before you start
Exporting an Office 365 mailbox is different than exporting an Exchange on-premises mailbox. Are you looking at how to export an Exchange on-premises mailbox to PST file? Read the article: Export Exchange mailbox to PST with PowerShell.
Export PST file from Office 365 using eDiscovery
To export Office 365 mailbox to PST file, follow the steps below.
Step 1. Assign eDiscovery permissions
As an administrator, we have the Global admin role in the organization. But that does not mean we have the permissions to search through mailboxes and export the results. To have access, we have to check if the permissions are set. If not, we will add them to the role group eDiscovery Manager.
Note: Set the permissions in the compliance center. Otherwise, you can’t create a content search and export the mailbox to PST file.
- Sign in to Microsoft Purview compliance portal.
- Expand Roles & scopes and click on Permissions.
- Expand Microsoft Purview solutions and click on Roles.
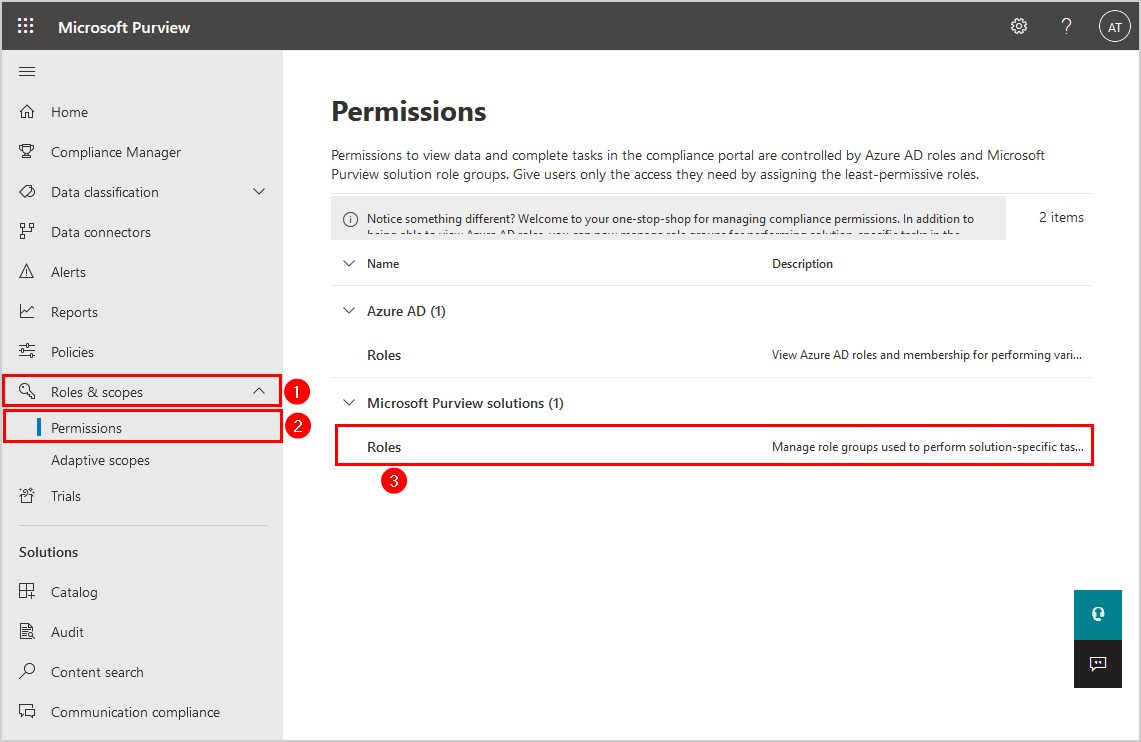
- Search for ediscovery.
- Click in the results on eDiscovery Manager.

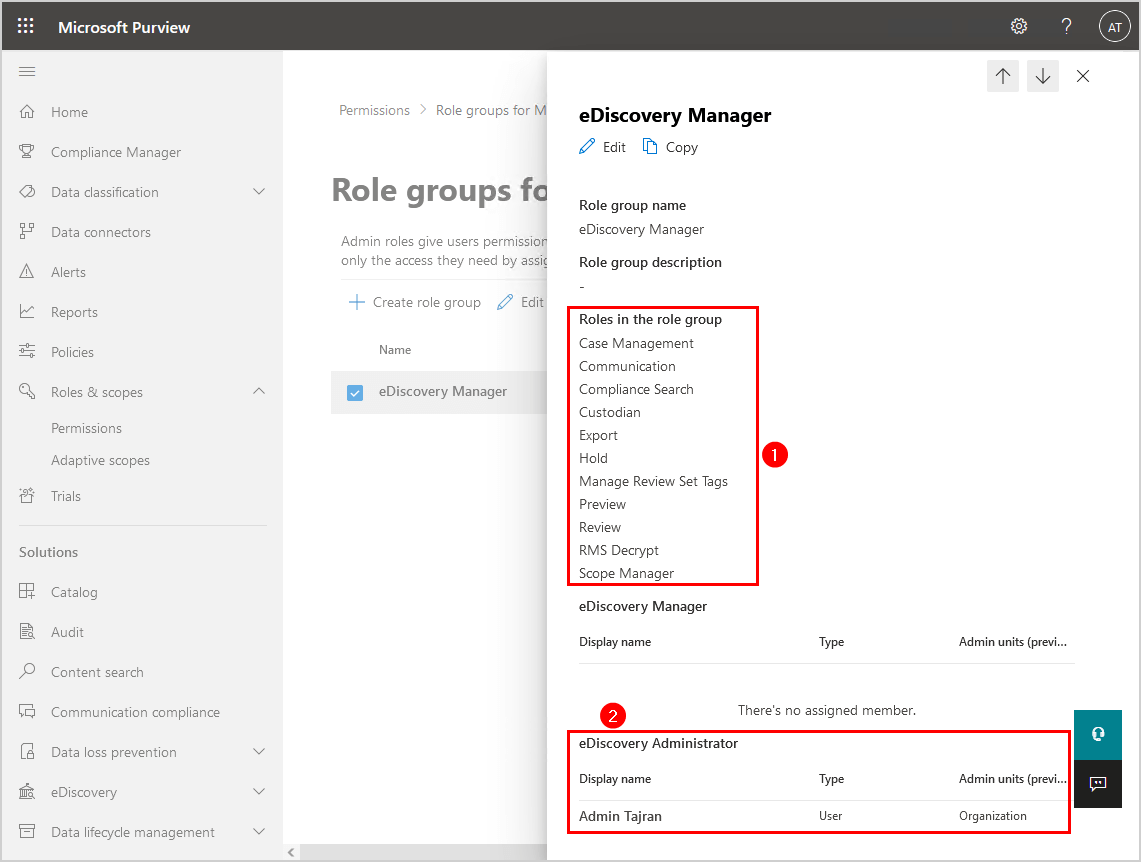
- Check that the Assigned roles for eDiscovery Manager are present. If not, add these roles.
- Add the administrator account to the Discovery Administrator.
- Click Close.
Note: It can take up to 24 hours before the change applies. But, most of the time it will work within 1 hour.
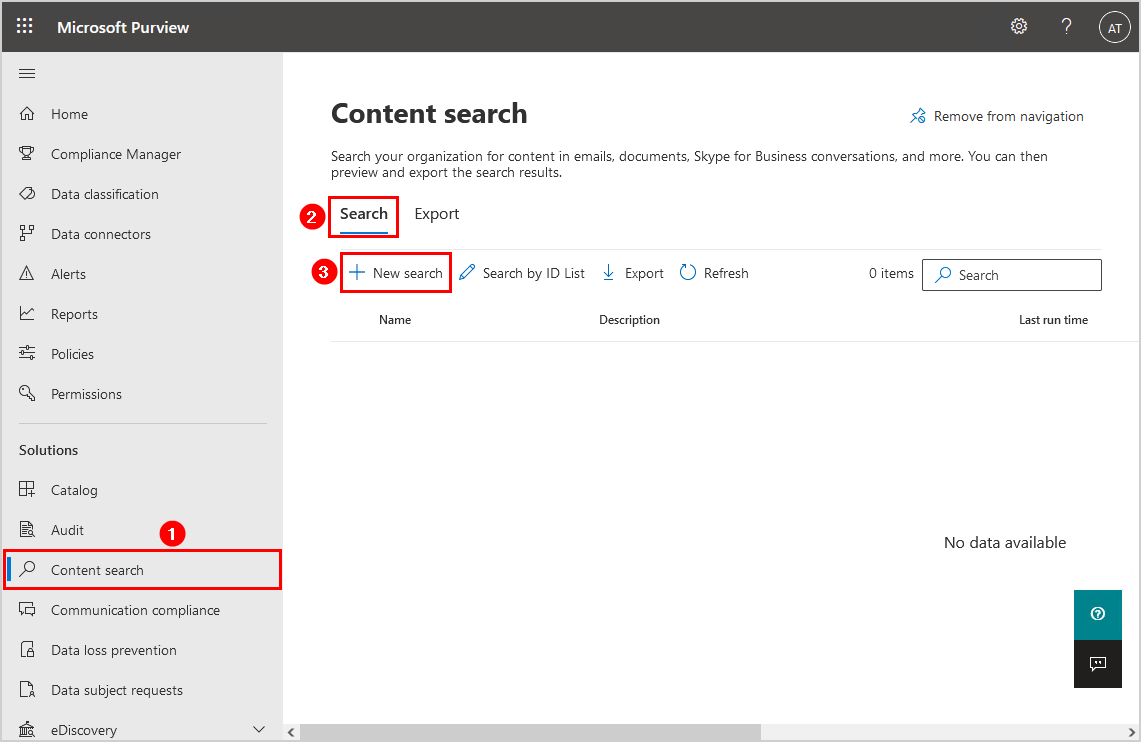
In the next step, we will create a content search.
Step 2. Create content search
- Sign in to Microsoft Purview compliance portal.
- Click on Content search > Search > New Search.
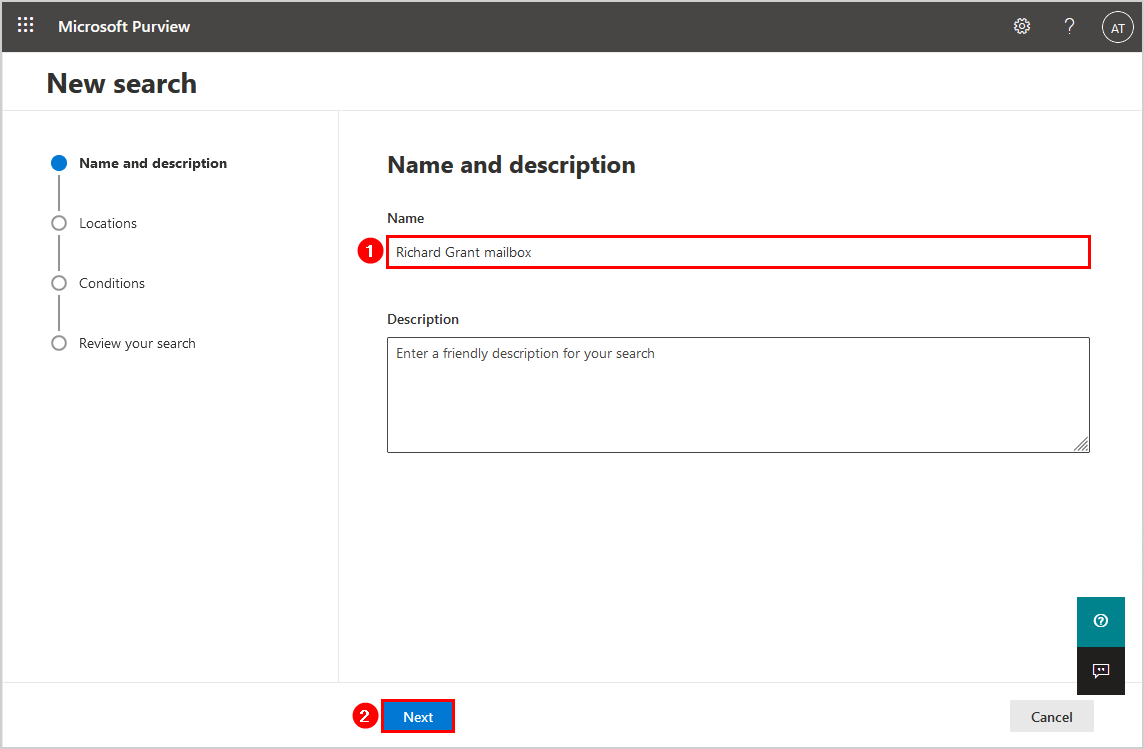
- Add the name of the mailbox. Click Next.
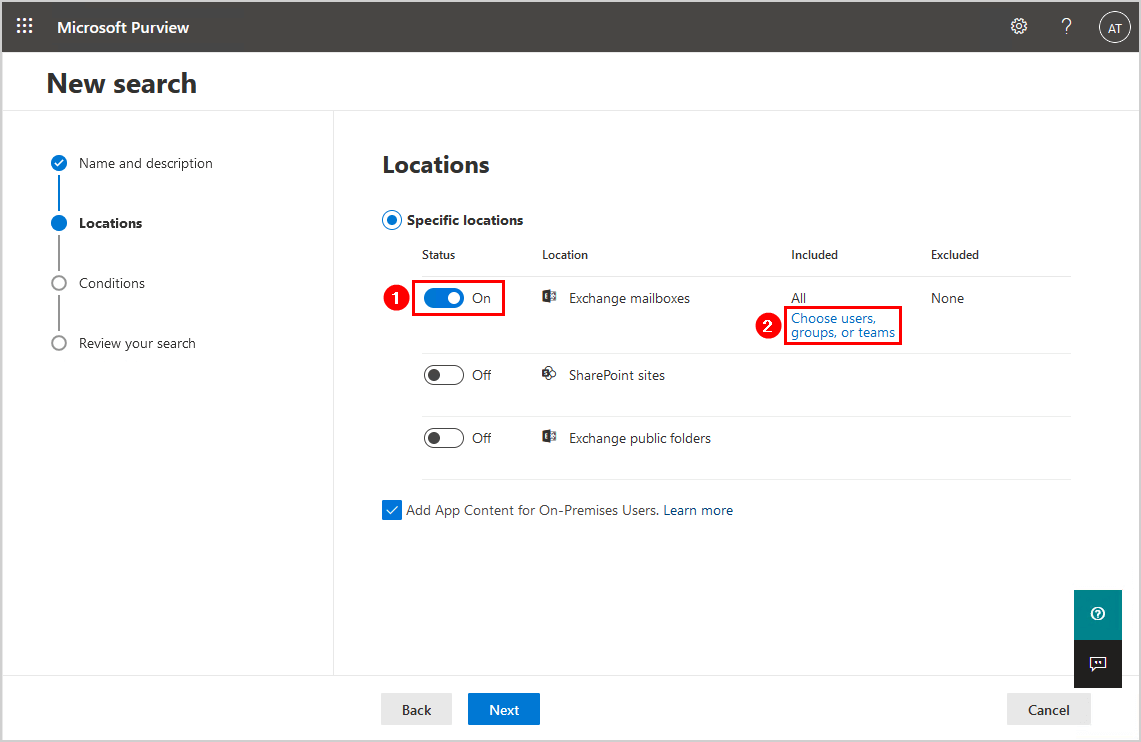
- Turn the switch to On for Exchange mailboxes.
- Click on Choose users, groups, or teams.
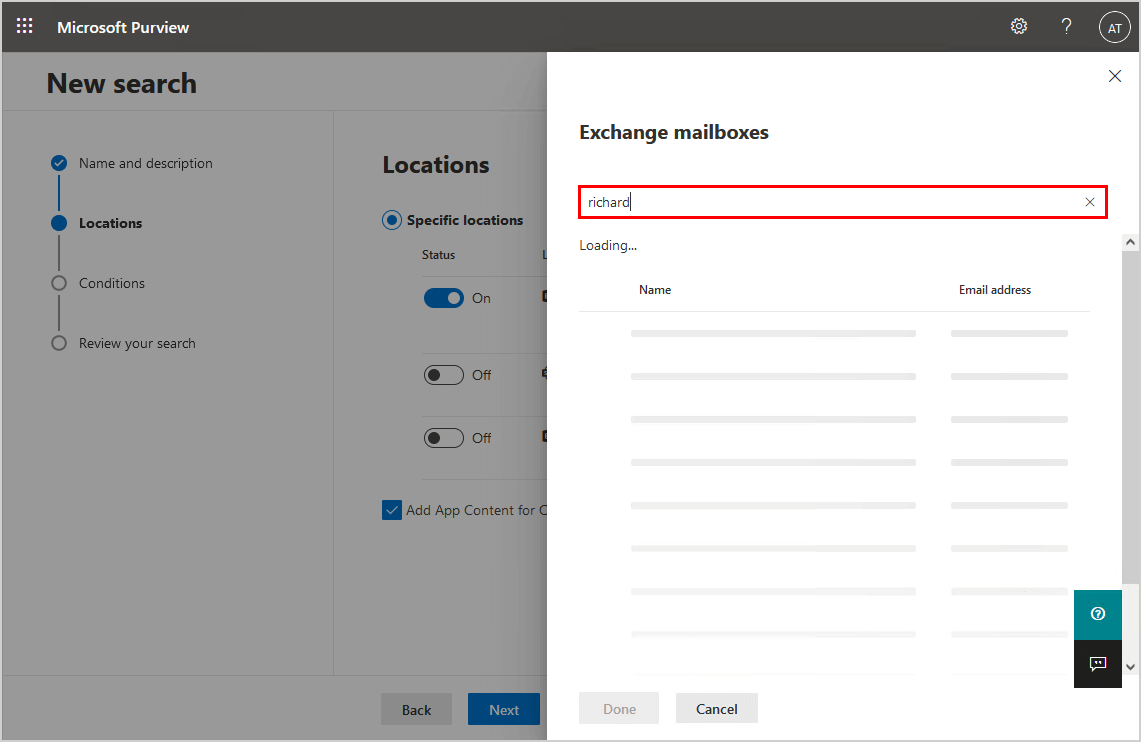
- Search for the Exchange mailbox. The loading can take a little bit of time.
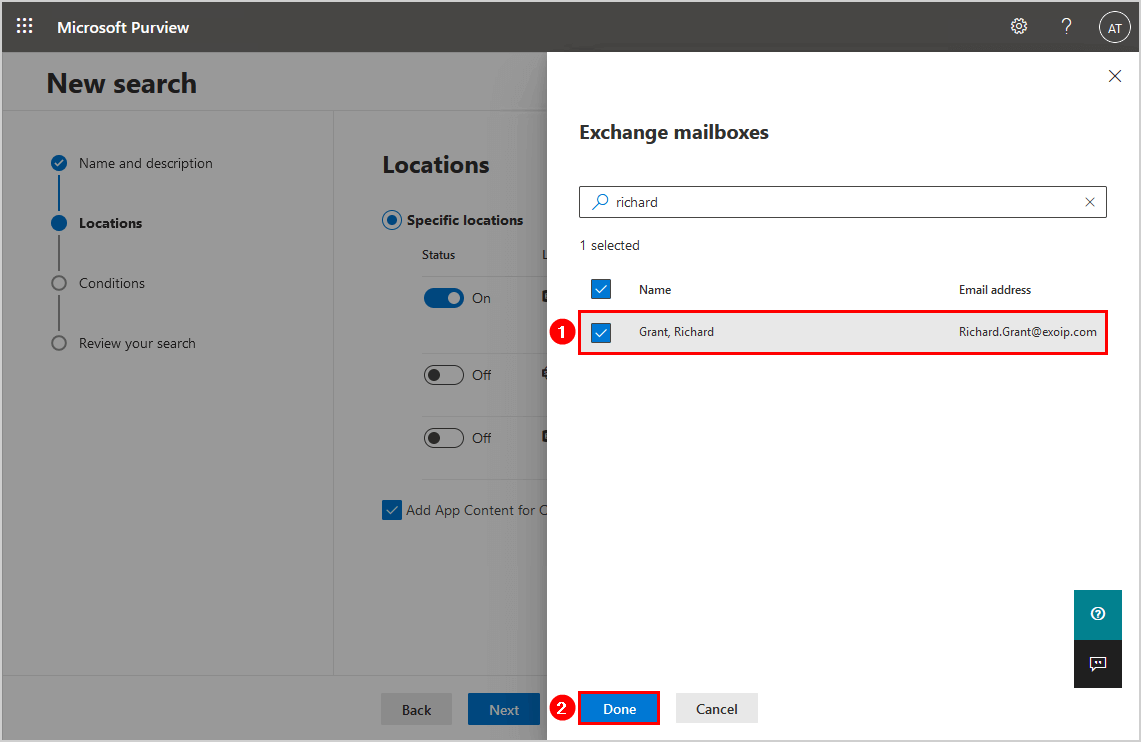
- Select the Exchange mailbox.
- Click Done.
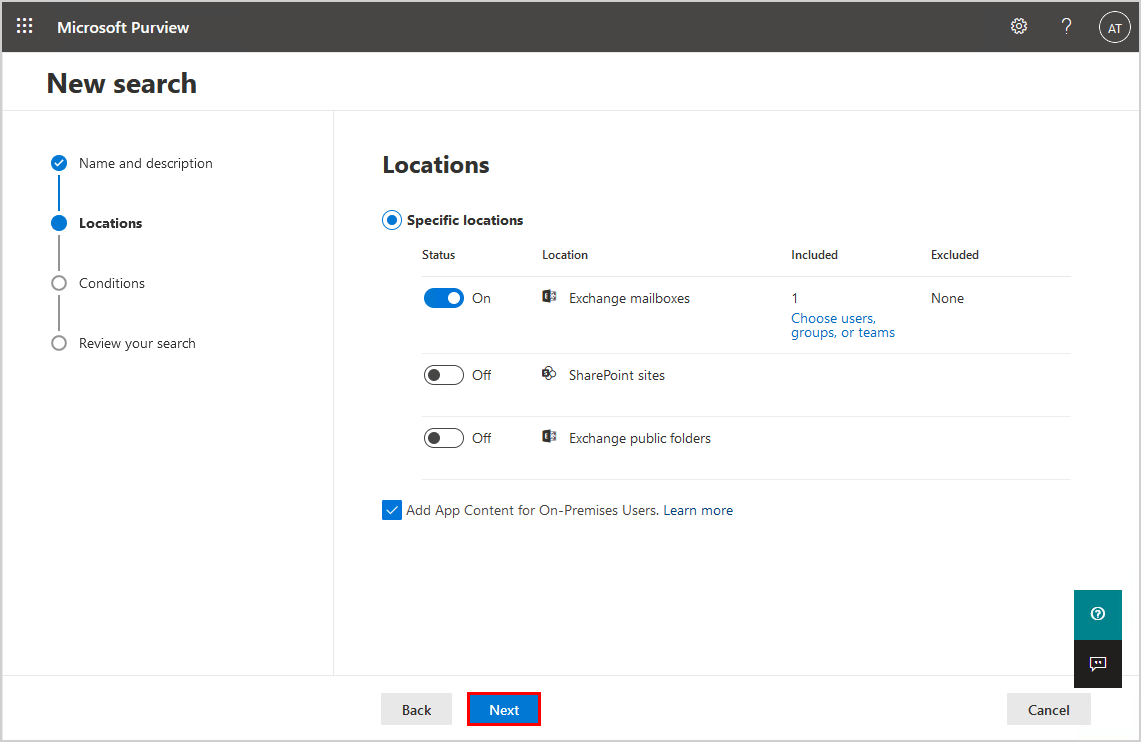
- Click Next.
- Click again on Next.

- Click on Submit.
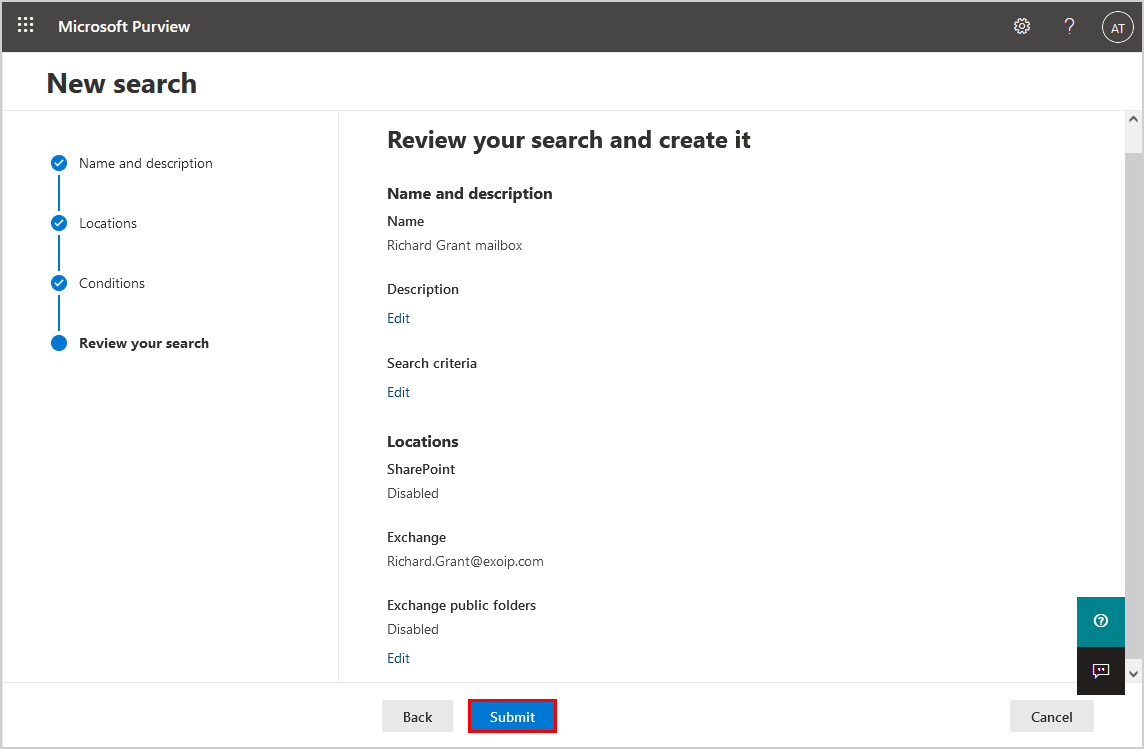
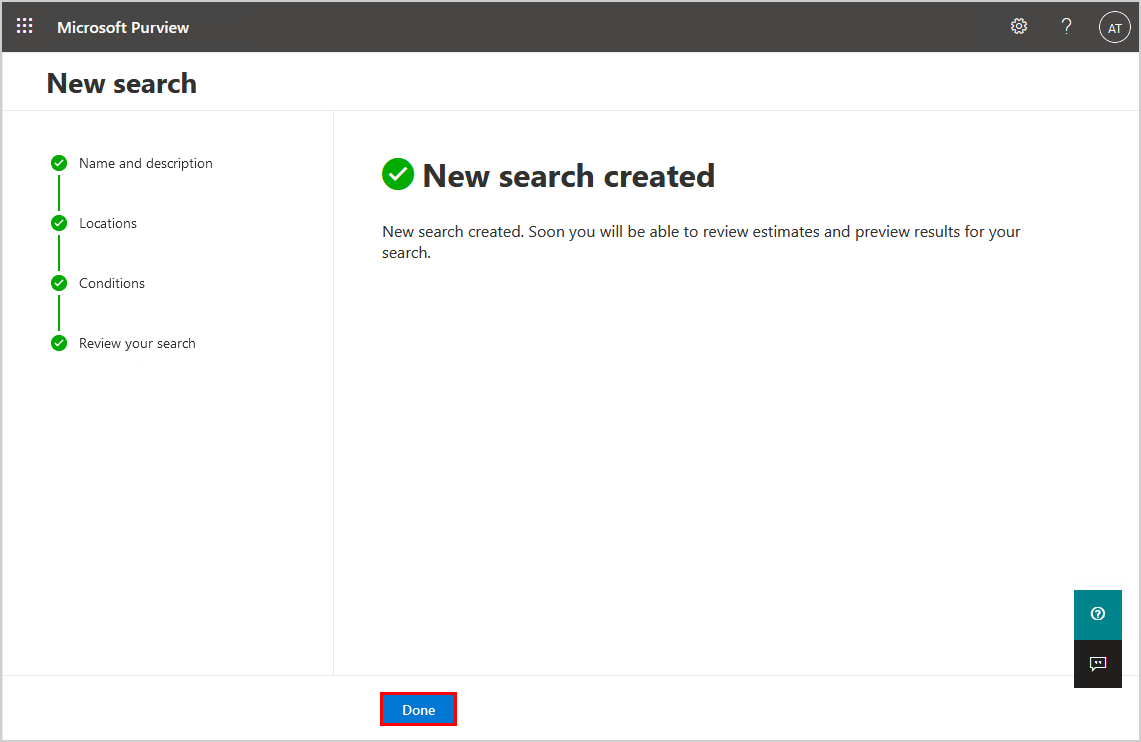
- New search created. Click Done.
In the next step, we will export the PST file.
Step 3. Export Office 365 mailbox to PST file
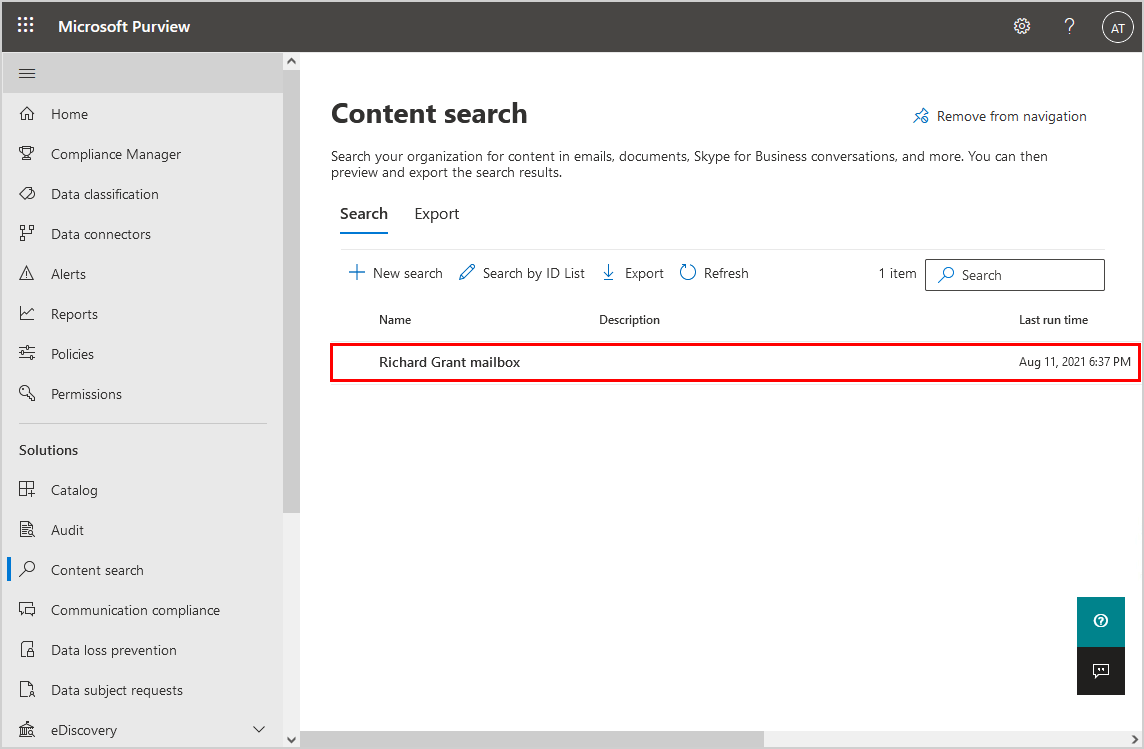
- In the Content search list, click on the name that you created in the previous step.
- You will see that the search status is completed.
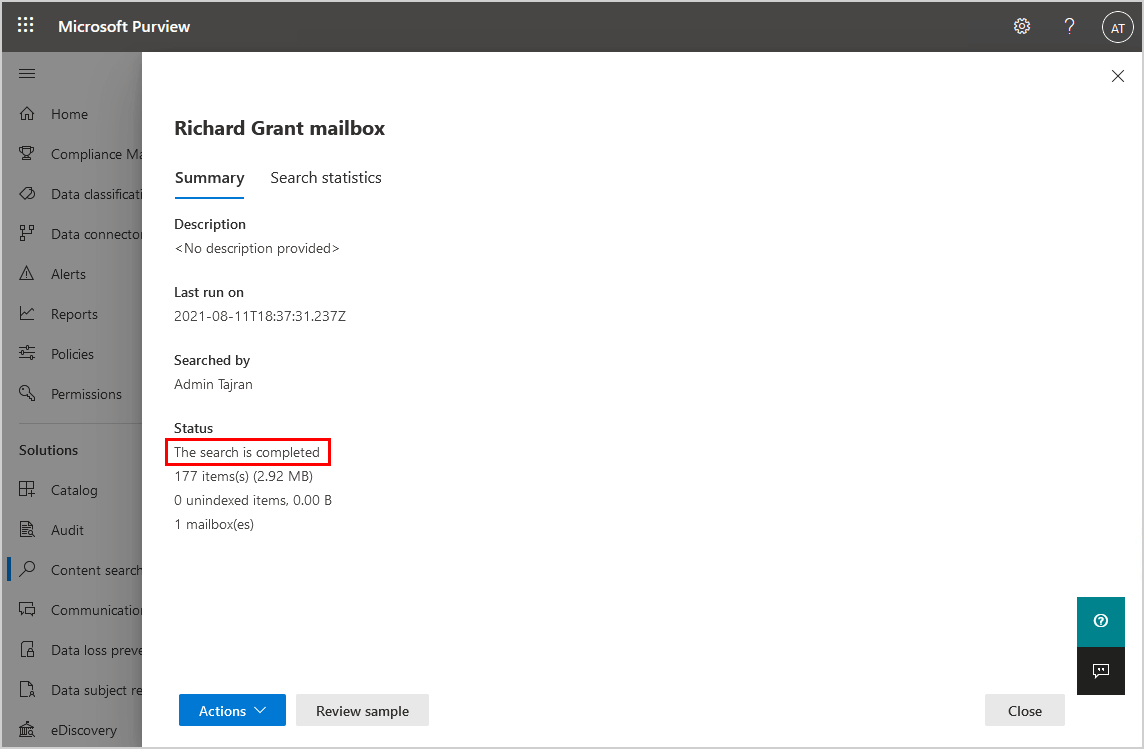
- Click on Action.
- In the menu, click on Export results.
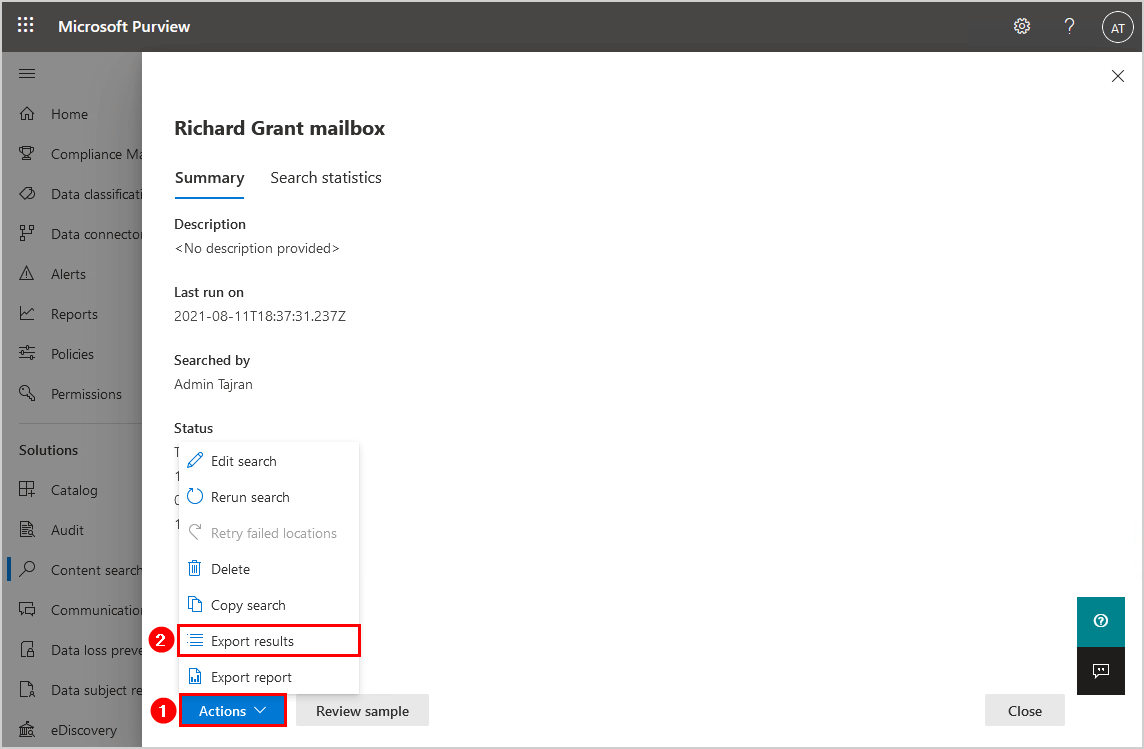
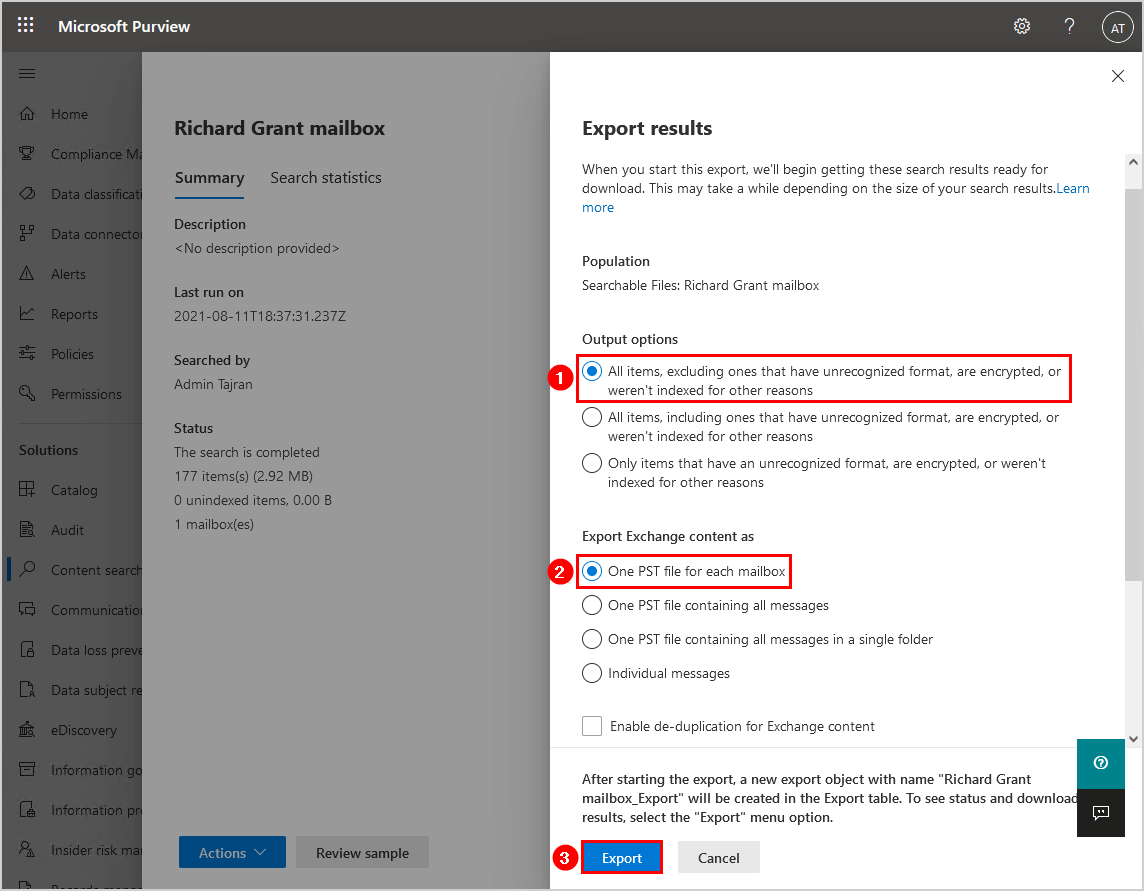
- Select the output options that you like to have.
- Click Export.
In our example:
- All items, excluding ones that have unrecognized format, are encrypted, or weren’t indexed for other reasons
- One PST file for each mailbox.
In the final step, we will download the Office 365 PST file.
Step 4. Download Office 365 mailbox PST file
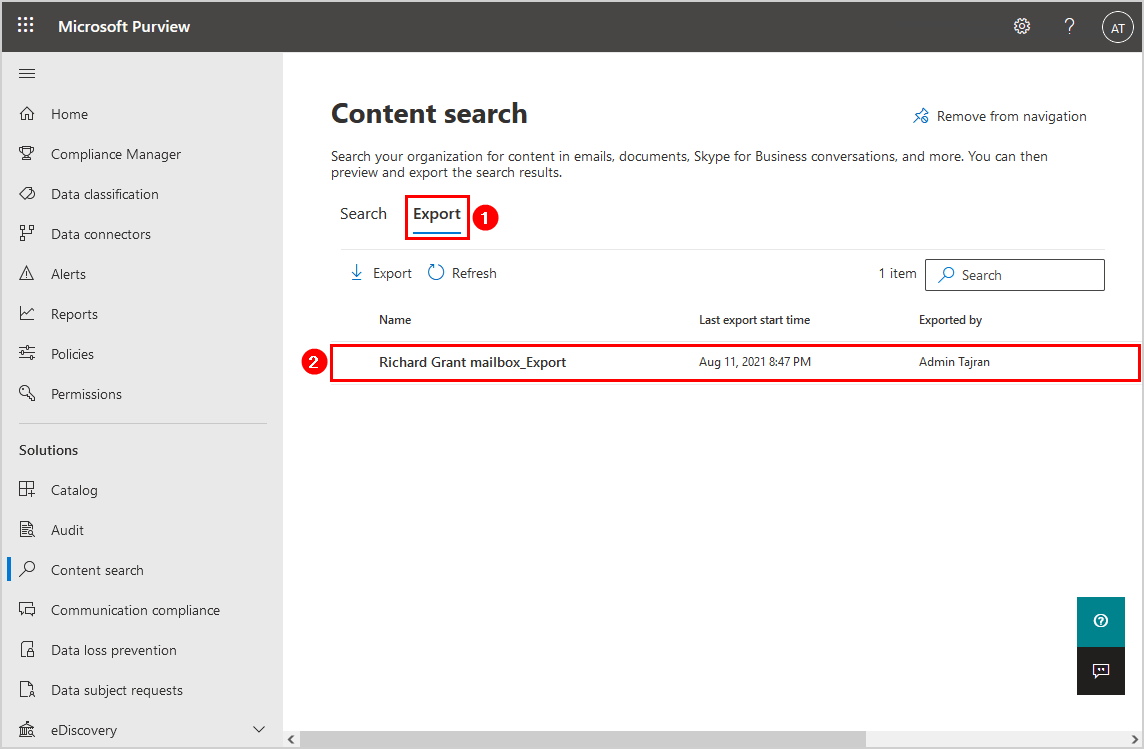
- Select the tab Export.
- Click on the list on the export object.
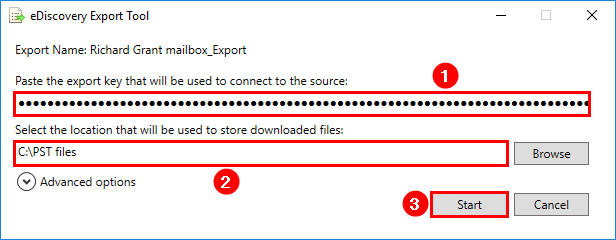
- Copy the export key by clicking on Copy to clipboard.
- Click on Download results.
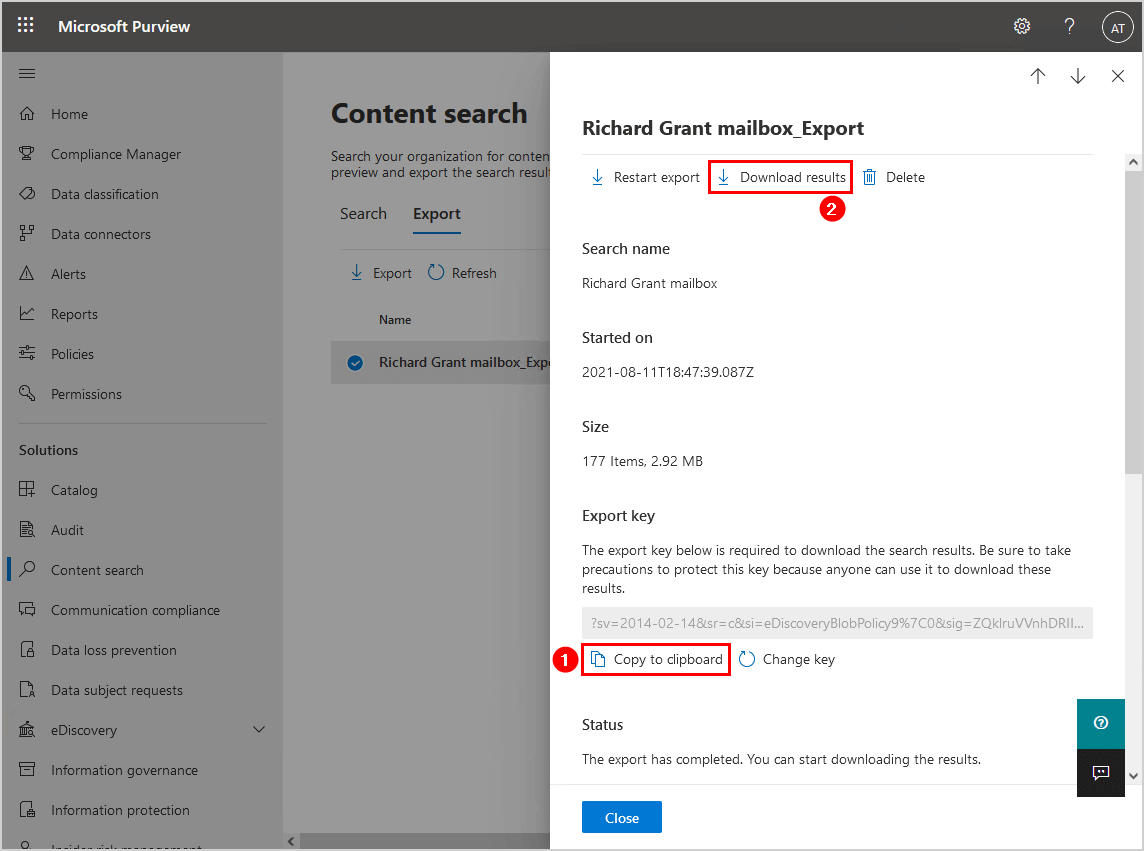
- You will see a warning that you must use Microsoft Edge or Internet Explorer to download search results or reports.
If you use a non-Microsoft browser, you need to install the ClickOnce browser extension. Find the extension on the add-on webpage for that browser:
- Mozilla Firefox: Breez ClickOnce
- Google Chrome: Meta4 ClickOnce Launcher

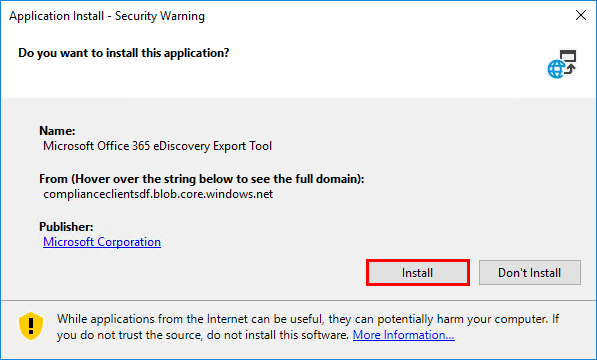
- Install the Microsoft Office 365 eDiscovery Export Tool.
If the tool doesn’t start, read the Microsoft documentation You can’t start the eDiscovery PST Export Tool.
- Paste the export key that you copied.
- Select a location for the PST file.
- Click on Start.
In our example, we will save the export to the directory path C:\PST files. Click Start.
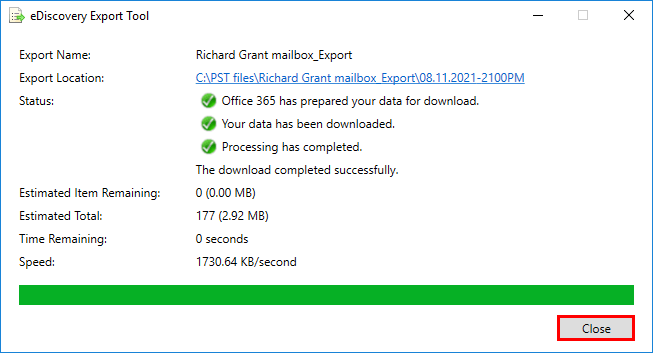
- The status will show that the download completed successfully.
- Click Close.
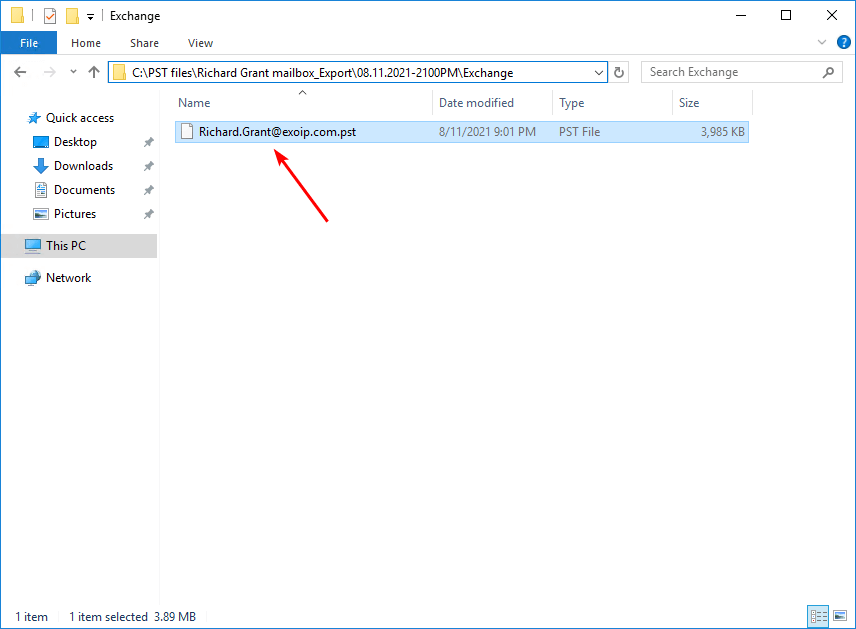
- Go to the download location path and find the PST file.
That’s it!
Change PST file export size
When you use the eDiscovery Export tool to export the email results of an eDiscovery search, the default size of a PST file that you can export is 10 GB. The 10 GB default file size is a good balance between the optimal amount of content in a single PST and a minimum chance of file corruption.
You can change the default 10 GB PST export file size. On the computer that you run the eDiscovery Export tool to export the results to PST, follow the steps:
- Close the eDiscovery Export tool if it’s open.
- Run Registry Editor and create the following registry key:
HKEY_LOCAL_MACHINE\SOFTWARE\Microsoft\Exchange\Client\eDiscovery\ExportTool- Create a new String value for 20 GB in PST export file size:
PstSizeLimitInBytes=21474836480- Do you need another PST file size? Change the String value to the desired maximum size of an export PST file. See the below table for other sample values.
| Size in GB | Size in bytes |
|---|---|
| 1 GB | 1073741824 |
| 5 GB | 5368709120 |
| 10 GB | 10737418240 |
| 15 GB | 16106127360 |
| 20 GB | 21474836480 |
Did the export Office 365 mailbox to PST file from Microsoft 365 compliance center work for you?
Read more: Find specific SMTP address with PowerShell »
Conclusion
You learned how to export an Office 365 mailbox to PST file. There are four steps involved. First, assign eDiscovery permissions to the administrator account. Second, create a new content search with the administrator account. The third step is to export the results. The last step is to download the PST file to the computer.
Another way to export Office 365 mailboxes is to give yourself full access right to the mailbox. Then, when you start Outlook, you will see the mailbox in the left panel. After that, you can export to PST file from Outlook. That will get the job done, but the steps in this article are more convenient.
Did you enjoy this article? You may also like Export distribution group members to CSV with PowerShell. Don’t forget to follow us and share this article.
I love your work Ali and your attention to detail is excellent. I always recommend your page to my colleagues!!
Hi Ali, Thank you for post. i wanna ask you about powershell.. How can i start export pst by powershell.. i want to automatize this process.
It’s not possible to export Office 365 mailboxes to PST with PowerShell. There are no cmdlets that support that.
Thank you for response.
i wanna to automate export pst by powershell..
Regards,
The best how-tos on the internet !