A couple of arbitration mailboxes are corrupt, and we like to make them healthy. It…
External recipient for notification emails in migration batch
Create a migration batch in Exchange Admin Center and add the mailboxes that you like to move. How do you know when the migration batch finished? One of the options is to get a notification by email. How does it work? When the migration batch finished moving the mailboxes an email is being sent to the recipient. In this article, you will learn how to add an external recipient for notification emails when creating a migration batch.
Table of contents
Select recipient for notification emails
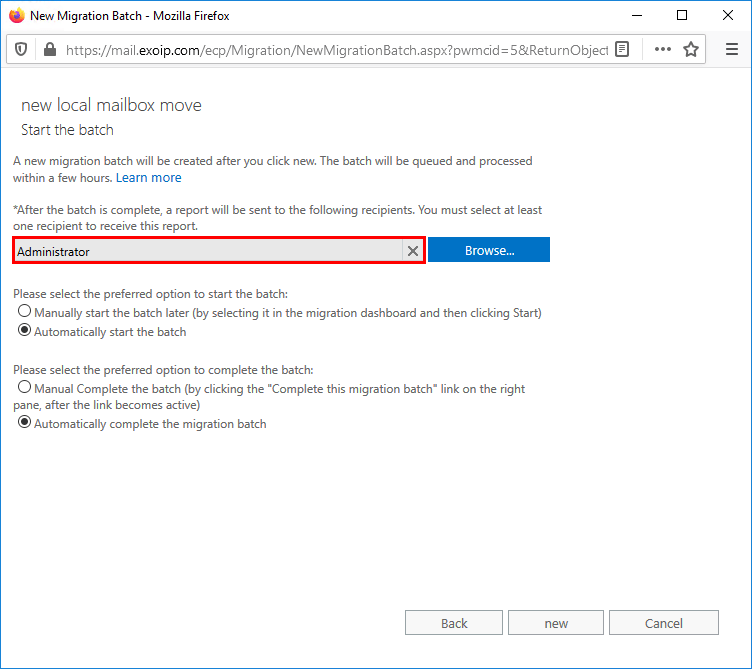
Sign in to Exchange Admin Center. We are signing in with the administrator account. Create a new migration batch.
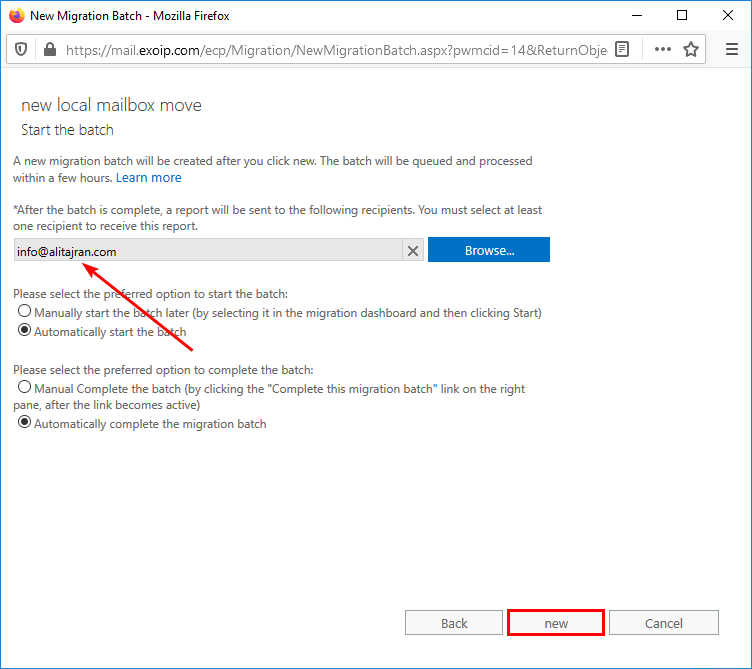
By default, the account that is signed in will be shown as the recipient to receive the report.
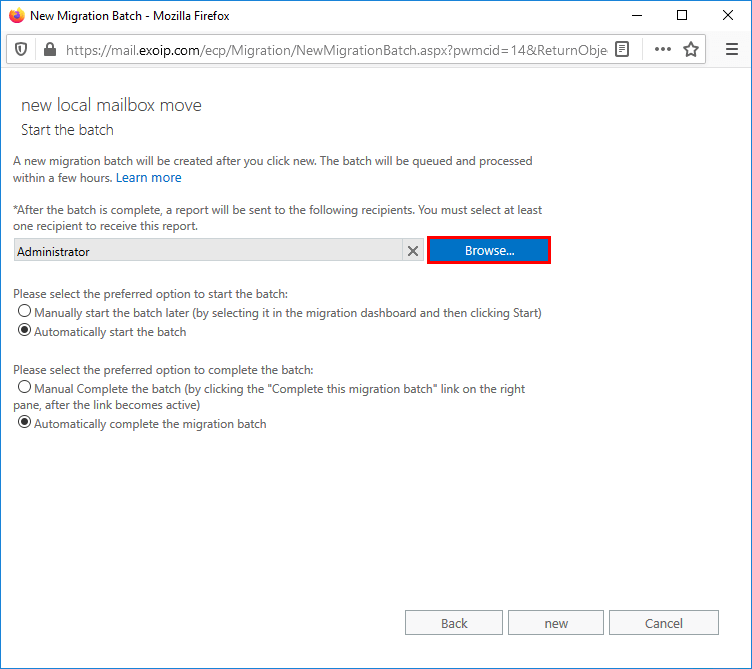
What if you want to get the email notification to your external email address? For example, you are an IT service provider and you like to get the report of completion to your external email.
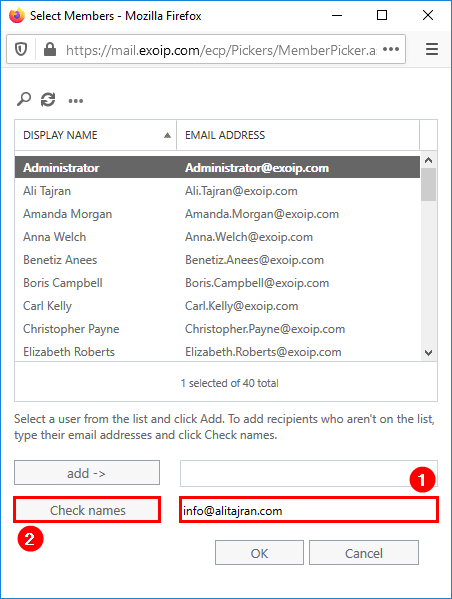
Add external recipient not on the list
Click the Browse… button.
You can see all the mailboxes that are configured on the Exchange Organization.
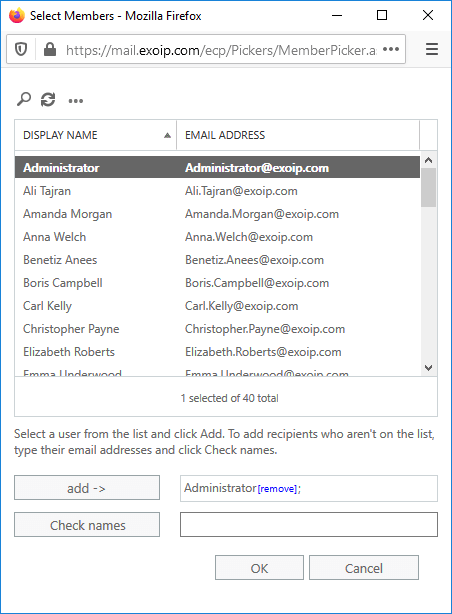
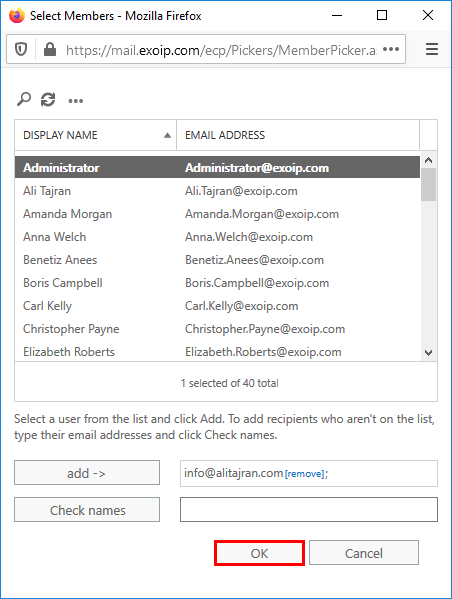
Remove the administrator’s email address. In the check names field, type the external email address and click Check names.
Click OK.
What if you want to have the external recipient in the list of users? That way you don’t have to type in the external email address every time you are creating a migration batch. It’s easier to search for the external recipient and add it to the list.
Create external recipient for notification emails
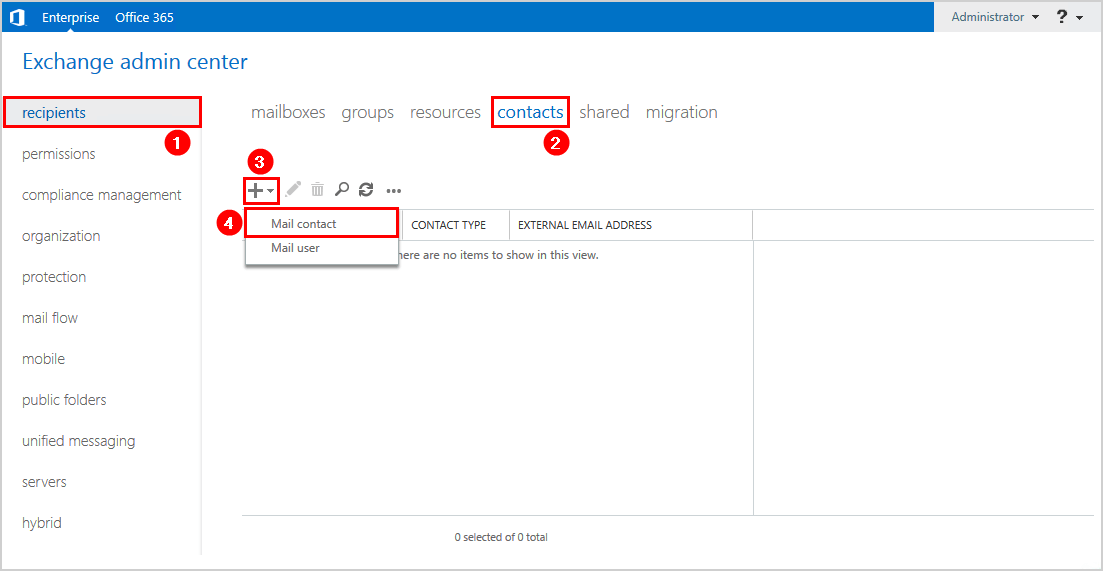
In Exchange Admin Center, click recipients in the feature pane and click contacts. Click the + icon and click Mail contact.
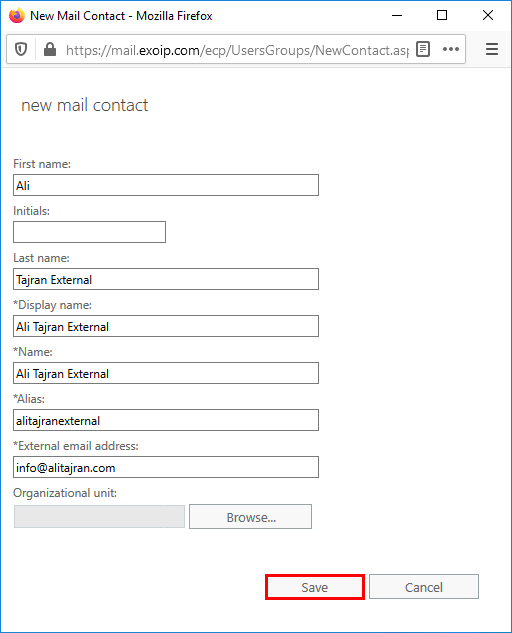
Fill in the information to create a new mail contact. We kept the organizational unit empty, it will save the contact to the default OU named Users. If you want to keep it tidy, create a new OU with the name Contacts in Active Directory Users and Computers (ADUC) and browse to it. Click Save when done.
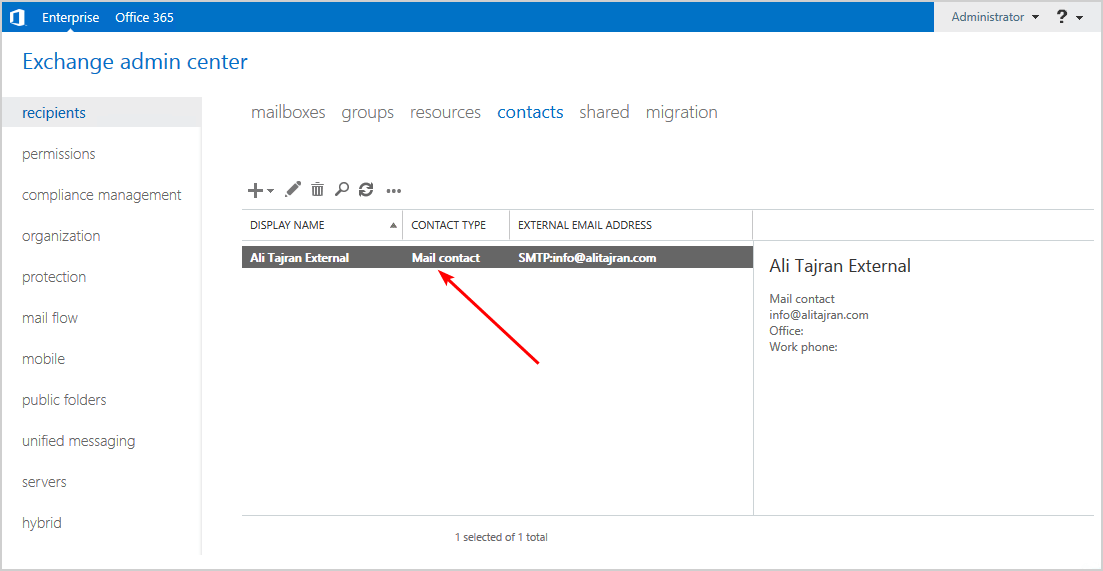
Mail contact is successfully created.
Add external recipient from the list
Go back to the migration batch to find and select the mail contact that you created. It’s possible that you need to click the refresh icon at the top. Click Add and OK.
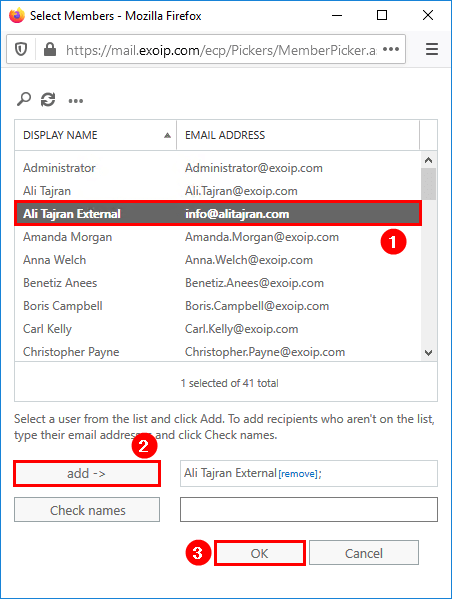
The external recipient is selected. Click new to start the batch.
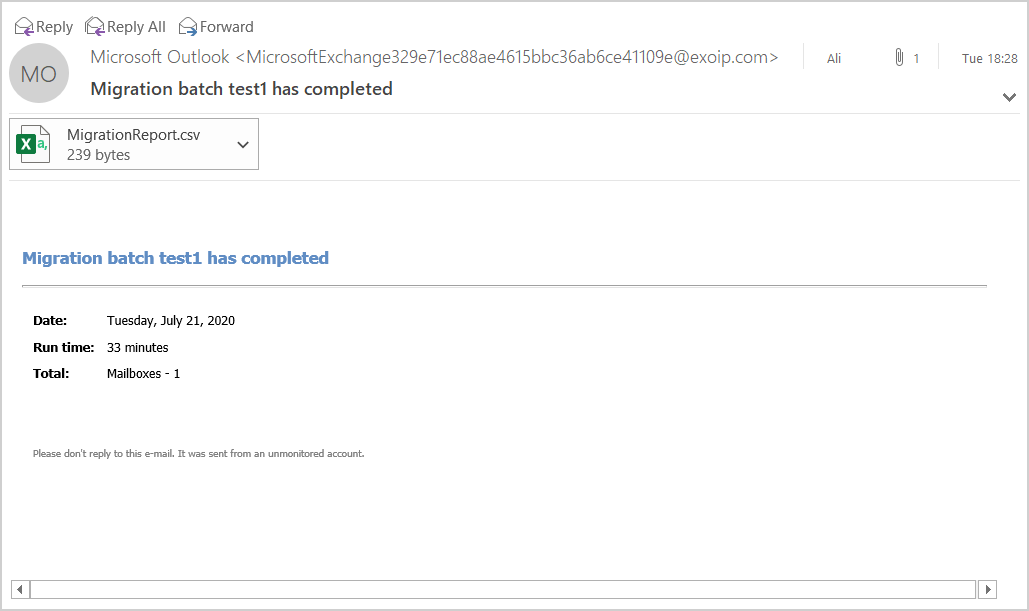
Wait for the notification email being sent to the external recipient address.
Notification email
The mailbox is moved and the migration batch is completed. An email is sent to the external recipient. The next step for you is to have a look at the Migration Report CSV file.
Did this help you to add an external recipient for notification emails in a migration batch?
Read more: Find total number of mailboxes in Exchange »
Conclusion
In this article, you learned how to add an external recipient for notification emails when creating a migration batch. Fill in the email address to get notified or create a mail contact as shown in the article. After that, you can select it in the list of users. Wait till the migration batch finishes and an email is being sent to the external recipient.
Did you enjoy this article? You may also like Create user mailbox in Exchange Server. Don’t forget to follow us and share this article.
Is it possible to perform this in the new EOL admin centre? I’ve noticed that mail contacts do not appear in the schedule batch migration wizard.
It’s possible in the new Exchange admin center (Microsoft 365), and the contact will appear. You have to search for the contact email address and not the name.