Many environments have not yet enabled Extended Protection in Exchange Server. While it's possible for…
Import remote IP addresses to Exchange receive connector
We like to import remote IP addresses to Exchange receive connector in a quick way. In our example, it’s a new receive connector with only a couple of IP addresses configured. Adding the IP addresses and IP address ranges one by one in Exchange Admin Center takes us some time. What is a faster way to achieve our goal? In this article, we will use a PowerShell script to import remote IP addresses to Exchange receive connector.
Table of contents
Check remote IP addresses in Exchange Admin Center
Sign in to Exchange Admin Center. Click in the feature pane on mail flow and follow with receive connectors in the tabs. Select the Exchange Server, which has the receive connector to add the remote IP addresses to. Click the receive connector in the list view and click the edit icon in the toolbar.
In our example, it’s Exchange Server EX02-2016.exoip.local, and the SMTP relay receive connector.
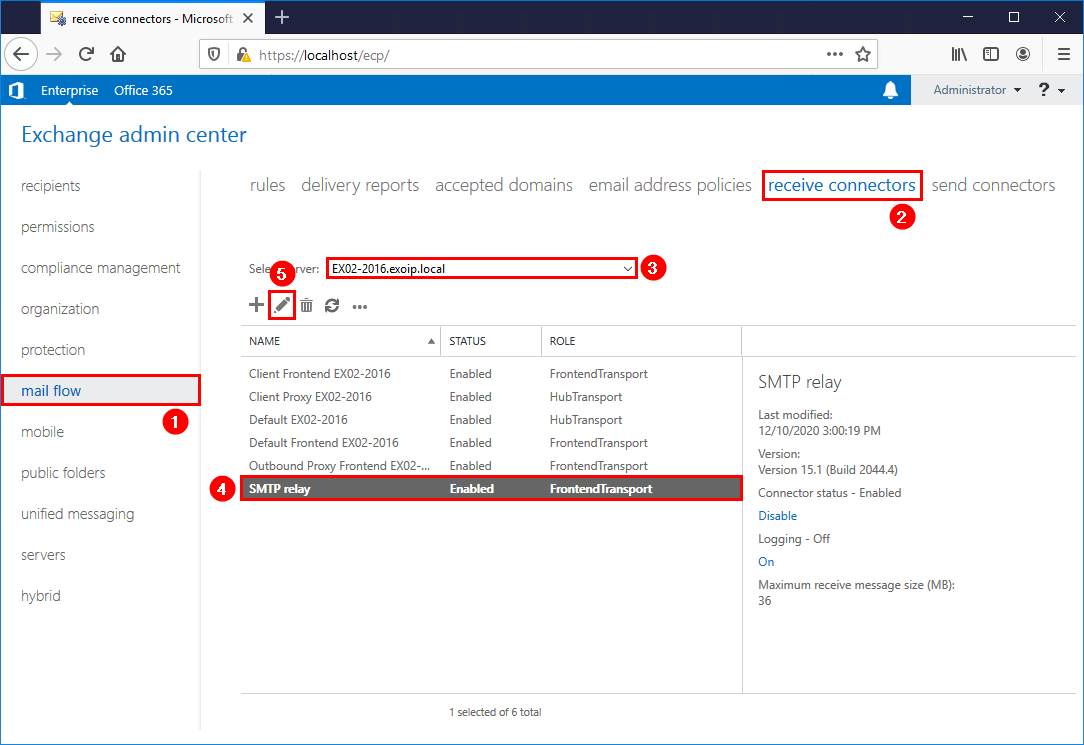
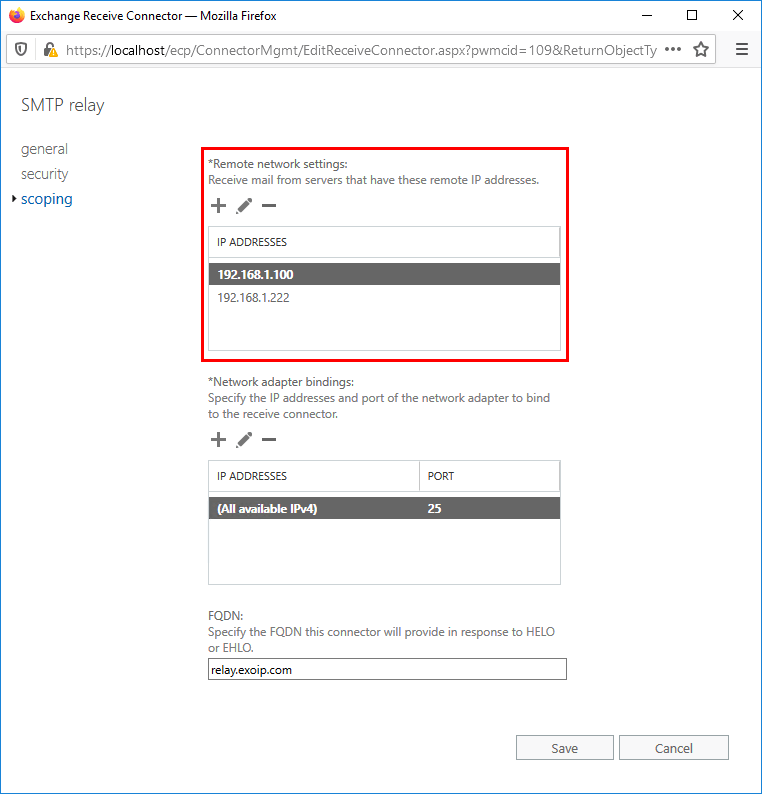
We can see that there are two remote IP addresses added.
To add the IP addresses one by one in Exchange Admin Center is possible but not recommend. It is time-consuming, and you can miss an IP address.
How will we add the IP addresses to Exchange receive connector in a quick way? PowerShell to the rescue.
Prepare the IP addresses CSV file
Do you already have a list of IP addresses that you like to add? That’s great. If not, you can create one as the screen shown below. If you want to use IP addresses from a receive connector, read the article Export remote IP addresses from Exchange receive connector.
How the CSV with IP addresses looks like. The first two are a couple of IP address ranges, and the others are single IP addresses. Make sure to use the same CSV file name and header “Expression”.

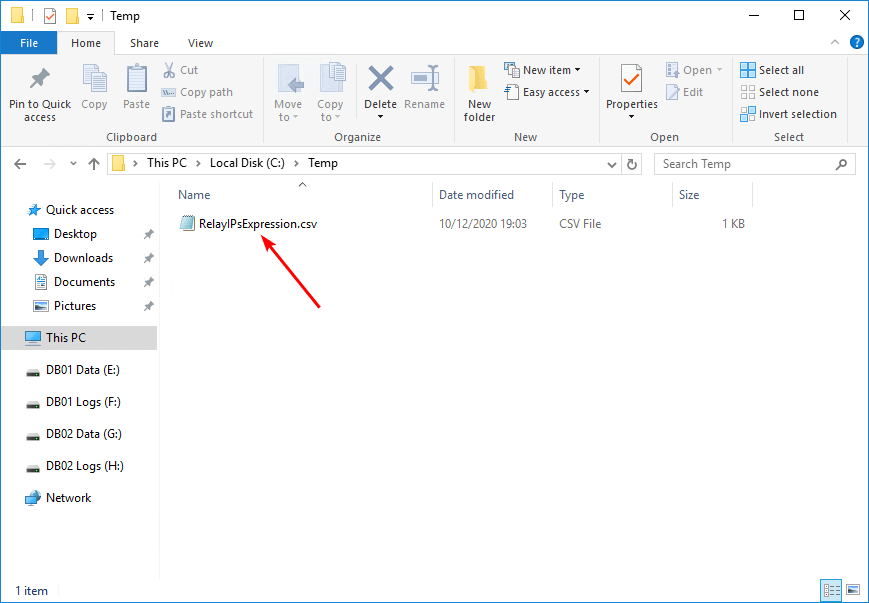
Place the CSV file with the name RelayIPsExpression.csv in the C:\temp folder.
Run Exchange Management Shell as administrator. Verify that PowerShell can read the CSV file with the Import-Csv cmdlet.
[PS] C:\>Import-Csv "C:\temp\RelayIPsExpression.csv"

Expression
----------
192.168.1.70-192.168.1.80
192.168.1.75-192.168.1.80
192.168.1.99
192.168.1.174
192.168.1.221
192.168.1.222
192.168.1.234
192.168.1.235
192.168.1.240
Prepare add IP address to receive connector PowerShell script
Download the Add-IPReceiveConnector.ps1 script or copy and paste the below code in Notepad. Give it the name Add-IPReceiveConnector.ps1 and place it in the C:\scripts folder. Create a script folder if you don’t have one.
Ensure the file is unblocked to prevent errors when running the script. Read more in the article Not digitally signed error when running PowerShell script.
# Fill in the path of your csv file and receive connector
$Csv = "C:\temp\RelayIPsExpression.csv"
$RC = "EX02-2016\SMTP Relay"

# Import IP addresses from CSV file
$IPs = Import-Csv $Csv

# Get receive connector
$RCon = Get-ReceiveConnector $RC

# Get receive connector remote IP addresses
$RemoteIPRanges = $RCon.RemoteIPRanges

# Loop through each IP address
foreach ($IP in $IPs) {
    $IPEx = $IP.Expression

    # Check if IP addres already exist
    if ($RemoteIPRanges -contains $IPEx) {
        Write-Host "IP address $($IPEx) already exist in receive connector $($RC)" -ForegroundColor Red
    }

    # If IP address not exist than add IP address
    else {
        $RemoteIPRanges += $IPEx

        # Remove the -WhatIf parameter after you tested and are sure to add the remote IP addresses
        Set-ReceiveConnector $RC -RemoteIPRanges $RemoteIPRanges -WhatIf
        Write-Host "IP address $($IPEx) added to receive connector $($RC)" -ForegroundColor Green
    }
}
Information Add-IPReceiveConnector.ps1 PowerShell script
The script will not remove any IP addresses in the receive connector. It will check if the IP address is configured. If yes, it will show that the IP address is already present and move on to the next IP in the CSV file.
Example
We do have a receive connector with two IP addresses already present:
- 192.168.1.100 not in the CSV file
- 192.168.1.222 in the CSV file
In the next step, we will run the script and see it in action.
Bulk add IP address to receive connector PowerShell script
Run Exchange Management Shell as administrator. Go to the script path and run the Add-IPReceiveConnector.ps1 script. The script will go through each IP address in the list.
Note: Good to know is that the -WhatIf parameter is added in the script. If you run the script, nothing will happen in the environment. You will get an output showing what will happen.
In my example, the script will try to bulk add nine IP addresses to the specified receive connector. It will not add one IP address because it’s already present, as shown in the picture above.
After running the script, confirm the IP addresses and the receive connector.
[PS] C:\>cd C:\scripts
[PS] C:\scripts>.\Add-IPReceiveConnector.ps1
What if: Configuring Receive connector "EX02-2016\SMTP Relay".
IP address 192.168.1.70-192.168.1.80 added to receive connector EX02-2016\SMTP Relay
What if: Configuring Receive connector "EX02-2016\SMTP Relay".
IP address 192.168.1.75-192.168.1.80 added to receive connector EX02-2016\SMTP Relay
What if: Configuring Receive connector "EX02-2016\SMTP Relay".
IP address 192.168.1.99 added to receive connector EX02-2016\SMTP Relay
What if: Configuring Receive connector "EX02-2016\SMTP Relay".
IP address 192.168.1.174 added to receive connector EX02-2016\SMTP Relay
What if: Configuring Receive connector "EX02-2016\SMTP Relay".
IP address 192.168.1.221 added to receive connector EX02-2016\SMTP Relay
IP address 192.168.1.222 already exist in receive connector EX02-2016\SMTP Relay
What if: Configuring Receive connector "EX02-2016\SMTP Relay".
IP address 192.168.1.234 added to receive connector EX02-2016\SMTP Relay
What if: Configuring Receive connector "EX02-2016\SMTP Relay".
IP address 192.168.1.235 added to receive connector EX02-2016\SMTP Relay
What if: Configuring Receive connector "EX02-2016\SMTP Relay".
IP address 192.168.1.240 added to receive connector EX02-2016\SMTP Relay
We can see that everything looks great, and we can remove the -WhatIf parameter.
In line 28, remove the -WhatIf parameter from the PowerShell script and rerun the script. The IP addresses are added to the Exchange receive connector. The IP address 192.168.1.222 already exists and the PowerShell script will not add that IP address. After that, it keeps adding the remaining IP addresses that are on the list.
[PS] C:\scripts>.\Add-IPReceiveConnector.ps1
IP address 192.168.1.70-192.168.1.80 added to receive connector EX02-2016\SMTP Relay
IP address 192.168.1.75-192.168.1.80 added to receive connector EX02-2016\SMTP Relay
IP address 192.168.1.99 added to receive connector EX02-2016\SMTP Relay
IP address 192.168.1.174 added to receive connector EX02-2016\SMTP Relay
IP address 192.168.1.221 added to receive connector EX02-2016\SMTP Relay
IP address 192.168.1.222 already exist in receive connector EX02-2016\SMTP Relay
IP address 192.168.1.234 added to receive connector EX02-2016\SMTP Relay
IP address 192.168.1.235 added to receive connector EX02-2016\SMTP Relay
IP address 192.168.1.240 added to receive connector EX02-2016\SMTP Relay
Verify your work
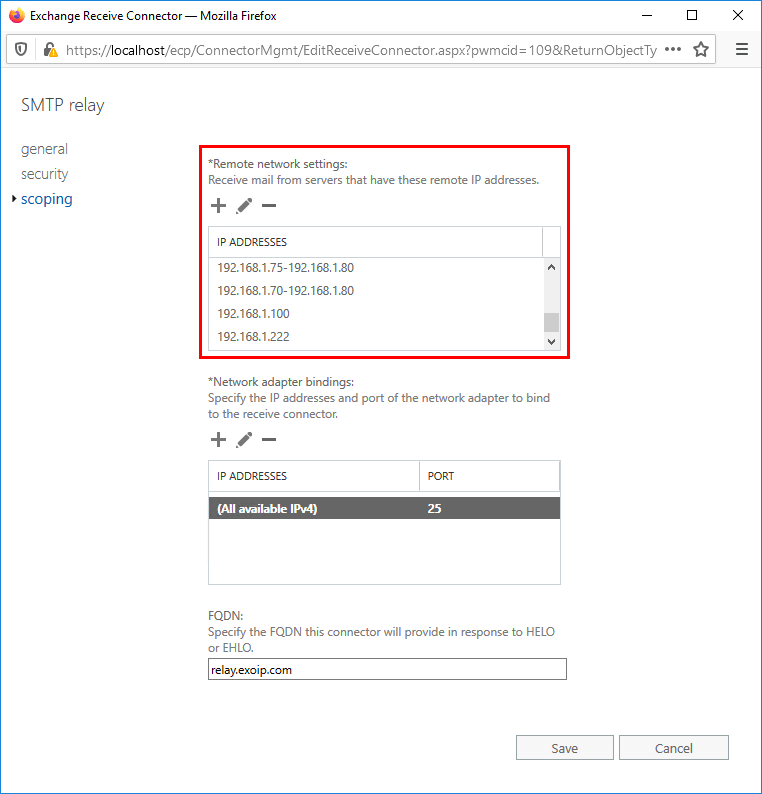
After running the PowerShell script, we can confirm that the IP addresses are added successfully to the receive connector. Both the IP addresses that we already had in the receive connector are present and not removed. Also, the script did not abort and did go to the next IP address in the list.
Note: The IP ADDRESSES in the *Remote network settings in Exchange Admin Center will sort the IP addresses by the date added. You can always click on IP ADDRESSES to sort on IP Addresses.
Let’s list the IP addresses in the receive connector with PowerShell and sort by IP address.
[PS] C:\>(Get-ReceiveConnector -Identity "EX02-2016\SMTP relay").RemoteIPRanges | Sort-Object | Format-Table

LowerBound    UpperBound    Netmask CIDRLength   RangeFormat Size Expression
----------    ----------    ------- ----------   ----------- ---- ----------
192.168.1.70  192.168.1.80                              LoHi ::b  192.168.1.70-192.168.1.80
192.168.1.75  192.168.1.80                              LoHi ::6  192.168.1.75-192.168.1.80
192.168.1.99  192.168.1.99                     SingleAddress ::1  192.168.1.99
192.168.1.100 192.168.1.100                    SingleAddress ::1  192.168.1.100
192.168.1.174 192.168.1.174                    SingleAddress ::1  192.168.1.174
192.168.1.221 192.168.1.221                    SingleAddress ::1  192.168.1.221
192.168.1.222 192.168.1.222                    SingleAddress ::1  192.168.1.222
192.168.1.234 192.168.1.234                    SingleAddress ::1  192.168.1.234
192.168.1.235 192.168.1.235                    SingleAddress ::1  192.168.1.235
192.168.1.240 192.168.1.240                    SingleAddress ::1  192.168.1.240
Import IP addresses to receive connector with PowerShell worked. Did this work for you?
Read more: List all SMTP addresses with PowerShell »
Conclusion
You learned how to import remote IP addresses to Exchange receive connector. It’s good to use the PowerShell script and add the remote IP addresses to the receive connector. It will spare you some time. The good thing is that the script will not delete the already present IP addresses.
Did you enjoy this article? You may also like Create send connector in Exchange. Don’t forget to follow us and share this article.
What Others Are Reading


This worked so beautifully! Thank you for putting this out there!
The output when i add the ip address it says added to receiver but i never see the ip address in exchange admin center.
Remove the -WhatIf parameter in the script and rerun it.
Thanks, this worked a treat!
Thank you very much, Ali. Bless your hands. very useful script
You have the most detailed articles. It works perfect. Thank you!!!
Thank you, Ali! This, along with the Export remote IP addresses from Exchange receive connector post, saved me SO much time.