There are times when you want to bulk import users into Active Directory. You already…
Install Administrative Template files for Microsoft Office
We like to manage Microsoft Office with Group Policy. To do that, we have to install Administrative Template files for Microsoft Office. Good to know is that this will work for Microsoft Office and Microsoft 365. If you like to install different Administrative Templates, the steps are the same.
Table of contents
- Download Administrative Template files for Microsoft Office
- Extract Administrative Template files
- Administrative Templates extracted files
- Copy ADMX files to Windows PolicyDefinitions folder
- Copy ADML files to Windows PolicyDefinitions language folder
- Verify Administrative Template files in Group Policy Management Editor
- Conclusion
Download Administrative Template files for Microsoft Office
First, we have to download Administrative Template files (Microsoft). The files are regularly updated to have the latest settings.
Administrative Templates (ADMX/ADML) for Microsoft Office and Microsoft 365 are not installed by default.
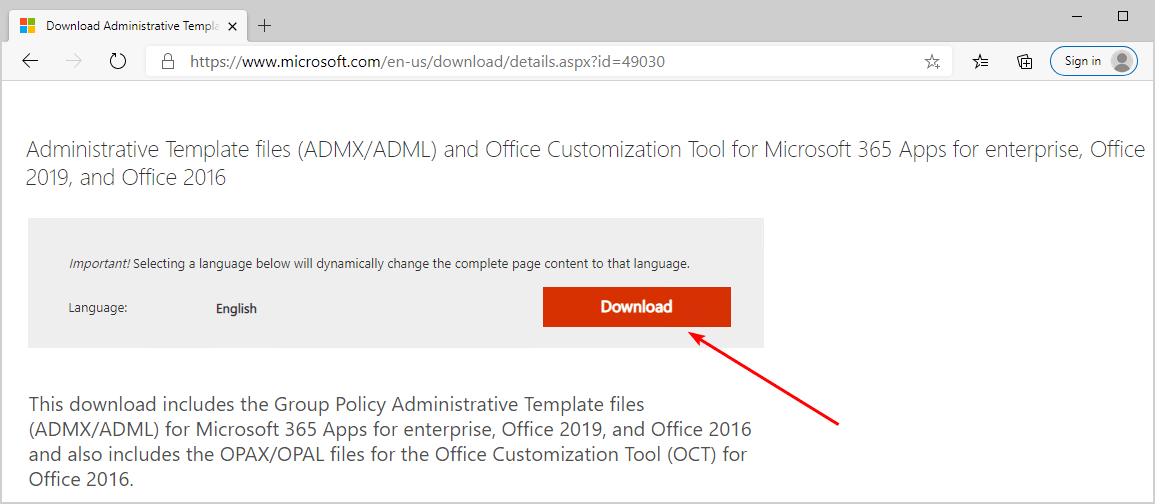
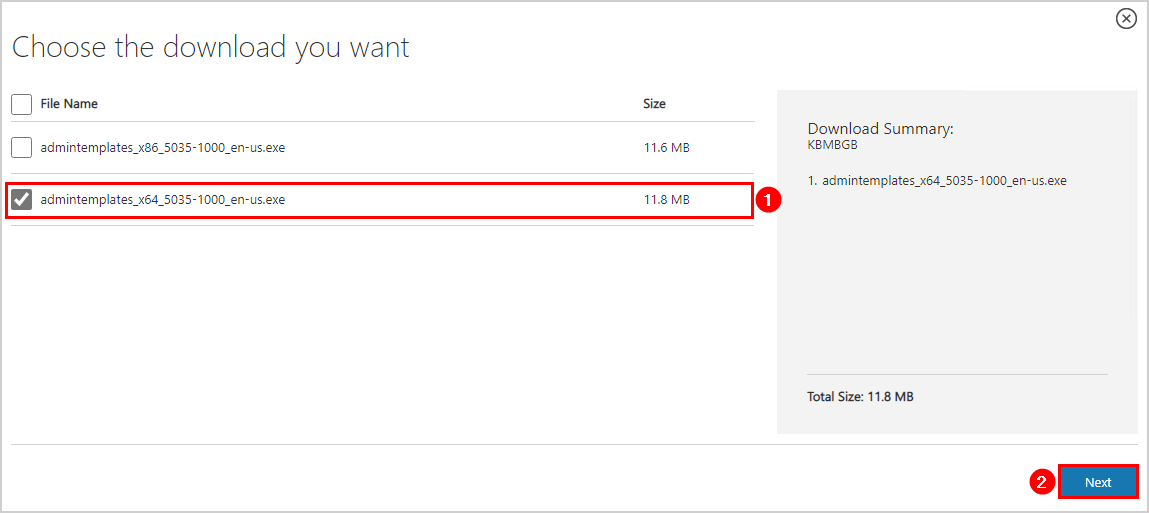
Choose whether you want to download the 32-bit (x86) or 64-bit (x64) files, or both. For example, if you’re using the Office Customization Tool (OCT) to customize the 64-bit version of Office installations, download the 64-bit (x64) files. If you need the ADMX/AMDL files, you can download either the 32-bit (x86) or 64-bit (x64) files. The ADMX/ADML files are the same for both.
In our example, we did select the 64-bit. Click Next.
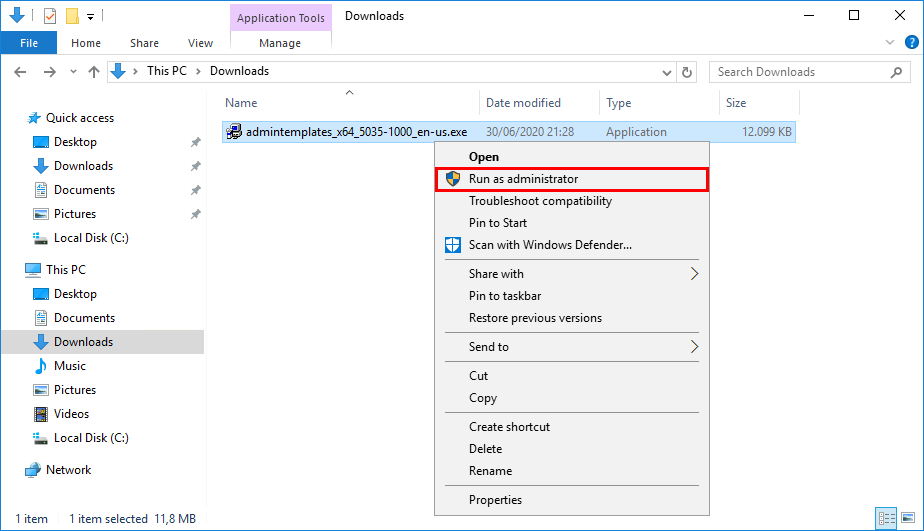
Extract Administrative Template files
Right-click the downloaded file and run as administrator.
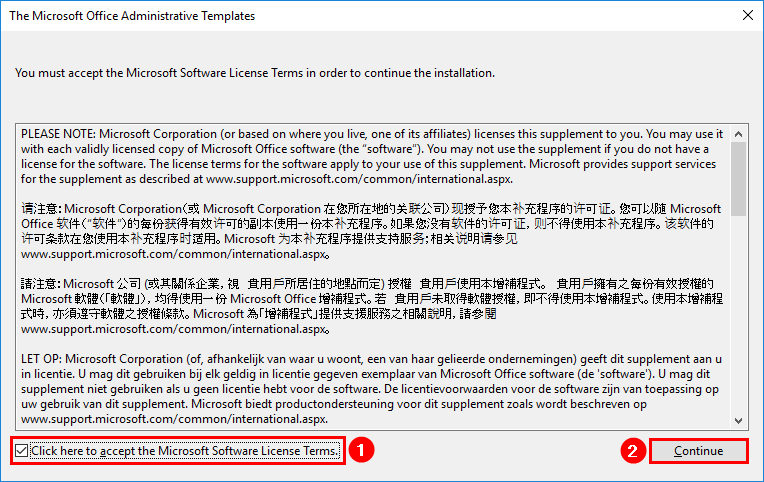
Accept the Microsoft Software License Terms and click Continue.
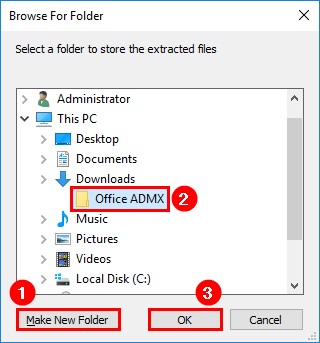
Make a new folder with the name Office ADMX and select the folder. Click OK to start the extraction.
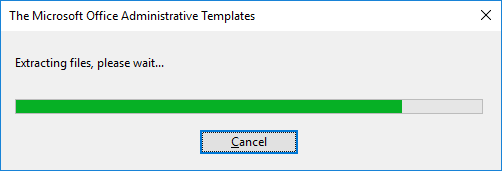
Extracting the files to the folder, give it a couple of seconds.
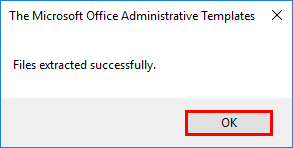
The files did extract successfully. Click OK.
Administrative Templates extracted files
Do you have a Central Store for Group Policy Administrative Templates? Place the files in there. In our example, we only have one domain controller running, and we will place the Administrative Templates in the local store of the Domain Controller.
We recommend having at least two domain controllers running in an organization for High Availability. A central store will make it easier because you don’t have to place the files in both of the domain controllers. It will load the administrative templates from the central store.
Go to the extracted folder, and you will see two folders and one file.
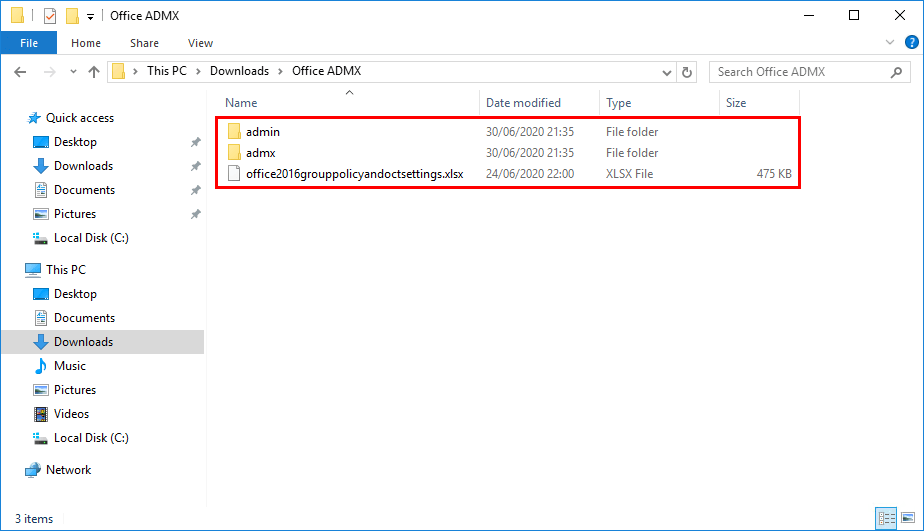
Open the folder admx.

ADMX files that you will see:
| Name | Microsoft application |
|---|---|
| access16.admx | Access 2016 |
| excel16.admx | Excel 2016 |
| lync16.admx | Lync/Skype for Business 2016 |
| office16.admx | Microsoft Office general settings |
| onent16.admx | OneNote 2016 |
| outlk16.admx | Outlook 2016 |
| ppt16.admx | PowerPoint 2016 |
| proj16.admx | Project 2016 |
| pub16.admx | Publisher 2016 |
| teams16.admx | Teams 2016 |
| visio16.admx | Visio 2016 |
| word16.admx | Word 2016 |
In the next step, we will install Administrative Templates for Microsoft 365 and Microsoft Office.
Copy ADMX files to Windows PolicyDefinitions folder
Copy all the ADMX files to install the Administrative Template of all the Office applications (recommend). If you like to have the group policy of only one application, copy only the ADMX file that you need. For example, outlk16.admx (Microsoft Outlook).
The ADMX file defines the Group Policy settings.
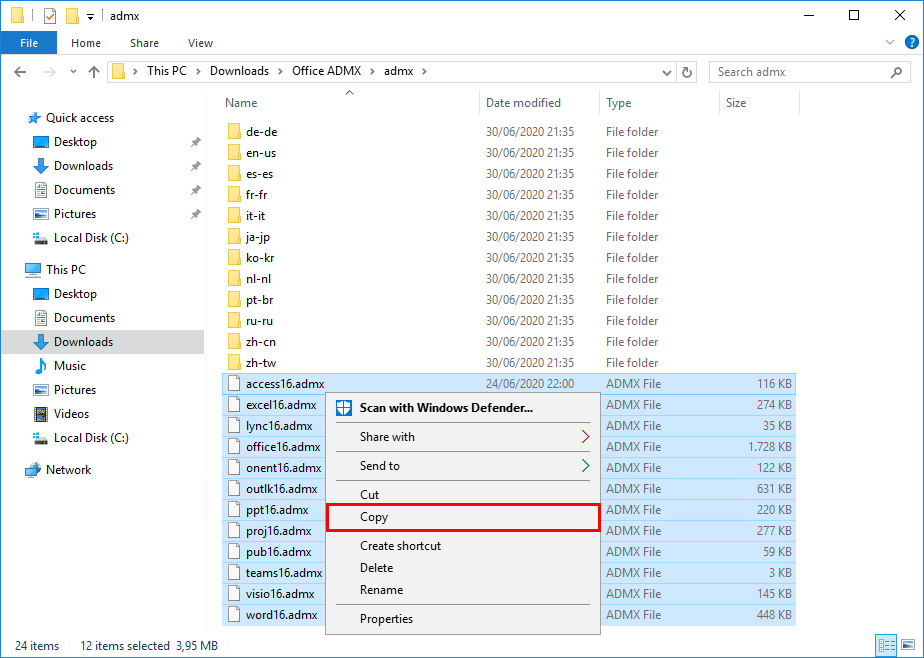
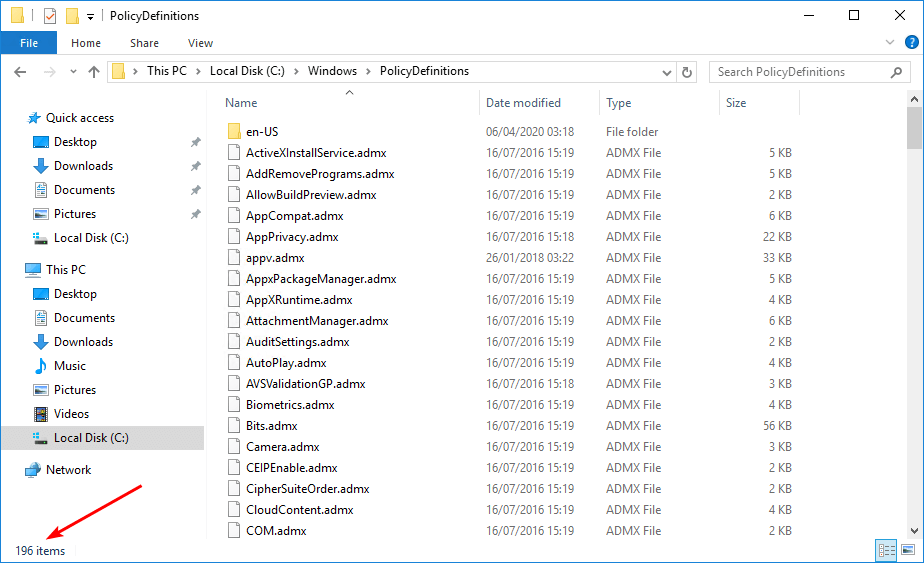
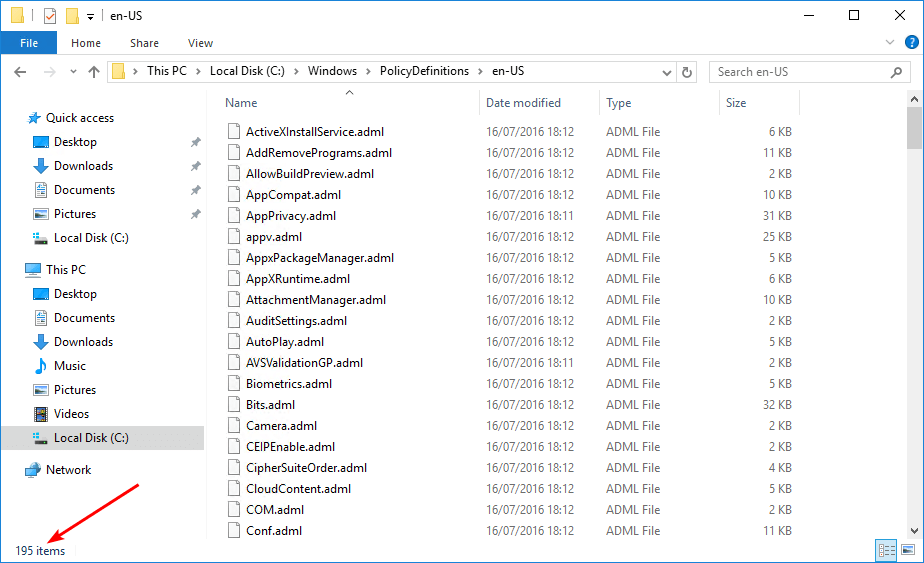
Start File Explorer and go to the path C:\Windows\PolicyDefinitions. Have a look at the items count. The items count can show differently on your end, but in our example, the count is 196 before pasting the ADMX files.
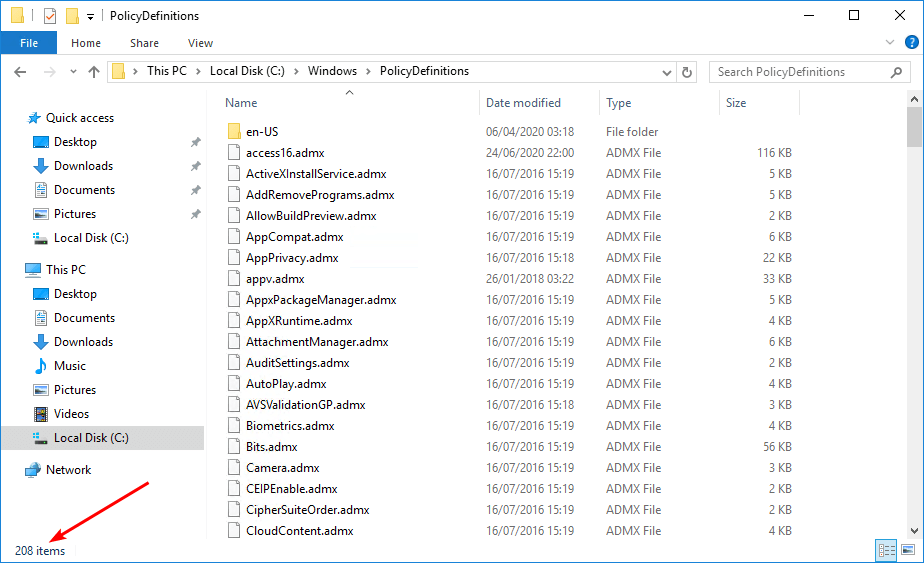
Paste the ADMX files that you copied in the folder C:\Windows\PolicyDefinitions. The total item count is 208 items. That’s correct because we did copy and paste 12 items. If you already have files with these names, a prompt will show you to overwrite the files. Click Yes to All.
Overwrite the files to have the latest Microsoft Office and Microsoft 365 Policy settings.
Copy ADML files to Windows PolicyDefinitions language folder
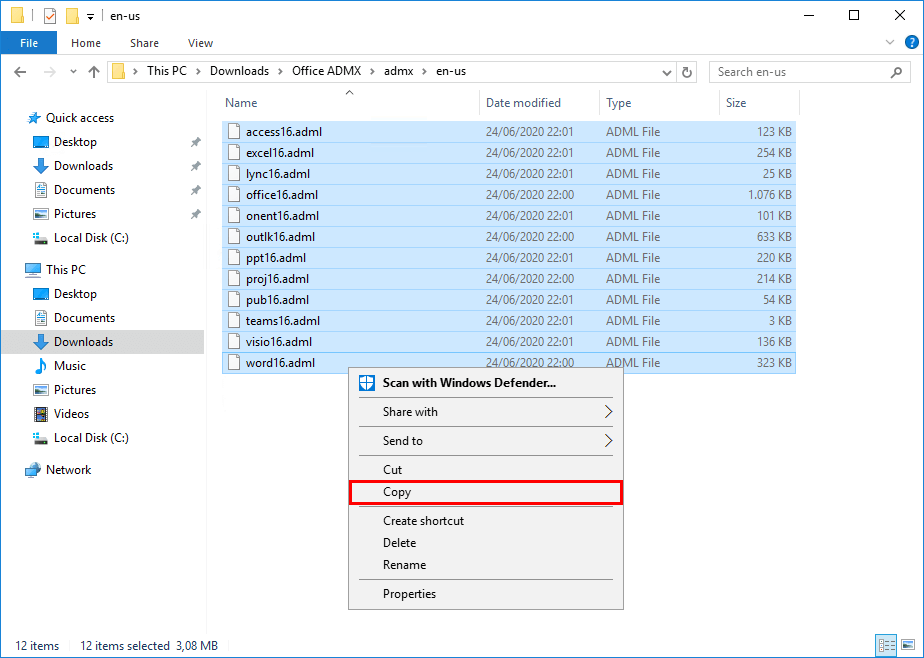
Go back to the extracted ADMX template files. Open the language folder that you want. It depends on which Microsoft Office language you have installed. In my example, it’s en-us (English – United States). Select all the files and click Copy.
The ADML file contains the language to be used with the ADMX file.
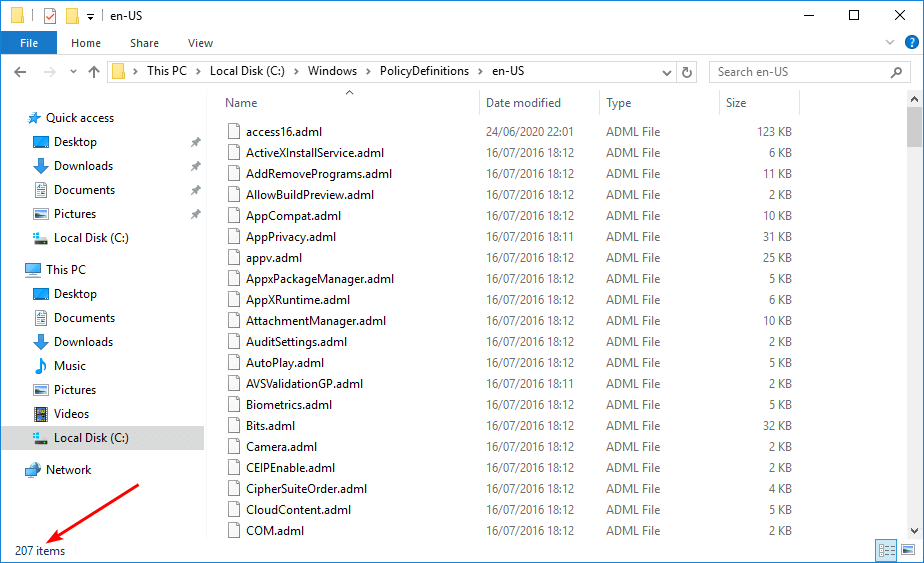
Go back to the folder path C:\Windows\PolicyDefinitions. Open the language folder. In my example, en-US. The total count is 195 items.
Paste the copied ADML language files. The total count is 207 items. That’s correct because we did copy 12 items. If you already have files with these names, a prompt will show you to overwrite the files. Click Yes to All.
Overwrite the files to have the latest Microsoft Office and Microsoft 365 Policy language settings.
In the next step, we will verify that we did install Administrative Templates correctly.
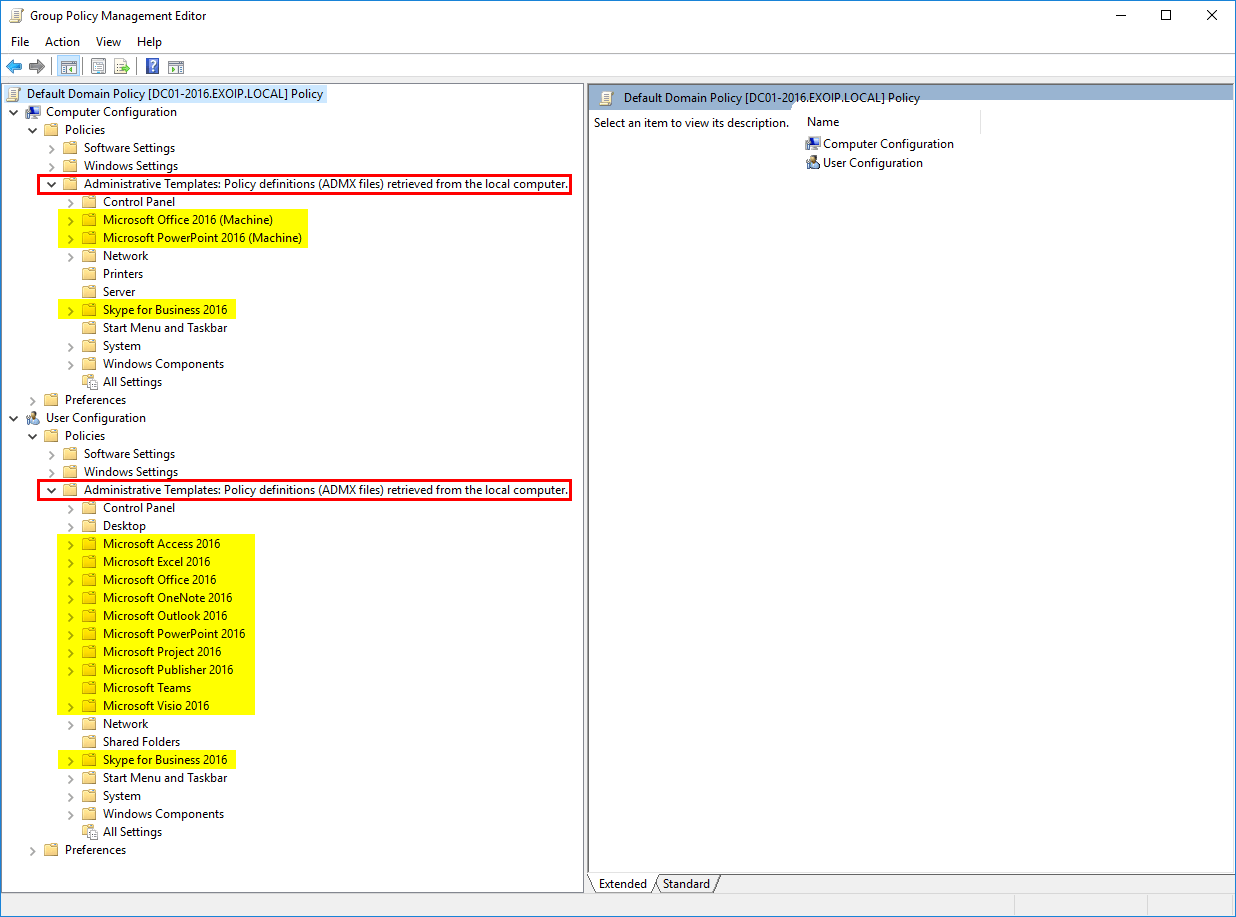
Verify Administrative Template files in Group Policy Management Editor
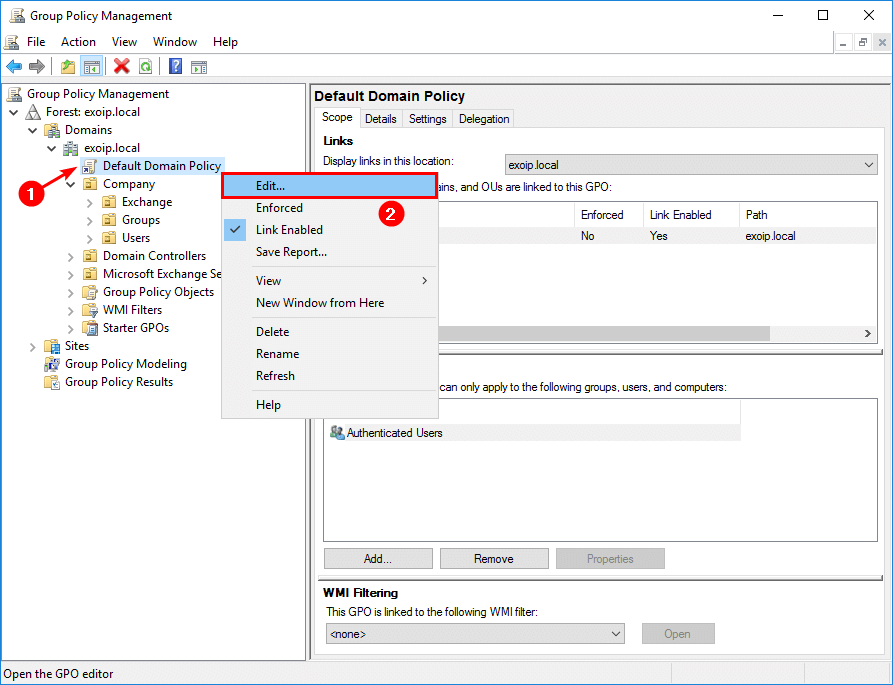
It’s always good to verify that the Administrative Templates installation went successful. Start Group Policy Management. Right-click the Default Domain Policy and click Edit.
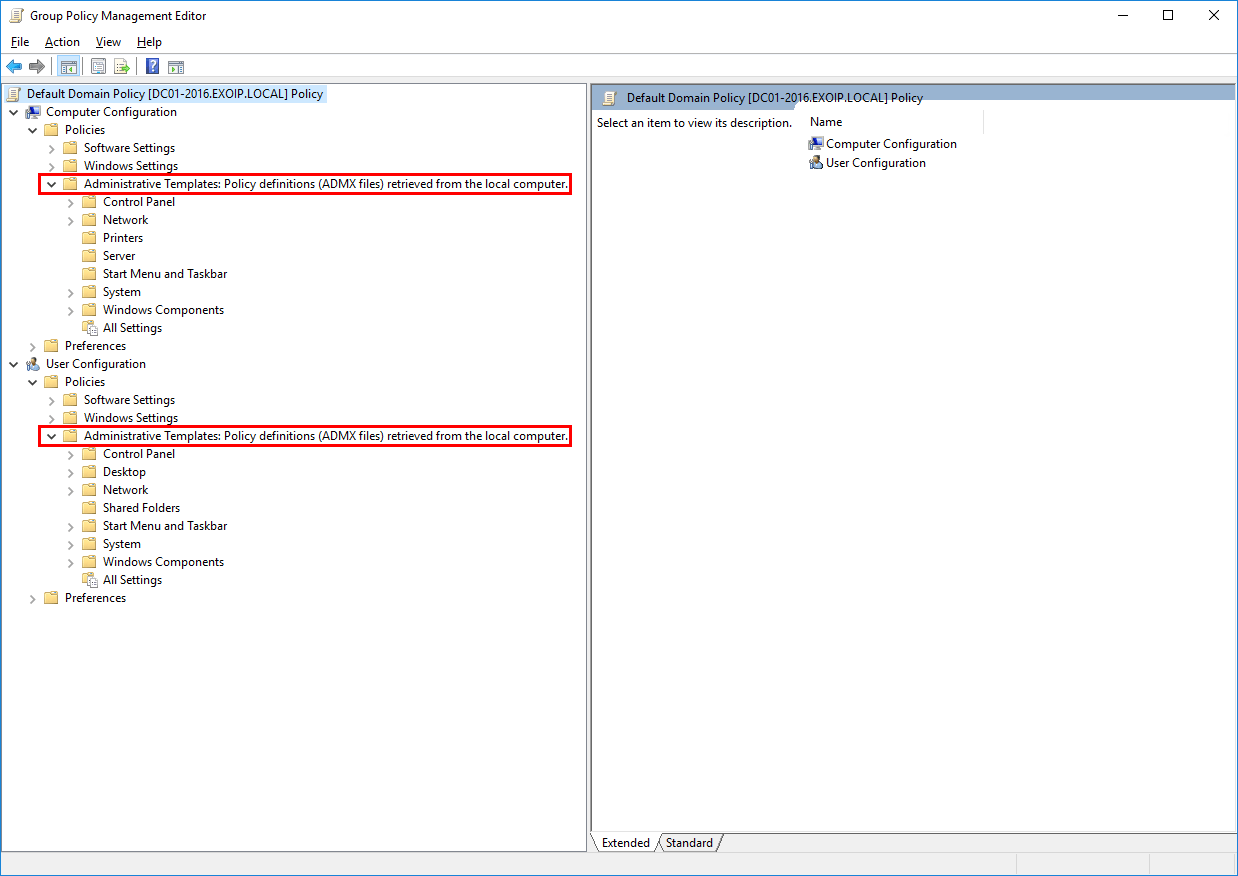
Expand the folders:
- Computer Configuration > Policies > Administrative Templates
- User Configuration > Policies > Administrative Templates
Before installing Administrative Template files
Before copy and pasting the ADMX and ADML files, no Microsoft Office folders are showing.
After installing Administrative Template files
After copy and pasting the ADMX and ADML files, we do see the Microsoft Office folders.
We did install Group Policy Administrative Template files for Microsoft Office. In the next step, we will configure a policy for a Microsoft Office application.
Read more: Manage Microsoft Office with Group Policy »
Conclusion
In this article, you learned how to install Administrative Template files for Microsoft Office. Download Administrative Templates setup and extract the files. After that, copy ADMX and ADML Administrative Template files to the local or central store PolicyDefinitions folder. As of last, you can verify the Administrative Templates in Group Policy Management Editor. Keep an eye on the Administrative Templates download link because Microsoft keeps the setup up to date with the latest Microsoft Office features.
Did you enjoy this article? You may also like Count mailboxes per Exchange Server with PowerShell. Don’t forget to follow us and share this article.
What Others Are Reading

I followed the instructions, all of the new settings did not come through. What else could I be missing to have this happen?
For example, only the Office2016 (Machine) & the OneNote2016 & Office2016 from the bottom section showed up. It has had several days to push out to the other DCs. We are running Office365, if that matters.
Hi,
I can’t seem to find OneDrive admx files. Please guide me from where can I download the OneDrive admx file?
You will not find the OneDrive app ADMX/AMDL files in the Administrative Template files for Microsoft 365 Apps.
Follow the article Configure OneDrive administrative template files (ADMX/ADML).
Hi Ali,
Thanks for the article it is very useful.
I have one question though
Is there a document which lists all the individual policy setting entries and how they work ?
I recommend the website https://admx.help.
You can select the category you want to check the policies for, and it will show each computer and user policy with all the details.
In this example, it will be the category: Microsoft Office 365 ProPlus, Office 2019, Office 2016.
OMG this is a gold mine. Thank you!!!
I wonder why is it not posted on the official MS site too
Hi there,
How can I add admx template of office 2019 on DC 2016?
Is there a way to fulfil this purpose?
Go through the steps as shown in the article. Microsoft keeps the ADMX/ADML files up to date for the Office versions.
This is a very simple and concise explanation of the task. It’s hard to make a mistake when following this guide. Thank you.
Will everything come in as off? Is there a chance it will mess up all my current settings from the older ones?
It will not mess up your current settings. If you want to play it safe, make a copy of the PolicyDefinition folder. Then, if you do get issues, place the folder back.
Hi Ali
Thanks a lot for this step-by-step instructions. I can now configure Office with the group policy editor and hope that I am able to change the update channel.
Best regards
Uli
Hi Uli,
You’re welcome.
After you apply the GPO, make sure to run gupdate /force on a client and verify that it’s working.
All the best.
how to change for active synch… pls advise do you have any PS commands.