After setting up Exchange Server, it's time to test the internal mail flow in Exchange…
Install Exchange Security Update step by step
Microsoft Exchange team releases Exchange Server Security Updates (SUs) for Exchange Server 2013/2016/2019 when vulnerabilities are discovered. You don’t want to wait and patch Exchange Servers immediately. Keep in mind that it can take time before it finishes. If you have only one Exchange Server, mail flow will not work at that time. Now, what is the best procedure to install Security Update in Exchange Server? In this article, you will learn how to install Exchange Security Update step by step.
Table of contents
- Install Exchange Security Update best practice
- Find Exchange Server version
- Download Exchange Server Security Update
- Put Exchange Server in maintenance mode
- Install Exchange Server Security Update
- Take Exchange Server out of maintenance mode
- Verify Exchange Security Update installation
- Install Security Update on all Exchange Servers
- Check that Exchange Server is up to date
- Conclusion
Install Exchange Security Update best practice
Before the Security Update:
- Place the server in maintenance mode in the monitoring systems (for example, SCOM)
- Check for Windows Updates and install the updates
- Restart the server
- Put the server in maintenance mode
- Temporarily disable any anti-virus software
- Temporarily disable any backup software
- Use an elevated command prompt to run the Security Update
After the Security Update:
- Restart the server
- Check the event logs by filtering for errors and warnings
- Take the server out of maintenance mode
- Enable backup software
- Enable anti-virus
- Take the server out of maintenance mode in the monitoring systems (for example, SCOM)
Find Exchange Server version
Read more in the article Find Exchange version with PowerShell.
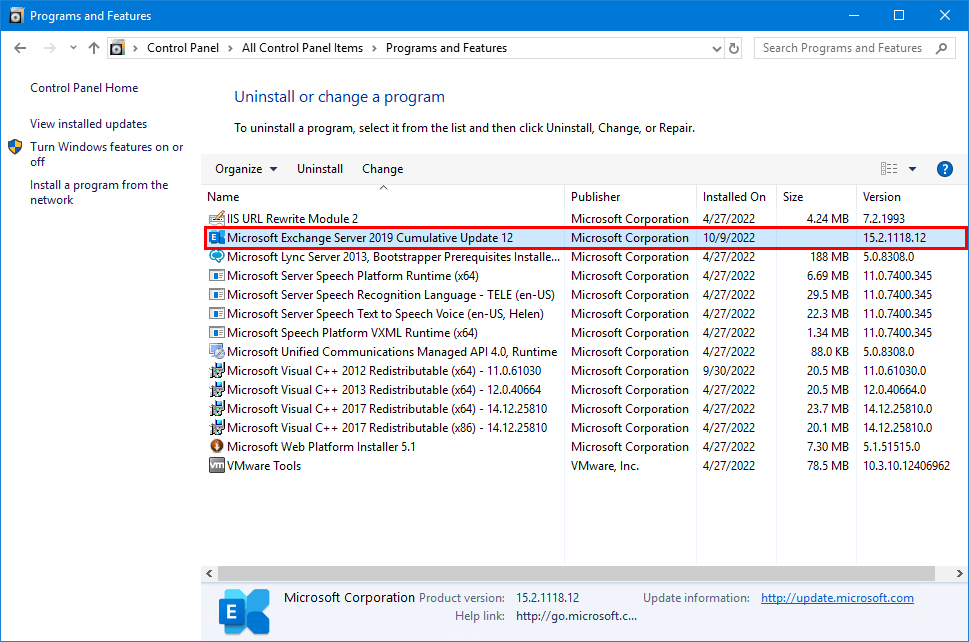
Before you start to install Exchange Security Updates, go to Control Panel > Programs and Features and check which Exchange Server version is installed.
We have seen that the Exchange Server build version is not always correctly shown in the Programs and Features window. A better way is to find Exchange Server version with PowerShell.
Start Exchange Management Shell as administrator and run the below script. The output will show the Exchange Servers build number.
$ExchangeServers = Get-ExchangeServer | Sort-Object Name
ForEach ($Server in $ExchangeServers) {
    Invoke-Command -ComputerName $Server.Name -ScriptBlock { Get-Command Exsetup.exe | ForEach-Object { $_.FileversionInfo } }
}
In our example, both the Exchange Servers EX01-2019 and EX02-2019 are running Exchange Server 2019 CU12 (build number 15.02.1118.012).
ProductVersion   FileVersion      FileName                                                         PSComputerName
--------------   -----------      --------                                                         --------------
15.02.1118.012   15.02.1118.012   C:\Program Files\Microsoft\Exchange Server\V15\bin\ExSetup.exe   EX01-2019
15.02.1118.012   15.02.1118.012   C:\Program Files\Microsoft\Exchange Server\V15\bin\ExSetup.exe   EX02-2019
Download Exchange Server Security Update
It’s good to know that when you download Exchange Server Security Update (SU), it’s not the Exchange Server Cumulative Update (CU). A Security Update is what you will install on top of a Cumulative Update. If the Exchange Server is not up to date with the latest CU, you need to install Exchange Server Cumulative Update first before applying the Security Update.
Microsoft releases Security Updates for the last two Exchange Server versions. They do not release SUs for every Exchange Server version because that is not only too much work for them, but older CUs are not recommended to run when new CUs are pushed. Always keep your Exchange Server up to date with the latest CU.
Note: The Exchange Server Security Updates are cumulative. If you are running the CU that the SU can be installed on, you do not need to install all the SUs in sequential order but can install the latest SU only.
Let’s download Exchange Security Update. Go to the Microsoft Security Update Guide for all the Security Updates. Filter on product family Exchange Server. Click on Security Update.
In this example, we will download Exchange Security Update for Exchange Server 2019 CU12.
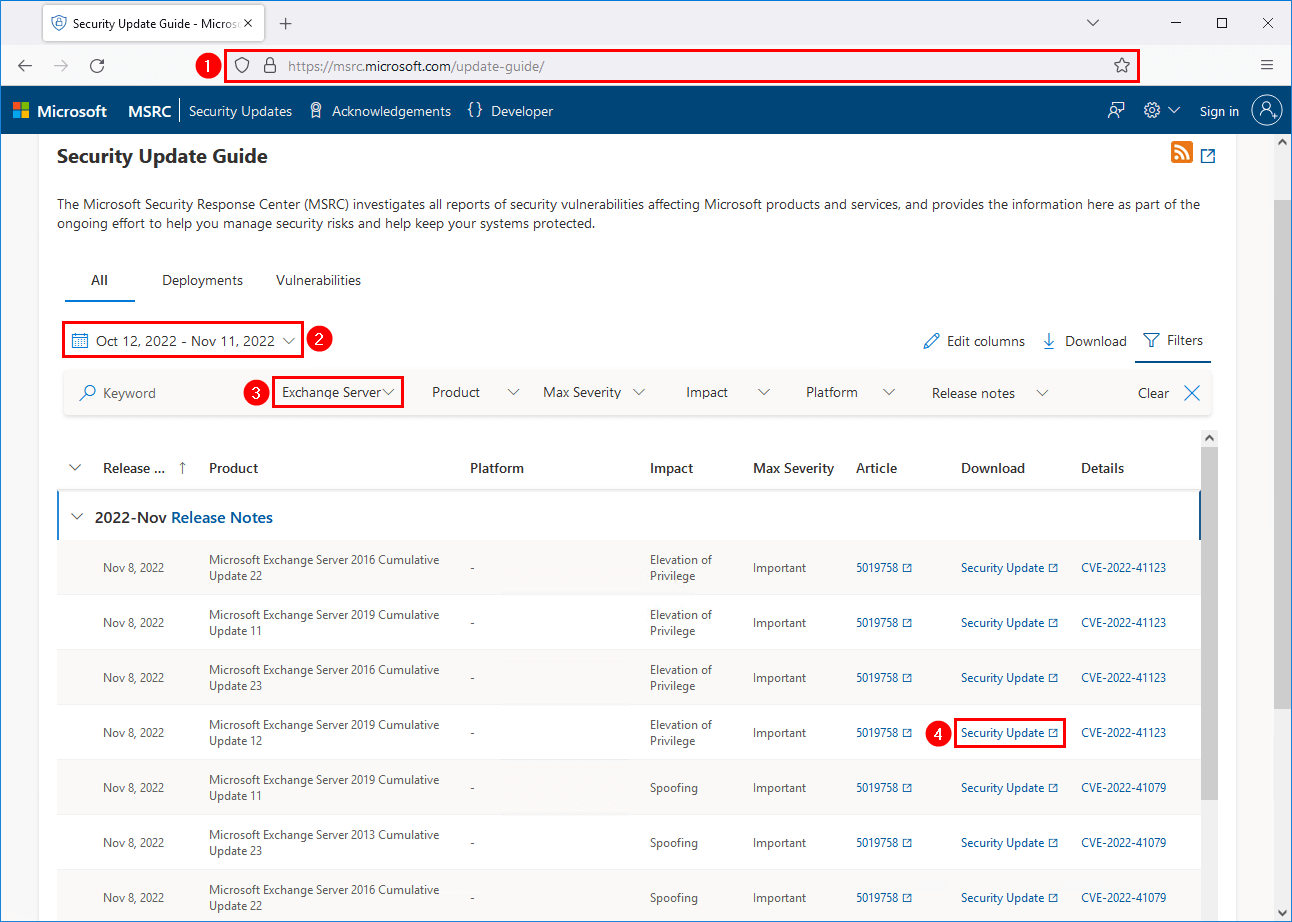
The Microsoft Security Response Center (MSRC) investigates all reports of security vulnerabilities affecting Microsoft products and services. It provides the information here as part of the ongoing effort to help you manage security risks and help keep your systems protected.
Download the Exchange Security Update.

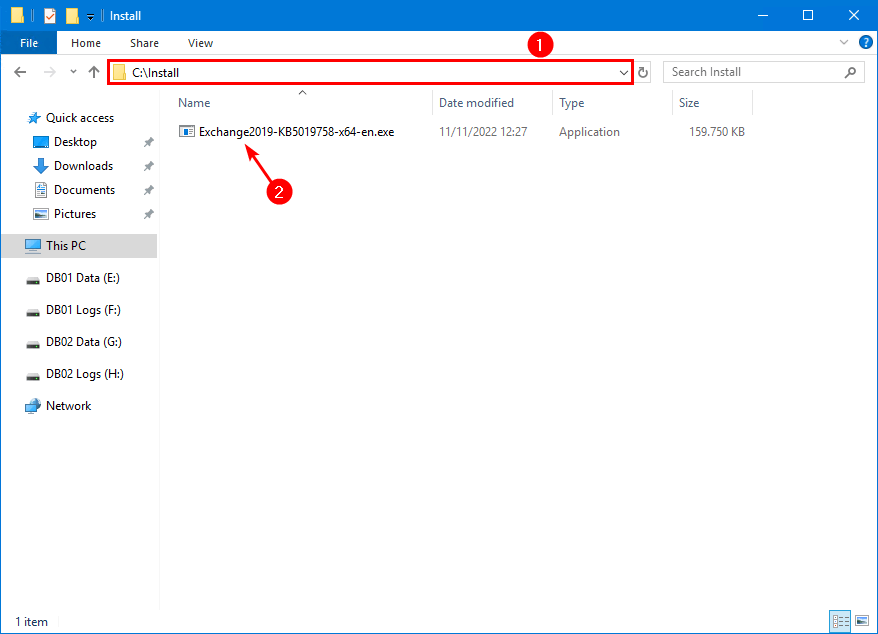
Place the Exchange Security Update on the Exchange Server C:\install folder. If you don’t have an install folder, create one.
Put Exchange Server in maintenance mode
Read more in the article Put Exchange Server in maintenance mode.
Sign in to Exchange Server EX01-2019. Run Exchange Management Shell as administrator. Set the Hub Transport Service to draining. It will stop accepting any more messages.
[PS] C:\>Set-ServerComponentState -Identity "EX01-2019" -Component HubTransport -State Draining -Requester MaintenanceRedirect any queued messages to EX02-2019. The target Server value has to be the target server’s FQDN. The target server shouldn’t be in maintenance mode.
[PS] C:\>Redirect-Message -Server "EX01-2019" -Target "EX02-2019.exoip.local"

Confirm
Are you sure you want to perform this action?
Redirecting messages to "EX02-2019.exoip.local".
[Y] Yes  [A] Yes to All  [N] No  [L] No to All  [?] Help (default is "Y"): Y
If the server is a DAG member, run the following commands. If your server is not a DAG member, skip to the command for setting ServerWideOffline.
Pause the cluster node. Suspend Server EX01-2019 from the DAG.
[PS] C:\>Suspend-ClusterNode "EX01-2019"

Name      State  Type
----      -----  ----
EX01-2019 Paused Node
Disable database copy automatic activation. This command will also move any active database copies to other DAG members. Assuming there are other healthy DAG members available. This is not instantaneous, and it can take several minutes for the moves to occur. We’ll check it in one of the following commands.
[PS] C:\>Set-MailboxServer "EX01-2019" -DatabaseCopyActivationDisabledAndMoveNow $trueMake a note of the database copy automatic activation policy on the server. You can set it back to this value at the end of maintenance. The default setting is Unrestricted.
[PS] C:\>Get-MailboxServer "EX01-2019" | Select DatabaseCopyAutoActivationPolicy

DatabaseCopyAutoActivationPolicy
--------------------------------
                    Unrestricted
Set it to Blocked to prevent any of the databases from becoming Active.
[PS] C:\>Set-MailboxServer "EX01-2019" -DatabaseCopyAutoActivationPolicy BlockedCheck for any database copies that are still mounted on the server. It may take a while for the Active databases to move. This command should return no results. If any database copies are still active on the server and other DAG members host copies of the database, perform a manual switchover.
[PS] C:\>Get-MailboxDatabaseCopyStatus -Server "EX01-2019" | Where {$_.Status -eq "Mounted"} | ft -AutoSizeOnce the active databases have been moved, we will check the transport queue. Queues should be empty or almost empty, as we will be disabling all server components. Any emails still pending in the queues will have a delay in delivery till the server is taken out from maintenance mode.
[PS] C:\>Get-Queue

Identity             DeliveryType Status MessageCount Velocity RiskLevel OutboundIPPool NextHopDomain
--------             ------------ ------ ------------ -------- --------- -------------- -------------
EX01-2019\Submission Undefined    Ready  0            0        Normal    0              Submission
Put the Server EX01-2019 into maintenance mode.
[PS] C:\>Set-ServerComponentState "EX01-2019" -Component ServerWideOffline -State Inactive -Requester MaintenanceCheck the load balancer
Do you have the Exchange Server configured in a load balancer? Verify that the load balancer health checks have taken the server out of the pool or marked it as offline/inactive. If the load balancer does not automatically do this, manually mark the server as offline/inactive. Sign in to your load balancer and set any virtual services you have to disable any connections to Server EX01-2019. Typically there would be SMTP and HTTPS virtual services. This will force any future connections to Server EX01-2019.
How to verify Exchange Server is in maintenance mode
Verify if the Exchange Server EX01-2019 has been placed into maintenance mode. All components should show Inactive except for Monitoring and RecoveryActionsEnabled.
[PS] C:\>Get-ServerComponentState "EX01-2019" | Select Component, State

Component                     State
---------                     -----
ServerWideOffline          Inactive
HubTransport               Inactive
FrontendTransport          Inactive
Monitoring                   Active
RecoveryActionsEnabled       Active
AutoDiscoverProxy          Inactive
ActiveSyncProxy            Inactive
EcpProxy                   Inactive
EwsProxy                   Inactive
ImapProxy                  Inactive
OabProxy                   Inactive
OwaProxy                   Inactive
PopProxy                   Inactive
PushNotificationsProxy     Inactive
RpsProxy                   Inactive
RwsProxy                   Inactive
RpcProxy                   Inactive
XropProxy                  Inactive
HttpProxyAvailabilityGroup Inactive
ForwardSyncDaemon          Inactive
ProvisioningRps            Inactive
MapiProxy                  Inactive
EdgeTransport              Inactive
HighAvailability           Inactive
SharedCache                Inactive
MailboxDeliveryProxy       Inactive
RoutingUpdates             Inactive
RestProxy                  Inactive
DefaultProxy               Inactive
Lsass                      Inactive
RoutingService             Inactive
E4EProxy                   Inactive
CafeLAMv2                  Inactive
LogExportProvider          Inactive
Install Exchange Server Security Update
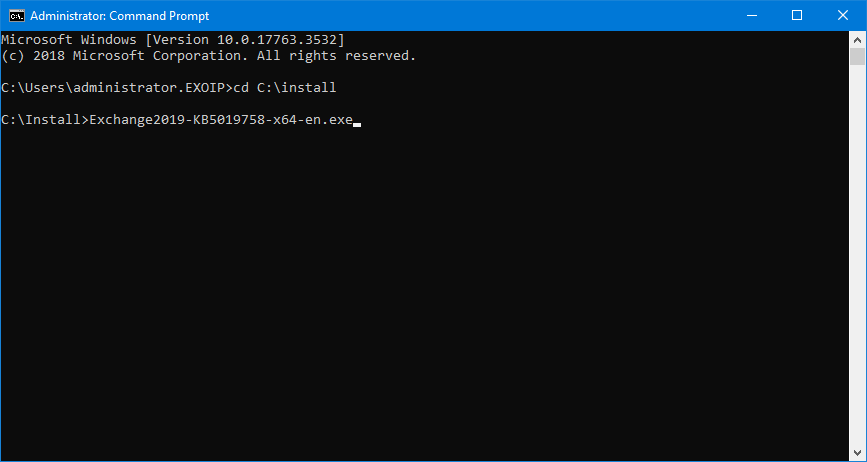
Run Command Prompt as administrator on the Exchange Server and browse to the C:\install path. After that, type in the file name and click on Enter.
Important: Install the Exchange Security Update through Command Prompt with administrator privileges.
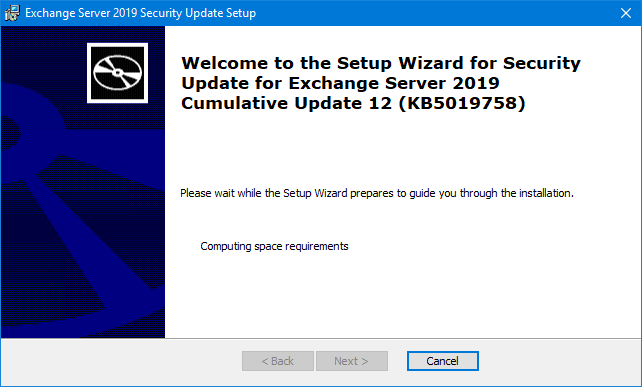
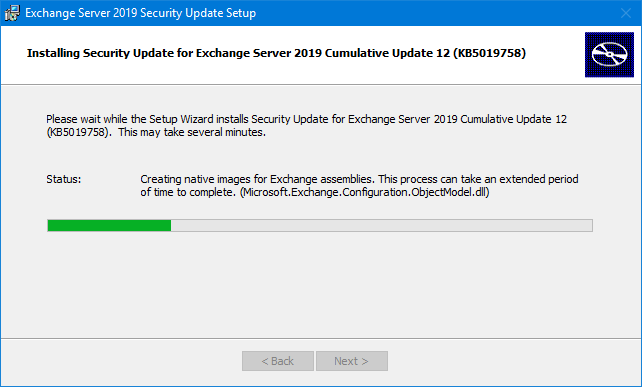
Wait for the setup to compute space requirements.
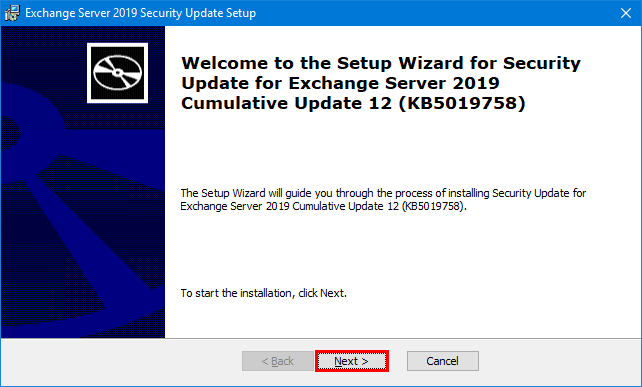
Click on Next.
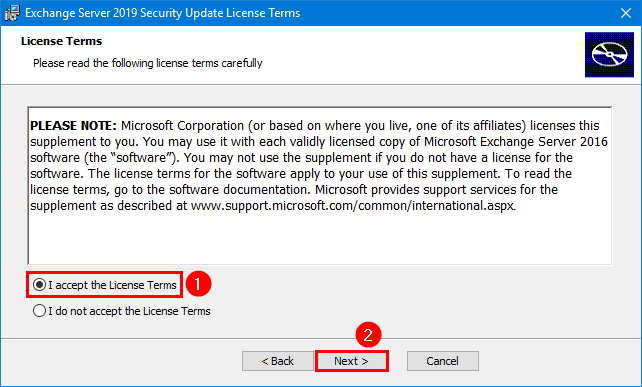
Accept the License Terms and click on Next.
The Security Update installation for Exchange Server will:
- Stop the services
- Copy the files
- Create backup files
- Install the files
- Start the services
- Remove backup files
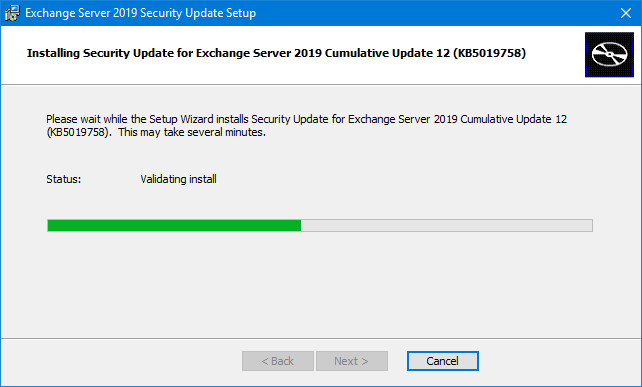
One more screen as the Exchange Security Update installation proceeds further.
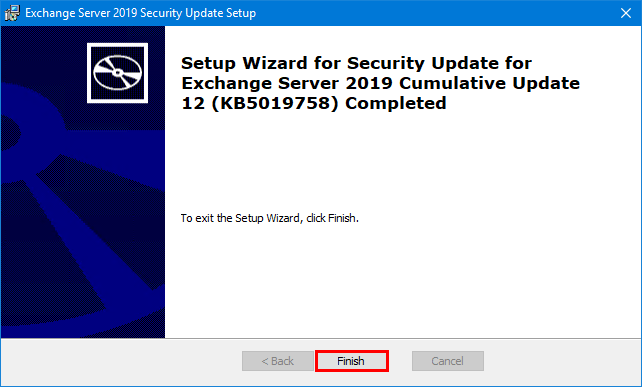
The Exchange Security update finished. Click Finish.
Click Yes to restart the Exchange Server.
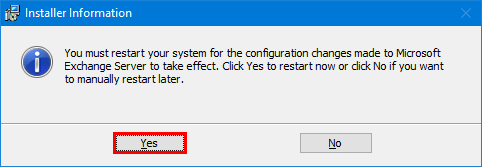
Note: You might not get a reboot message shown. Always reboot the Exchange Server after a Security Update.
Testing
Check the event logs by filtering for errors and warnings. If there are errors, make sure to troubleshoot and fix them.
Take Exchange Server out of maintenance mode
Read more in the article Take Exchange Server out of maintenance mode.
After the update, we like to get the Exchange Server EX01-2019 active again. So, let’s remove the server from maintenance mode.
Run Exchange Management Shell as administrator and run the commands.
Note: Only the first and last commands are necessary if the server is not a DAG member. If the server is a DAG member, you need to run all the commands.
Use the database copy auto-activation policy value that was set on the server. The default is Unrestricted.
[PS] C:\>Set-ServerComponentState "EX01-2019" -Component ServerWideOffline -State Active -Requester Maintenance

[PS] C:\>Resume-ClusterNode -Name "EX01-2019"

[PS] C:\>Set-MailboxServer "EX01-2019" -DatabaseCopyAutoActivationPolicy Unrestricted

[PS] C:\>Set-MailboxServer "EX01-2019" -DatabaseCopyActivationDisabledAndMoveNow $false

[PS] C:\>Set-ServerComponentState "EX01-2019" -Component HubTransport -State Active -Requester Maintenance
Rebalance Database Availability Groups
Read more in the article Balance mailbox databases in Exchange DAG.
Throughout the update process, the database copies will move between DAG members. Return your active database copies to their most preferred DAG member. Use the PowerShell script supplied by Microsoft.
[PS] C:\>cd $exscripts

[PS] C:\Program Files\Microsoft\Exchange Server\V15\scripts\>.\RedistributeActiveDatabases.ps1 -DagName "DAG01-2019" -BalanceDbsByActivationPreference -SkipMoveSuppressionChecks
Verify out of maintenance mode
Verify if the Exchange Server EX01-2019 is back up and running. Run the following commands.
The cluster node needs to have the state up.
[PS] C:\>Get-ClusterNode "EX01-2019"

Name      State Type
----      ----- ----
EX01-2019 Up    Node
Check that the cluster node has the state up on all the Exchange Servers.
[PS] C:\>Get-ClusterNodeCheck that all the required services are running.
[PS] C:\>Test-ServiceHealth "EX01-2019"


Role                    : Mailbox Server Role
RequiredServicesRunning : True
ServicesRunning         : {IISAdmin, MSExchangeADTopology, MSExchangeDelivery, MSExchangeIS, MSExchangeMailboxAssistants, MSExchangeRepl, MSExchangeRPC, MSExchangeServiceHost,
                          MSExchangeSubmission, MSExchangeThrottling, MSExchangeTransportLogSearch, W3Svc, WinRM}
ServicesNotRunning      : {}

Role                    : Client Access Server Role
RequiredServicesRunning : True
ServicesRunning         : {IISAdmin, MSExchangeADTopology, MSExchangeMailboxReplication, MSExchangeRPC, MSExchangeServiceHost, W3Svc, WinRM}
ServicesNotRunning      : {}

Role                    : Hub Transport Server Role
RequiredServicesRunning : True
ServicesRunning         : {IISAdmin, MSExchangeADTopology, MSExchangeEdgeSync, MSExchangeServiceHost, MSExchangeTransport, MSExchangeTransportLogSearch, W3Svc, WinRM}
ServicesNotRunning      : {}
Check that the required services are running on all the Exchange Servers.
[PS] C:\>Get-ExchangeServer | Test-ServiceHealthTest the MAPI Connectivity.
[PS] C:\>Test-MAPIConnectivity -Server "EX01-2019"

MailboxServer           Database            Result    Error
-------------           --------            ------    -----
EX01-2019               DB01                Success
EX01-2019               DB03                Success
Test the MAPI Connectivity on all the Exchange Servers.
[PS] C:\>Get-ExchangeServer | Test-MAPIConnectivityGet the result of the DAG Copy Status Health.
[PS] C:\>Get-MailboxDatabaseCopyStatus -Server "EX01-2019" | Sort Name | Select Name, Status, Contentindexstate

Name           Status  ContentIndexState
----           ------  -----------------
DB01\EX01-2019 Mounted      NotApplicable
DB02\EX01-2019 Healthy      NotApplicable
DB03\EX01-2019 Mounted      NotApplicable
DB04\EX01-2019 Healthy      NotApplicable
Get the result of the DAG Copy Status Health on all the Exchange Servers.
[PS] C:\>Get-MailboxDatabaseCopyStatus * | Sort Name | Select Name, Status, ContentindexstateCheck the Replication Health.
[PS] C:\>Test-ReplicationHealth -Server "EX01-2019"

Server          Check                      Result     Error
------          -----                      ------     -----
EX01-2019       ClusterService             Passed
EX01-2019       ReplayService              Passed
EX01-2019       ActiveManager              Passed
EX01-2019       TasksRpcListener           Passed
EX01-2019       TcpListener                Passed
EX01-2019       ServerLocatorService       Passed
EX01-2019       DagMembersUp               Passed
EX01-2019       MonitoringService          Passed
EX01-2019       ClusterNetwork             Passed
EX01-2019       QuorumGroup                Passed
EX01-2019       FileShareQuorum            Passed
EX01-2019       DatabaseRedundancy         Passed
EX01-2019       DatabaseAvailability       Passed
EX01-2019       DBCopySuspended            Passed
EX01-2019       DBCopyFailed               Passed
EX01-2019       DBInitializing             Passed
EX01-2019       DBDisconnected             Passed
EX01-2019       DBLogCopyKeepingUp         Passed
EX01-2019       DBLogReplayKeepingUp       Passed
Check the Replication Health on all the Exchange Servers.
[PS] C:\>Get-DatabaseAvailabilityGroup | Select -ExpandProperty:Servers | Test-ReplicationHealth | Sort NameVerify the Database Activation Policy is set to Unrestricted.
[PS] C:\>Get-MailboxServer "EX01-2019" | Select Name, DatabaseCopyAutoActivationPolicy

Name      DatabaseCopyAutoActivationPolicy
----      --------------------------------
EX01-2019                     Unrestricted
Verify the Database Activation Policy is set to Unrestricted on all the Exchange Servers.
[PS] C:\>Get-MailboxServer | Select Name, DatabaseCopyAutoActivationPolicyLoad balancer
Do you have the Exchange Server configured in a load balancer? Verify that the load balancer health checks have taken the server in the pool or marked it as online/active. If the load balancer does not automatically do this, manually mark the server as online/active. Sign in to your load balancer and set any virtual services you have to enable any connections to Server EX01-2019. Typically there would be SMTP and HTTPS virtual services. This will enable connections to Server EX01-2019.
Verify Exchange Security Update installation
Go to Control Panel > Programs and Features. Check the Exchange Server version in the program list.
The update sometimes does not change the Exchange Server Cumulative Update version. That’s because the Programs and Features window is not reliable as PowerShell.
Click on View installed updates.
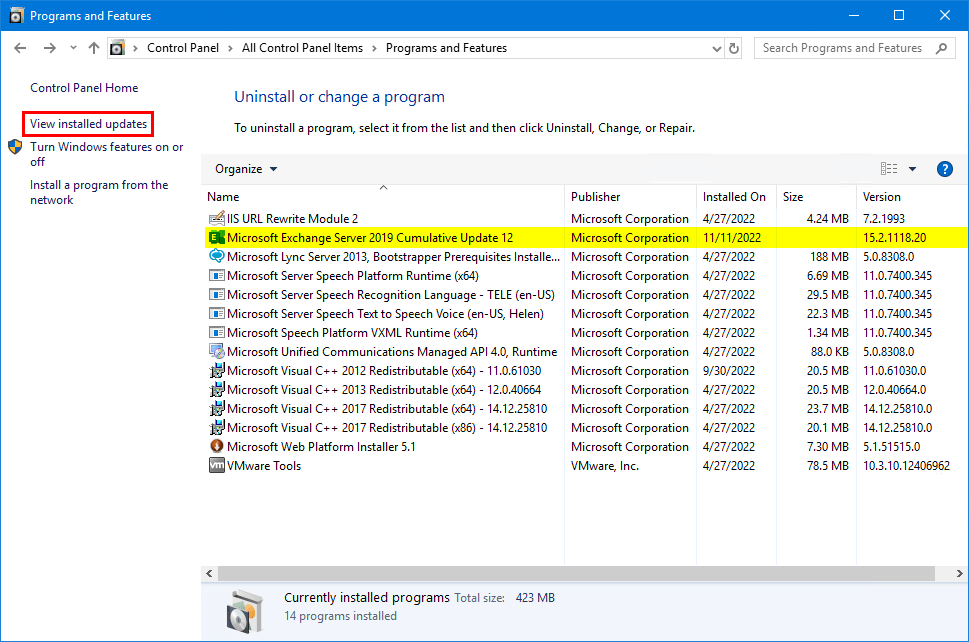
Verify that the Security Update for Exchange Server appears in the list. In this example, it’s Security Update for Exchange Server 2019 Cumulative Update 12 (KB5019758).
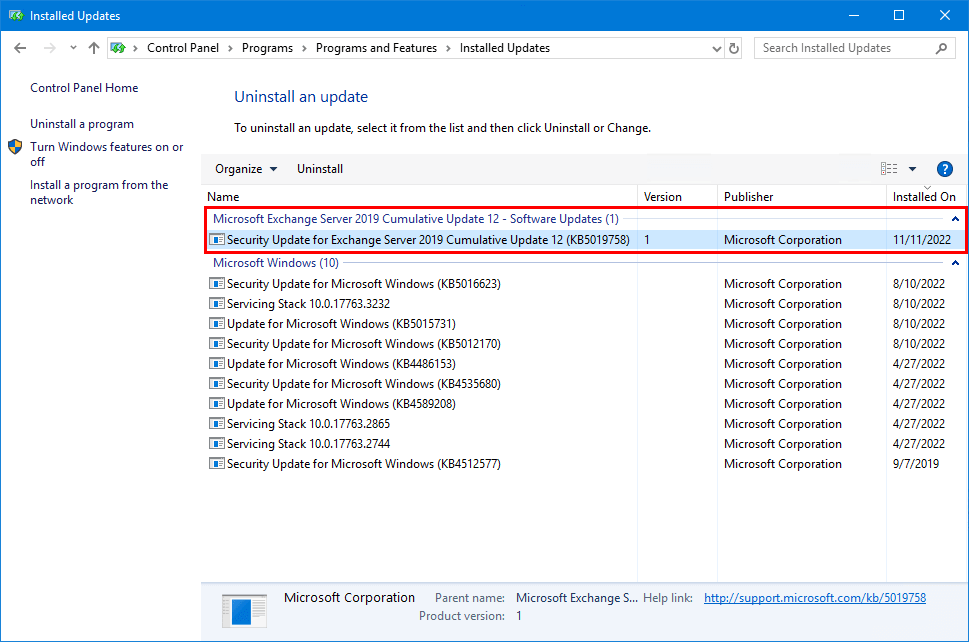
The Exchange Server Security Update is installed successfully.
Install Security Update on all Exchange Servers
Do you have more than one Exchange Server running in the organization? Do the same steps on all the Exchange Servers. It can be the:
- Exchange Mailbox server
- Exchange Edge server
- Exchange Hybrid server
Check that Exchange Server is up to date
Read more in the article Microsoft Exchange Server vulnerability check.
How to verify that all the Exchange Servers in the organization are up to date? Run the Exchange Health Checker script (make sure you download the latest version from GitHub).
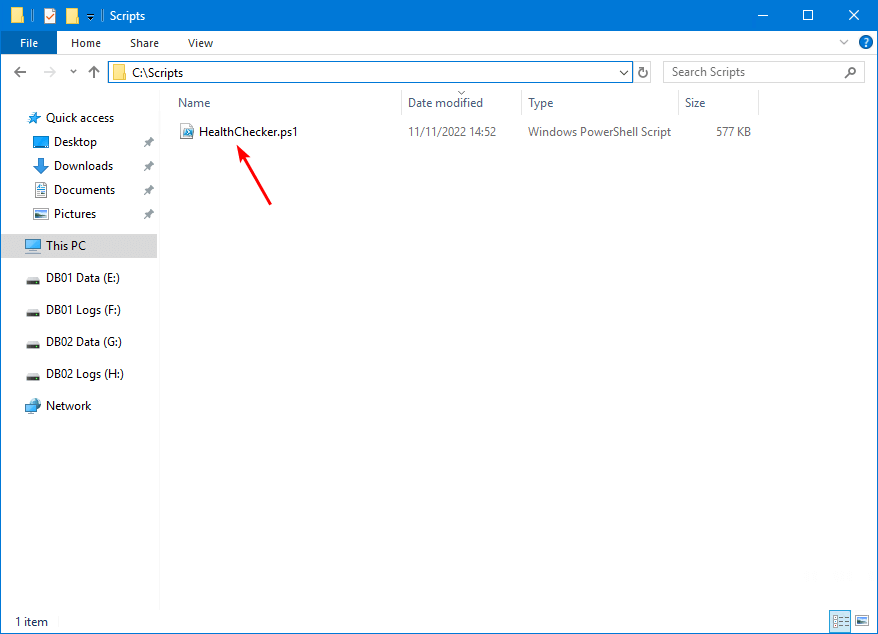
Download and place the HealthChecker.ps1 PowerShell script on the Exchange Server C:\scripts folder. If you don’t have a scripts folder, create one. Ensure that the file is unblocked to prevent any errors when running the script. Read more in the article Not digitally signed error when running PowerShell script.
Create Exchange Servers report
Run Exchange Management Shell as administrator. Change the path to the scripts folder.
[PS] C:\>cd C:\scripts
[PS] C:\scripts>
Verify the signature before running the script with the Get-AuthenticodeSignature cmdlet.
[PS] C:\scripts>Get-AuthenticodeSignature -FilePath ".\HealthChecker.ps1" | ft -AutoSize


    Directory: C:\scripts


SignerCertificate                        Status Path
-----------------                        ------ ----
AFBF0B8B6A18F7E23CCA1DDCD0AC1A55B4035173 Valid  HealthChecker.ps1
Run the cmdlet to create a report for all Exchange Servers. It will run the HTML report and open it automatically.
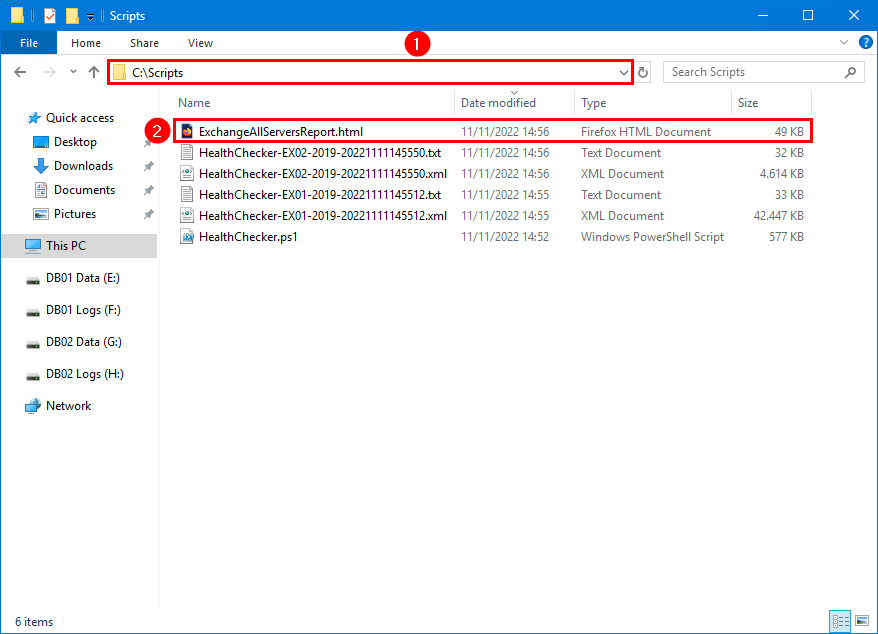
[PS] C:\scripts>Get-ExchangeServer | ?{$_.AdminDisplayVersion -Match "^Version 15"} | .\HealthChecker.ps1; .\HealthChecker.ps1 -BuildHtmlServersReport -HtmlReportFile "ExchangeAllServersReport.html"; .\ExchangeAllServersReport.htmlIf the report does not open automatically, you can find the report in the C:\scripts folder.
Check Exchange Servers report for vulnerabilities
The HTML Report will show as below screen. All looks great because the environment got two Exchange Servers with the mailbox role. Both of them are on Exchange 2019 CU12 and patched. The column Security Vulnerabilities shows both Exchange Servers as None.
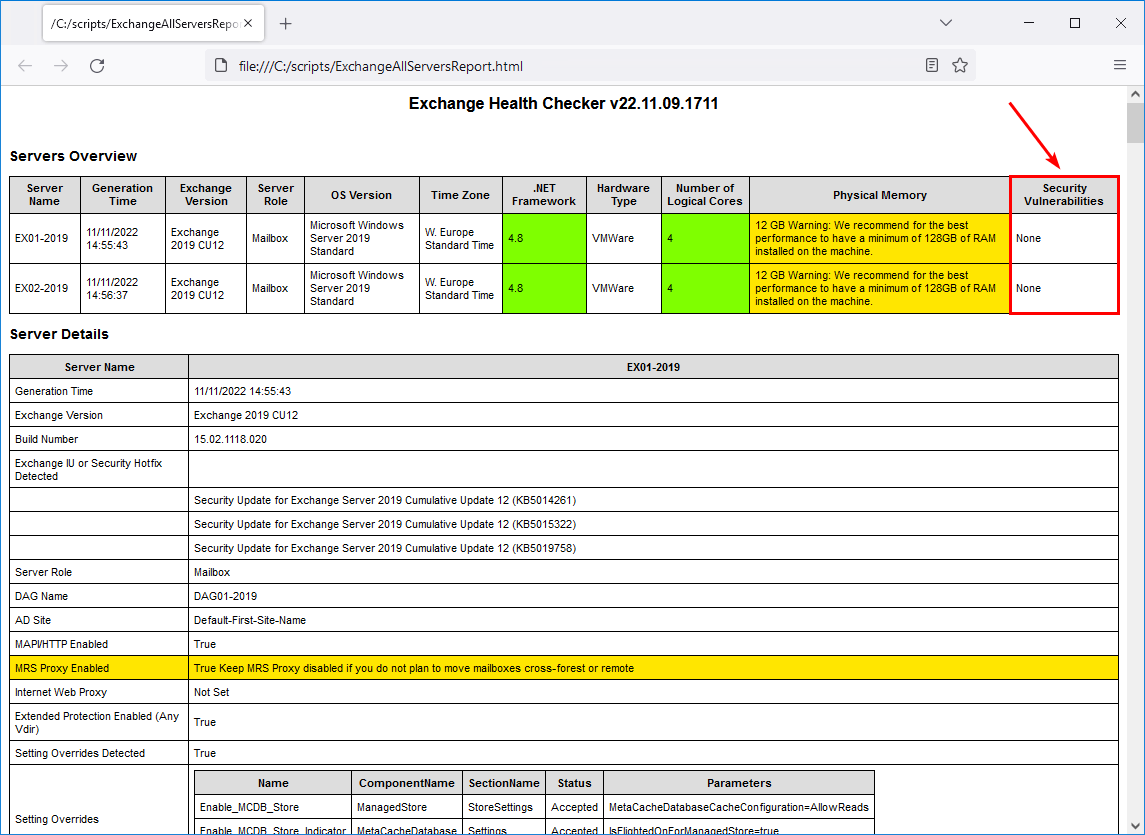
If you’re not up to date or not patched, it will show you that you’re vulnerable. Do you see red or yellow warnings in the Exchange Server report? Look into it and fix it!
Conclusion
You learned how to install Exchange Security Updates step by step. It’s important to have the Exchange Servers up to date to simplify pushing the Security Updates. When new security patches are rolling out, you don’t have to update to the latest CU and patch, which takes much more time than immediately patching because you are already on the latest CU.
Did you enjoy this article? You may also like Restart Exchange services with PowerShell script. Don’t forget to follow us and share this article.
What Others Are Reading

Hello,
could we use the check for updates menu present when running a CU to install the SU?
I mean by this is it via this method the download and installation will be automatic for SU?
Or do you recommend going directly to the higher CU, for example I am in CU11, putting the CU12 directly without going through the SUs of the CU11, or even going from the CU to the CU13 without intermediate steps?
Thanks
Is it recommended to apply the security package for exchange servers through Wsus?
What a smart way to write all technical articles in such a simple method. Everything looks like crystal clear and understandable. simply marvelous
Hi Ali!
Awesome information, as always!
I have a question though:
What if we have only 1 Exchange server (Hybrid) and need to install the security update? No DAG and no secondary Exchange server present. Should I schedule a downtime for mail flow? Is the update time different/longer than a normal Windows CU update? This will be my first time installing a security update and I want to make sure I don’t break something! 🙂 Thanks!
Glad to hear, Tina.
The Exchange SU installation is much faster than an Exchange CU.
Do the SU update after working hours and schedule a downtime of 1 hour. This way, you have time to check the mail flow:
1. Test internal mail flow in Exchange Server
2. Test inbound mail flow in Exchange Server
3. Test outbound mail flow in Exchange Server
If you follow this article step by step, you should be all good.
Hi.
I want to install windows security update. May i follow the same steps ??
Br Reda
Apologies for the late comment, but I’ve recently found your article and I’m curious as to whether or not you can use PowerShell to apply the same SU, from an elevated PowerShell prompt.
I’ve tried to in the past, and it’s almost like the PowerShell prompt doesn’t have enough privilege to stop services, because it will always tell me that there are services that it needs me to stop.
Any thoughts?
Side note: Great site and great articles!
I recommend using an elevated command prompt to run the Security Update (as shown in the article).
thank you for your tutorial
so please when the security update is deployed and installed by software center of sccm in the server
so during installation it went in error but after retrying many times and rebooting the server. the build number of exchange server changes. how can we check if every things is right.
As shown in the last step, always run the Exchange Health Checker script and ensure that there are no errors shown.
Many thanks for this accurate tutorial… really a good job !
It’s rare.
I appreciate your work too !
Pascal.
I really appreciated your work! That helps much actually. I have question hope you can answer, So in order to block OWA for external users, we created an new site in IIS and moved OWA and ECP directories to new site.
Do I need to revert settings back before installing Exchange security patchs or cumulative updates?
Thanks
Dear Ali
Thanks for your fantastic blog
But after i run the last command about create html report i get below error
.\ExchangeAllServersReport.html : The term ‘.\ExchangeAllServersReport.html’ is not recognized as the name of a cmdlet, function, script file, or operable program. Check the spelling of the name, or if a path was included, verify that the path is correct and try again. At line:1 char:155
i check everything seems right.
what’s your idea?
Hi Mahdi,
Thank you for visiting and that you find my blog fantastic!
It seems you didn’t copy the whole command, which is:
Read more about the Exchange Server health check with PowerShell script.
If I have multiple security updates to install, can I install both and then reboot or should I: update, reboot, update, reboot?
The Exchange Server Security Updates are cumulative. If you are running the CU that the SU can be installed on, you do not need to install all the SUs in sequential order but can install the latest SU only.
hi ,
after upgrade exch 2016 to cu21 and installed july security update
our owa and ecp broken and i got error 1003 in event viewer.
can help please
The error shows up because the Exchange Server Open Authentication (OAuth) certificate is expired, not present, or not configured correctly.
To solve the error, follow these steps: Renew Microsoft Exchange Server Auth Certificate.
hi thank you all for sharing this informations, I apreciate that.
after following all update installation steps, it seems the owa is blocket , when connecting from the internet.
I’ve been unable to find a definitive answer on this. If there was an issue installing an Exchange Security update (NOT a CU, but a monthly Exchange security update), such as server crashing during the update or forgetting to disable AV and it messes with the update, can you uninstall an Exchange Security update,and then try to re-install it? Or are Security updates similar to CUs where uninstalling it will actually uninstall Exchange?
Yes, you can uninstall the Exchange Security Update. The Exchange Server will remain in place.
I recommend rerunning the Security Update from Command Prompt (high privileges) instead of uninstalling and installing it again. It takes less time. But, as I said earlier, you can uninstall it. Don’t forget to reboot after each task.
Also, I have seen that Exchange OWA/ECP sometimes will not work after a Security Update install/uninstall/reinstall. When that happens, run the RestartExchangeServices.ps1 PowerShell script to get that fixed. I did write about the script in the article Restart Exchange Services with PowerShell script.
Many thanks for this step-by-step tutorial…really appreciated your work!
Hi Ali,
Thanks for this article, but after i applied the april 2021 patch, there are so many component states that become inactive.
Thanks for the tip on the temporarily stopping antivirus and backups. I normally do all of your steps except those two, and can see where there would be value in doing that.