How to bulk remove users from AD security group with PowerShell? You can select multiple…
Manage Microsoft Office with Group Policy
In the previous article, we discussed how to install Administrative Template files for Microsoft Office. The next step is to manage Microsoft Office settings with Group Policy. The same settings and actions apply to Microsoft 365. In this article, you will learn how to create Microsoft Office Group Policy with administrative templates.
Table of contents
Group Policy Management
Group Policy allows the system administrators to have centralized control of users and computers joined to the domain. Some of the things that you can do with the Group Policy Management Console:
- Quick and easy configuration changes to users and computers
- Security configuration
- One console to manage all settings
- Restrict setting to particular users and computers
- Deploy software to machines
Create Group Policy Object
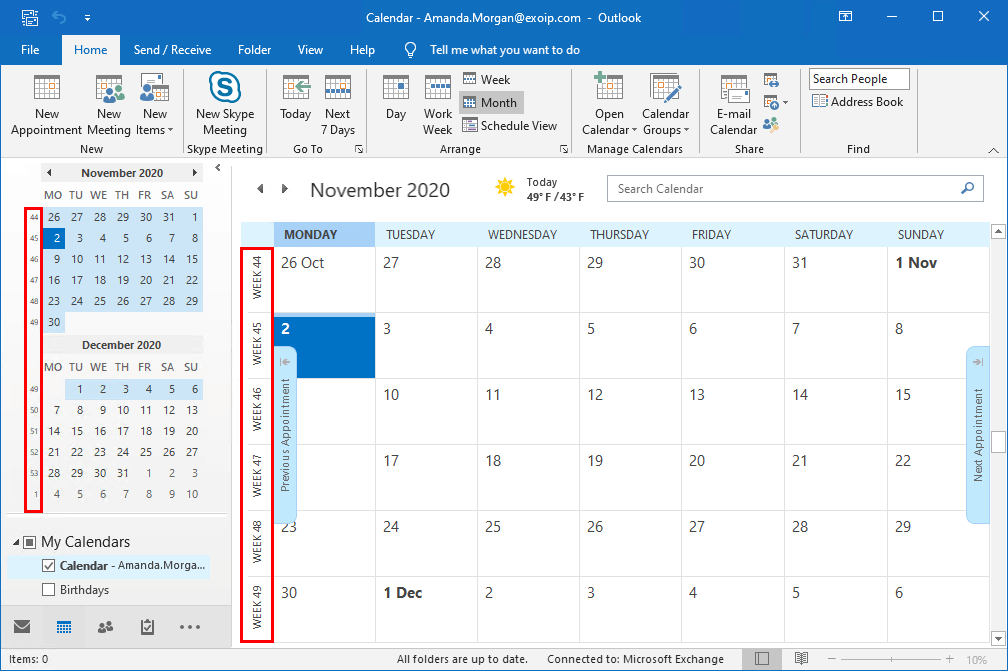
In our example, we will create a new policy for Outlook. We like to enable week numbers in Outlook calendar for all the users.
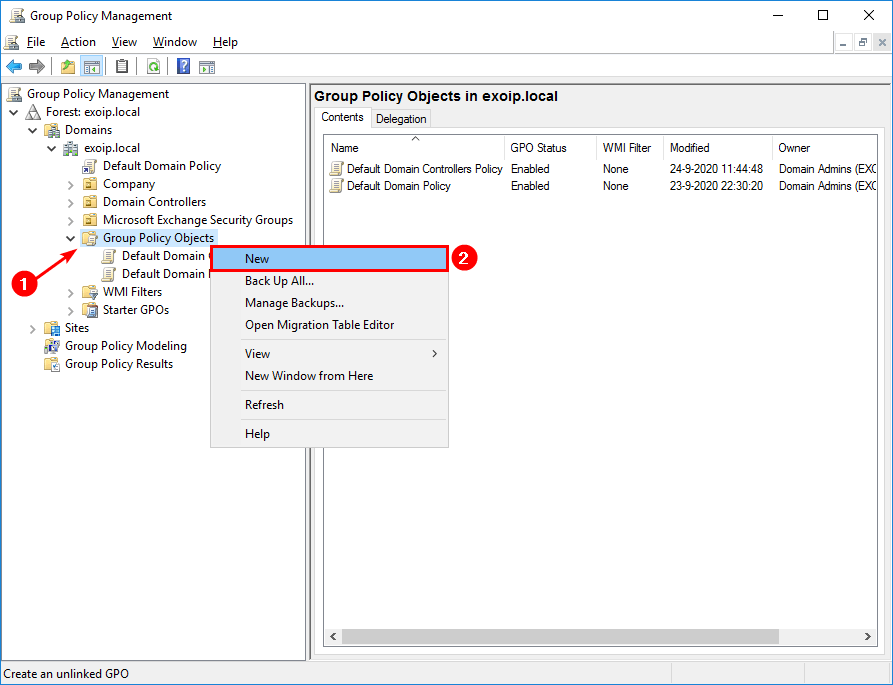
Start Group Policy Management on the management server or domain controller. Right-click Group Policy Objects and click New.
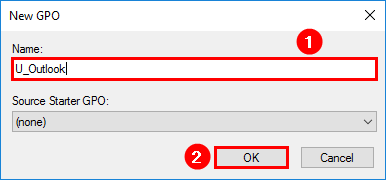
Is the new Group Policy Object (GPO) a user or computer policy? Or are you going to place user and computer policy settings in the GPO? If it’s a Computer Policy, we recommend placing a C_ in front of the group policy name. If it’s a User Policy, make it a U_. Do you want to add computer and user policy settings in a new group policy object? Name it CU_.
- C stands for Computer Policy
- U stands for User Policy
- CU stands for Computer and User Policy
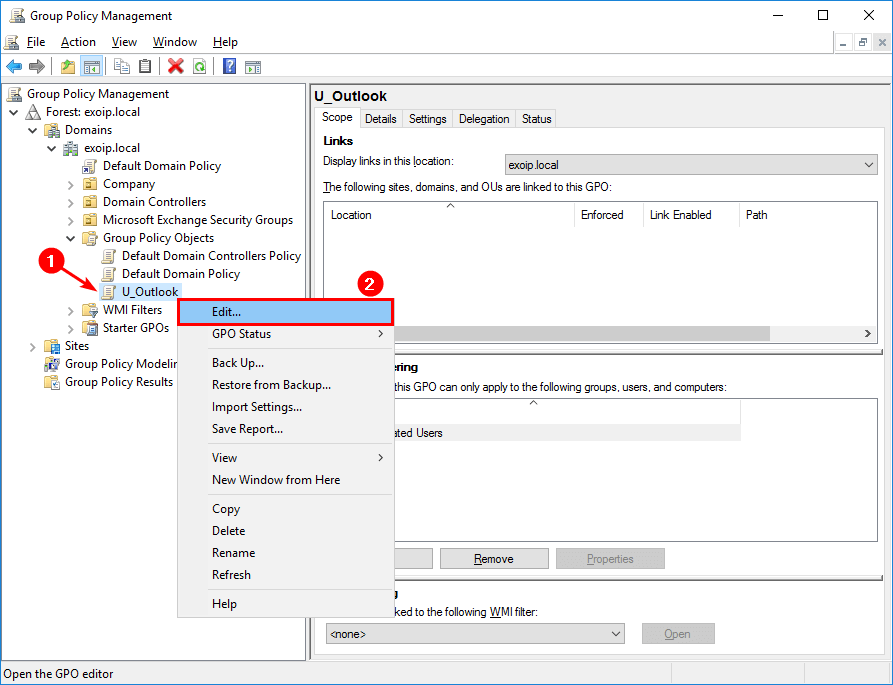
In our example, the GPO is a user policy. We will give it the name U_Outlook. All the Outlook user policies are going to be configured in this GPO from now on.
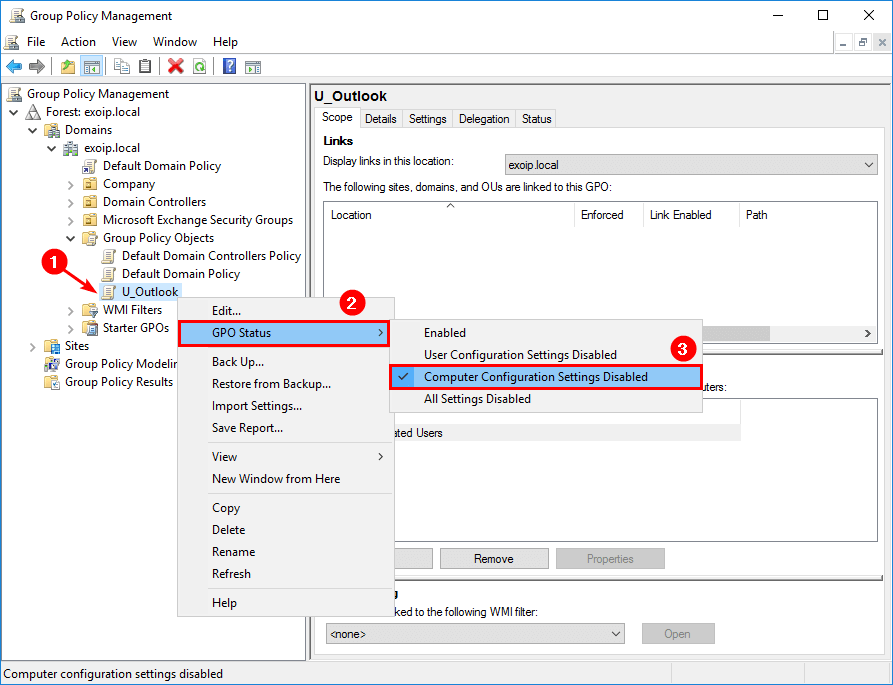
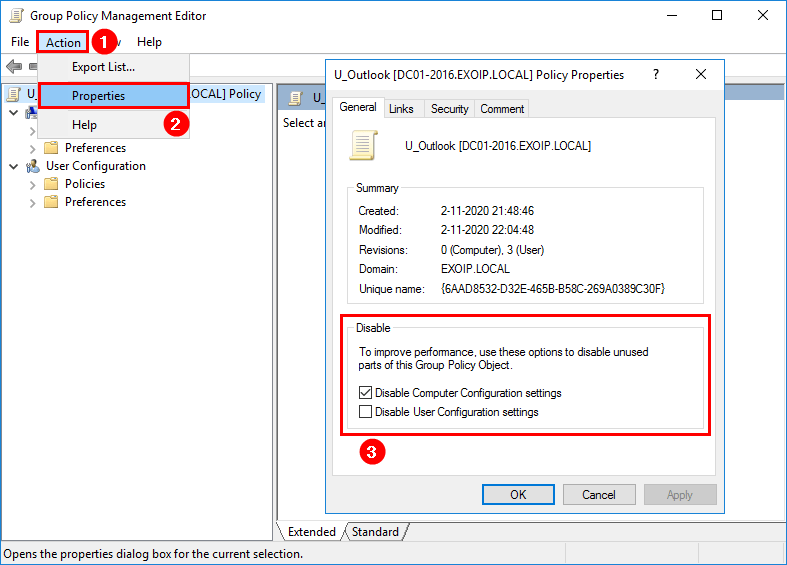
Right-click the U_Outlook GPO and click GPO Status. Select Computer Configuration Settings Disabled.
Right-click the GPO U_Outlook and click Edit.
Click Action in the toolbar. Click Properties. In the previous step, we did disable Computer Configuration settings. If we didn’t, it’s possible to do it over here.
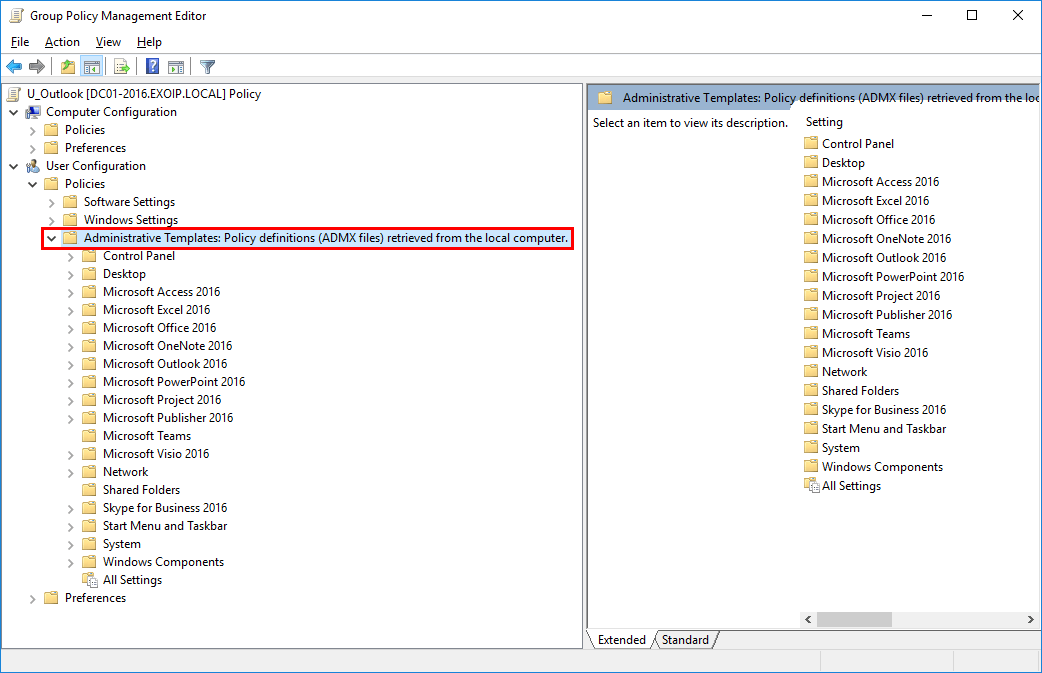
Open the User Configuration > Policies > Administrative Templates. You can see the Microsoft Office ADMX files are showing and retrieved from the local computer. If you have a central store, it will show that it did retrieve from the central store.
Read more: Create Central Store for Group Policy Administrative Templates »
Enable Group Policy settings
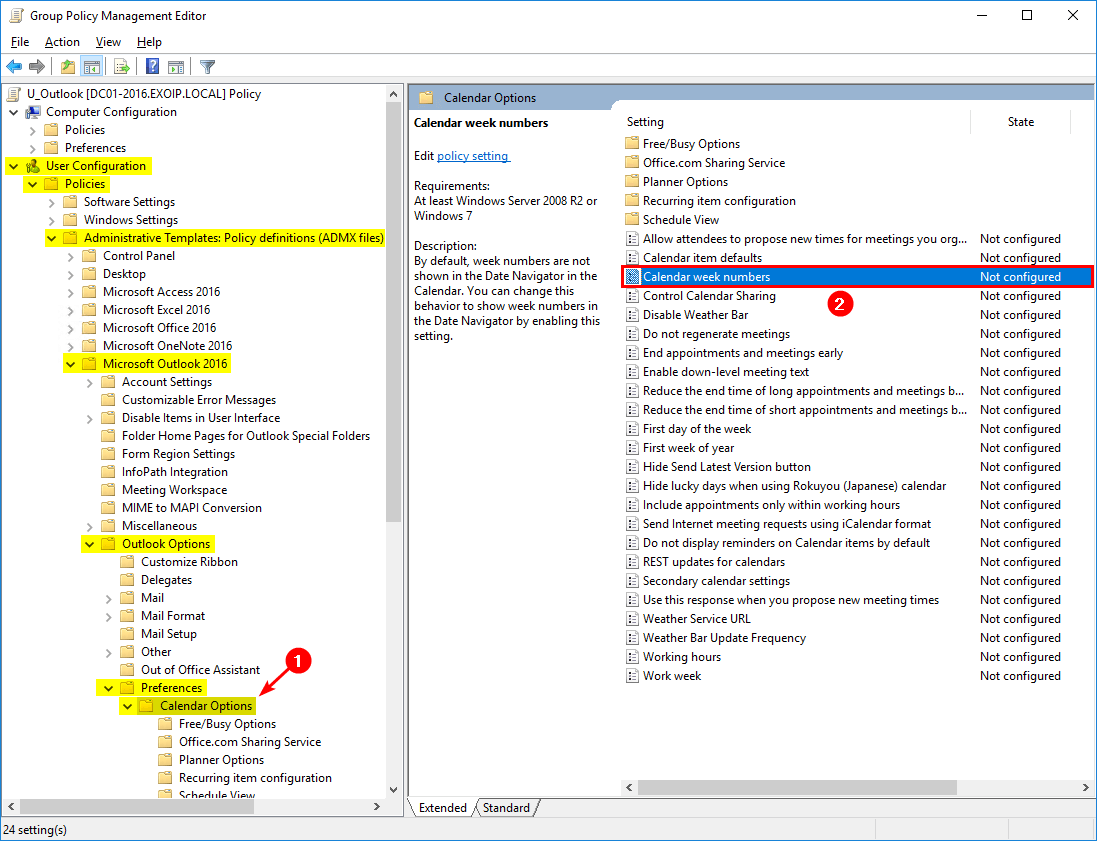
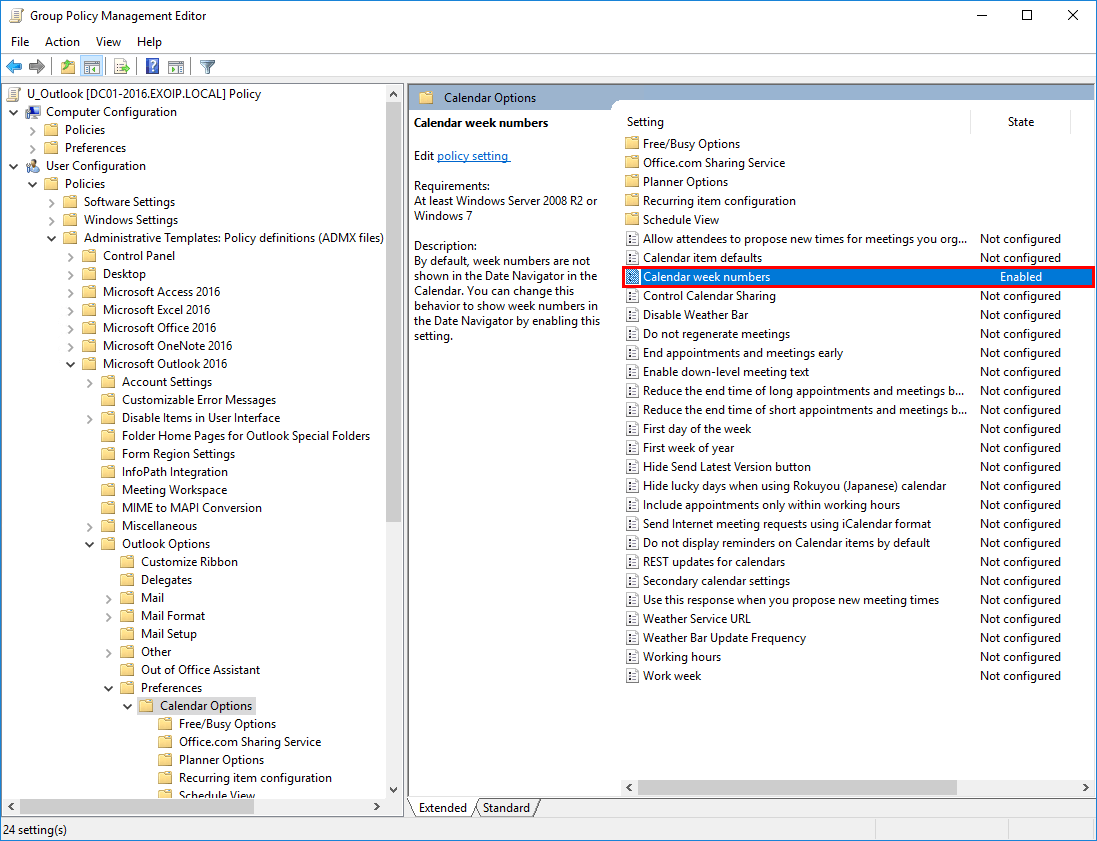
Navigate to User Configuration > Administrate Templates > Microsoft Outlook 2016 > Outlook Options > Preferences > Calendar Options.
Double-click Calender week numbers.
Select Enabled and click OK.
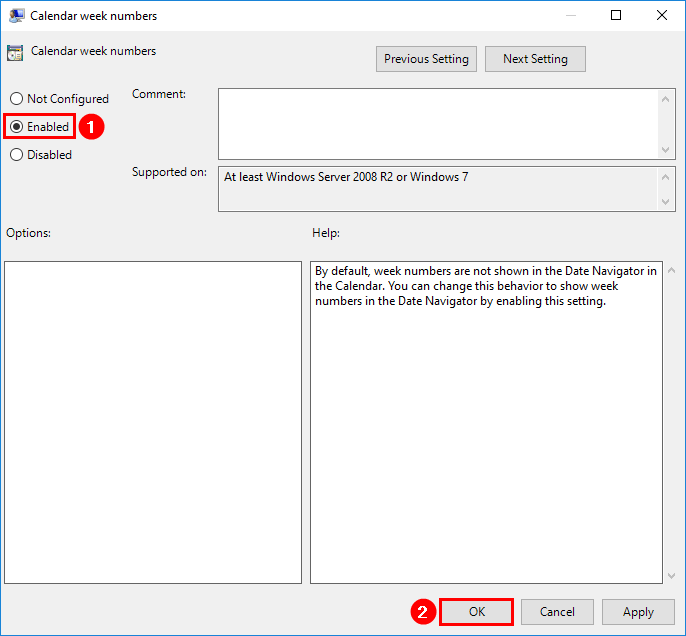
The setting Calendar week numbers will show Enabled.
Close all the windows and go back to Group Policy Management.
Link Group Policy Object
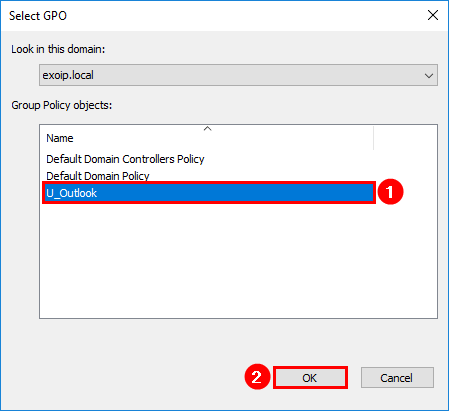
Right-click the OU and click Link an Existing GPO. In our example, it’s the OU Users.
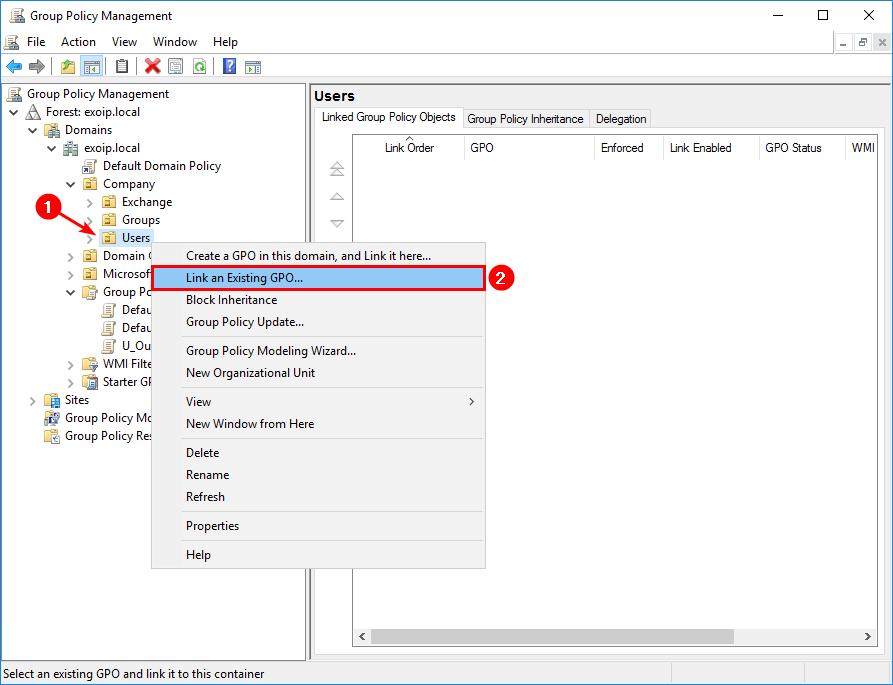
Select the Group Policy Object, U_Outlook.
Verify Office Group Policy setting
The final step is to verify that we successfully set the Group Policy. Sign in to a computer that is domain joined with Outlook installed. Run Command Prompt and type gpupdate /force. It will force update the policies to the user and computer. Start Outlook and verify that the calendar week numbers are showing.
Did this help you to manage Microsoft Office settings with Group Policy administrative templates?
Keep reading: Restart remote computer with PowerShell »
Conclusion
In this article, you learned how to manage Microsoft Office with Group Policy. Start Group Policy Management Console and create a Group Policy Object. Give it a clear name, so it’s easy to understand. Edit the GPO and navigate to the setting that you like to configure. After you configure the setting, wait for the changes to apply. If you don’t like to wait, do a Group Policy update on the machine to retrieve the policies immediately.
Did you enjoy this article? You may also like Install Exchange Server with GUI step by step. Don’t forget to follow us and share this article.
This Post Has 0 Comments