In the previous article, we did update MX records to Office 365. This time, we…
Migrate Exchange mailboxes with CSV file
We like to migrate Exchange mailboxes with a CSV file to another database. It will work the same if you want to migrate Exchange mailboxes to a new server. Before doing a batch migration with a CSV file, we need to create the CSV file. Also, a small adjustment in the CSV header needs to take place. In this article, you will learn how to migrate Exchange mailboxes with CSV file.
Table of contents
Information
Before you start, read the article New-Migrationbatch or New-MoveRequest in Exchange Server. It will give you an understanding of the available options to move mailboxes. Why do you want to migrate mailboxes in Exchange Server? Some examples:
- You installed a new Exchange Server in the organization
- The mailbox database is corrupt
- Clear available new mailbox space
- Distribute the mailboxes
Export CSV file
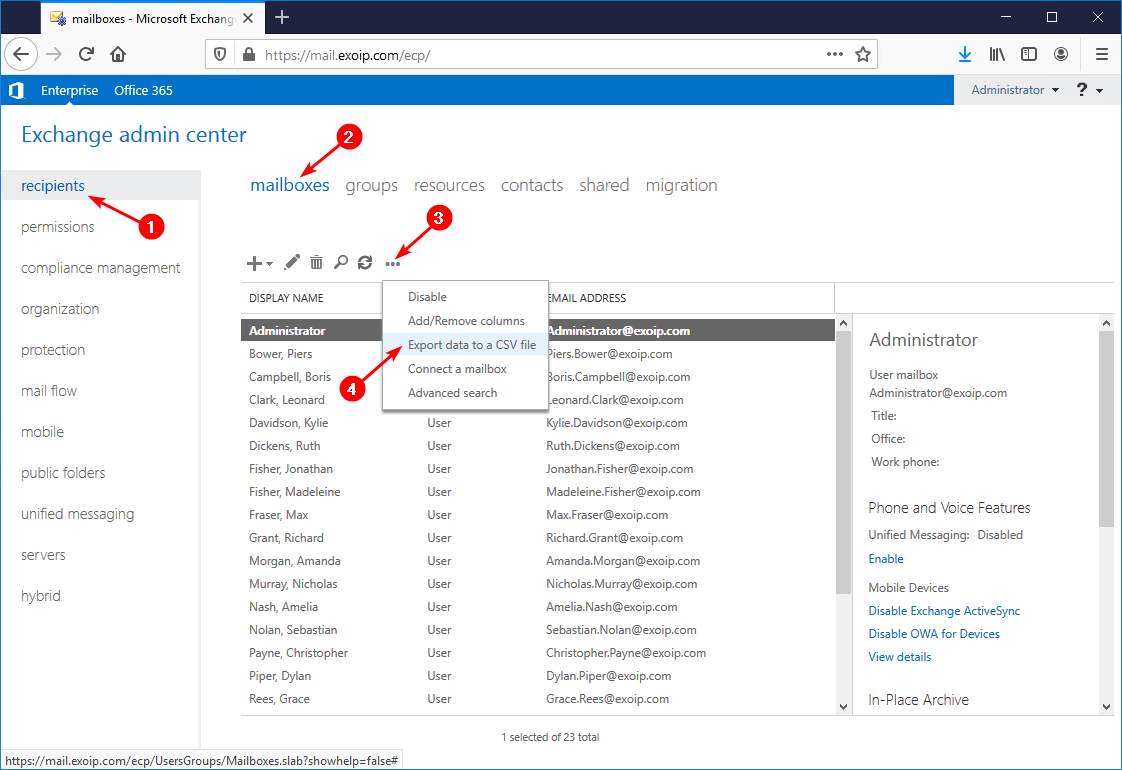
Sign in to Exchange Admin Center. Click in the feature pane on recipients and follow with mailboxes in the tabs. Click the more icon in the toolbar and click on Export data to a CSV file.
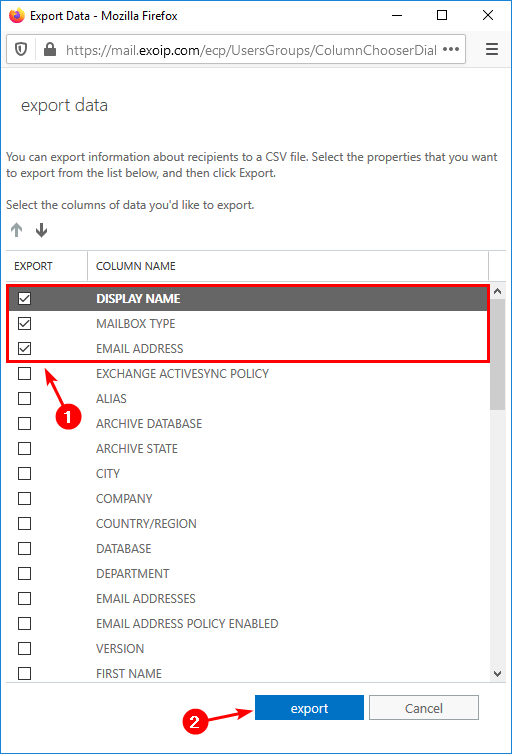
Check the checkboxes DISPLAY NAME, MAILBOX TYPE, and EMAIL ADDRESS. Click Export.
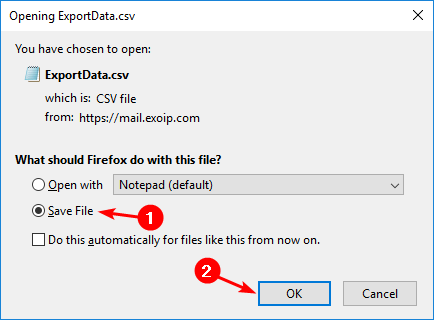
It will download the CSV file to the Downloads folder by default. If a prompt shows up, make sure to save the CSV file.
In the next step, we will edit the CSV header.
Migration batch CSV header
It’s essential to edit the CSV file before uploading the CSV file in the next step. If you don’t do that, it will not work when uploading, and an error shows up.
Read more: The given key was not present in the dictionary »
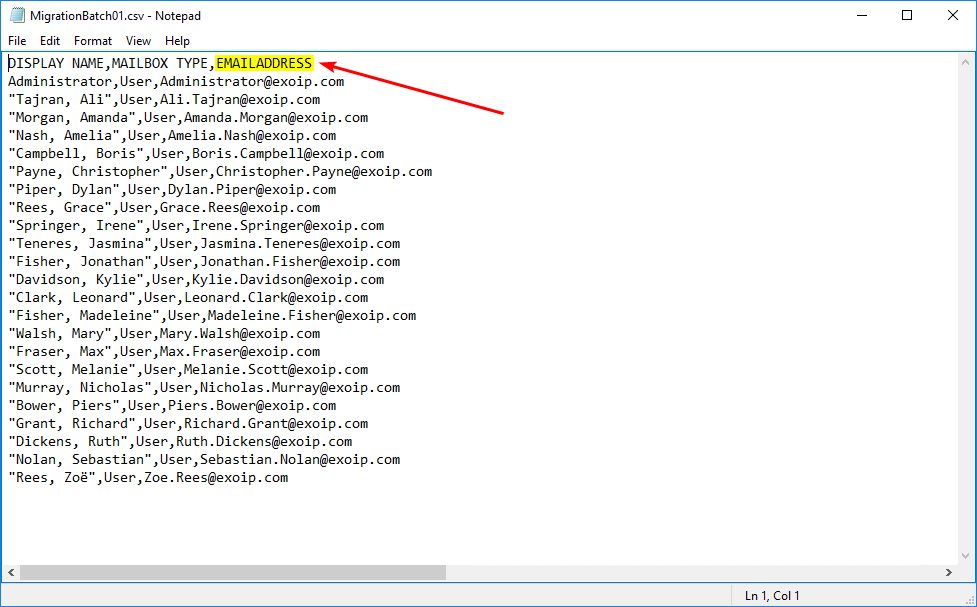
Go to the file and rename ExportData.csv to MigrationBatch01.csv.

Place good attention and edit the CSV file. Remove the space between EMAIL ADDRESS.

It needs to look like EMAILADDRESS. Save the file.
In the next step, we will create a new migration batch and upload the CSV file.
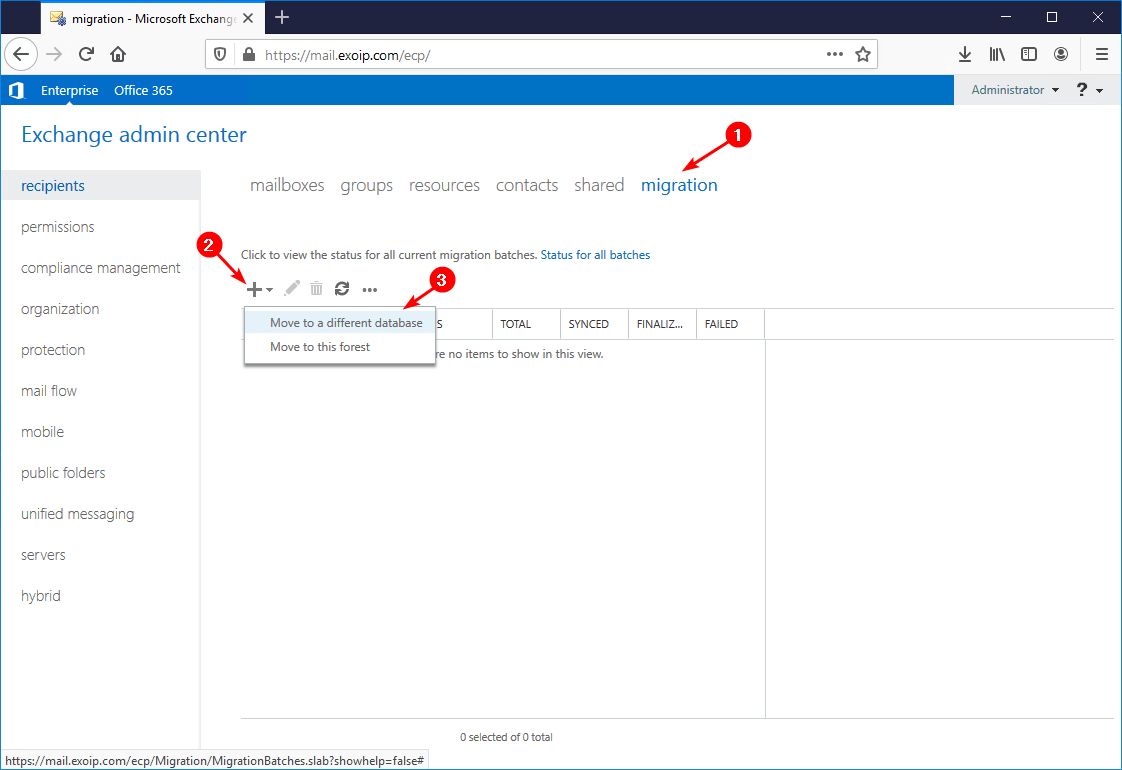
Create migration batch with CSV file
Click migration in the tabs. Click the + icon and select Move to a different database.
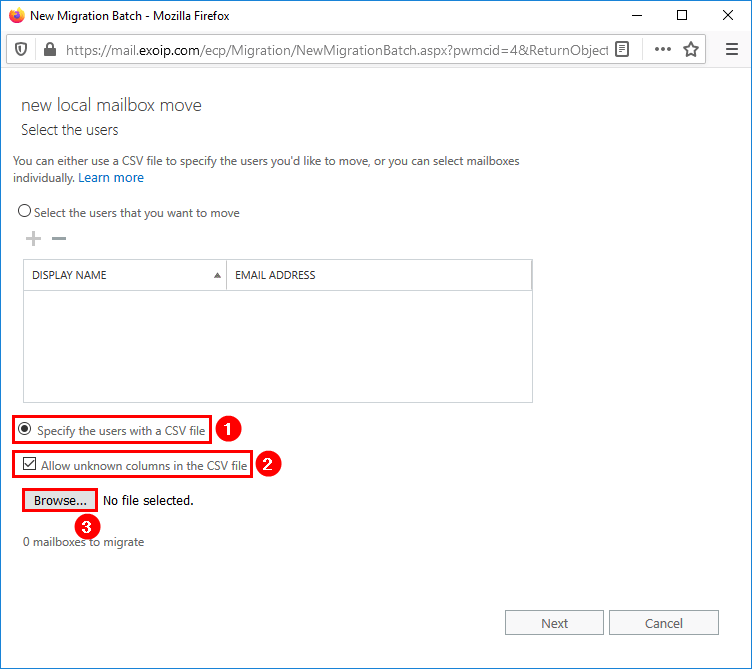
Select the radio button Specify the users with a CSV file. Check the checkbox Allow unknown columns in the CSV file. Click the Browse button and select the MigrationBatch01.csv file.
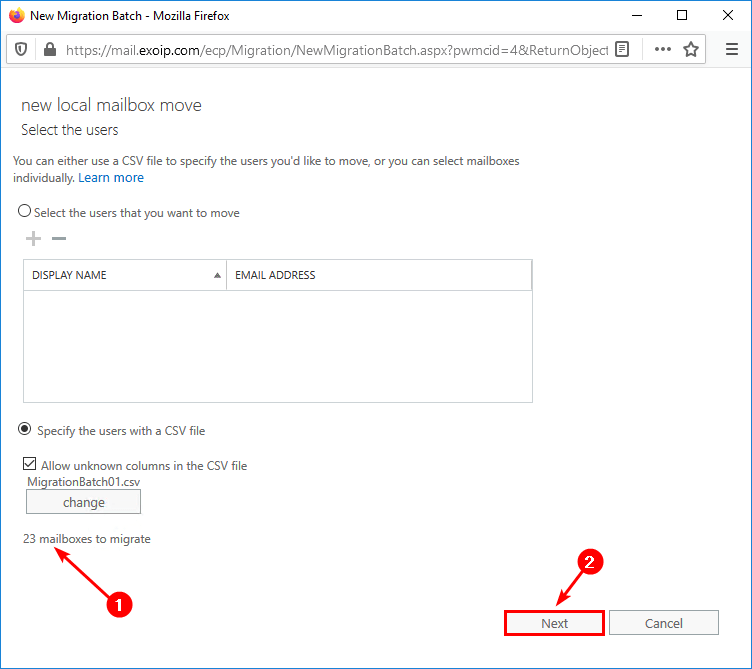
The CSV is read, and the total mailboxes to migrate are showing. Click Next.
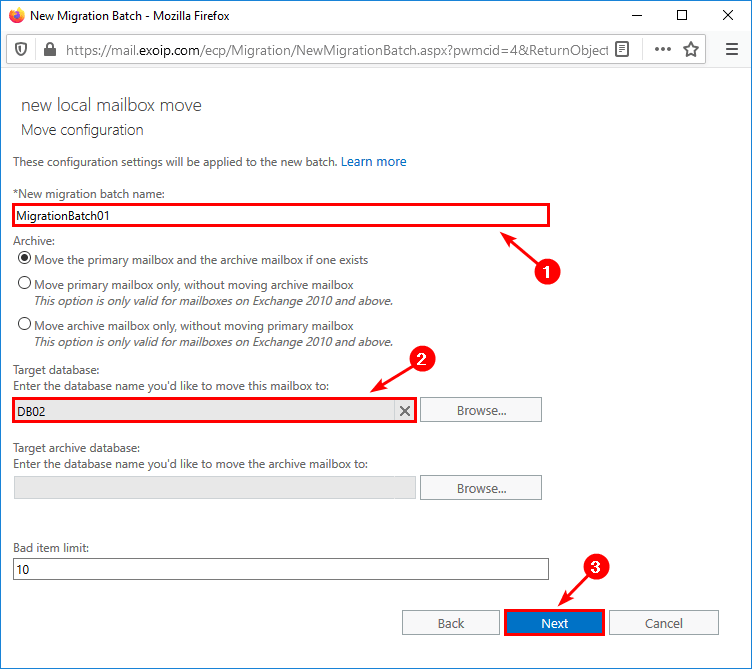
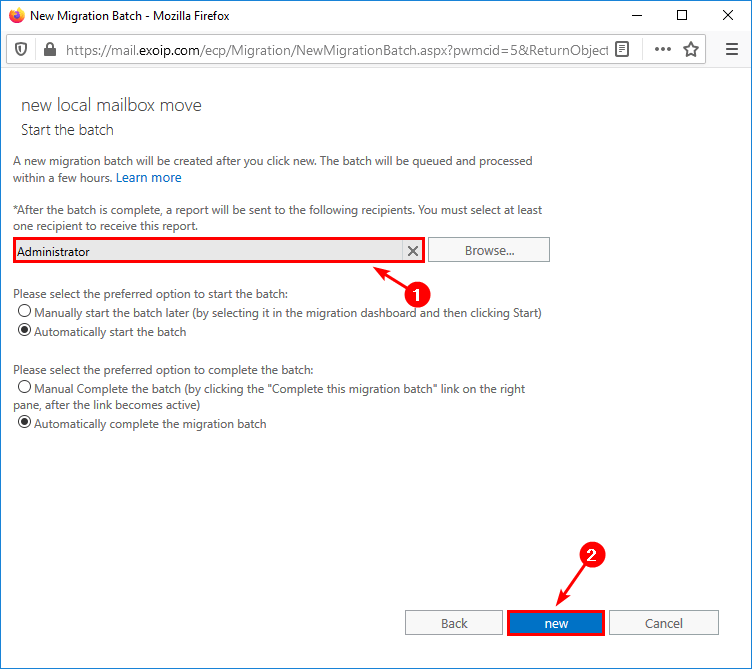
Give the new migration batch a name. In our example, MigrationBatch01. Click Browse and select the target database you like to move the mailboxes to. In our example, it’s DB02.
Do the mailboxes have an archive, and do you want to migrate them too? Browse and select the target archive database. Click Next.
Select the mailbox that will get a report after the migration batch finishes. Click New to start the migration batch. Read more about external recipient for notification emails in migration batch.
In the next step, we will check the status of the Migration batch.
Check mailbox move progress
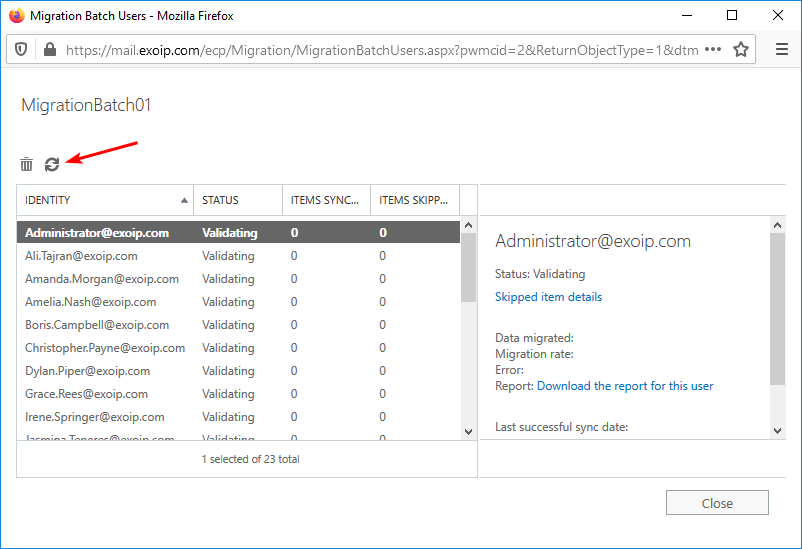
Select the MigrationBatch01 in the list view. Click in the details pane on View details to get more information regarding the mailboxes move.

It first will start with Validating the mailboxes move request. Click the refresh icon.
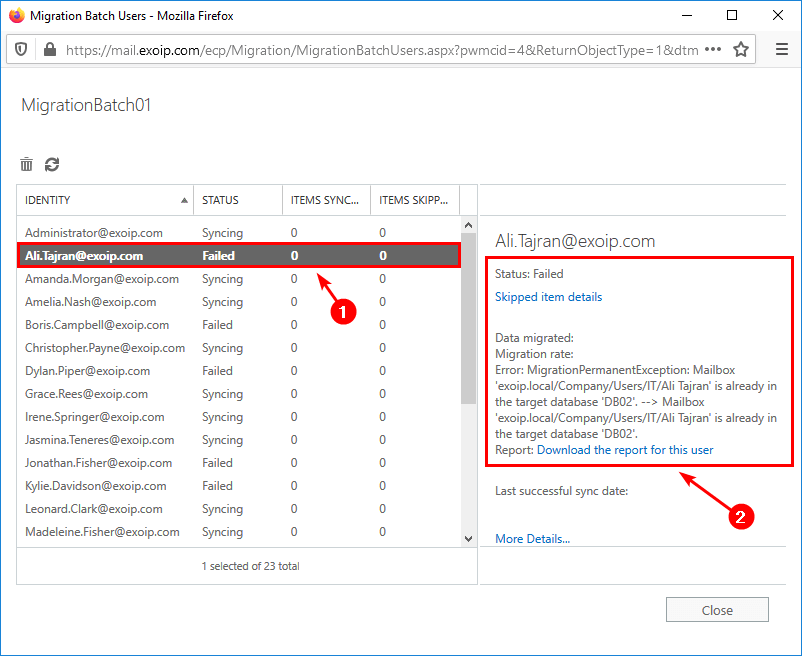
The status will change to Syncing or Failed. Click on the failed mailbox to check why it failed. In our example, it failed because the mailbox is already in the target database.
In the next step, which is the last step, we will verify the migration batch completion status.
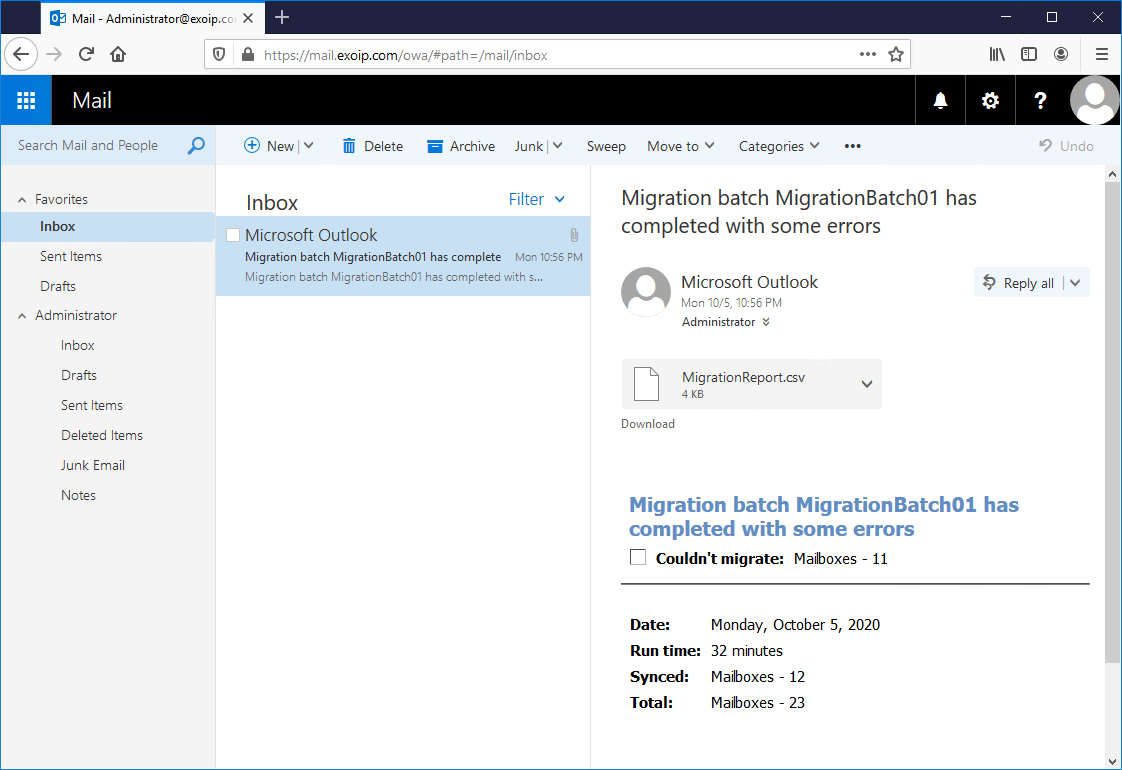
Verify migration batch completion
Migration batch Completed with errors. You can see if all the mailboxes are finalized or failed in the details pane on the right side. In our example, eleven mailboxes failed because they already are hosted in the target database. If you have other errors, troubleshoot further.
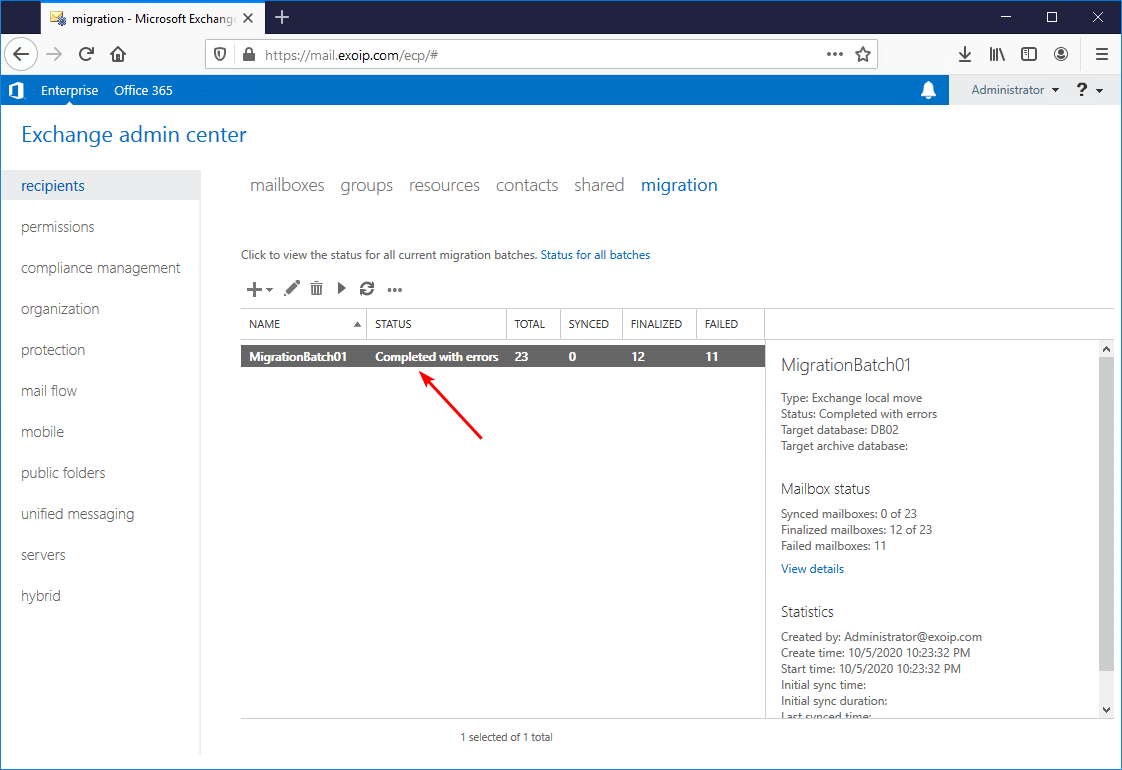
The migration report is sent to the mailbox that you set up earlier.
We can always verify and check the mailbox database location of the mailboxes.
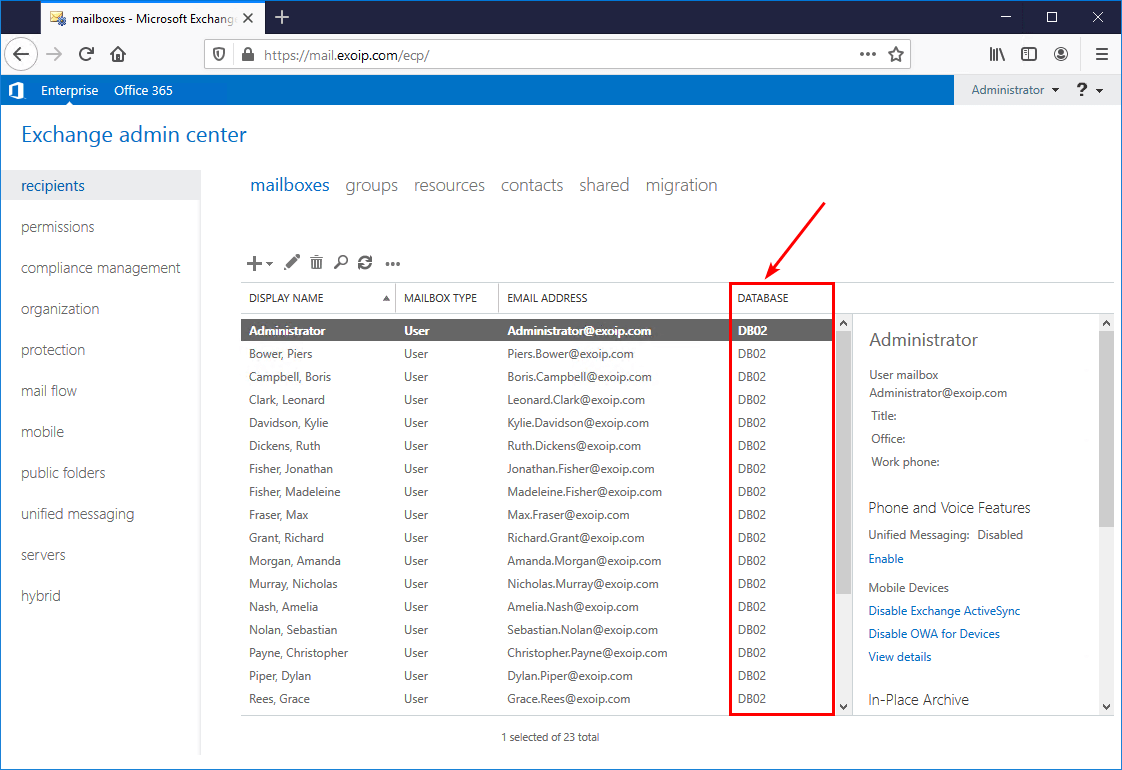
All mailboxes in the CSV file are moved to the specified target database. Did this help you to migrate Exchange mailboxes with CSV file to another mailbox database or a new server?
Other ways to move mailboxes
Interesting articles that can help you move mailboxes:
- Move mailbox in Exchange Admin Center
- Move mailbox to another database with PowerShell
- Move mailbox to Exchange Online with PowerShell
- Move all mailboxes from one database to another
- Migrate Exchange mailboxes through text file
Conclusion
In this article, you learned how to migrate Exchange mailboxes with CSV file. First, export the mailboxes to CSV file from Exchange Admin Center (EAC). Remove the email addresses that you don’t want to move from the CSV file. Don’t forget to edit the header and save the CSV file. If you don’t, an error shows up when uploading the CSV file. Create a new migration batch and upload the CSV file. Keep an eye on the migration progress status.
Did you enjoy this article? You may also like Complete migration batch with PowerShell. Don’t forget to follow us and share this article.
What Others Are Reading

This Post Has 0 Comments