In our previous article, we created a send connector in Exchange. Our next step is…
Move mail queue to another location in Exchange Server
The mail queue database in Exchange temporarily holds the location for messages. These messages are waiting to enter the next stage of processing or delivery to a destination. The best way is to move the mail queue in Exchange Server to another location to prevent the (C:) drive from getting out of disk space. It’s best practice to move transport database mail.que when configuring a new Exchange Server. In this article, you will learn how to move the mail queue in Exchange Server to another location. We will use a PowerShell script to move the Exchange transport queue.
Table of contents
Create NTFS partition for the mail queue database
Before we start moving the mail queue database, we will:
- Add a new disk on the Exchange Server.
- Create and format a new NTFS partition (volume) with an allocation unit size of 64K.
- Name the volume Queue and give it the drive letter Q.
Note: The file system required for the mail queue database is NTFS.
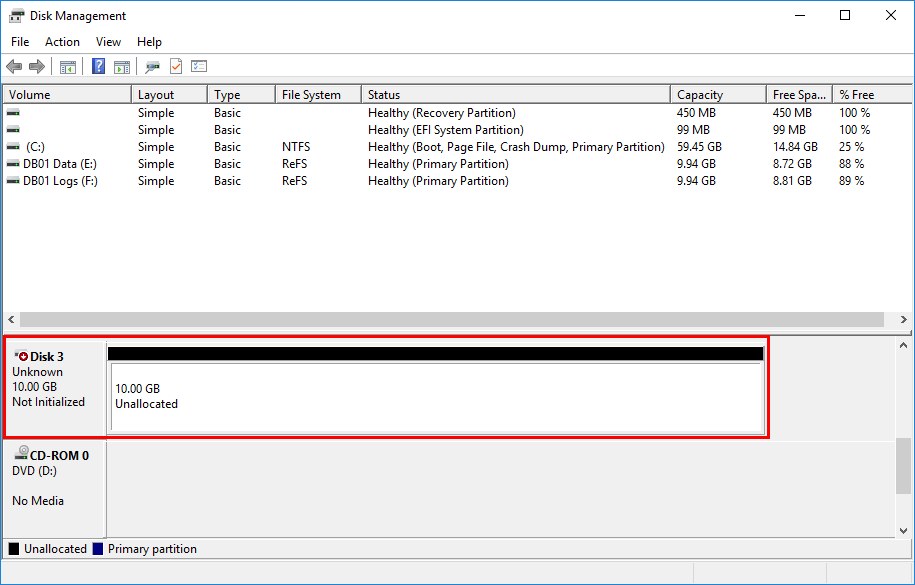
Get disk status
After adding a disk to the Exchange Server, we will configure it for the mail queue database.
Run PowerShell as administrator and get the information regarding the disks in the system running the Get-Disk cmdlet.
PS C:\> Get-Disk | Format-Table -AutoSize

Number Friendly Name       Serial Number                    HealthStatus OperationalStatus Total Size Partition Style
------ -------------       -------------                    ------------ ----------------- ---------- ---------------
0      VMware Virtual disk 6000c2905397f746b506a29e5ae7fe22 Healthy      Online                 60 GB GPT
1      VMware Virtual disk 6000c29893be5b047dad48219ca6a74b Healthy      Online                 10 GB GPT
2      VMware Virtual disk 6000c29efde88f55a88f2cd7bc6d82a1 Healthy      Online                 10 GB GPT
3      VMware Virtual disk 6000c29580298e701e4c6cb79979ad54 Healthy      Offline                10 GB RAW
The disk that we like to configure is shown as Number 3, and it’s offline.
PowerShell one-liner creating NTFS volume
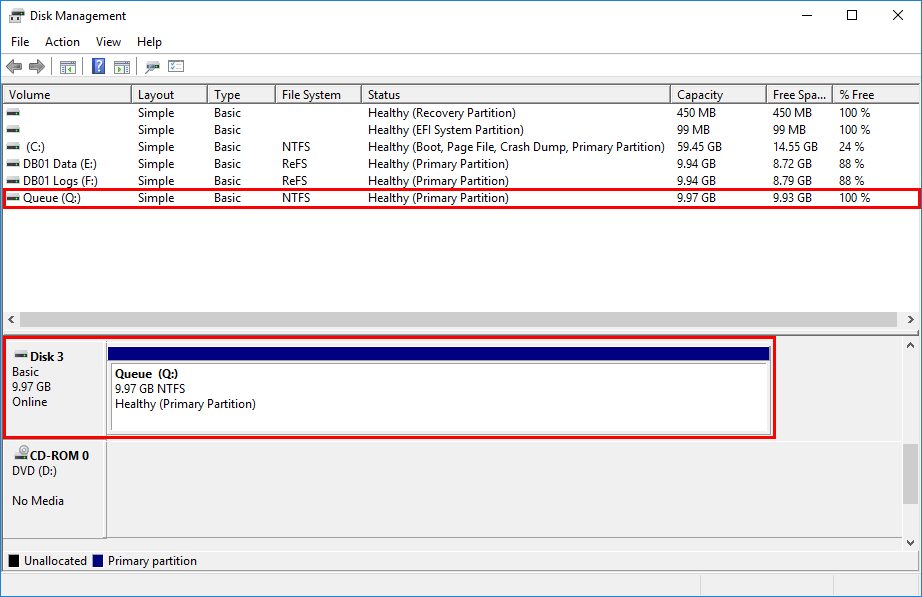
The partition style of disk number 3 shows as RAW. We will set the disk online and initialize the partition as GPT (GUID partition table). Mount the partition as drive letter (Q:) with the format volume NTFS and allocation unit size of 64K.
We recommend configuring 64K allocation unit size/block size on the transport database volume in Exchange. The name of the new volume will be Queue.
PS C:\> Get-Disk 3 | Initialize-Disk -PartitionStyle GPT -PassThru | New-Partition -UseMaximumSize -DriveLetter Q | Format-Volume -FileSystem NTFS -AllocationUnitSize 65536 -NewFileSystemLabel Queue

DriveLetter FileSystemLabel FileSystem DriveType HealthStatus OperationalStatus SizeRemaining    Size
----------- --------------- ---------- --------- ------------ ----------------- -------------    ----
Q           Queue           NTFS       Fixed     Healthy      OK                      9.93 GB 9.97 GB
The NTFS volume is successfully configured. Verify the disk in Disk Management.
Open File Explorer and go to This PC. Verify that the Queue disk shows up.
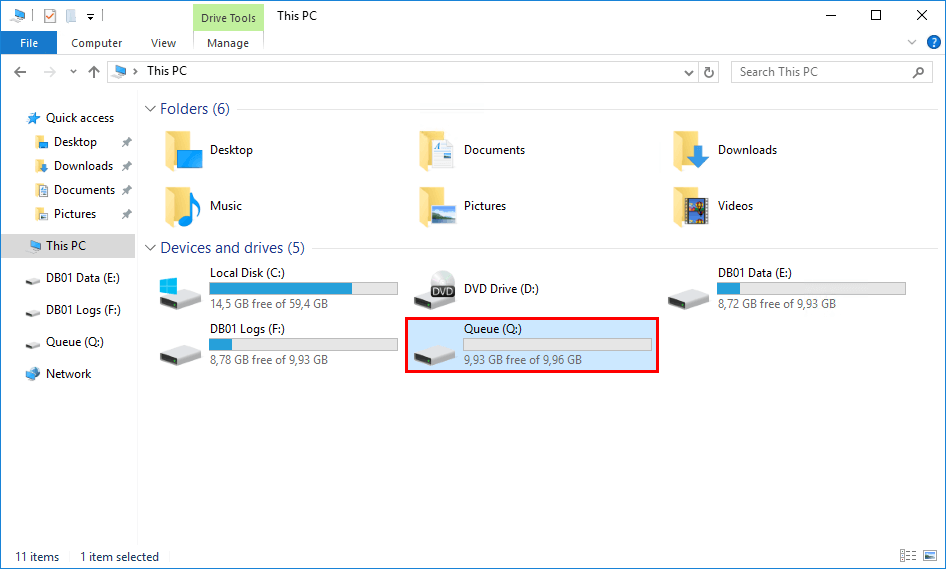
The volume is created with an NTFS partition and shown on This PC. In the next step, we will verify if everything is in place. After that, we will move the transport database to the Queue disk.
Before moving Exchange mail queue database
It’s good to prepare and ensure everything is in place before moving the mail queue database.
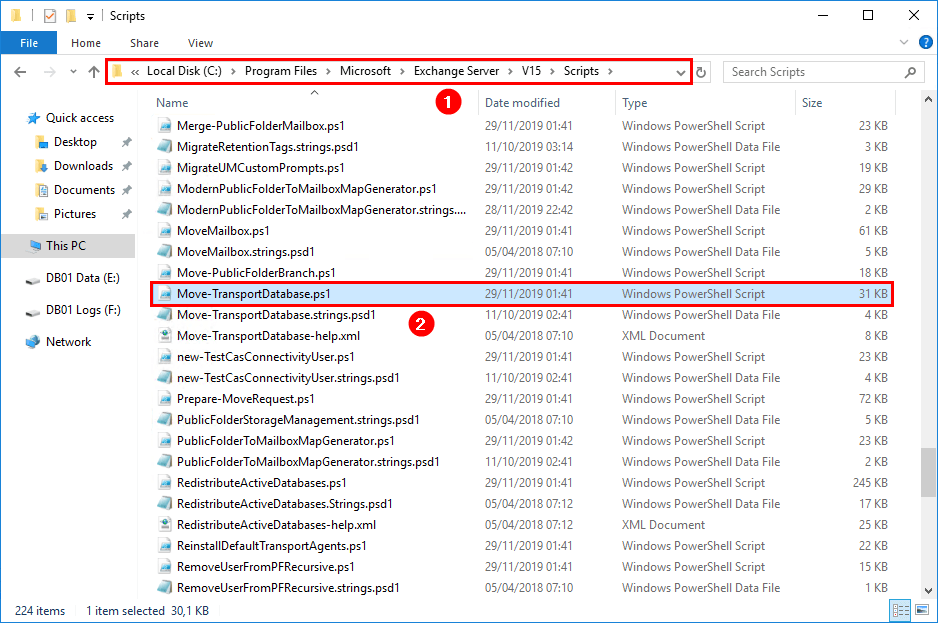
Microsoft created a PowerShell script Move-TransportDatabase.ps1. We will use the script to move the mail queue database to another location. The script is located in the Scripts folder. Find the script in the following path:
%ExchangeInstallPath%ScriptsConfirm that the Move-TransportDatabase.ps1 appears in the scripts directory.
Start File Explorer and go to the following path:
%ExchangeInstallPath%TransportRoles\data\The Transport Roles folder, including the folders in data, will be moved to another location. In our example, the (Q:) drive. Open the Queue folder if you like to check the mail.que database.
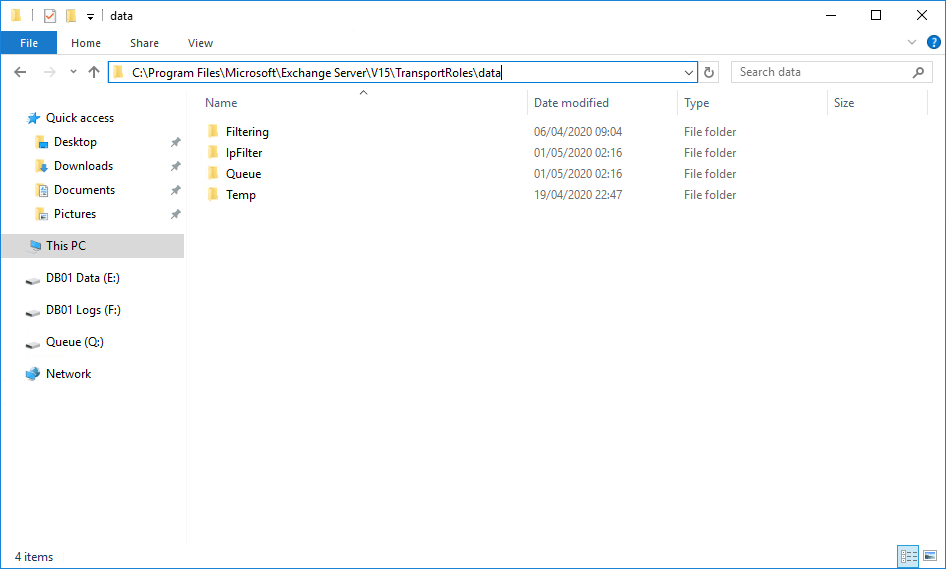
After verifying, we are ready to move the transport database in Exchange Server.
Move Exchange mail queue database
1. Run Exchange Management Shell as administrator.
2. Change the path to the default Exchange scripts folder.
[PS] C:\>cd $ExScripts3. Run the command to move the Transport Roles folder, including the mail queue database.
The script will go through the steps:
- Calculate the size of the files that it will move.
- Check if there is space available on the disk.
- Create new folders with permissions.
- Stop the Microsoft Exchange Transport service.
- Create a backup of the configuration file.
- Move the files.
- Start the Microsoft Exchange Transport service.
Note: There will be no mail data loss when using the PowerShell script.
[PS] C:\Program Files\Microsoft\Exchange Server\V15\scripts>.\Move-TransportDatabase.ps1 -queueDatabasePath 'Q:\TransportRoles\data\Queue' -queueDatabaseLoggingPath 'Q:\TransportRoles\data\Queue' -iPFilterDatabasePath 'Q:\TransportRoles\data\IpFilter' -iPFilterDatabaseLoggingPath 'Q:\TransportRoles\data\IpFilter' -temporaryStoragePath 'Q:\TransportRoles\data\Temp'

Queue Database Logging : Original path is C:\Program Files\Microsoft\Exchange Server\V15\TransportRoles\data\Queue; New path is Q:\TransportRoles\data\Queue
Temporary Storage : Original path is C:\Program Files\Microsoft\Exchange Server\V15\TransportRoles\data\Temp; New path is Q:\TransportRoles\data\Temp
IP Filter Database Logging : Original path is C:\Program Files\Microsoft\Exchange Server\V15\TransportRoles\data\IpFilter; New path is Q:\TransportRoles\data\IpFilter
IP Filter Database : Original path is C:\Program Files\Microsoft\Exchange Server\V15\TransportRoles\data\IpFilter; New path is Q:\TransportRoles\data\IpFilter
Queue Database : Original path is C:\Program Files\Microsoft\Exchange Server\V15\TransportRoles\data\Queue; New path is Q:\TransportRoles\data\Queue
Required disk space: 2173698048 bytes. Target drive Q: has 10665787392 bytes free.
Required disk space: 2147483648 bytes. Target drive Q: has 10665787392 bytes free.
Required disk space: 2149580800 bytes. Target drive Q: has 10665787392 bytes free.
Required disk space: 2155945984 bytes. Target drive Q: has 10665787392 bytes free.
Required disk space: 2675908608 bytes. Target drive Q: has 10665787392 bytes free.
Creating Q:\TransportRoles\data\Queue.
Adding full control access to the directory for NetworkServiceSid.
Adding full control access to the directory for LocalSystemSid.
Adding full control access to the directory for BuiltinAdministratorsSid.
Creating Q:\TransportRoles\data\Temp.
Adding full control access to the directory for NetworkServiceSid.
Adding full control access to the directory for LocalSystemSid.
Adding full control access to the directory for BuiltinAdministratorsSid.
Creating Q:\TransportRoles\data\IpFilter.
Adding full control access to the directory for NetworkServiceSid.
Adding full control access to the directory for LocalSystemSid.
Adding full control access to the directory for BuiltinAdministratorsSid.
Q:\TransportRoles\data\IpFilter already exists. Skipping directory creation.
NetworkServiceSid already has full control to the directory.
LocalSystemSid already has full control to the directory.
BuiltinAdministratorsSid already has full control to the directory.
Q:\TransportRoles\data\Queue already exists. Skipping directory creation.
NetworkServiceSid already has full control to the directory.
LocalSystemSid already has full control to the directory.
BuiltinAdministratorsSid already has full control to the directory.
Preparing to stop the MSExchangeTransport service...
WARNING: Waiting for service 'Microsoft Exchange Transport (MSExchangeTransport)' to stop...
MSExchangeTransport service is stopped successfully.
Saving a copy of original configuration file in C:\Program Files\Microsoft\Exchange Server\V15\bin\EdgeTransport.exe.config.20200504191948.old.
File trn.log has moved to the destination.
File trn00000004.log has moved to the destination.
File trntmp.log has moved to the destination.
File Trnres00001.jrs has moved to the destination.
File Trnres00002.jrs has moved to the destination.
Skipping file Temp.edb because it doesn't exist.
Queue Database Logging path is updated to Q:\TransportRoles\data\Queue
Temporary Storage path is updated to Q:\TransportRoles\data\Temp
File trn.log has moved to the destination.
File trntmp.log has moved to the destination.
File Trnres00001.jrs has moved to the destination.
File Trnres00002.jrs has moved to the destination.
Skipping file Temp.edb because it doesn't exist.
IP Filter Database Logging path is updated to Q:\TransportRoles\data\IpFilter
File IPFiltering.edb has moved to the destination.
File trn.chk has moved to the destination.
IP Filter Database path is updated to Q:\TransportRoles\data\IpFilter
File mail.que has moved to the destination.
File trn.chk has moved to the destination.
Queue Database path is updated to Q:\TransportRoles\data\Queue
Preparing to start the MSExchangeTransport service...
WARNING: Waiting for service 'Microsoft Exchange Transport (MSExchangeTransport)' to start...
MSExchangeTransport service is started successfully.
Script execution completed successfully.
The Transport Roles data folder is moved successfully to the (Q:) drive.
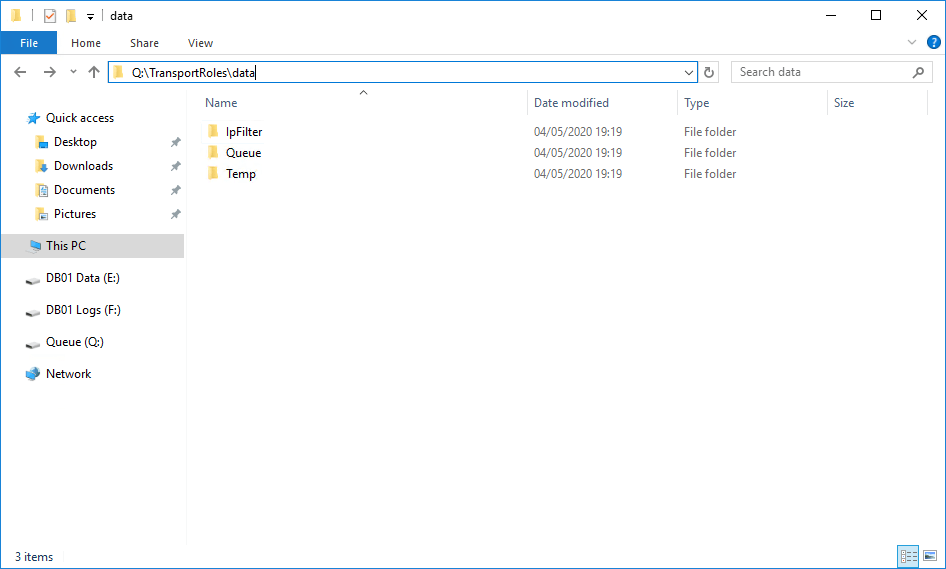
Verify Exchange queue database files after moving
Start File Explorer. Verify the folders in the new location.
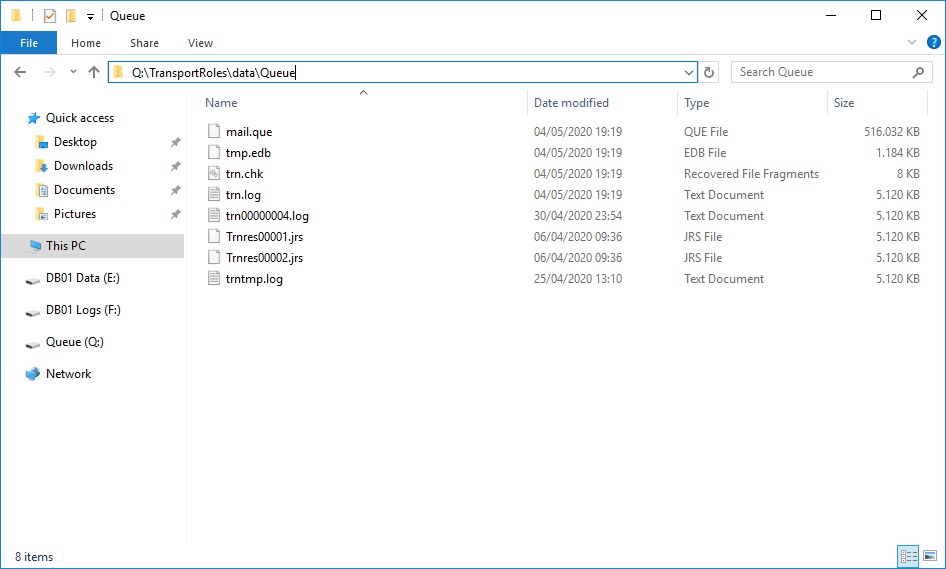
Open the Queue folder and verify that the files exist in the new location:
- Queue database files mail.que and trn.chk.
- Transaction log files trn.log, trntmp.log, trnres00001.jrs, trnres00002.jrs, and tmp.edb. Even though temp.edb isn’t a transaction log file, it’s kept in the same location as the transaction log files.
Good to know about EdgeTransport.exe.config
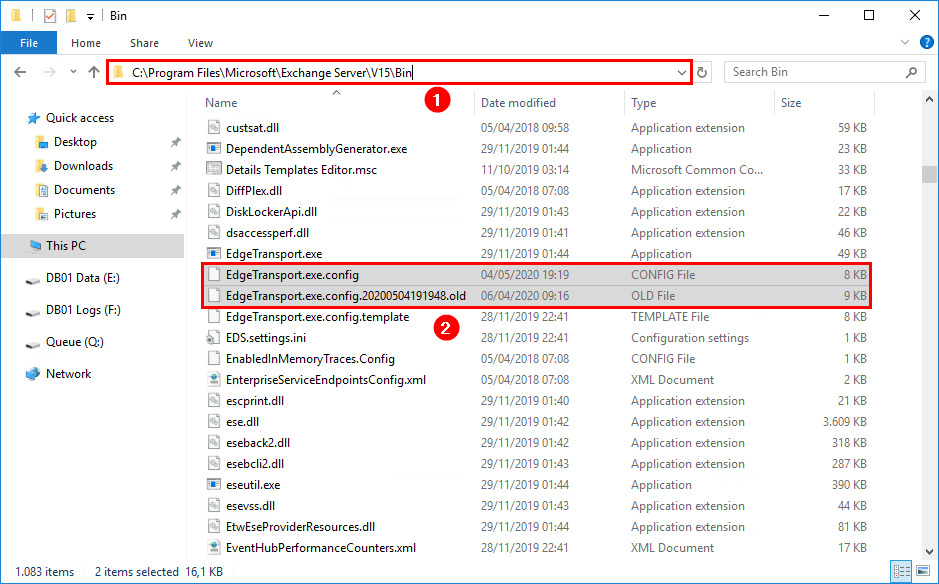
We can find the configured values in the CONFIG file EdgeTransport.exe.config. The XML application configuration file is associated with the Exchange Transport service. Find it in the following path:
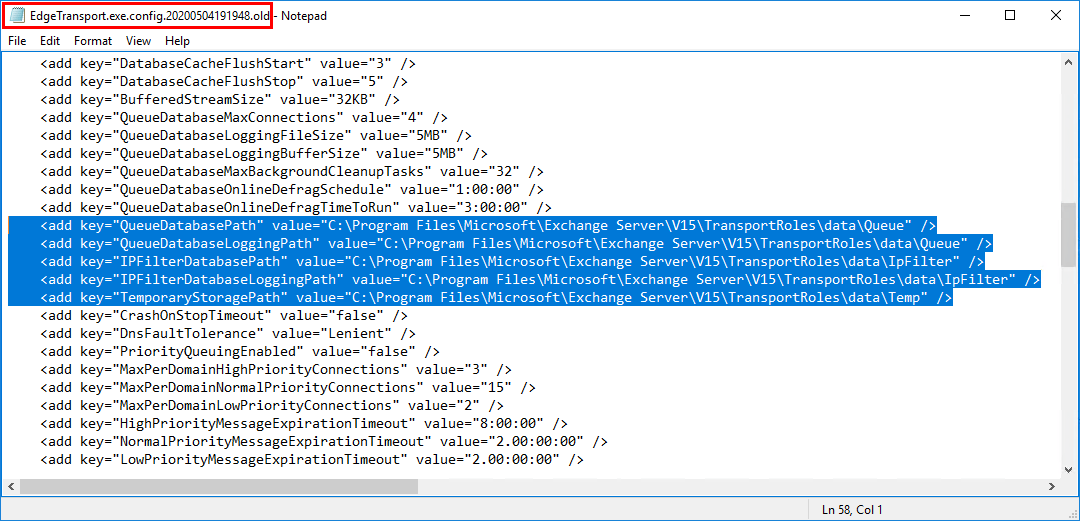
%ExchangeInstallPath%BinAfter running the PowerShell script, the EdgeTransport.exe.config is renamed. The date and .old are appended to the config name. You can open both the .config and .old files with Notepad.
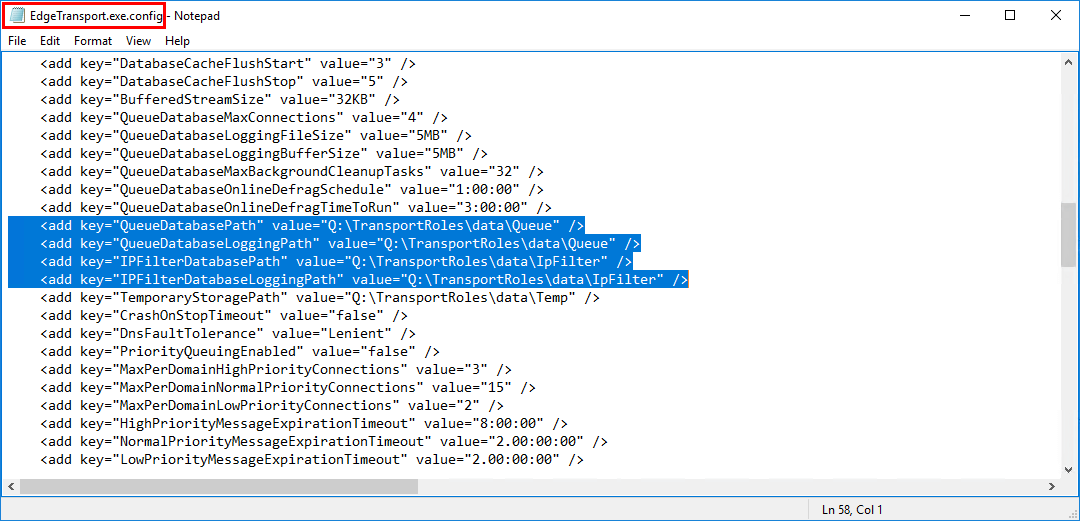
Compare the following keys in both files:
- QueueDatabasePath
- QueueDatabaseLoggingPath
- IPFilterDatabasePath
- IPFilterDatabaseLoggingPath
- TemporaryStoragePath
Before moving the database queue database
After moving the database queue database
Now that you moved the mail queue database to another location, it will be easier to track. The monitoring team will be notified that the Queue disk is getting full, knowing immediately that it’s the mail queue database.
Important: After the above change, you need to edit the UnifiedContent folder path in the Antimalware.xml settings file, so it doesn’t fill up the UnifiedContent folder with temporary logs.
Did the article help you to move Exchange transport queue to another location?
Read more:
- Mail.que file growing in Exchange Server to check the safety net values and adjust it
- Mail.que file large in size Exchange Server to start with a new mail.que database file
Conclusion move mail queue Exchange Server
You learned how to move mail queue in Exchange Server to another location. First, we created a separate disk volume for the queue database. Second, we moved the transport database with the PowerShell script Move-TransportDatabase.ps1. As of last, we verified the moved files in the new location. I recommend using the script by Microsoft to move the Exchange transport database queue.
Did you enjoy this article? You may also like Exchange database best practices. Don’t forget to follow us and share this article.
What Others Are Reading

Excellent article, thanks so much !
Thought about a topic and found again a solution in your great blog!
Thank you for sharing your experiences!
Excellent article, congratulations. Very useful. I have a doubt. My environment has coexistence between Exchange 2013 and 2019. I just configured the entire Exchange 2019 environment. Currently, all the flow points to Exchange 2013. Before migrating the mailboxes to the 2019 environment, I must move the mail queue to another local on Exchange Server 2019, or only after migration? And running the script to move the mail queue to another location in Exchange Server 2019 does not impact Exchnage 2013?
Set everything up correctly on Exchange Server 2019 so you only focus on moving the mailboxes.
It’s always good to do such tasks after working hours. If something happens, you can troubleshoot or rollback (I never had any issues).
I recommend moving the mail queue before you start the migration.
I will move the mail queue before starting the migration. Thanks !!
Excelent Post, TY
I found this tutorial very helpful and easy to understand. Great tutorial !