There is an Exchange Hybrid configuration between on-premises and Microsoft 365/Office 365. However, Exchange Hybrid…
Configure postmaster address in Exchange Server
The default external postmaster address is set to the default accepted domain. What if you want to change the external postmaster address or check that everything is in place? In this article, you will learn how to configure the postmaster address in Exchange Server.
Table of contents
How to configure external postmaster address
When there’s a problem delivering a message, Exchange sends an NDR (Non-Delivery Report) to the message sender that indicates there was a problem. NDRs include a code that shows why the message wasn’t delivered and possible solutions to help get the message delivered.
There are two ways to configure the external postmaster address in Exchange Server:
- Exchange admin center
- PowerShell
Configure postmaster address in Exchange admin center
To configure the postmaster address in Exchange admin center, follow these steps:
- Sign in to on-premises Exchange admin center
- Click on mail flow > send connectors > … > Organization transport settings
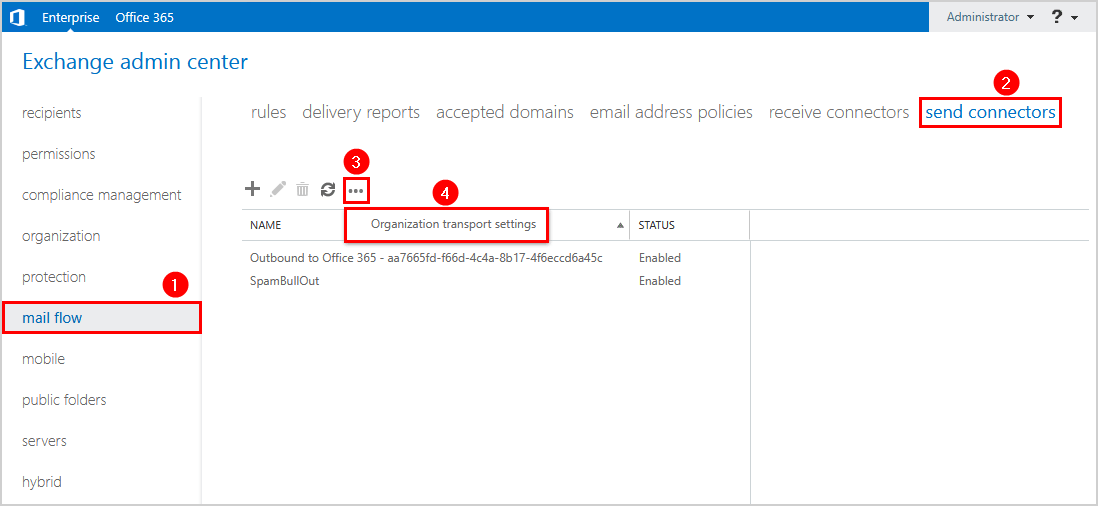
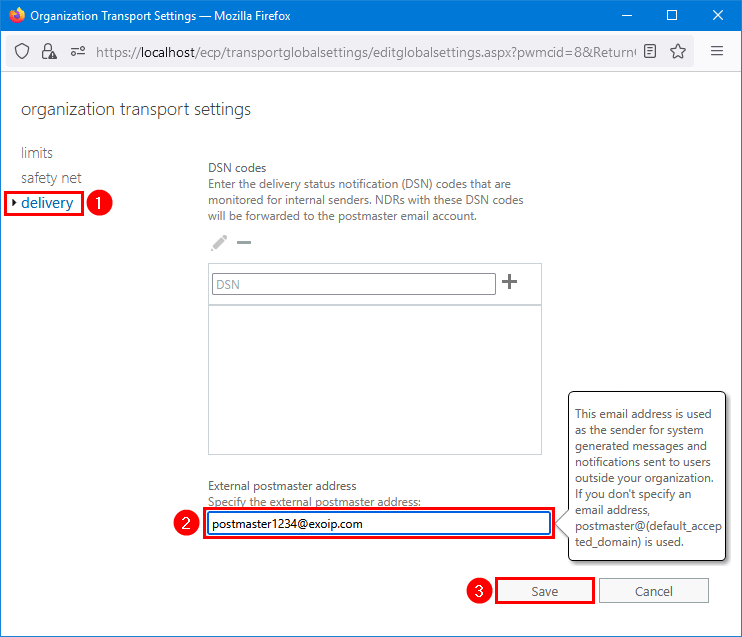
- Fill in the external postmaster address
- Click Save
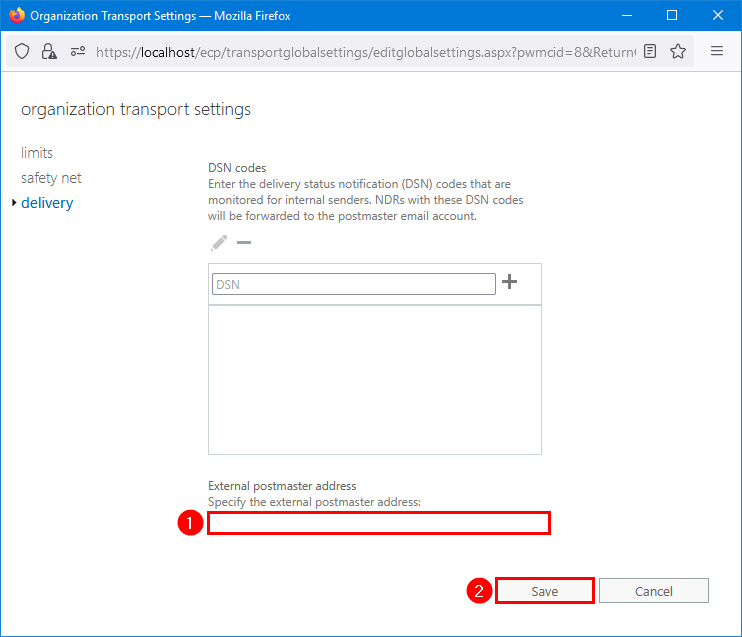
Keep default external postmaster address
Do you want to keep the default settings which will use the address: postmaster@default_accepted_domain?
- Keep the external postmaster address field empty
- Click Save
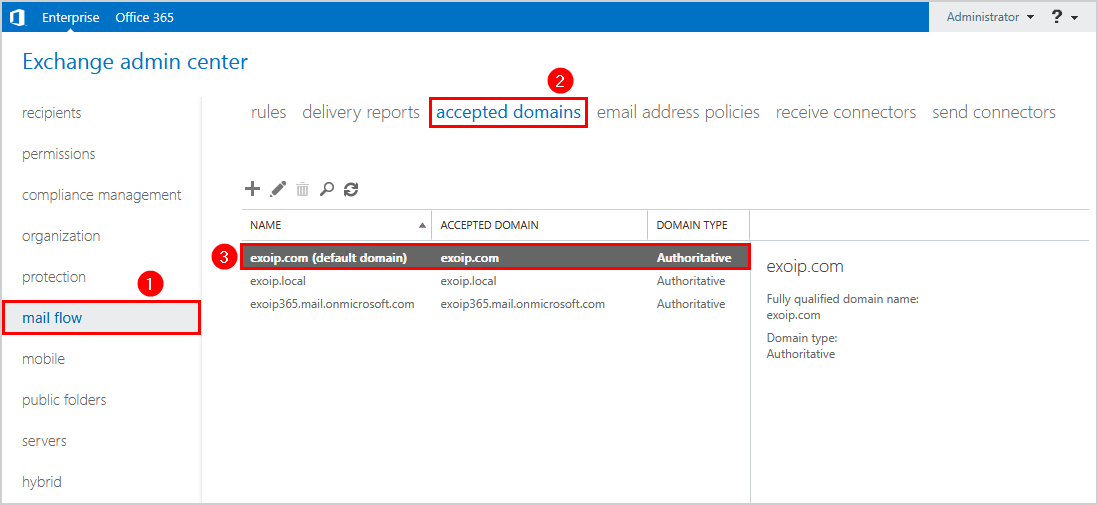
Check default accepted domain
Verify the default accepted domain:
- Click on mail flow > accepted domains
- Verify the default domain
Configure postmaster address with PowerShell
To configure the postmaster address in Exchange Management Shell, follow these steps:
Run Exchange Management Shell as administrator and run the Set-TransportConfig cmdlet to set the external postmaster address.
[PS] C:\>Set-TransportConfig -ExternalPostmasterAddress postmaster1234@exoip.comKeep default external postmaster address
Do you want to keep the default settings which will use the address: postmaster@default_accepted_domain?
Set the default external postmaster address value to $null.
[PS] C:\>Set-TransportConfig -ExternalPostmasterAddress $nullGet external postmaster address
Run the Get-TransportConfig cmdlet to verify the external postmaster address.
[PS] C:\>Get-TransportConfig | Format-List ExternalPostmasterAddressGet default accepted domain
Run the Get-AcceptedDomain to verify the default accepted domain.
[PS] C:\>Get-AcceptedDomain | Where-Object {$_.Default -like $true} | ft -AutoSize

Name      DomainName DomainType    Default
----      ---------- ----------    -------
exoip.com exoip.com  Authoritative True
Test external postmaster address
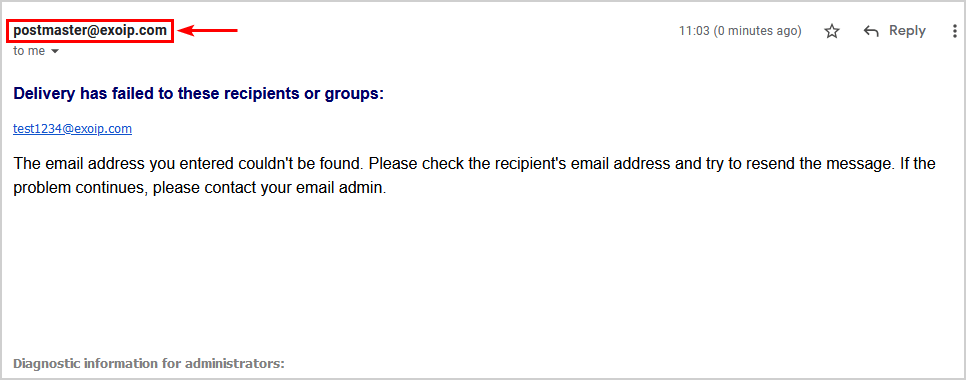
To test that everything works as you configured, you can send a message to the Exchange organization from an external email account. Ensure that you fill in an email that is not registered. This will send an NDR report back to you.
In our example, we know that the email address 1234@exoip.com does not exist, and we will send an email to that email address.
That’s it!
Read more: Add additional columns in Active Directory »
Conclusion
You learned how to configure the postmaster address in Exchange Server. Change the external postmaster address in Exchange admin center or with PowerShell (Exchange Management Shell). The new postmaster address will show up at recipients when they receive an NDR.
I recommend keeping the external postmaster address value empty and setting the accepted domain you want as default. But don’t change “postmaster” to any other name. That’s because “postmaster” is well known for NDRs (Non-Delivery Reports).
Did you enjoy this article? You may also like Change default mailbox language. Don’t forget to follow us and share this article.
What Others Are Reading

Does Postmaster only need to setup in Exchange Online for a hybrid environment?
Great post as always Ali!
One note, with regards to Exchange Online:
– The external postmaster default address is postmaster@
– You can only use Exchange Online PowerShell to perform this procedure. (No EAC)
https://learn.microsoft.com/en-us/exchange/mail-flow-best-practices/configure-external-postmaster-address