How to find the Exchange Server URLs? Why do you need to find the Exchange…
Rename Exchange database with PowerShell
A unique generated mailbox database is created by default in Exchange Server after installing Exchange Server. We like to rename the Exchange default mailbox database to simplify the naming. We can rename the mailbox database without any disruption in the organization. This article will learn how to rename Exchange database with PowerShell and Exchange Admin Center (EAC).
Table of contents
Exchange database name convention
We recommend to rename the database to DB01 as it will be easier in the future to work with. For example, you want to migrate users from or to that database. A unique generated database will have a name that is not easy to remember.
Read more: Exchange database naming convention »
Rename Exchange default database with PowerShell
To rename the Exchange mailbox database with PowerShell, follow these steps:
Step 1. Get mailbox database name
Run Exchange Management Shell as administrator. Get the mailbox name with the Get-MailboxDatabase cmdlet.
In our example, the name of the unique database is Mailbox Database 1237333779.
[PS] C:\>Get-MailboxDatabase

Name                           Server          Recovery        ReplicationType
----                           ------          --------        ---------------
Mailbox Database 1237333779    EX01-2016       False           None
Step 2. Rename mailbox database
Rename the default mailbox database with Set-MailboxDatabase cmdlet.
[PS] C:\>Set-MailboxDatabase "Mailbox Database 1237333779" -Name "DB01"Step 3. Verify mailbox database name
Verify that the database name changed.
[PS] C:\>Get-MailboxDatabase

Name                           Server          Recovery        ReplicationType
----                           ------          --------        ---------------
DB01                           EX01-2016       False           None
The database is successfully renamed. If you want to rename the database with Exchange Admin Center, follow the steps below.
Rename Exchange default database in EAC
Sign in to Exchange Admin Center (EAC). Use the fully-qualified domain name (FQDN) of the Exchange Server in the format https:///ecp. For example, https://ex01-2016.local/ecp.
Note: To access the EAC in a web browser on the Exchange Server itself, you can use the value https://localhost/ecp.
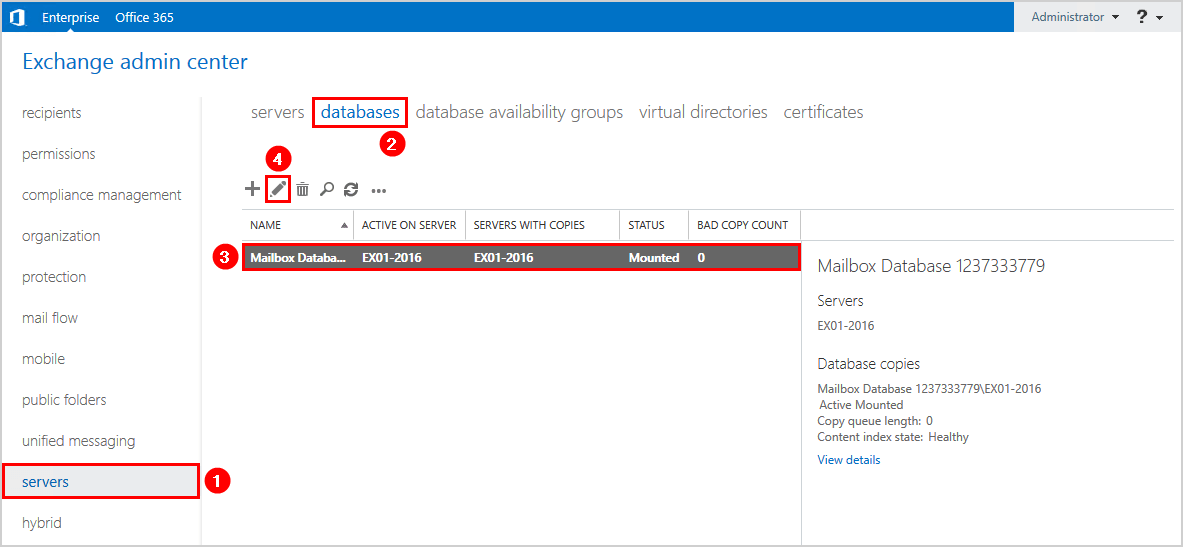
Sign in to Exchange Admin Center (EAC). Navigate to servers > databases. Click on the Mailbox Database<unique name> and click the edit icon in the toolbar.
Click general in the left pane and change the name of the Exchange database. Click Save.
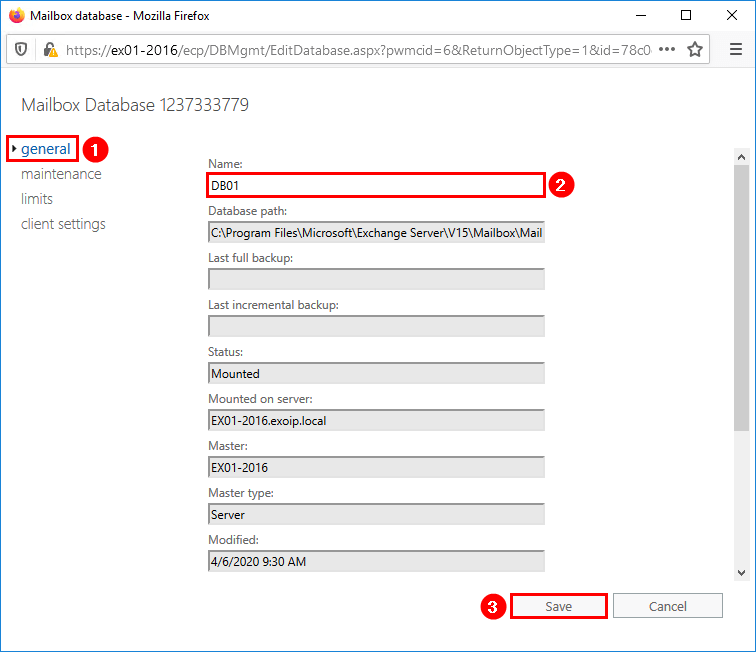
Confirm that the default mailbox database in Exchange Server is renamed.

You successfully renamed the mailbox database! Did you rename the Exchange database with PowerShell or with EAC?
What’s next?
Exchange Server installs the default mailbox database on the C:\ drive. Don’t keep the mailbox database in the C:\ drive, but move the database to another disk drive:
- Exchange database best practices
- Configure REFS volume in Exchange Server
- Move Exchange database to another drive
Conclusion
You learned how to rename the Exchange database with PowerShell. It’s also possible to rename the default mailbox database in Exchange Admin Center. Both ways will work. Renaming the mailbox database can be carried out in production as it will not interrupt any users.
Did you enjoy this article? You may also like List mailboxes in Exchange database with PowerShell. Don’t forget to follow us and share this article.
What Others Are Reading


Hello Alitajran.
I need rename the path database. Is possible?
Ex:
d:\databases\MB01\mb01.edb
to
d:\databases\MB10\mb10.edb
That’s possible.
If you want to “rename” the mailbox database, you must “move” it.
Read more on how to do it in the article Move Exchange database to another drive.