We like to connect to Azure AD with PowerShell because we want to retrieve Microsoft…
Install and configure Azure AD Connect
In the previous article, we run Microsoft IdFix to identify errors such as duplicates and formatting problems in the on-premises directory. To sync on-premises identity infrastructure to Microsoft Azure AD, we will install and configure Azure AD Connect step by step.
Table of contents
What is Azure AD Connect?
Azure AD Connect is a tool for connecting on-premises identity infrastructure to Microsoft Azure AD. The wizard deploys and configures prerequisites and components required for the connection, including sync and sign on. Azure AD Connect encompasses functionality that was previously released as Dirsync and AAD Sync. These tools are no longer being released individually, and all future improvements will be included in updates to Azure AD Connect.
Download Azure AD Connect
Download Azure AD Connect for free. Download Microsoft Azure Active Directory Connect from the Microsoft Download Center. In this article, we will install Azure AD Connect version 2.1.1.0, which is the latest.
Azure AD connect release notes
Microsoft keeps a changelog for Azure AD Connect. It’s best practice to keep Azure AD Connect up to date with the latest version. Scroll through the changes and see what’s new and which bugs got fixed!
Azure AD Connect requirements
Make sure that you meet the Azure AD Connect installation prerequisites. The minimum requirements are:
Hardware
- 1.6 GHz CPU
- 4 GB Memory
- 70 GB Hard drive size
Server
- .NET Framework 4.6.2 or later
- Domain-joined Windows Server 2016 or later
- Windows Server full GUI
- Windows Server Core isn’t supported
Before installing Azure AD Connect
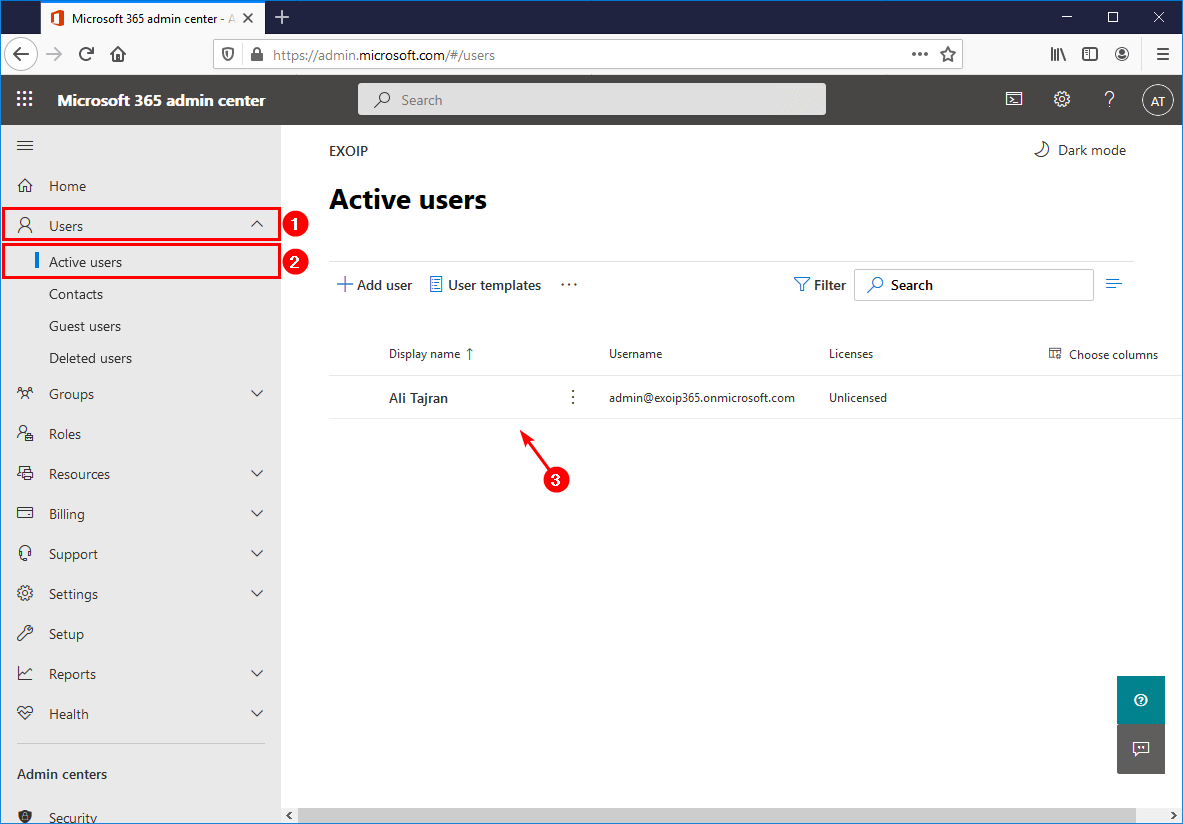
Currently, there are no users configured in Azure AD/Office 365. There is only one active user account, which is the Microsoft 365 tenant administrator.
Install and configure Azure AD Connect
Installing Azure AD Connect on the domain controller is supported, but Microsoft doesn’t recommend that. It’s best to install Azure AD Connect on a separate domain-joined Windows Server. In this example, we will use the domain controller for demonstration purposes.
Note: Do not install additional software or roles on Domain Controllers.
To install Azure AD Connect, follow the below steps:
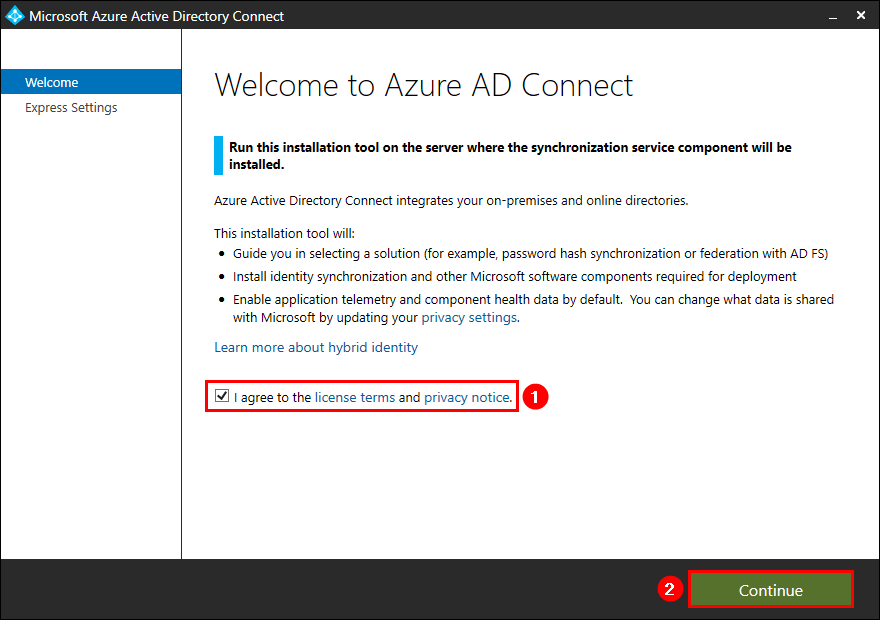
1. After downloading Azure AD Connect, run the setup. Agree to the license terms and click Continue.
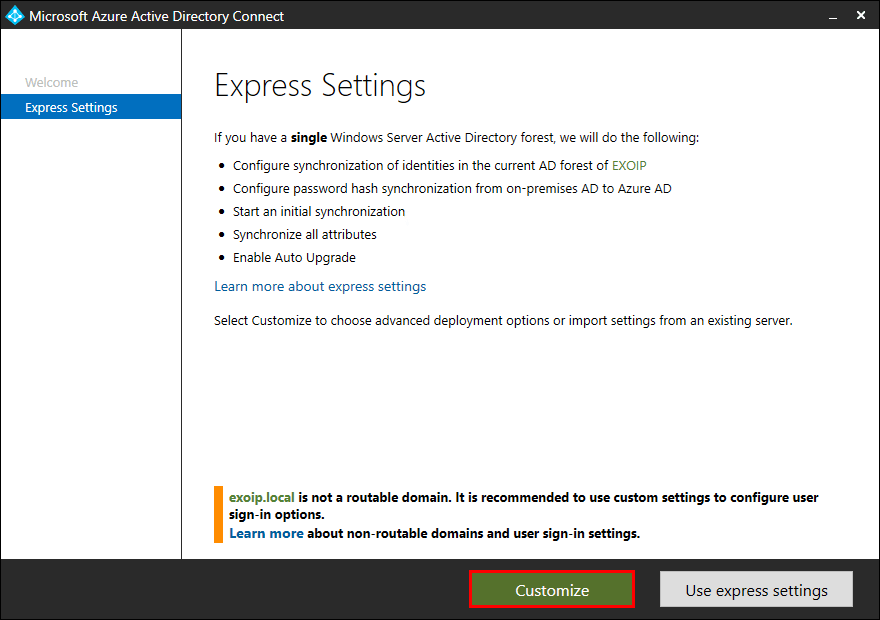
2. Click on Customize for a custom install. It will give you all the options which you can decide for yourself.
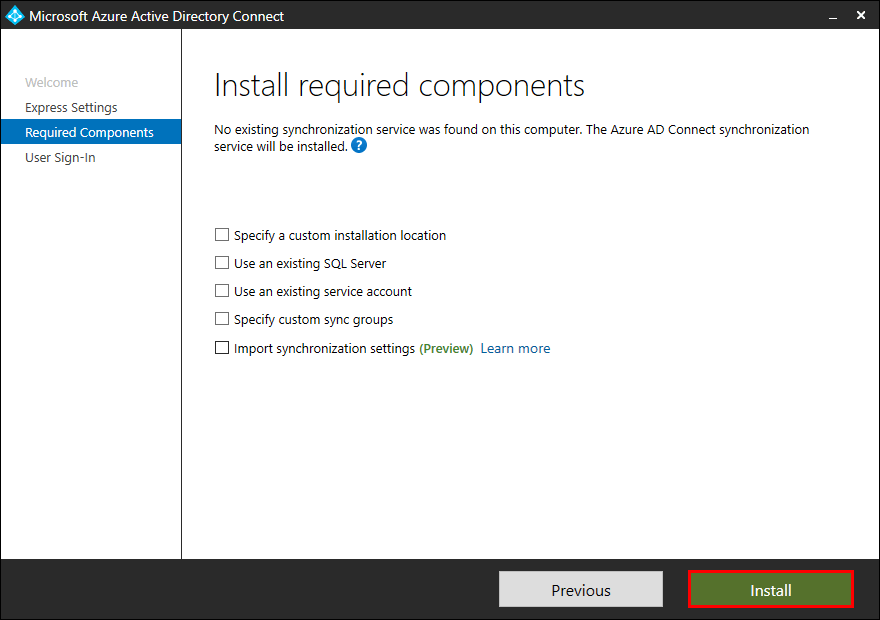
3. Click Install to start the Azure AD Connect synchronization service installation.
Read more: Find Azure AD Connect accounts »
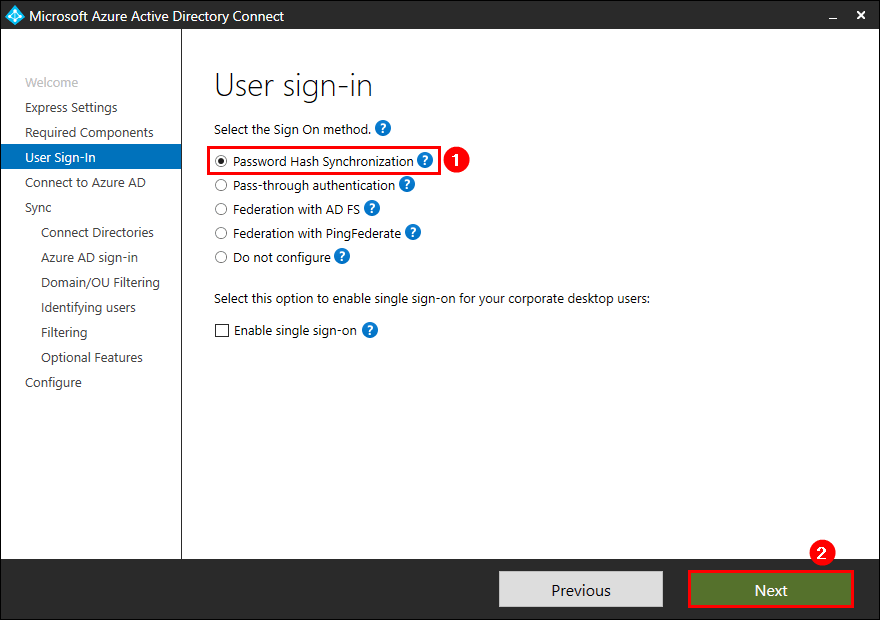
4. Select Password Hash Synchronisation. Click Next.
Do you want to Enable single sign-on? Read the article Configure Azure Active Directory Single Sign-On (SSO). You can skip this and do it later.
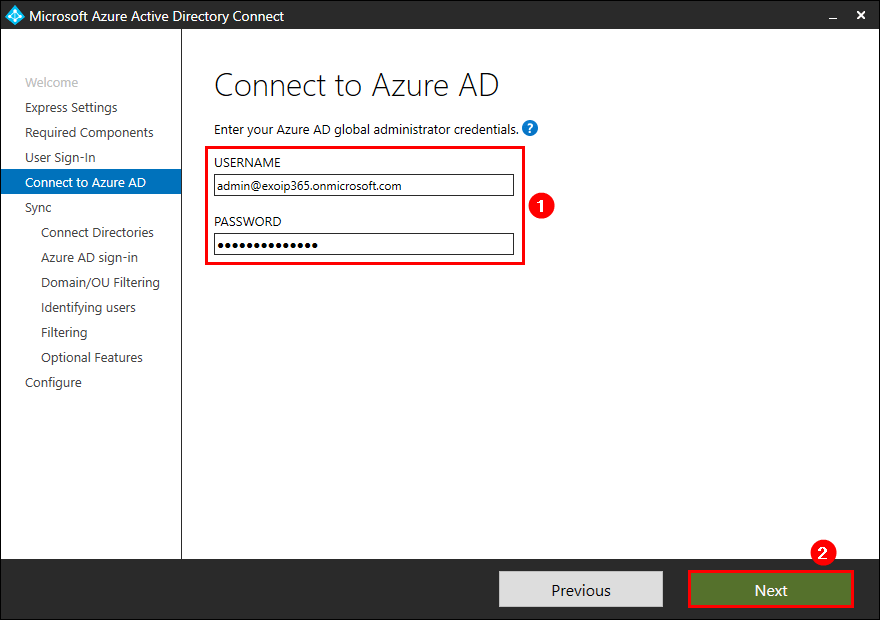
5. Enter the Azure AD global administrator credentials. Click Next.
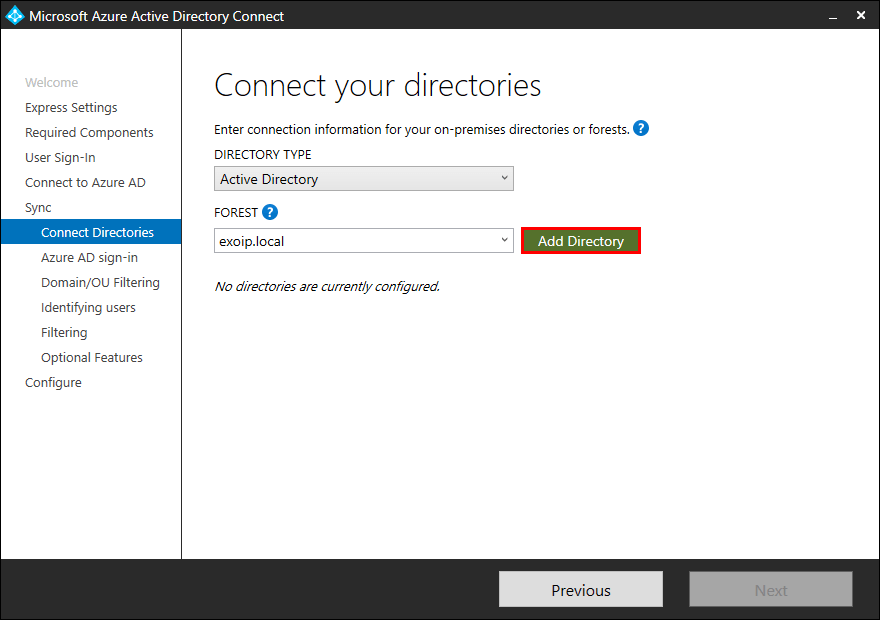
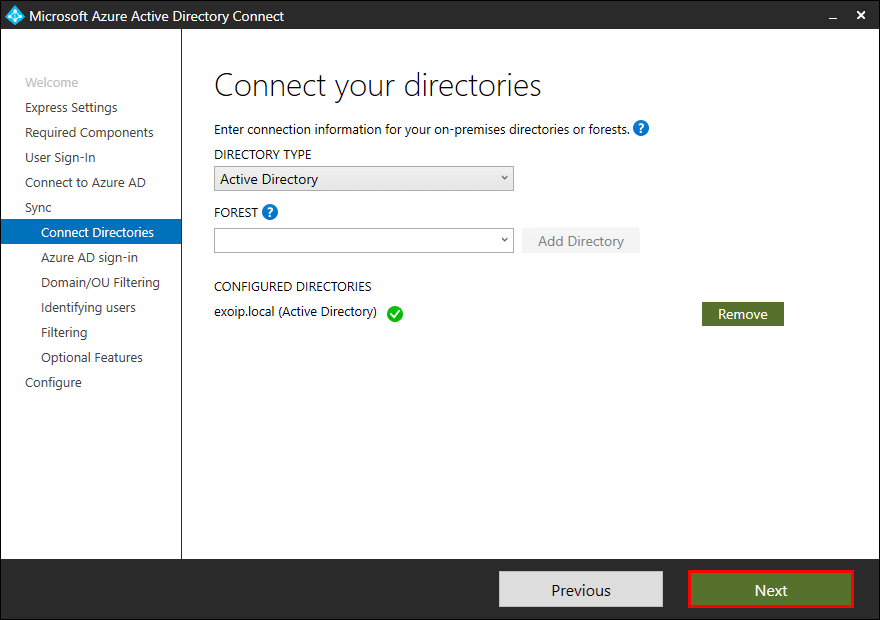
6. Click on Add Directory.
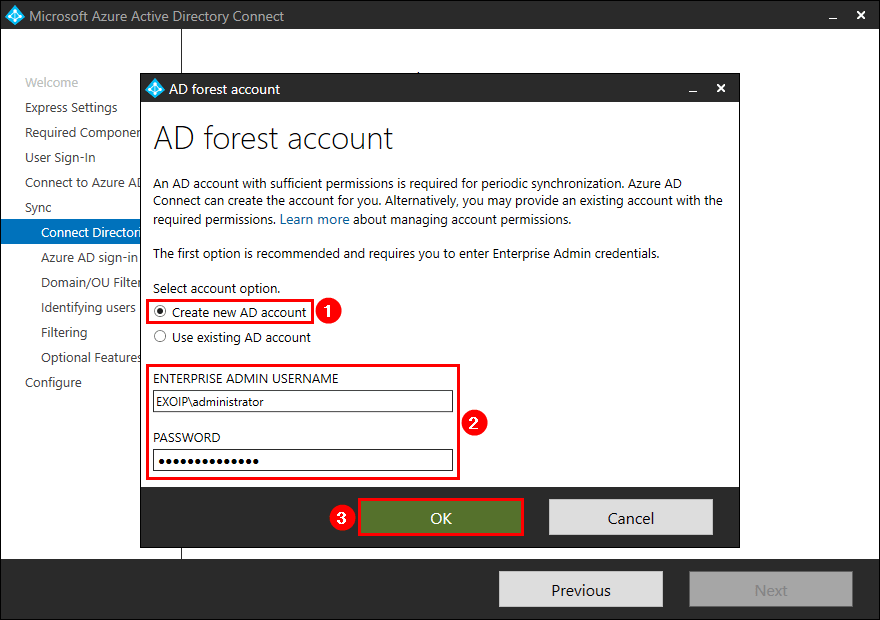
7. Select Create new AD account. Fill in the administrator account with Enterprise Admin rights. Click OK.
Azure AD Connect will create an AD DS Connector account (MSOL_xxxxxxxxxx) in AD with all the necessary permissions.
Note: You can select the option Use existing AD account and type the AD account credentials you created. Read more on how to create an AD DS Connector account.
8. The Active Directory is added. Click Next.
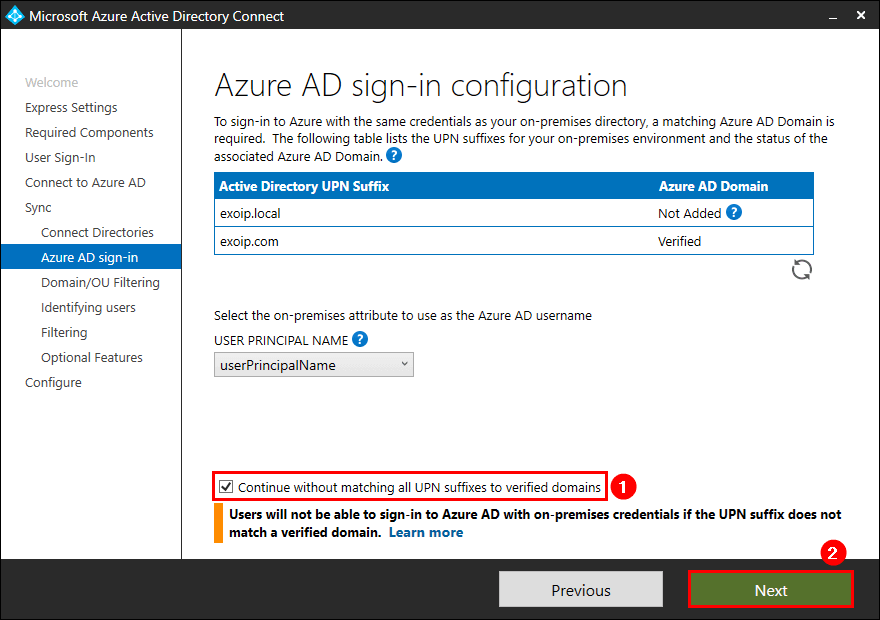
9. Select Continue without matching all UPN suffixes to verified domains. Click Next.
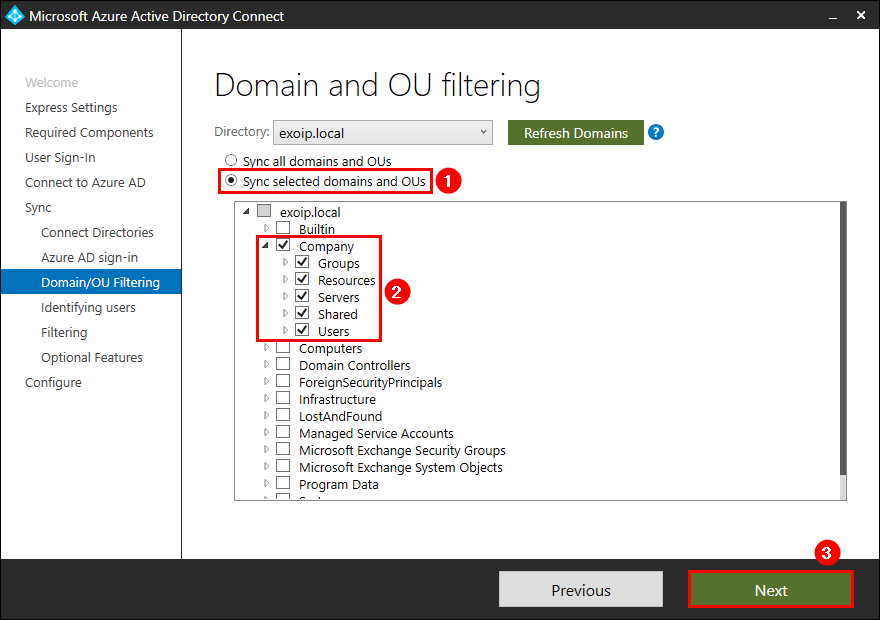
10. You can sync all domains and OUs. Click Next.
In our example, we will only sync the Company OU and sub-OUs.
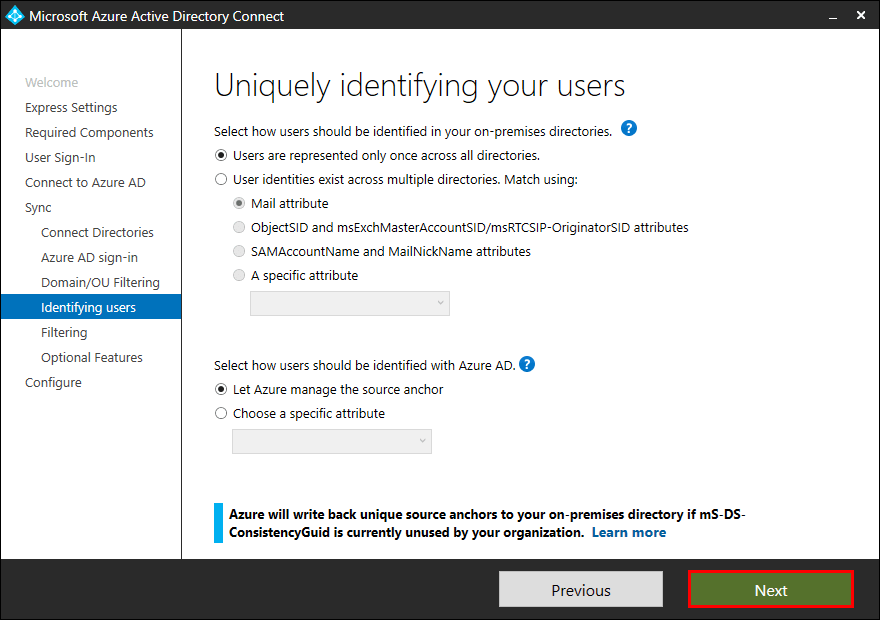
11. Select how users should be identified in your on-premises directories and select how users should be identified with Azure AD. Click Next.
In our example, we will keep the default settings.
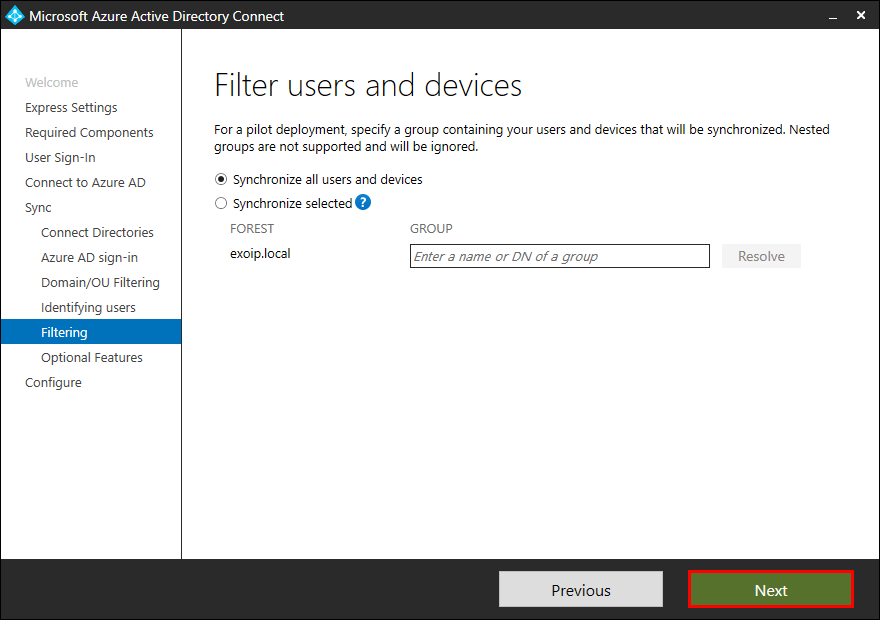
12. Synchronize all users and devices. Click Next.
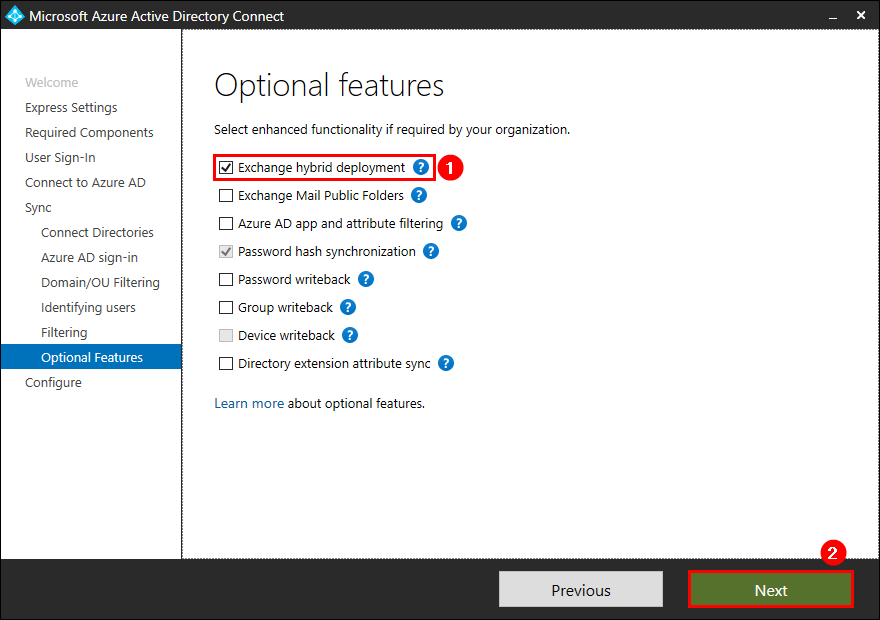
13. Select Exchange hybrid deployment. Click Next.
You can enable password writeback. After that, enable Self-Service Password Reset in Azure AD. You can do that step later if you want.
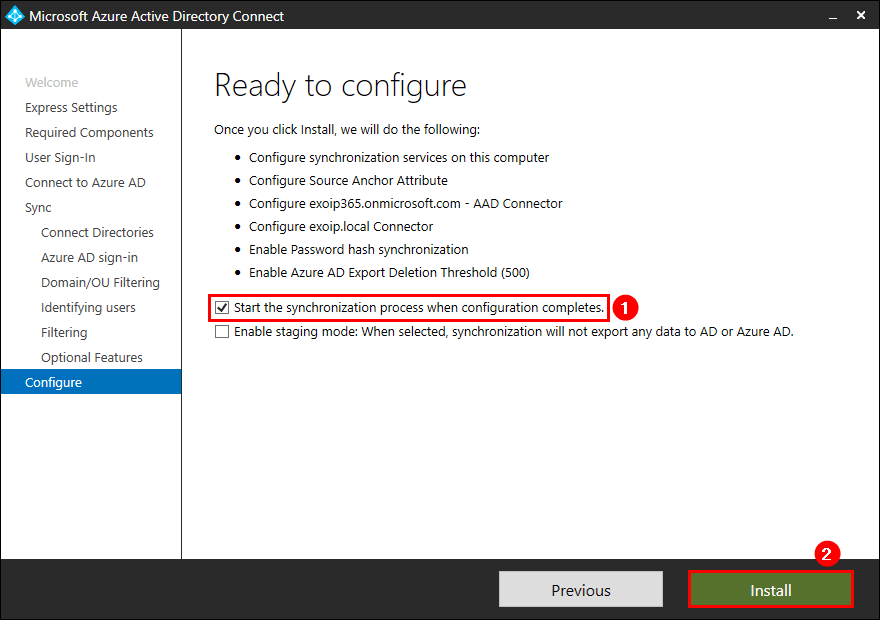
14. Select Start the synchronization process when configuration completes. Click Install.
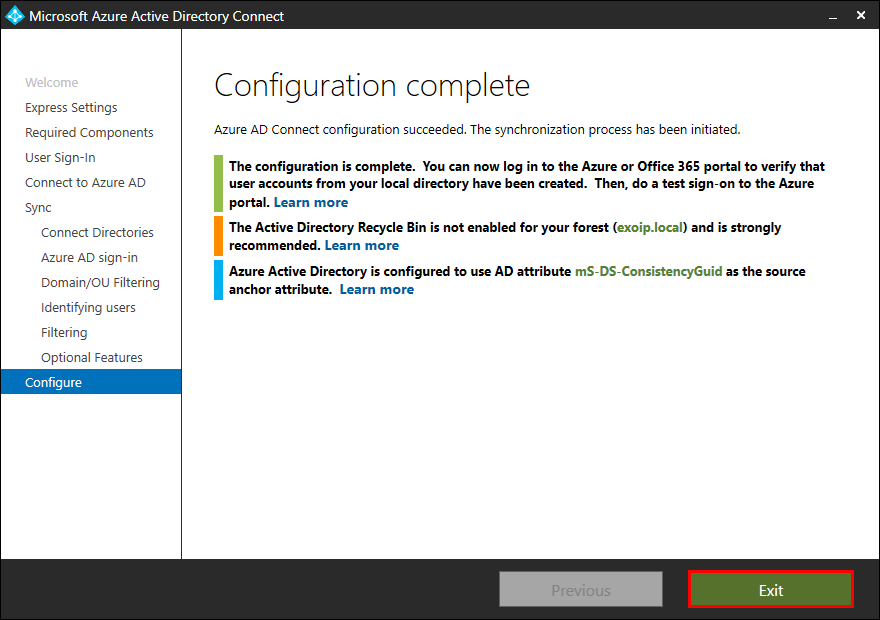
15. Azure AD Connect configuration completed. Click Exit.
After installing Azure AD Connect
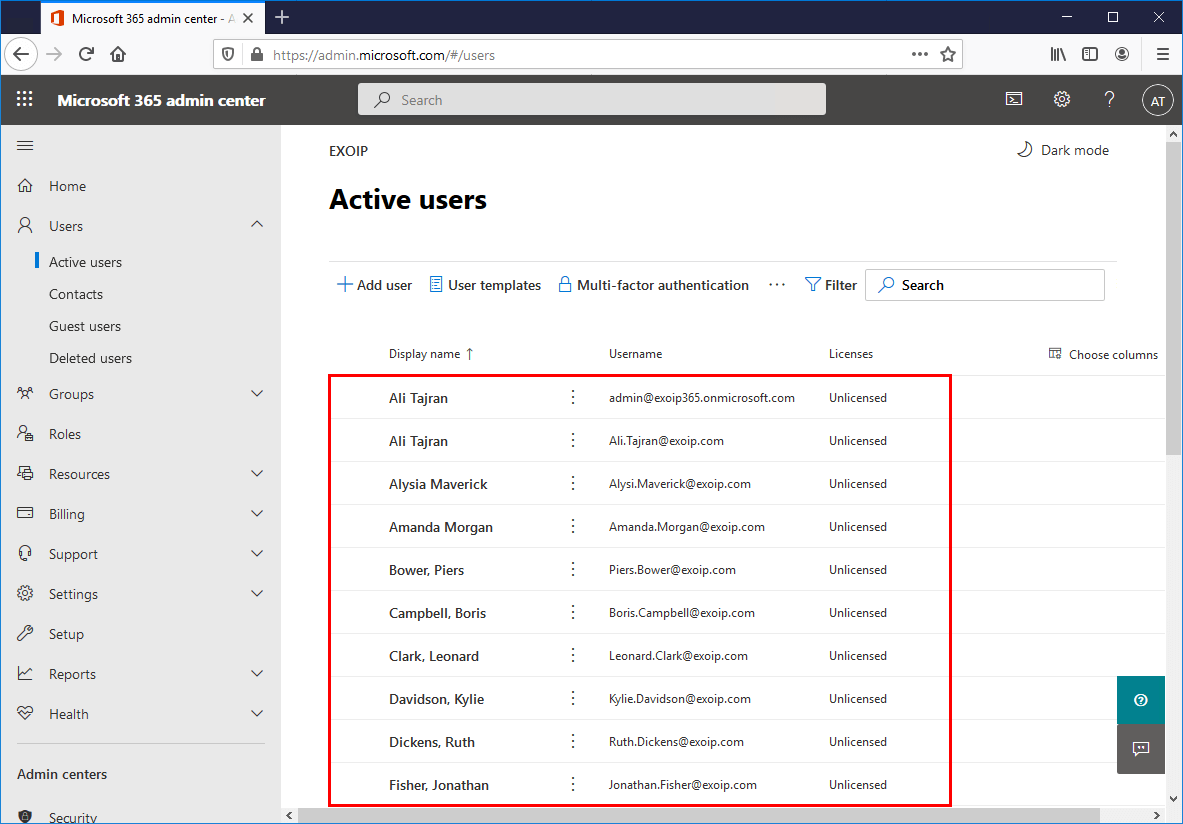
Sign in to the Microsoft 365 admin center, and you can see that a new user is displayed. That’s the Azure AD connector account created by Azure AD Connect setup, which will sync AD objects between on-premises AD and Azure AD.
Note: Azure AD Connect setup creates a total of three service accounts.

Click the start menu on the Windows Server. Search and start the application Synchronisation Service. It already did start a synchronization: the first time a full import is made, a full synchronization, and an export.
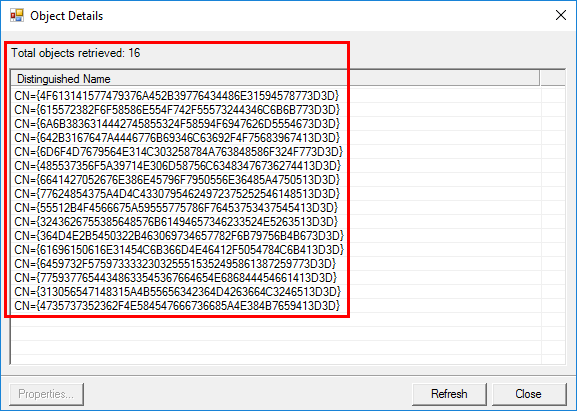
Click on the domain.onmicrosoft.com with the profile name Export. Click on Adds in the Export Statistics.
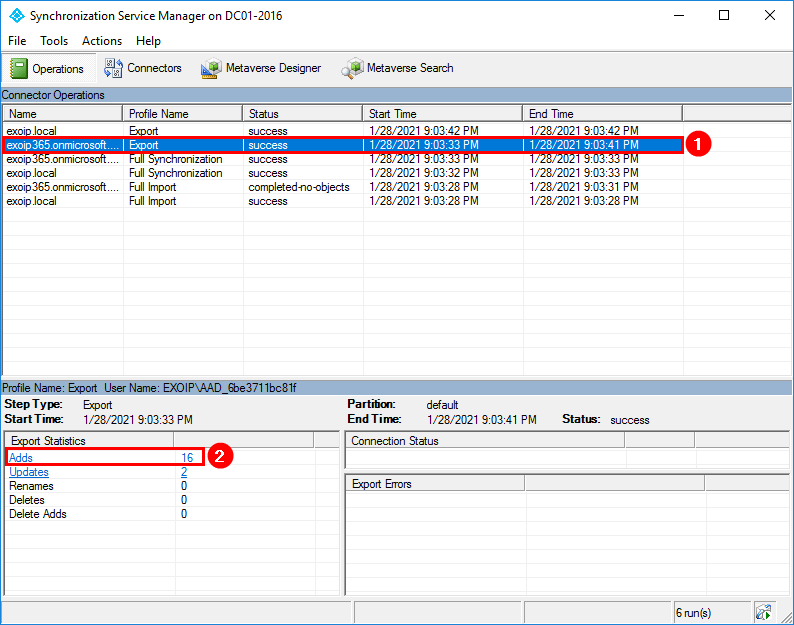
These objects are exported with success from on-premises AD to Azure AD. You can double-click on each Distinguided Name to identify the user object.
Refresh the Microsoft 365 admin center and verify the users.
Everything looks great. We did successfully install and configure Azure AD Connect.
In the next article, we will configure Exchange Hybrid firewall ports.
Conclusion
You learned how to install and configure Azure AD Connect. Before you start, make sure that you meet the prerequisites for installation. After the Azure AD Connect installation completes, synchronization will occur automatically every 30 minutes. In the Microsoft 365 admin center, you can verify the synced on-premises AD users. Don’t forget to upgrade Azure AD Connect when a new release is available.
Did you enjoy this article? You may also like Force sync Azure AD Connect with PowerShell. Don’t forget to follow us and share this article.
What Others Are Reading
This is Great step by step guide. great work. Keep it up
Hi
How can I synchronize on prem AD pwdlastset attribute with Azure AD LastPasswordChangeTimestamp attribute without make a reset password on prem?
Is it possible to achieve this simply changing to the current system time the attribute “pwdLastSet” , by assigning “0” and in turn “-1” to it , as explained in the page ? :
https://social.technet.microsoft.com/Forums/en-US/6622c897-c460-41ce-a237-a6eabff3ca12/why-cant-i-set-pwdlastset-with-setaduser
I tried but actually the attribute isn’t synchronized , it gets aligned only If I really make a password reset on prem but I’d rather avoid on prem users change their passwords .
Thanks a lot.
Regards
Antonello