Set-MailboxFolderPermission is an excellent cmdlet to set calendar access rights with PowerShell. We can use…
Import PST to Office 365
How to import PST files into Office 365? Perhaps you start with a brand new Office 365 tenant, and you want to switch over to Exchange Online. If it’s a small organization, it’s good to export the PST files and change the DNS records. After that, upload PST to Office 365. In this article, you will learn how to import PST files into Office 365.
Table of contents
How to import Office 365 PST files
Follow the steps below on how to import Office 365 PST files step by step:
1. Assign Mailbox Import Export role
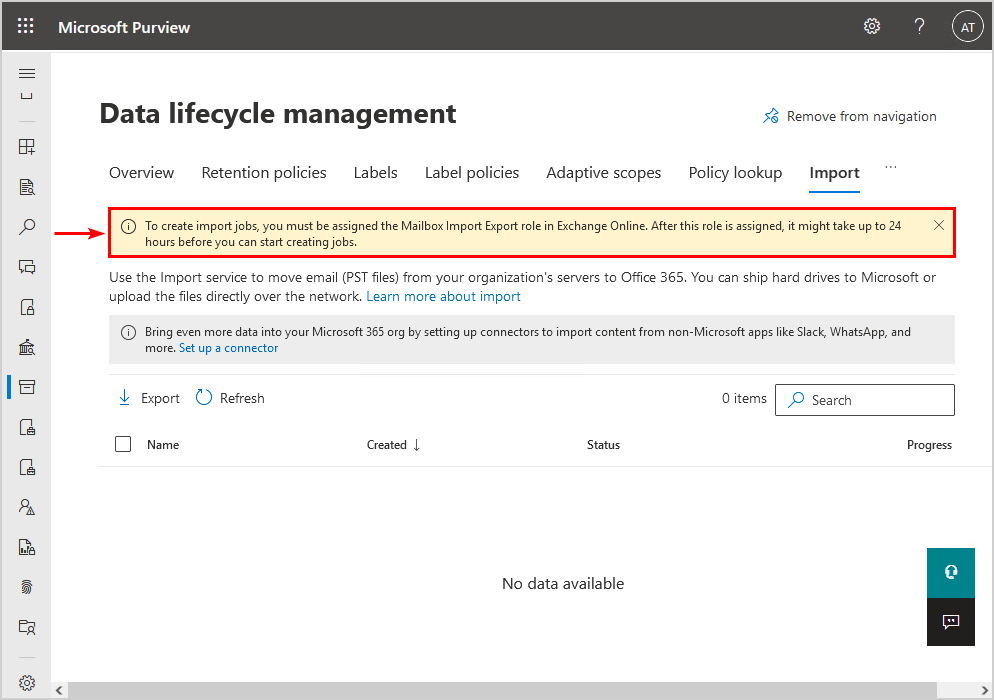
You must be assigned the Mailbox Import Export role in Exchange Online to create import jobs in the Microsoft Purview compliance portal and import PST files to user mailboxes. By default, this role isn’t assigned to any role group in Exchange Online.
Assign Mailbox Import Export role in Exchange Online to create import jobs in the Microsoft Purview compliance portal and import PST files to user mailboxes:
- Sign in to Exchange Admin Center.
- Expand Roles and click on Admin roles.
- Select Organization Management.
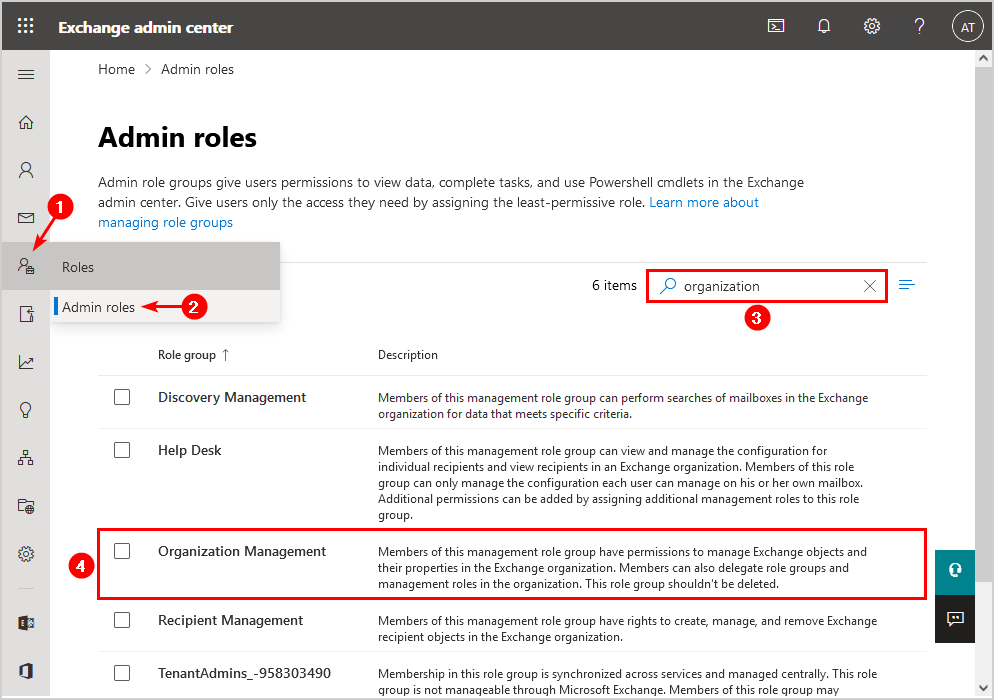
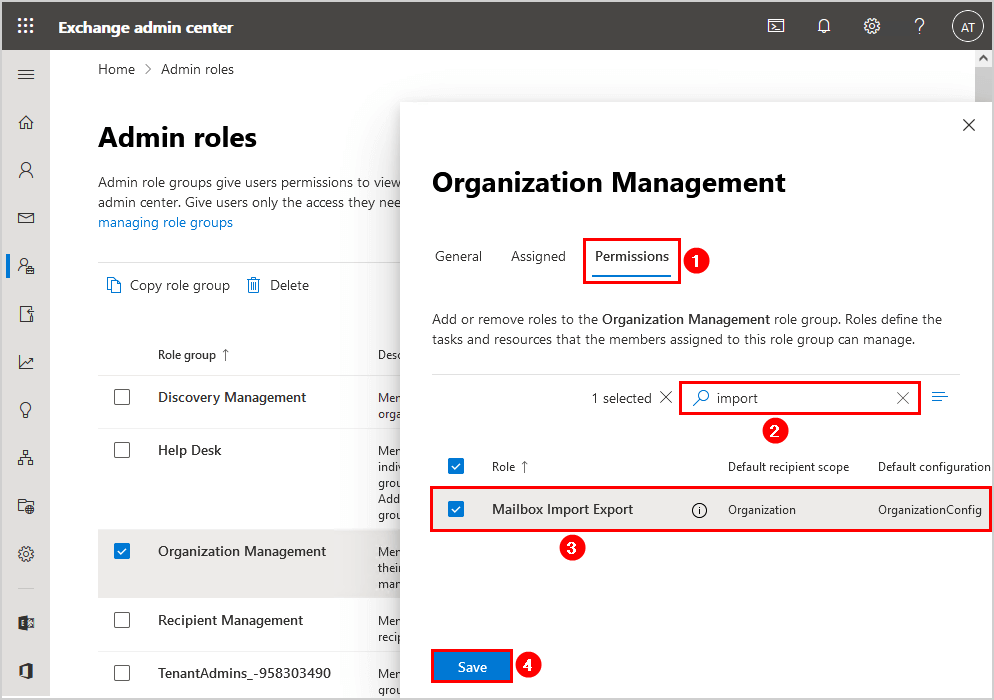
- Click on the tab Permissions.
- Select Mailbox Import Export role.
- Click Save.
Note: It can take up to 24 hours before the change applies. But, most of the time it will work within 1 hour.
Suppose you get the below error after clicking on Save:
We couldn’t save your changes. Please try again.
An excellent alternative way to add the Mailbox Import Export role is with PowerShell.
Connect to Exchange Online PowerShell and run the New-ManagementRoleAssignment cmdlet.
PS C:\> New-ManagementRoleAssignment -Role "Mailbox Import Export" -SecurityGroup "Organization Management" -Name "Import Export Org Management"

Name                           Role              RoleAssigneeName  RoleAssigneeType  AssignmentMethod  EffectiveUserName
----                           ----              ----------------  ----------------  ----------------  -----------------
Import Export Org Management   Mailbox Import... Organization M... RoleGroup         Direct
Note: If you get a dehydration error, read the article Tenant organization is dehydrated.
2. Create PST import job
To create a PST import job in Microsoft Purview compliance portal, follow these steps:
- Sign in to Microsoft Purview compliance portal.
- Expand Data lifecycle management and click on Microsoft 365.
- Choose Import.
- Click on New Import Job.
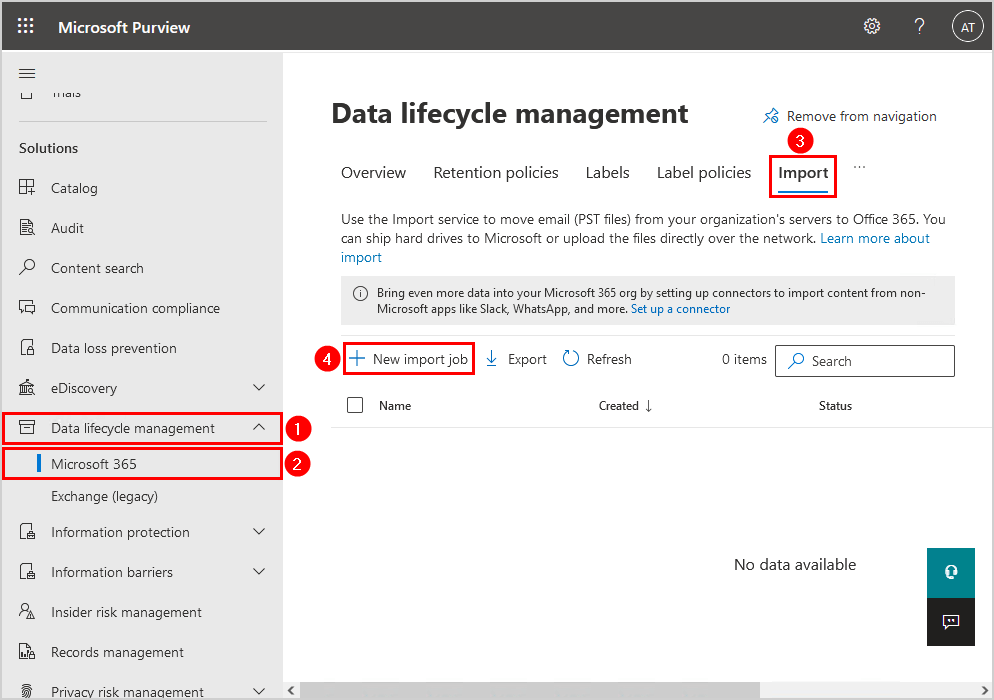
If you don’t see a New import job, it means that you have to wait before the change in the previous steps applies.
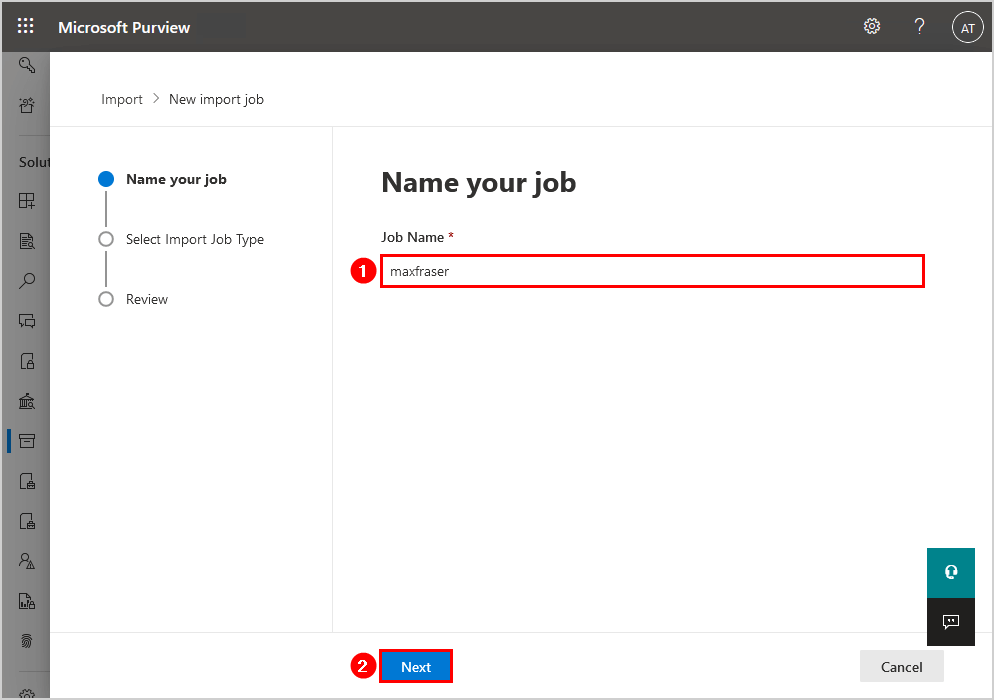
- Give the import job a name. Click Next.
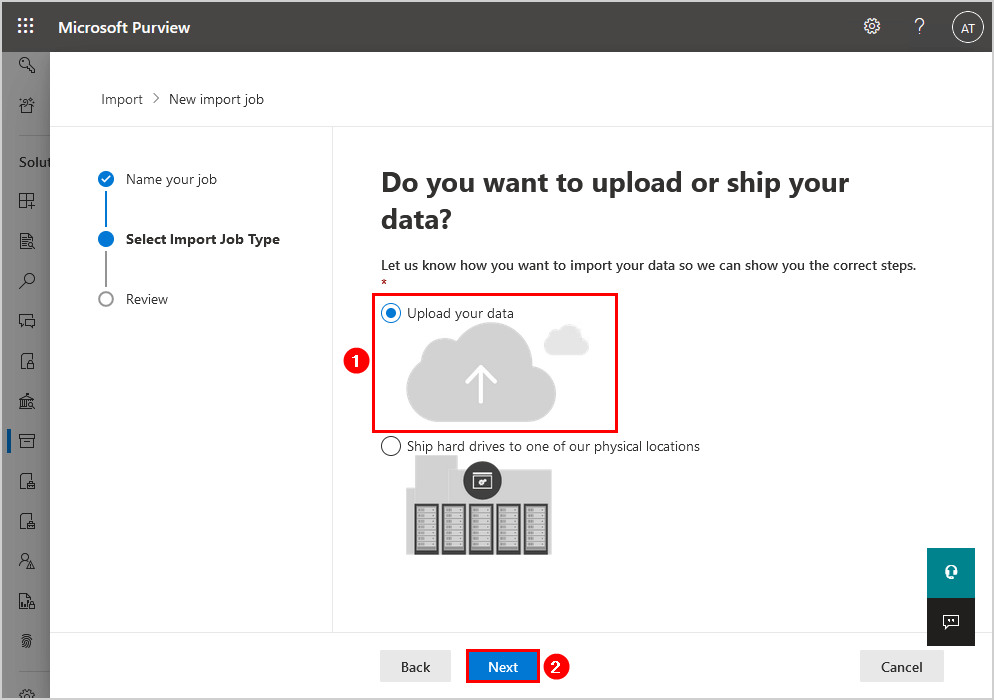
- Select Upload your data. Click Next.
- Click on Show network upload SAS URL.
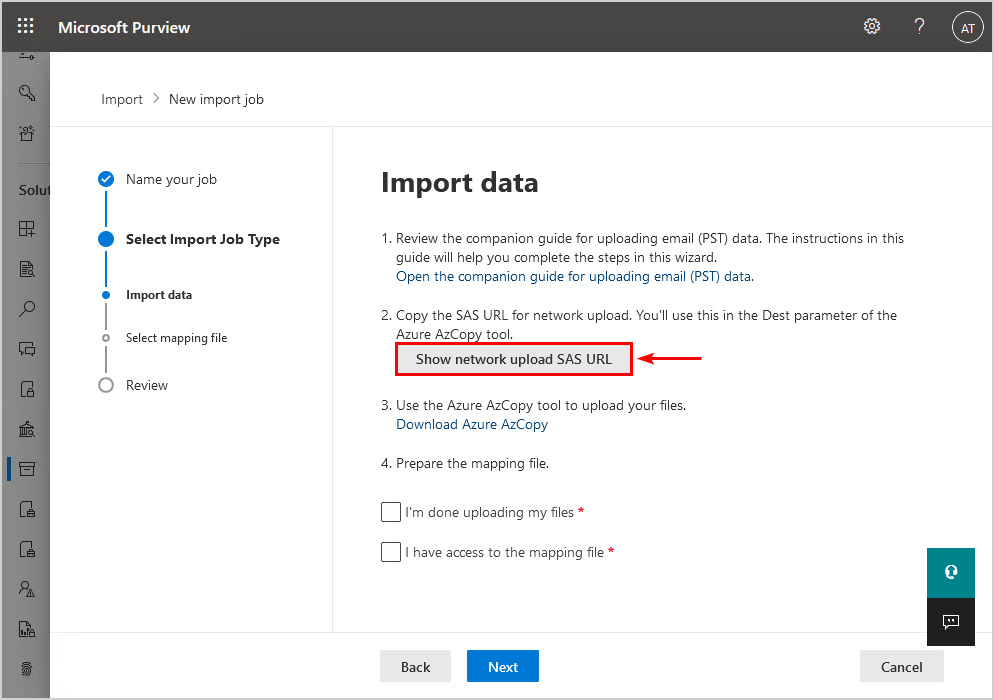
- Click on Copy to clipboard to copy the SAS URL. You will need the SAS URL in the next step.
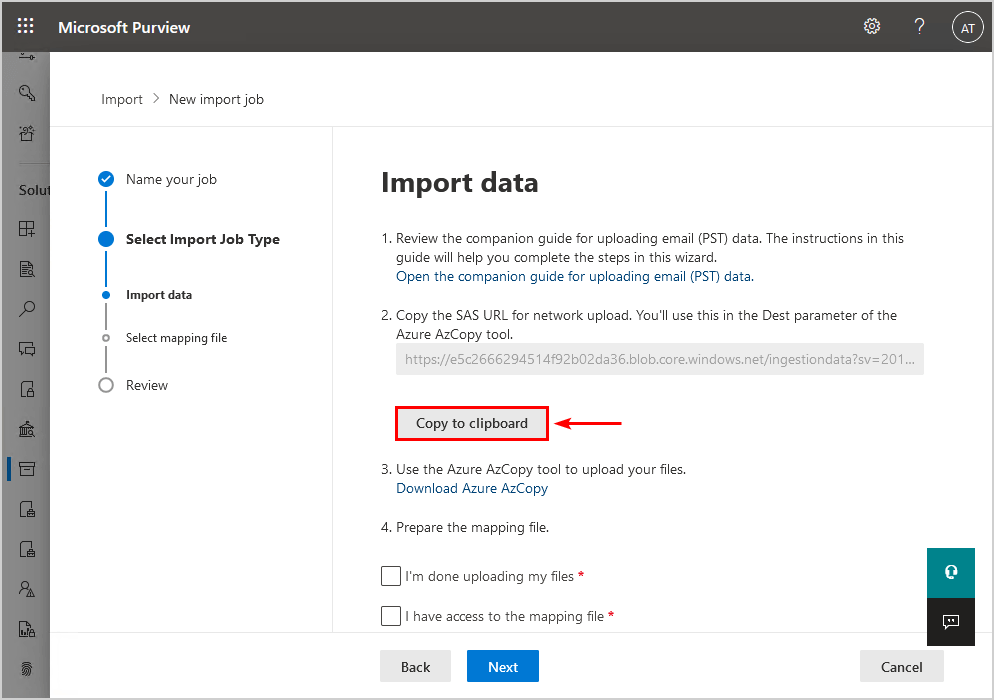
In the next step, you will upload the PST files to Office 365 with AzCopy command-line tool.
Note: Don’t cancel the import job because you need to return to this window and finish the import job. If you cancel the import job, you have to go through the steps again.
3. Upload PST files to Office 365
- Download AzCopy (Microsoft), and place it in the C:\Temp folder. AzCopy V10 is just an executable file, so there’s nothing to install.
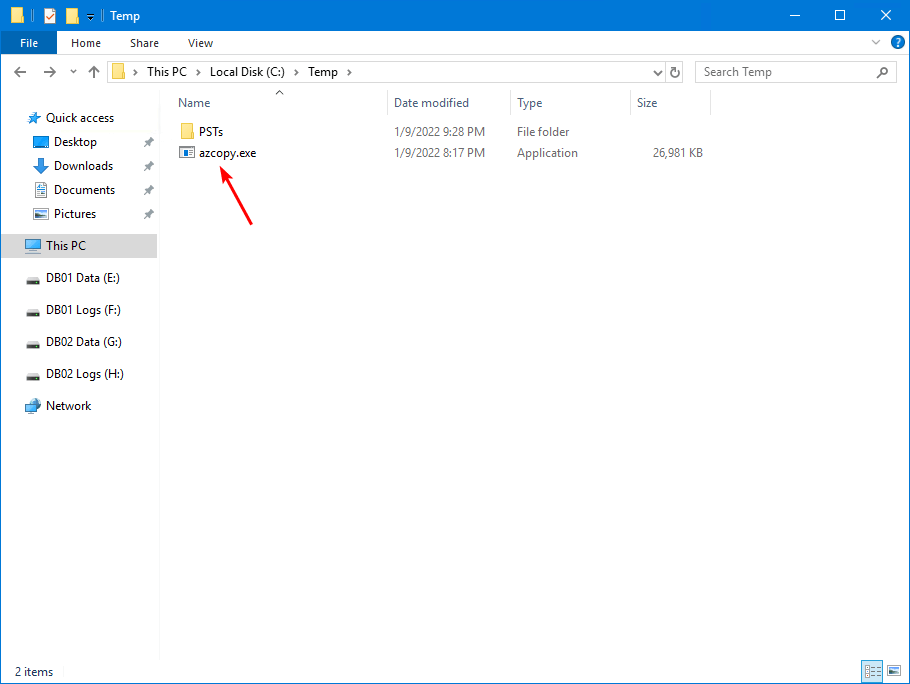
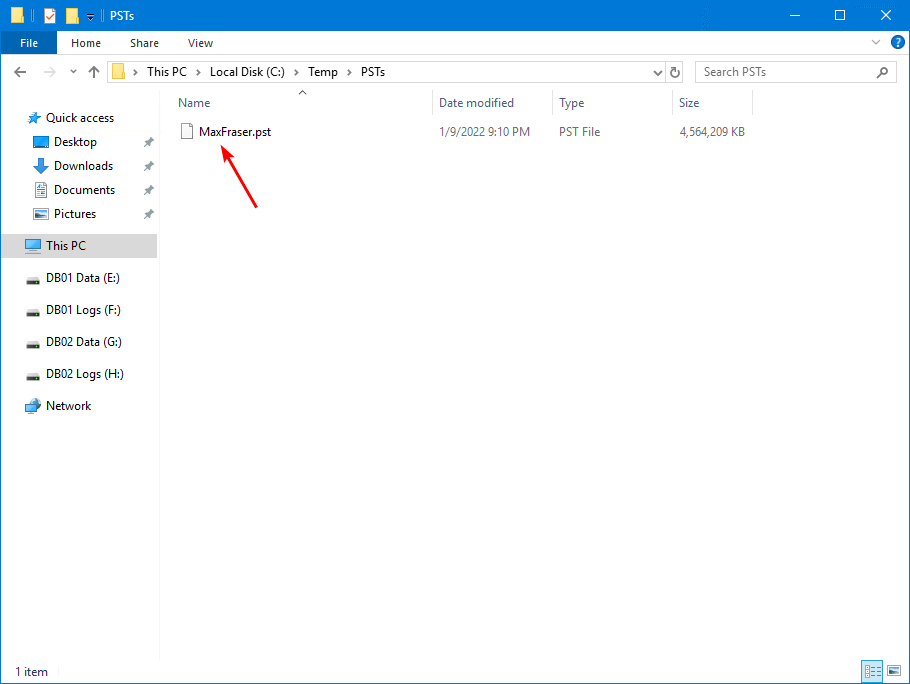
- Check the location of the PST files.
You can use the source directory on the share (\\yourserver\PSTs) or local drive (C:\PSTs). In our example, the PST file is on the local drive path C:\Temp\PSTs.
- Start Command Prompt as administrator.
- Change the directory to C:\Temp\.
- Paste the SAS URL you copied in the previous step in the command.
- Run the command to copy the PST file to Azure.
C:\>cd C:\Temp\
C:\Temp>azcopy.exe copy "C:\Temp\PSTs" "https://e5c2666294514f92b02da36.blob.core.windows.net/ingestiondata?sv=2015-04-05&sr=c&si=IngestionSasForAzCopy202201091916203434&sig=KF5CRE4YM65BLHgYtw%2BY0knNc%2ByNB%2B8w7aAfRXt8sT8%3D&se=2022-02-08T19%3A16%3A22Z" --recursive- The output will show like this.
INFO: Scanning...
INFO: Any empty folders will not be processed, because source and/or destination doesn't have full folder support

Job 37cf8d63-d431-e143-78c2-e3a9b85d0d7e has started
Log file is located at: C:\Users\administrator.EXOIP\.azcopy\37cf8d63-d431-e143-78c2-e3a9b85d0d7e.log

INFO: Could not read destination length. If the destination is write-only, use --check-length=false on the command line.
100.0 %, 1 Done, 0 Failed, 0 Pending, 0 Skipped, 1 Total, 2-sec Throughput (Mb/s): 26.7263


Job 37cf8d63-d431-e143-78c2-e3a9b85d0d7e summary
Elapsed Time (Minutes): 20.6073
Number of File Transfers: 1
Number of Folder Property Transfers: 0
Total Number of Transfers: 1
Number of Transfers Completed: 1
Number of Transfers Failed: 0
Number of Transfers Skipped: 0
TotalBytesTransferred: 4673750016
Final Job Status: Completed
Note: You can’t use the Azure Storage Explorer to upload or modify PST files. The only supported method for importing PST files is to use AzCopy. Also, you can’t delete PST files that you’ve uploaded to the Azure blob. If you try to delete a PST file, you’ll receive an error about not having the required permissions.
4. View PST files uploaded to Office 365
To install the Azure Storage Explorer and connect to your Azure Storage area, follow these steps:
- Download and install the Microsoft Azure Storage Explorer tool.
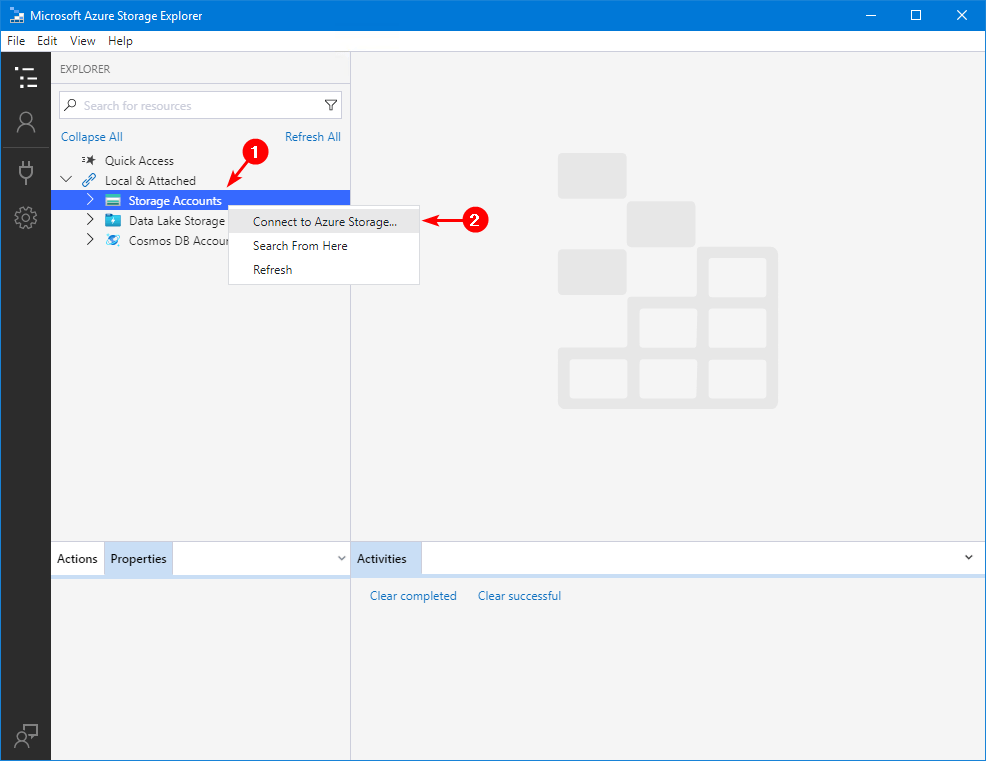
- Start Microsoft Azure Storage Explorer.
- Right-click Storage Accounts.
- Click on Connect to Azure Storage.
- Click on Blob container.

- Select Shared access signature URL (SAS). Click Next.
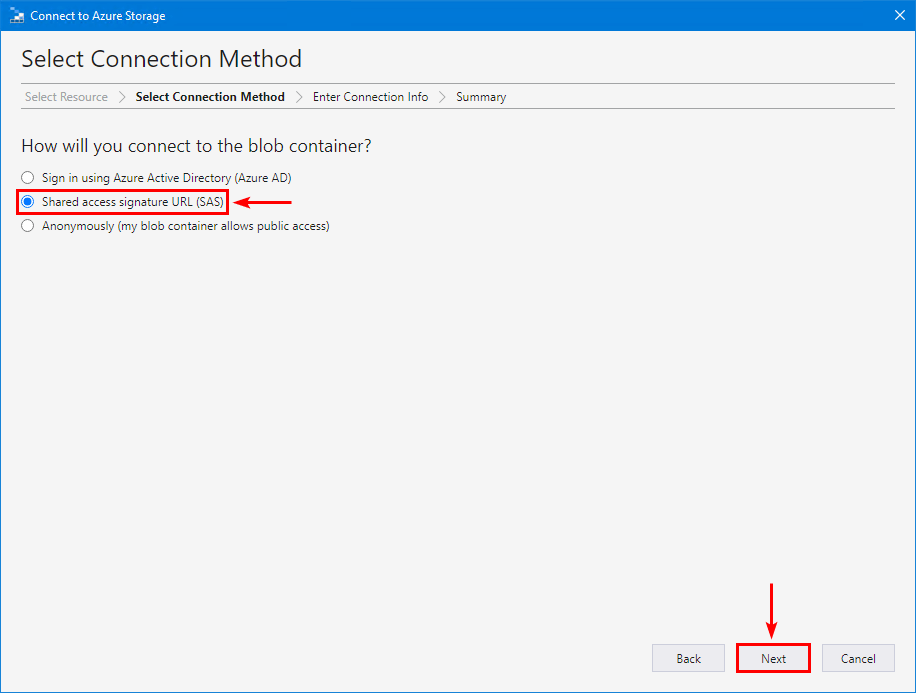
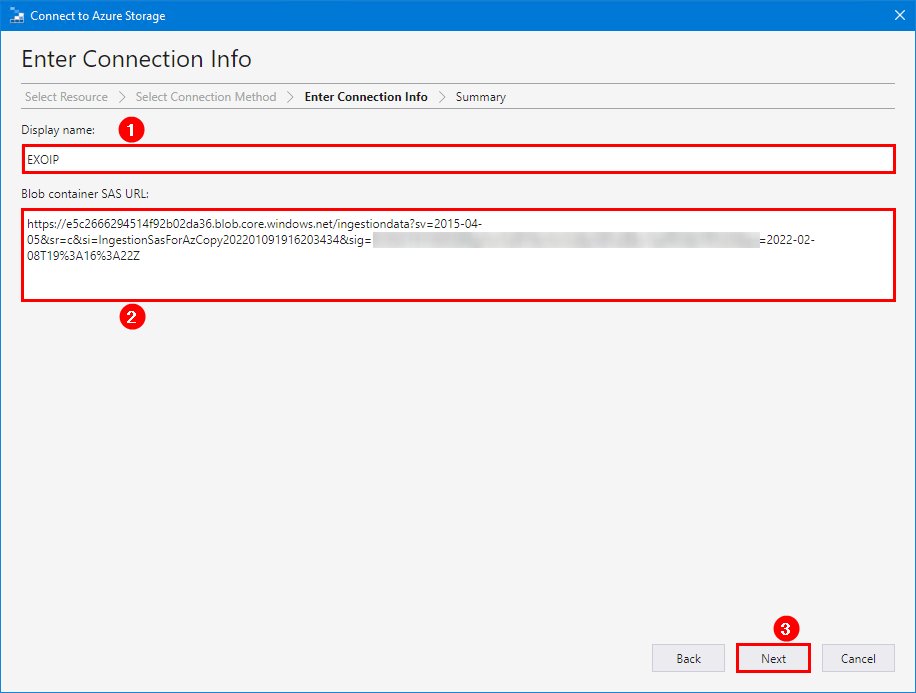
- Insert Display name.
- Paste the Blob container SAS URL that you obtained from the previous step.
- Click Next.
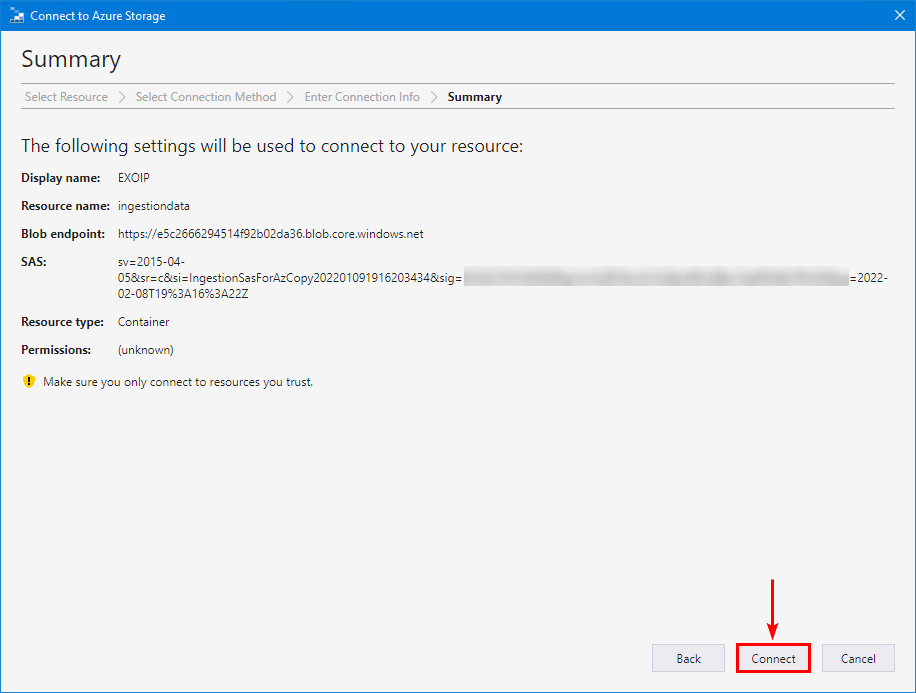
- Click Connect.
- You will see the PSTs folder and the PST file.
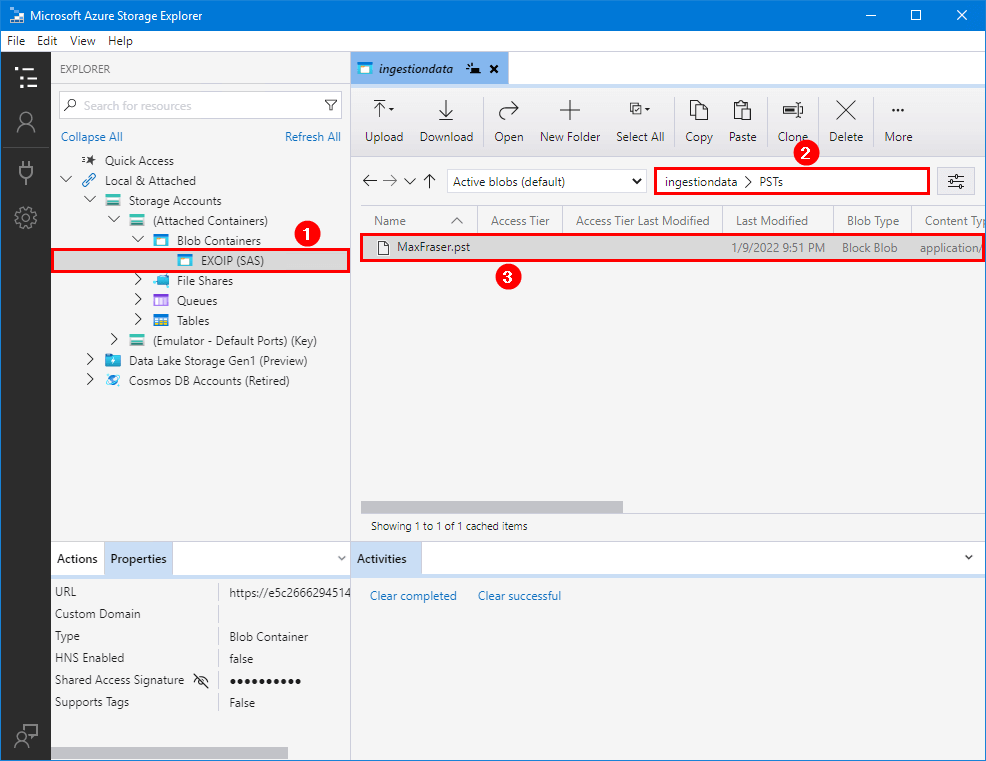
Note: All PST files are automatically deleted from your Azure storage area. If there are no import jobs in progress, then all PST files in the ingestiondata container are deleted 30 days after the most recent import job was created.
Now that you verified that the PST files are in the Azure storage, proceed to the next step.
5. Create PST import mapping file
- Download a copy of the PST import mapping file (direct) or (Microsoft).
- Start Microsoft Excel.
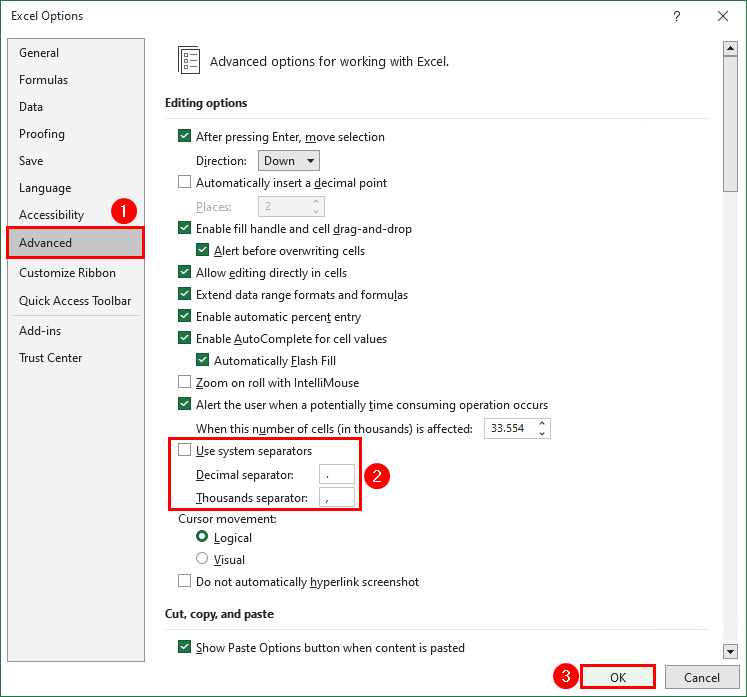
- Go to the Excel advanced options and change the below options:
- Uncheck the use system operators
- Set Decimal seperator to period (.)
- Set Thousands seperator to comma (,)
Important: Uploading the CSV file in the next step will show an error after validating the mapping file if you don’t set the system operators correctly.
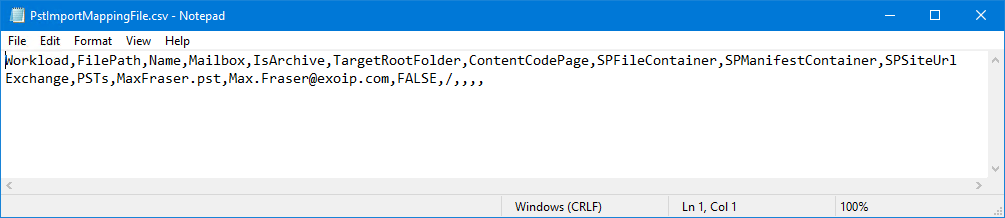
- Open the CSV file with Microsoft Excel and edit the values.
Pay close attention to the values and what you need to set:
- Workload: Specifies the service that data will be imported to. To import PST files to user mailboxes, use Exchange.
- FilePath: Specifies the folder location in the Azure Storage location that you uploaded the PST files to.
- Name: Specifies the name of the PST file that will be imported to the user mailbox. The value for this parameter is case-sensitive.
- Mailbox: Specifies the email address of the mailbox that the PST file will be imported to.
- IsArchive: Specifies whether to import the PST file to the user’s archive mailbox. Set the value TRUE or FALSE. If you choose TRUE, ensure that the user’s archive mailbox is enabled.
- TargetRootFolder: Specifies the mailbox folder that the PST file is imported to. If you leave this parameter blank, the PST file will be imported to a new folder named Imported at the root level of the mailbox (the same level as the Inbox folder and the other default mailbox folders). If you specify /, the folders and items in the PST file are imported to the top of the folder structure in the target mailbox or archive. If you specify /foldername, items and folders in the PST file are imported to a folder named foldername.
The other fields in the CSV file are optional, and you can leave them empty.

- You can open the CSV file with Notepad, edit the values, or verify that it’s saved as a comma-delimited file.
6. Select PST import mapping file
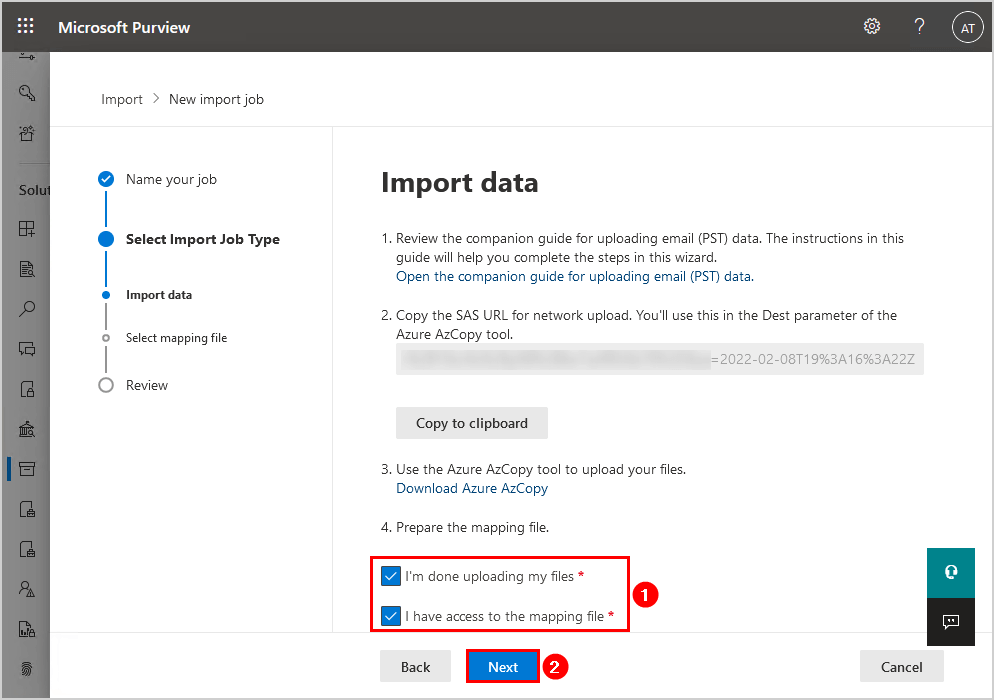
- Go back to the PST import job, check both the boxes, and click Next.
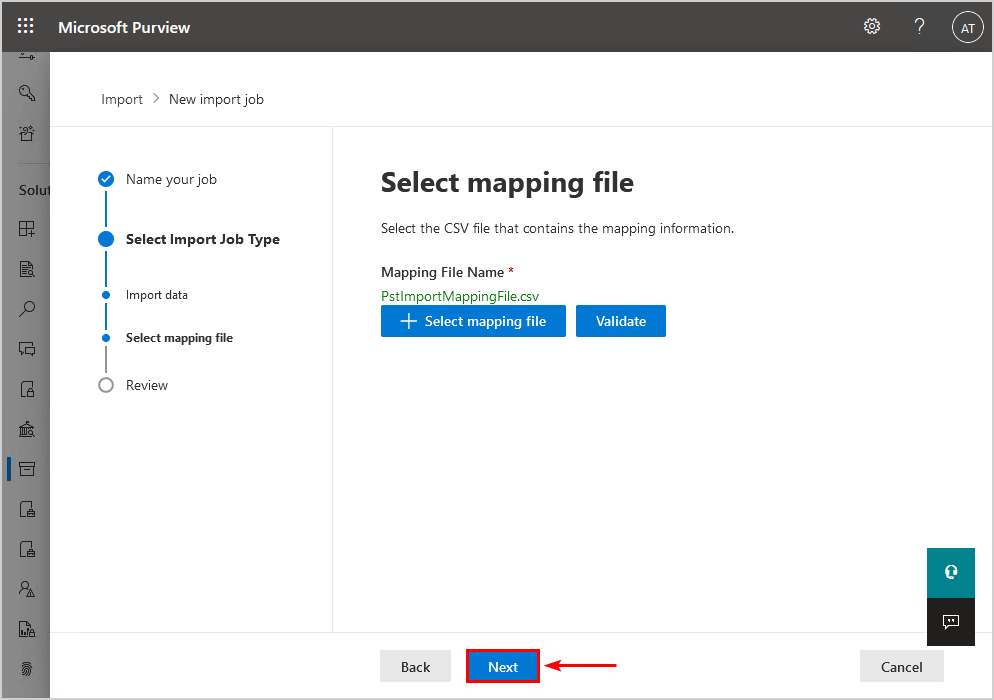
- Click Select mapping file.
- Browse to the PstImportMappingFile.csv file.
- Click on Validate.

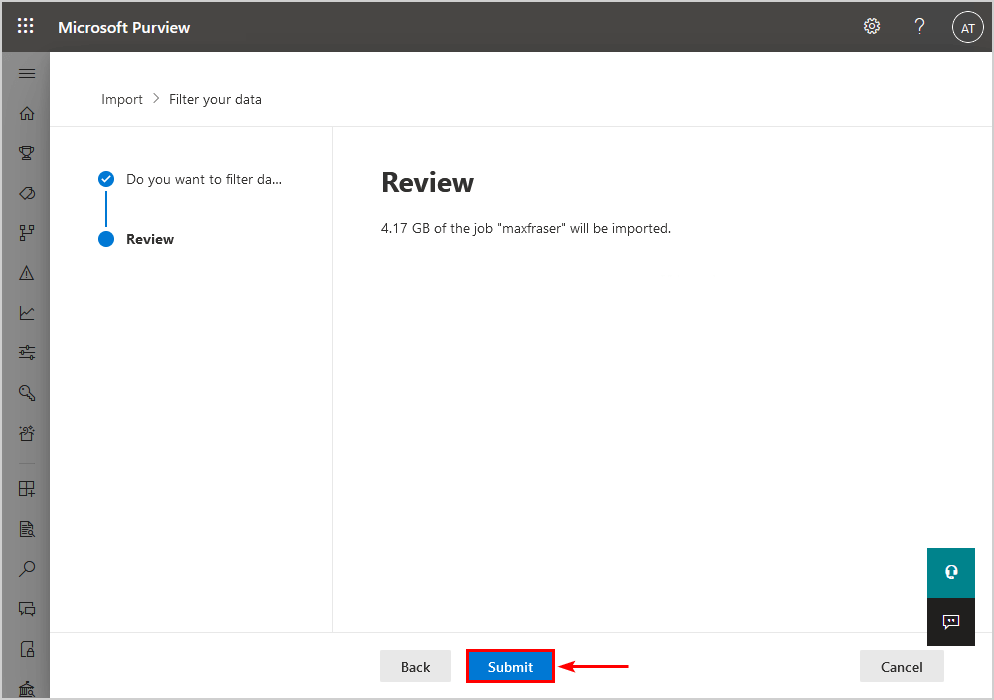
- It shows a green text, which means that it’s valid. Click Next.
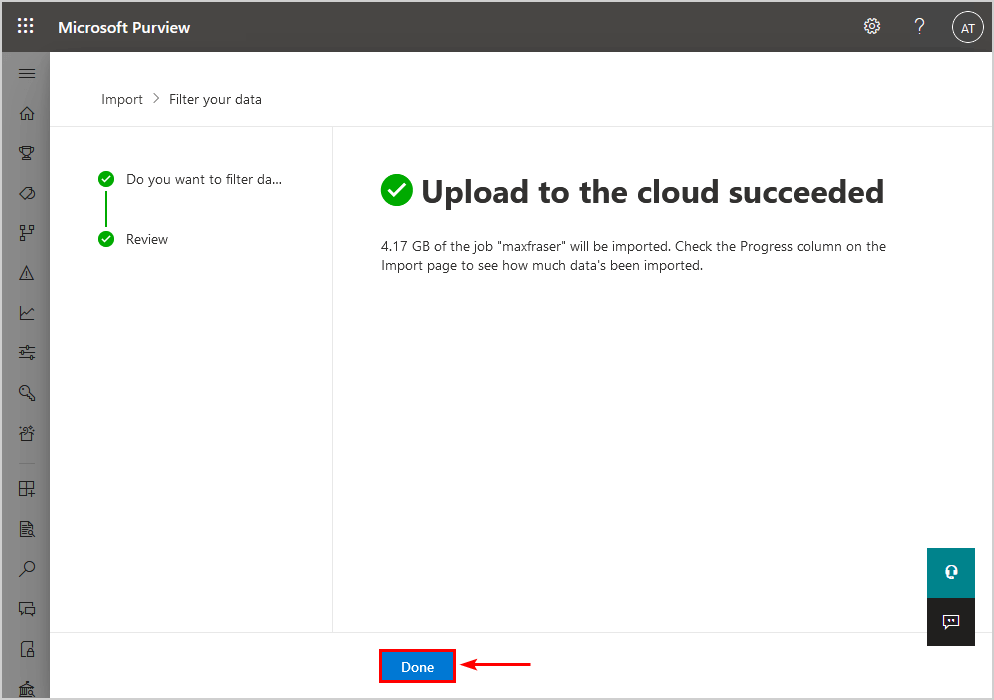
- Review the PST import job. Click Submit.
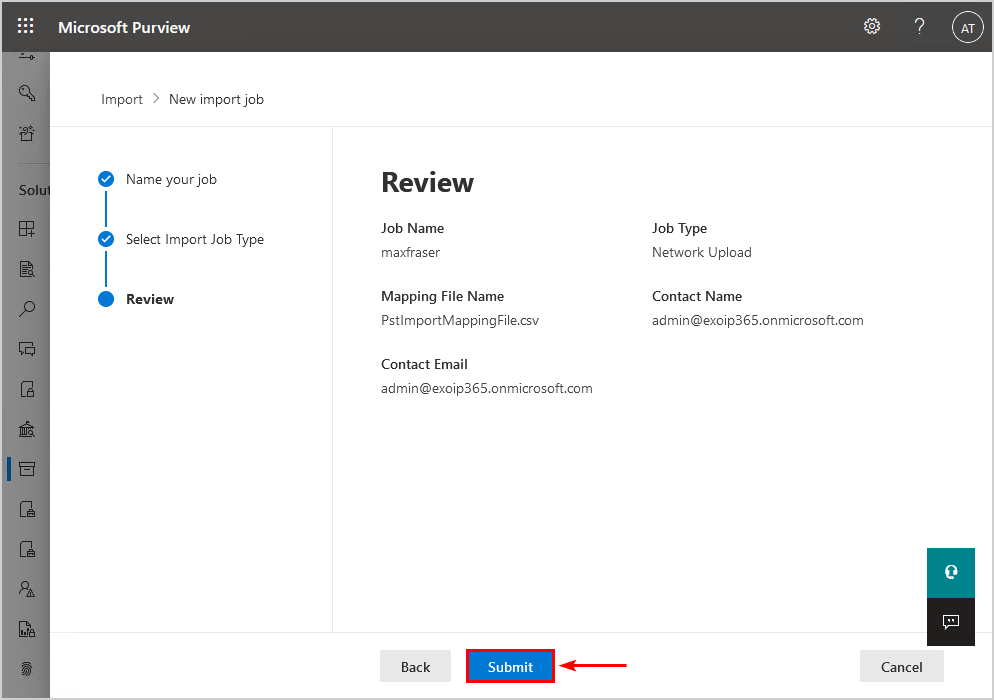
- Upload to the cloud succeeded. Click Done.
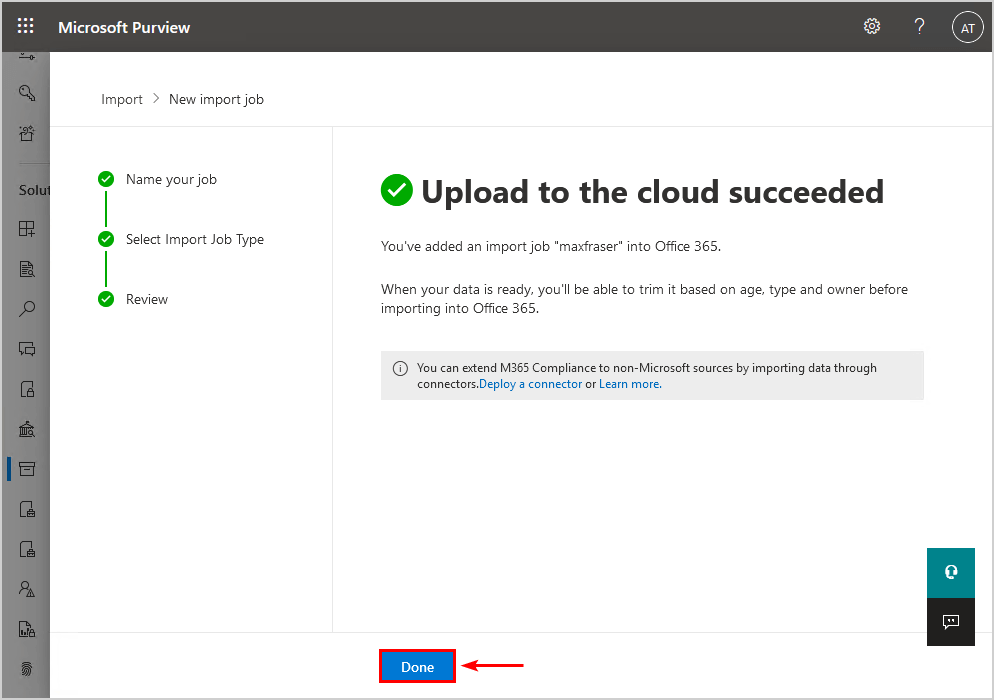
You are not finished because there is one last step. That’s to start the PST import to Office 365.
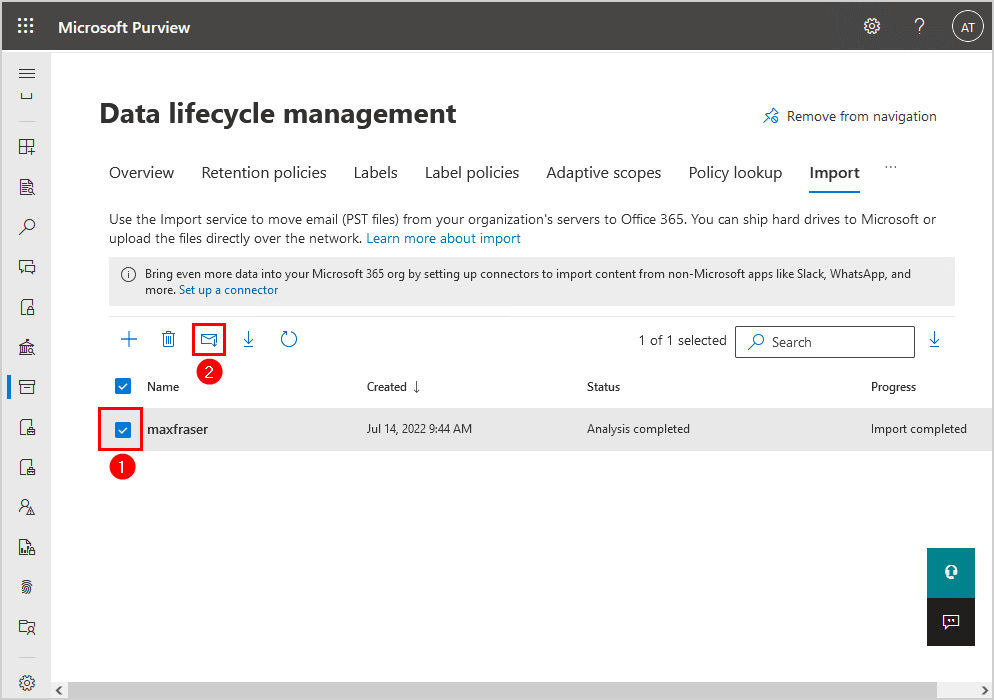
7. Start PST import to Office 365
Before you can start to import the PST file to Office 365, you have to wait for the analysis progress to complete. After that, it will show the Import completed progress and ready to:
- Select the checkbox in front of the Import Job.
- Click on Import to Office 365 button.
- Select No, I want to import everything. Click Next.
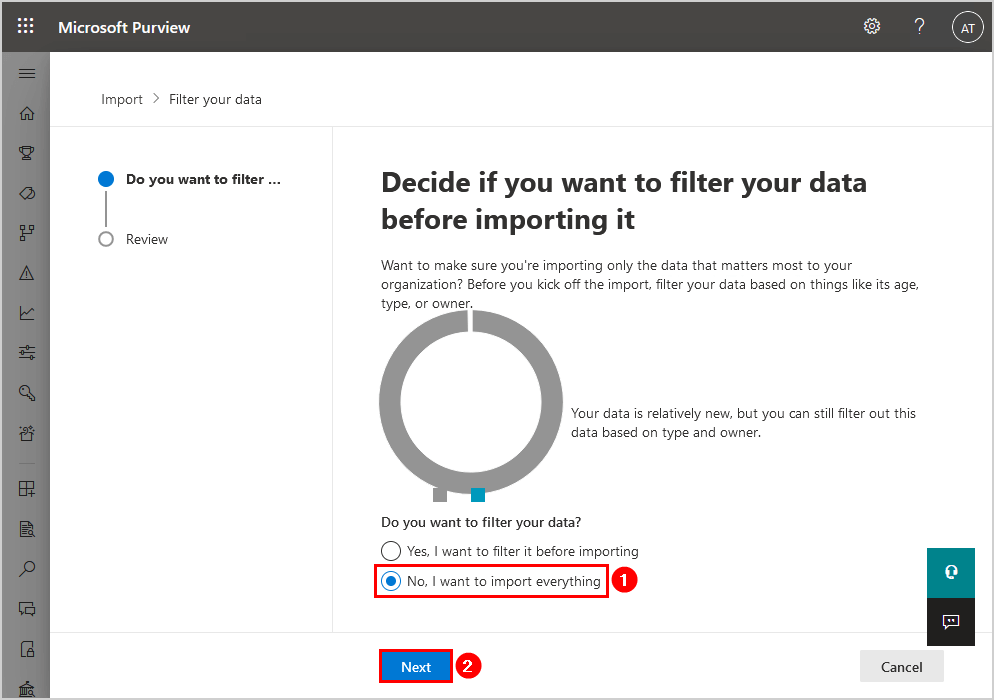
- Click on Submit.
- Upload to the cloud succeeded. Click Done.
You have to wait before Microsoft accepts the request and starts the progress. It’s not possible to force the PST import to Office 365.
8. Verify PST import job completion status
To verify the PST import job status, click on the Import Job in the list view. Then, verify that the PST import job shows the status completed.
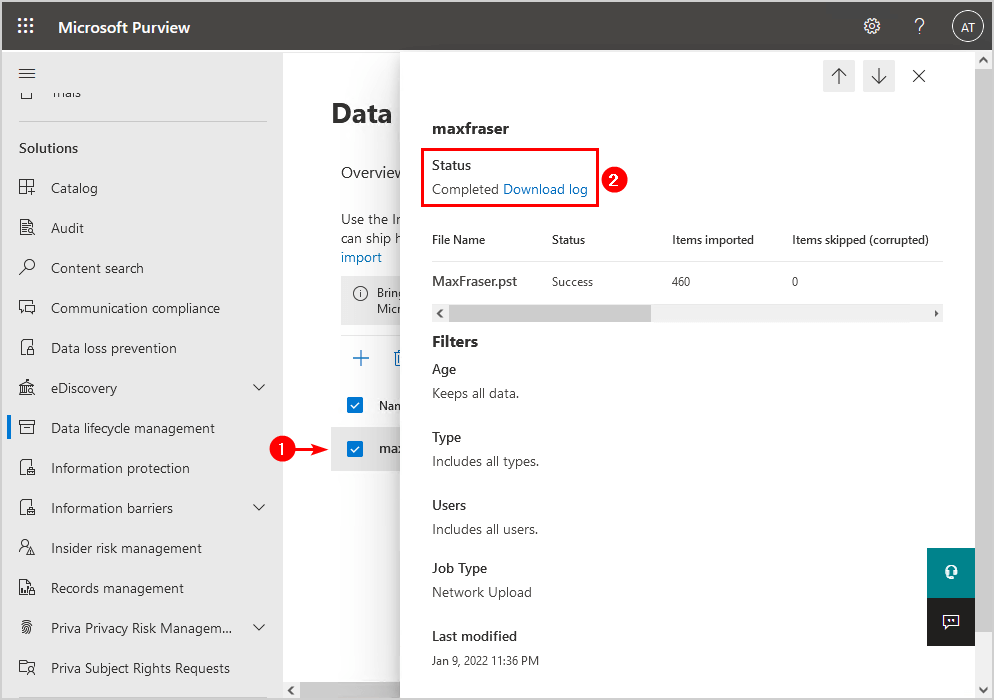
You successfully imported a PST file to Office 365.
Read more: Export Exchange mailbox to PST with PowerShell »
Conclusion
You learned how to import PST files to Office 365. There are a couple of steps involved in uploading PSTs to Office 365. But, it’s best to have the PST files imported in Office 365 with AzCopy and Microsoft Purview compliance portal. It’s better than importing the PSTs in each Outlook client.
Did you enjoy this article? You may also like Send from Alias in Office 365. Don’t forget to follow us and share this article.
Great guide as usual !
I’ve been following your guides for years now, i can say you’re from far the very best resource for Exchange Admins over the Internet!
So for once, i’ll say thank you Ali and keep on the good work !
Hi Ali,
We did this for an Exchange 2016 migration to Exchange Online; each PST was stored in a unique child folder of the Online Archive. One side effect we’ve had is the source PSTs contained calendar data, and Outlook 365 is recognizing the calendar data in each child folder and displaying calendar folders for each child folder. I’m told they’ve tried removing/deleting the offending calendars but it is not permitted. While I’m waiting for M365 support to research the scenario, might you have any ideas how to remove the undesired calendar entries?
Thanks!
MISSING: A prerequisite to be able to assign the “Mailbox import-export” to the GA group is that you need to run Enable-OrganizationCustomization cmdlet first.
As written in the article, you should go through this article to run the cmdlet and enable it: Tenant organization is dehydrated.
Hey Ali,
This was of great help and I have a task to do similar in my Org.
After the above, how do we attach this to a particular user? Can you furnish or share those steps please?
Ali, you’re the best. Amazing tutorial. Everything worked exactly like you described. Life saver.
Running through this process on a tenant I was getting error 500 when I went to the import tab. My roles were correct. According to MS Support I need a E5 license or equvalent on my account to complete the process. The tenant I was working in only had M365 Business Standard. Has the requirements for Imports changed?
Superb work, Ali.
Do you really need to keep the Create import job wizard open all the time that you are uploading the PST-files.
You cannot create a new import job with a previously generated SAS url and therefore you would need to keep the website alive and active between creating the SAS URL, uploading PST’s and validating the CSV mapping file.
This is so unconvenient…uploading took me couple of hours and now I need to start all over again 🙁
After my first import failed due to the destination mailbox being mistyped I was able to reuse a SAS URL as long it is within 30 days of the url creation.
I am getting error in exchange online completed with errors
You can get a log/report when clicking on the job. It will give you the reason for the error or if there were items skipped.
Thanks for creating this! It works really well. thank you
Hello thanks for the post.
Hi,
Great article .. as always !
Is this import solution (and also export to pst possibilities) available in all 365 Plan’s.
Consider to start with Microsoft 365 Business Basic (web only mailbox)
Roy
Yes, available in all Microsoft 365 Plans.
Is the 20 GIG limit only for the upload, but for shipping the a drive with the PST on it to MS as well? My client has a 46 GIG PST and is now on Exchange plan 2, a 100 GIG mailbox. We don’t need all of the 46 GIG, but probably over 30 GIG in just inbox alone. Thank you kindly for any information.
Each PST file that you copy to the hard drive should be no larger than 20 GB. That’s because PST files larger than 20 GB may impact the performance of the PST import process.
I recommend you upload the PST file through Outlook. Suppose your client does not have an Outlook client; download a Microsoft Office trial.
I am trying here for a while, and following Step is not working :Run the command to copy the PST file to Azure
During the command, there is the message of “Disk may be limiting speed” and after long time, job status is failed. Tried to have only necessary windows /chrome running, but no succeed.
I have only 1 PST file of 9.7GB, using office 365 web only version.
Any advanced tip to go trough the disk limit issue – which, first of all, should not be a problem, right ?
Each PST file that you upload to the Azure Storage location should be no larger than 20 GB.
I uploaded a 20 GB PST file and didn’t get such an error.
You can download a Microsoft Office trial and import the PST file through Outlook.
Hi Ali,
Thank you for such a great guide! Very detailed and easy to follow. One thing worth mentioning is that “Information Governance” has now been changed to “Data lifecycle management” in the compliance centre which by the looks of it has also had it’s name changed to Microsoft Purview!
Thanks again
Jamie
Hi Jamie,
Thanks for letting me know. I did go through all the steps and updated the article to keep up with the latest Microsoft changes.
Thank you Ali. You’re a lifesaver.
Thank you for the great article.
I have uploaded 13 Mailboxes and now I have the case that my MappingFile had a spelling error in one of the mail addresses and the analysis is stuck on “Error”.
Is there any way to edit the Import job to exclude that one Mailbox, or do I need to go through the whole scenario (create Import Job -> Upload pst to new blob storage) again?
Sort of the same issue here; I uploaded 4 PST’s of 20GB max each yesterday. And of course I don’t have the Create Import Job wizard open anymore; so I cannot resume creating the job for the given SAS url. Any way to fix this?
You really have the best articles out there my friend. I love your work and thanks a lot for this! Please keep going.
Ali,
Thank you for an accurate, concise document on how to do the import. There’s so much outdated microsoft documentation on the web, your website was the only one I found that actually worked. Nice job!
James
Hello
this seems like so much unnecessary work, not to mention that you have to leave copy of your pst file and can;t remove afterwards.
How about once you have an online mailbox, simply open Outlook and import the .pst file directly from Outlook.
thanks
Hi,
Importing the PST file in Outlook will work great if you don’t have many PSTs. However, when you have 20+ PSTs, it’s efficient to go through the Microsoft Purview compliance portal and import the PSTs to Office 365 mailboxes.
The PST files will be deleted from Azure after 30 days, as written in the article.