How to save sent items in shared mailbox sent items folder in Office 365 (Exchange…
Configure Office 365 SMTP relay
Office 365 gives you a free SMTP relay which is excellent for sending emails to the outside world. When you have a domain in the cloud, you can configure SMTP relay with Office 365. This can be an Exchange Hybrid configuration or a Microsoft 365/Office 365 cloud-only configuration. In this article, we will look at how to set up SMTP relay for Office 365.
Table of contents
Introduction
Most IT environments have some applications or devices that need to send emails, such as:
- Multifunction printers (scan to email)
- UPS system
- Backup applications
- Monitoring applications
- And a lot more
Let’s look at how to configure a connector in Exchange Online for on-premises devices and applications for SMTP relay.
Office 365 SMTP relay settings
When you set up Office 365 SMTP relay, you will need to:
- Find Public IP address from where it will send the emails
- Find Office 365 domain MX record
- Open port 25 on the organization firewall
- Add Public IP to domain’s SPF record
Find Public IP address
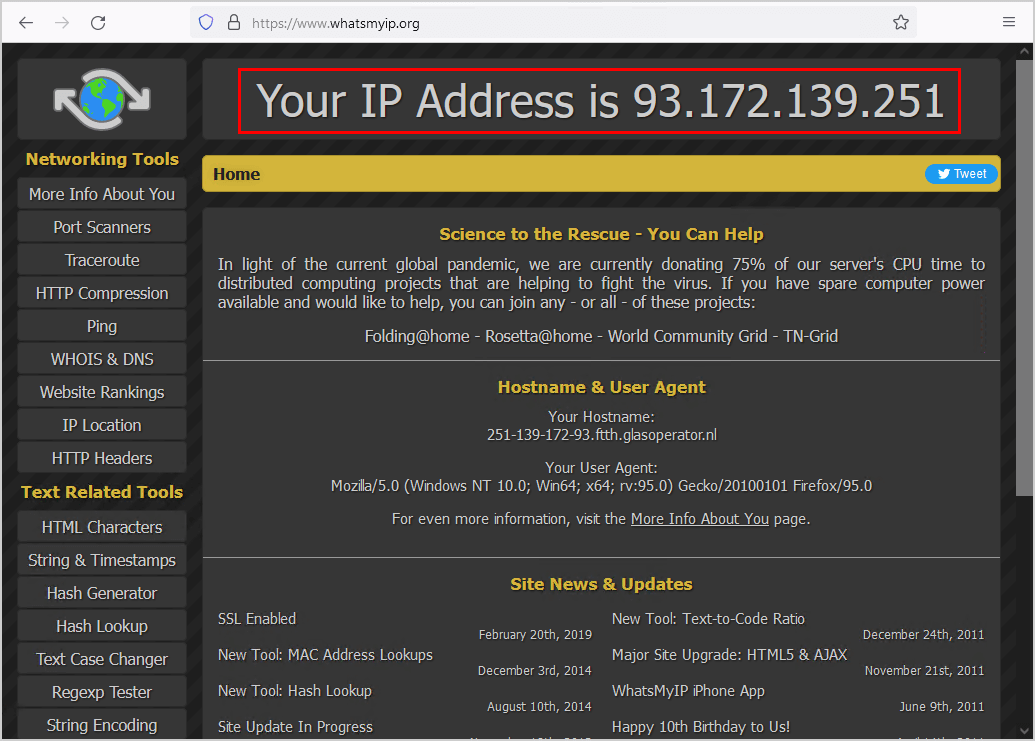
Go to www.whatsmyip.org or any other website that reveals your public IP address. Note down the Public IP address because you need it in the next step.
Note: Get the public IP address from the organization you want to send mail from. This can be multiple IP addresses.
In our example, it’s the Public IP address 93.172.139.251.
Find Office 365 MX record
The MX record l is what you will add to the scanner or application that needs to relay SMTP using Office 365.
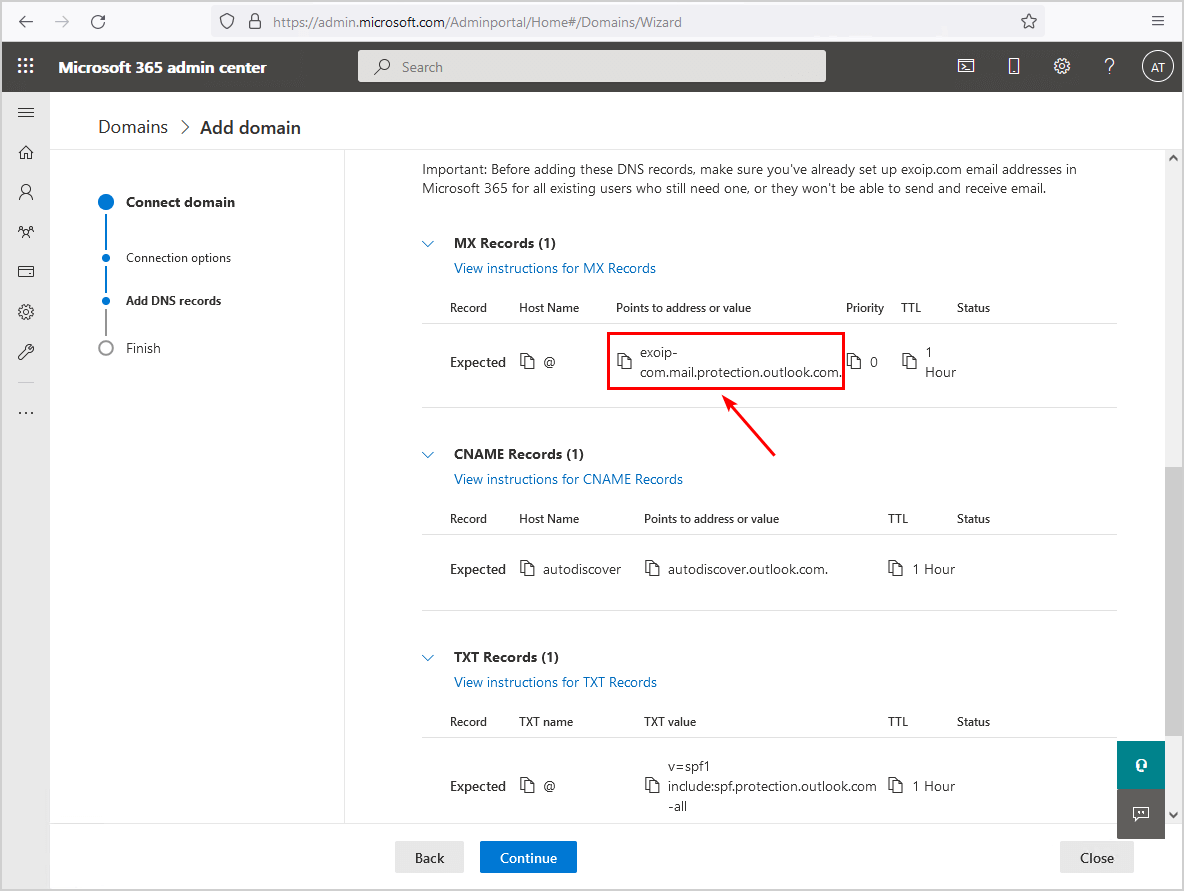
To find Office 365 MX record, follow these steps:
- Sign in to Microsoft 365 portal
- Expand Settings and click on Domains
- Click on your domain
- Go through the wizard and find the MX record
- Copy the Points to address or value field
In our example, it’s the MX record exoip-com.mail.protection.outlook.com.
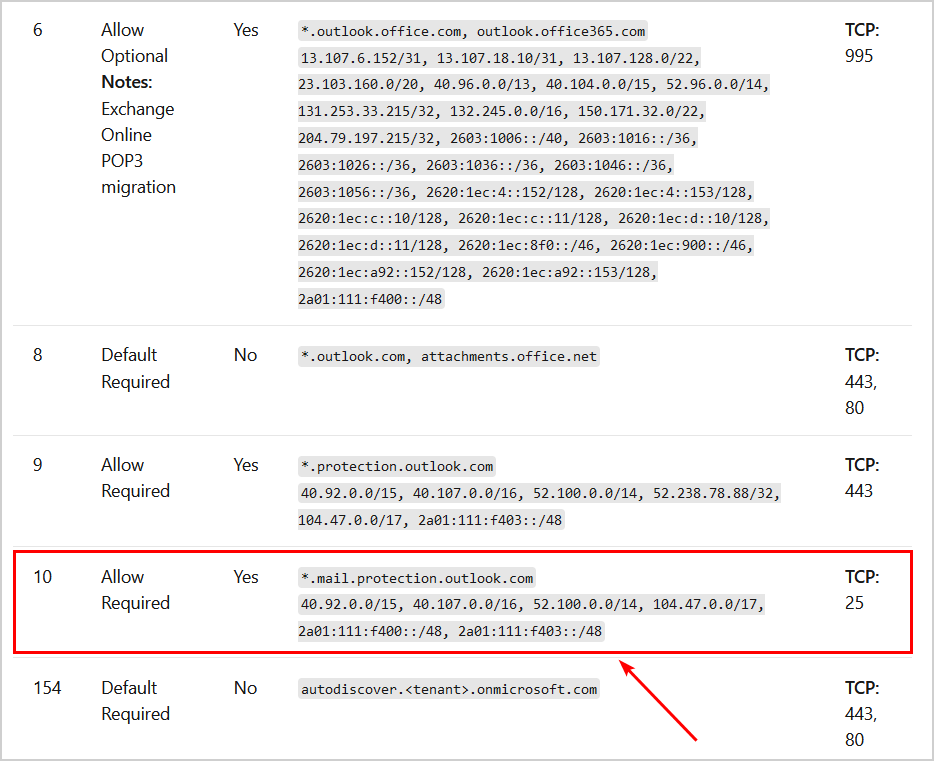
Open port 25 on firewall
To relay through Office 365 SMTP, you need to open port 25 from the organization firewall to external. The most secure way is to only add the Exchange Online IP addresses in the destination address and not ALL (everyone).
Add public IP to domain’s SPF record
Sign in to the domain’s registrar and open the domain DNS settings. In our example, the domain exoip.com.
The TXT record value for SPF looks like this:
v=spf1 mx include:spf.protection.outlook.comEdit the existing SPF record and add the Public IP address. The effect is that it will also authorize the organization’s Public IP address servers to send emails for the exoip.com domain name.
The new TXT record value for SPF looks like this:
v=spf1 mx include:spf.protection.outlook.com ip4:93.172.139.251 -allNote: The change can take up to 24 hours, but most of the time, this will resolve within 5-15 minutes.
Read more: Configure SPF record for Office 365 »
Now that you did all the steps, it’s time to configure Office 365 SMTP relay.
How to set up SMTP relay for Office 365
To set up SMTP relay for Office 365, follow these steps:
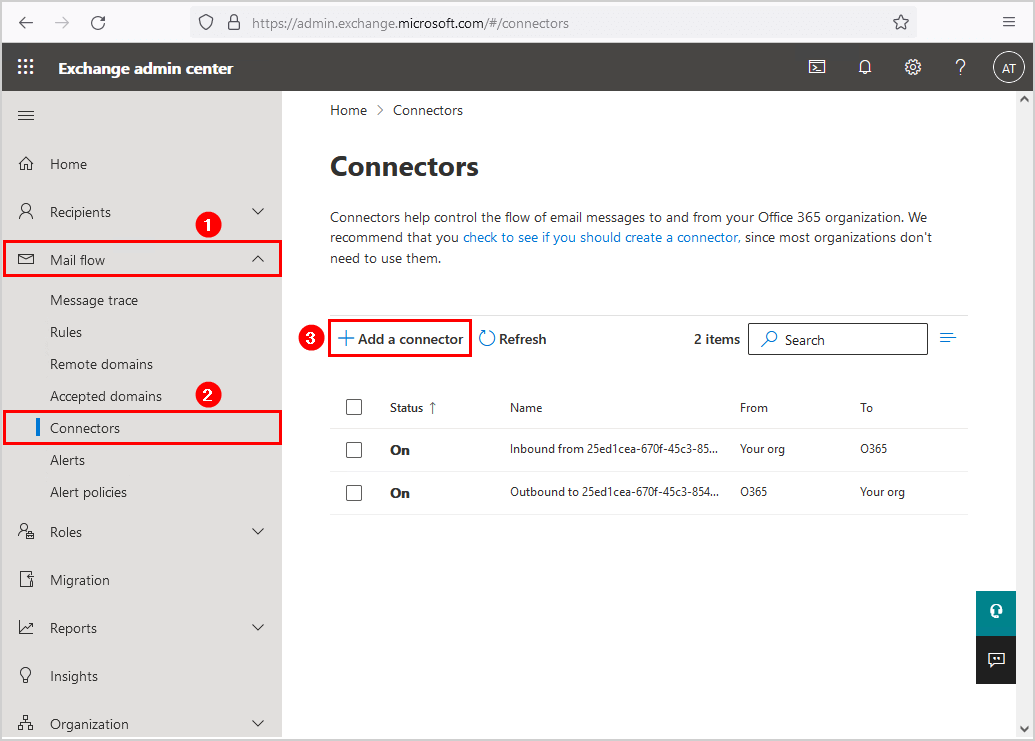
- Sign in to Exchange admin center
- Click on Mail flow > Connectors
- Click on Add a connector
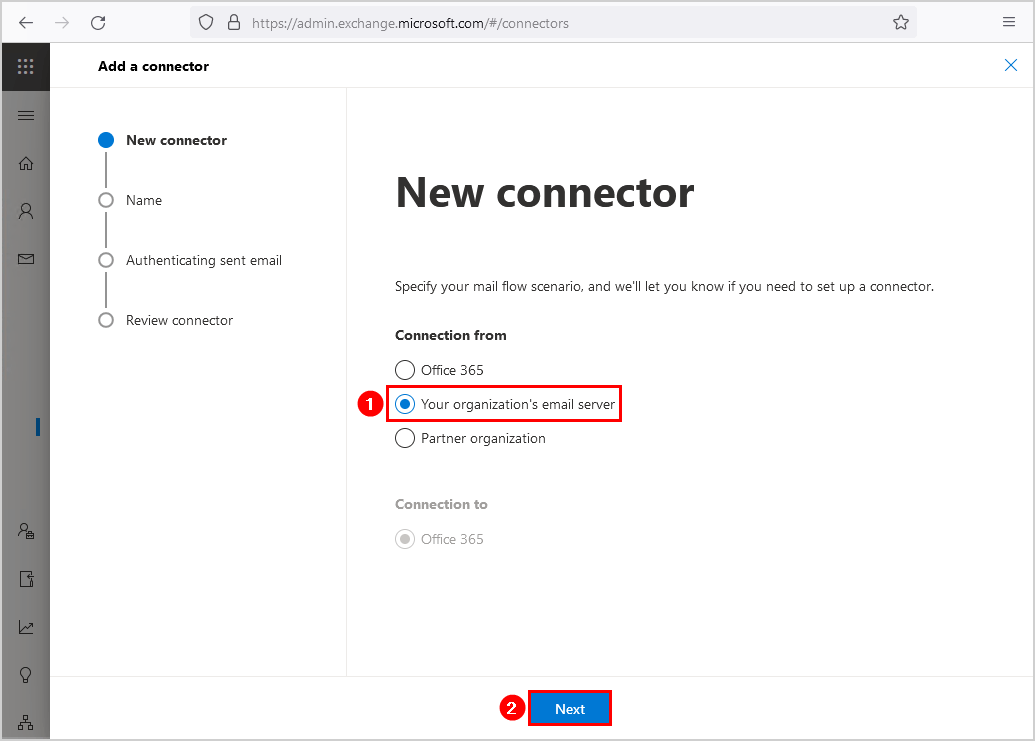
- Select Your organization’s email server
- Click Next
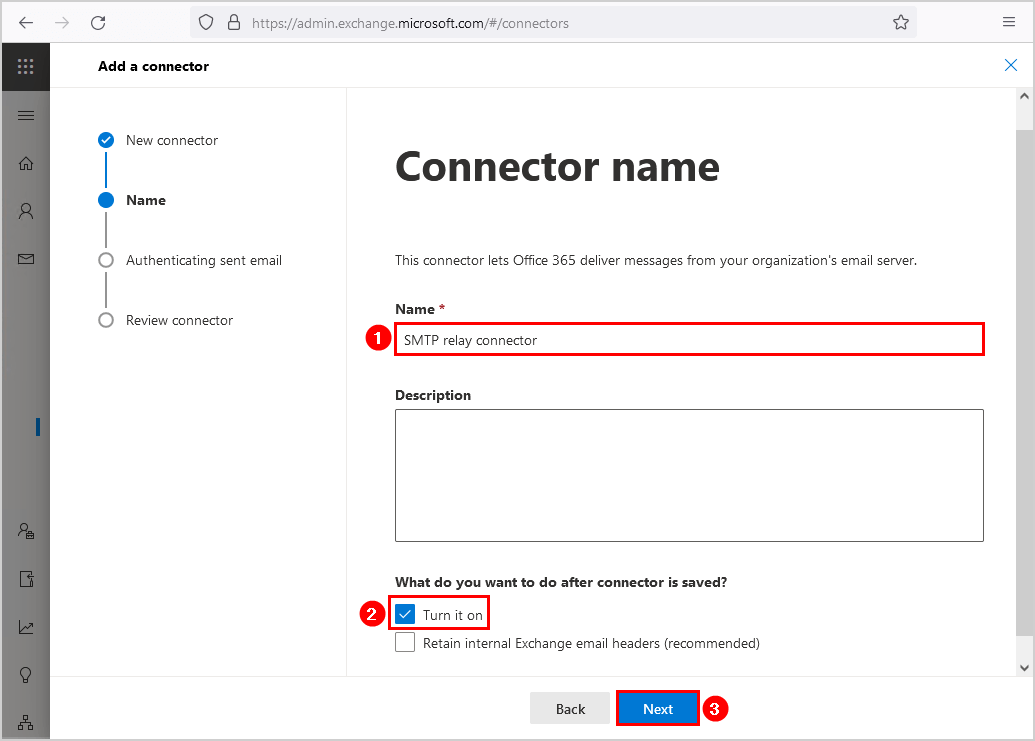
- Fill in the connector name SMTP relay connector
- Check the checkbox Turn it on
- Click Next
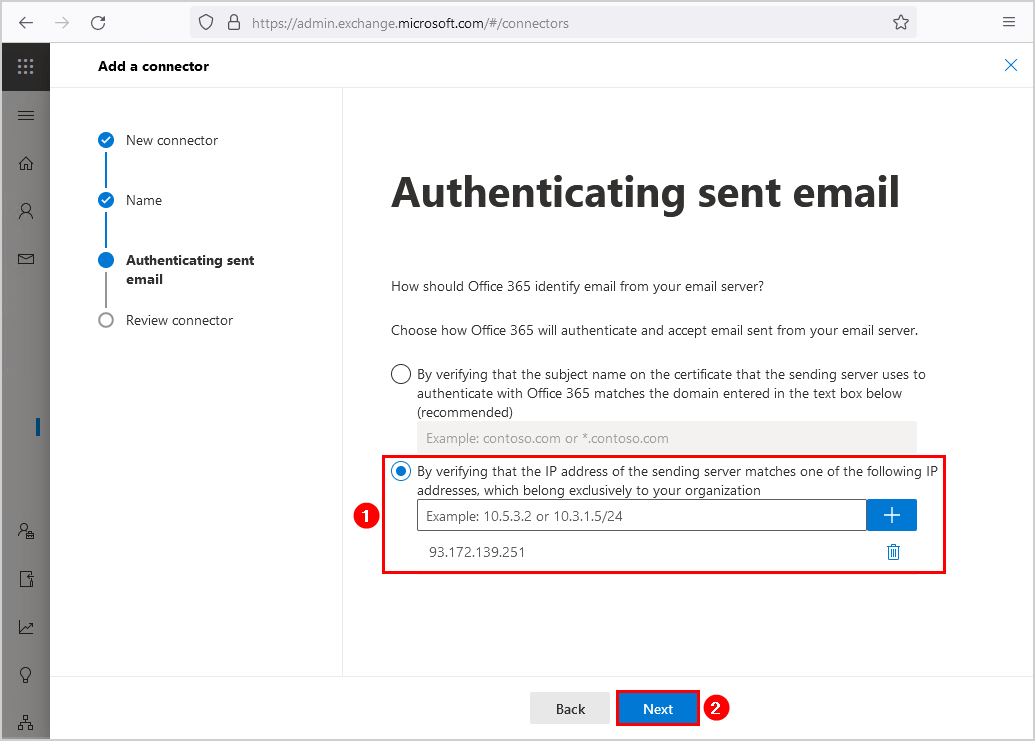
- Select By verifying that the IP address of the sending server matches one of the following IP addresses, which belong exclusively to your organization
- Add the Public IP address that you copied from the previous step
- Click Next
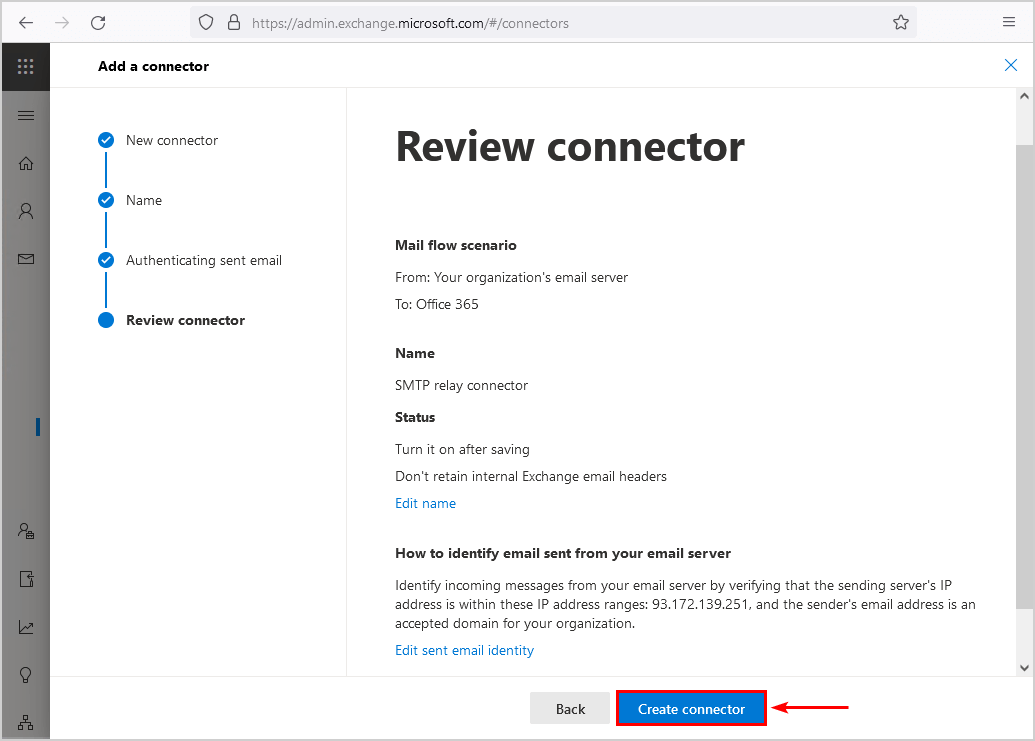
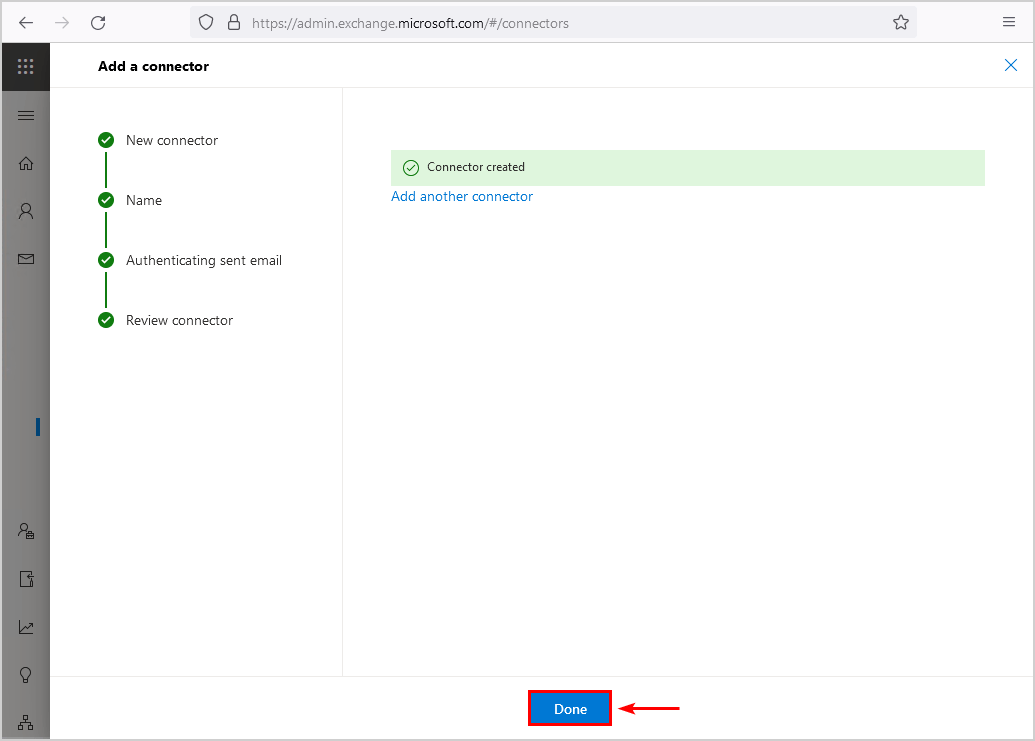
- Review the connector and click on Create connector
- The SMTP relay connector is created successfully
- Click Done
- Verify that the connector appears in the Connectors list and that the status is On
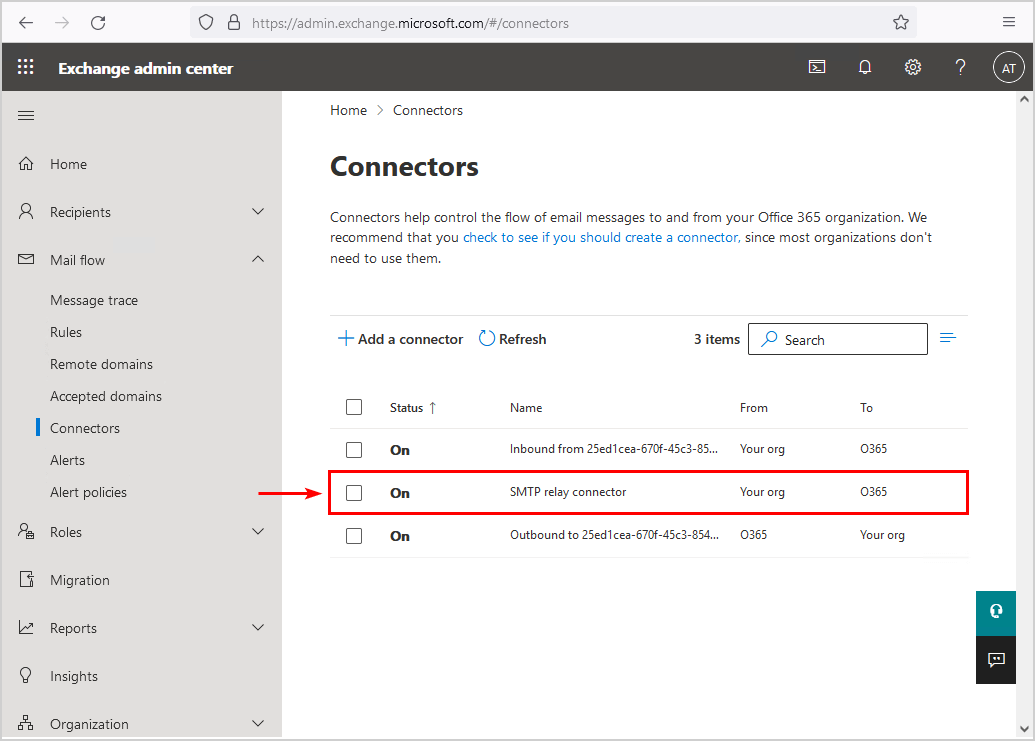
You successfully added an SMTP relay connector in Office 365. As a result, the organization is ready to send emails through Office 365.
Test Office 365 SMTP relay
Test that everything is set up correctly and that email relays through Office 365 successfully. An excellent way to test Office 365 SMTP relay is with the Send-EmailOffice365.ps1 PowerShell script.
Run PowerShell as administrator. Copy the script below or download the Send-EmailOffice365.ps1 PowerShell script. Before you run the script change the fields:
- To
- From
- SmtpServer
$EmailMessage = @{
    To         = "exoip@gmail.com"
    From       = "scanner@exoip.com"
    Subject    = "Test email"
    Body       = "Test email sent using Office 365 SMTP relay"
    SmtpServer = "exoip-com.mail.protection.outlook.com"
    Port       = "25"
}

Send-MailMessage @EmailMessage
The output should not give you an error, and the email will arrive in the inbox you added in the To field.
Read more: Send from Alias in Office 365 »
Conclusion
You learned how to configure SMTP relay in Office 365. Microsoft gives you an excellent approach to relay email through Exchange Online in Office 365, and you don’t have to pay extra. However, remember to follow the steps accordingly. Otherwise, the email will fail to send or arrive in the SPAM instead of the recipient’s inbox.
Did you enjoy this article? You may also like Export Office 365 mailbox permissions to CSV. Don’t forget to follow us and share this article.
What Others Are Reading

What happens if you send an email to an Exchange Online distribution list and DL is set to allow sender from inside your org? Will the email send via the SMTP relay be considered external and will be rejected by the DL? Or will the email be considered internal and be accepted by the DL? Thank you.
Hi, thanks for sharing this guide, but I am not fully understand where can I config this step “Open port 25 on firewall” I cant find this config.
Can you help me ?
That’s on your firewall. For example, Fortinet Fortigate firewall.
Hi
Can this also be done using Modern auth?