How to turn off Windows Defender in Windows 10 permanently? Sometimes you want to disable…
Disable Symantec Endpoint Protection (SEP)
We want to disable Symantec Endpoint Protection temporarily. Sometimes you need to run a file, and Symantec Endpoint Protection (SEP) does not let you open the file. You don’t have options to allowlist the file because SEP is managed by the organization. In this article, you will learn how to force disable SEP. It’s always great to bypass configurations made by organizations, right? Remember to disable SEP only if you know what you are doing!
Table of contents
What is happening?
We want to install an application. When browsing to the application, Symantec Endpoint Protection Notification appears on the screen.
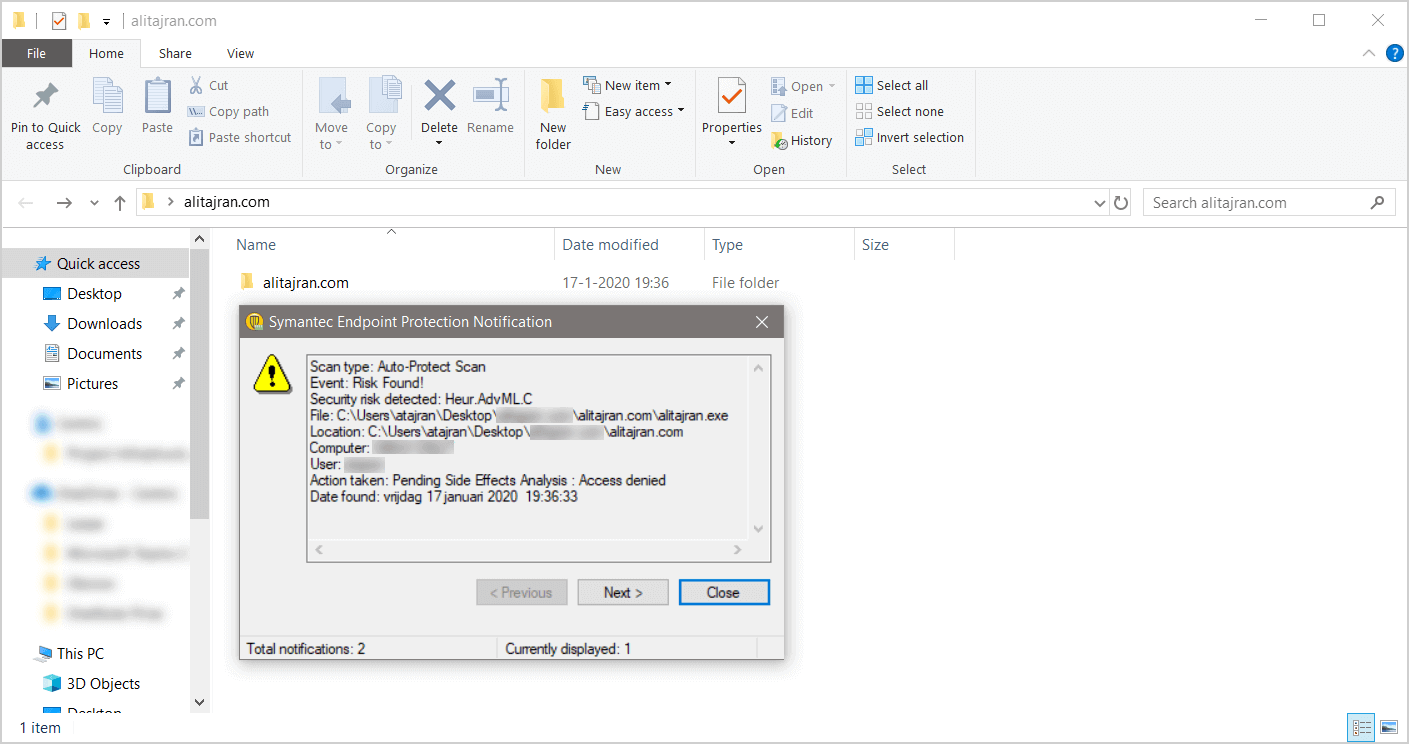
We know that the file alitajran.exe in the folder www.alitajran.com is not a malicious file. The security risk Heur.AdvML.C is a false positive.
False positives (false alarms) are harmless files or URLs that are incorrectly identified as malicious by the antivirus program.
Stop the service Symantec Endpoint Protection (SEP)
Start the program Run and run the command smc -stop to disable the service. The password prompt message appears.
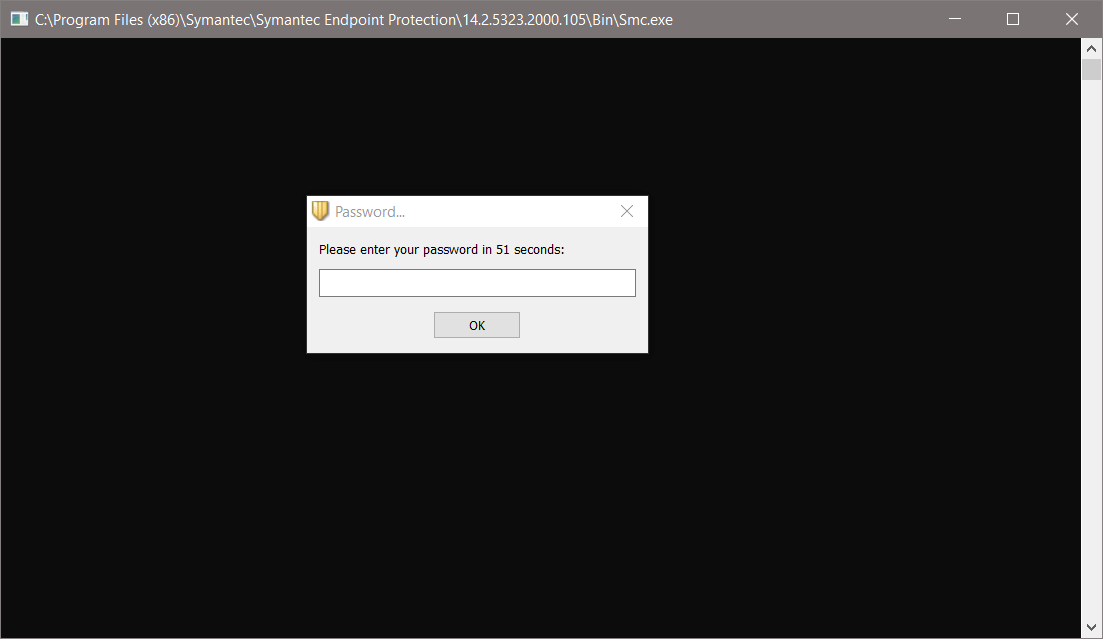
We don’t have the password. We can’t disable Symantec Endpoint Protection through the command.
Disable Symantec Endpoint Protection (SEP) through Windows Services
Click on Windows Start and search for services. Open Windows Services. You can also start the program Run. Type services.msc and click on OK.
Search for Symantec Endpoint Protection and double-click on the name. The services of Symantec Endpoint Protection are grayed out.
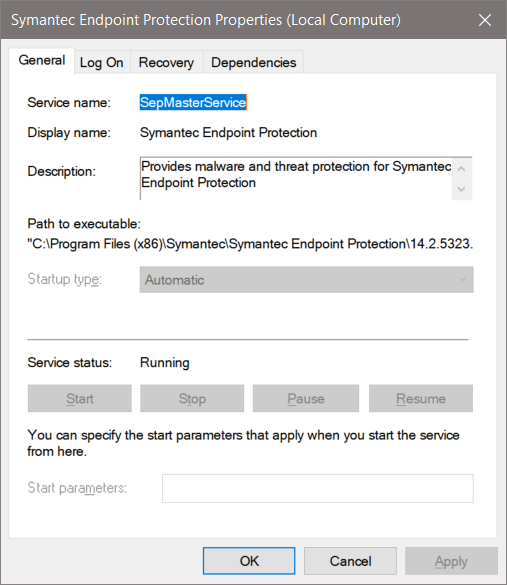
We can’t stop Symantec Endpoint Protection service through Windows Services. Find out how to disable Symantec Endpoint Protection through the next steps.
Boot into safe mode
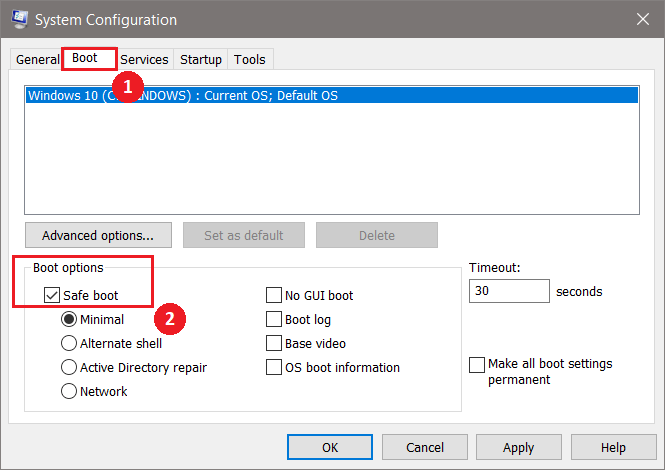
Click on Windows Start and search for msconfig. Click on System Configuration. You can also start the program Run. Type msconfig and click on OK.

Select the tab Boot. In the section Boot options, enable Safe boot. Click on OK.
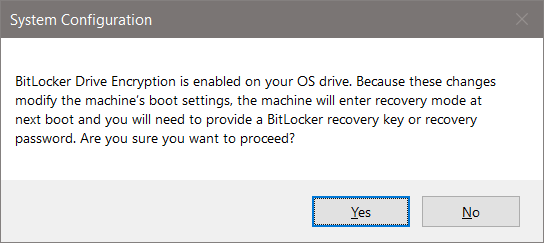
Do you have Bitlocker enabled? If yes, you will get a message. Click on Yes.
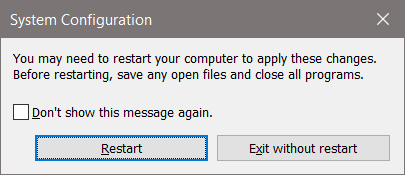
Click on Restart.
It will boot your machine into safe mode. Sign in after a reboot.
Disable Symantec Endpoint Protection (SEP) through Registry Editor
We will disable Symantec Endpoint Protection through the Registry Editor. Click Windows Start and search for regedit. You can also start the program Run. Type regedit and click on OK.
Go to the following path:
[HKEY_LOCAL_MACHINE\SYSTEM\ControlSet001\services\SepMasterService]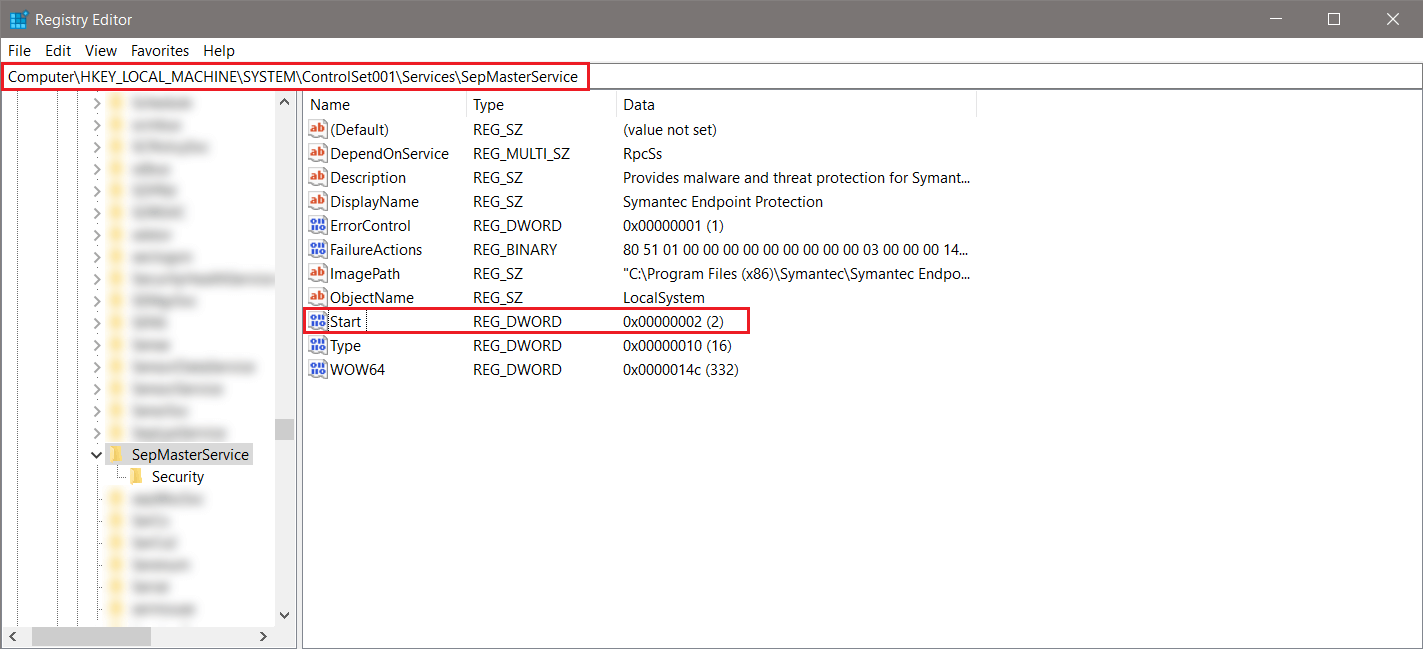
Edit the Start value data to 3 and click on OK.

Your screen should show the following.
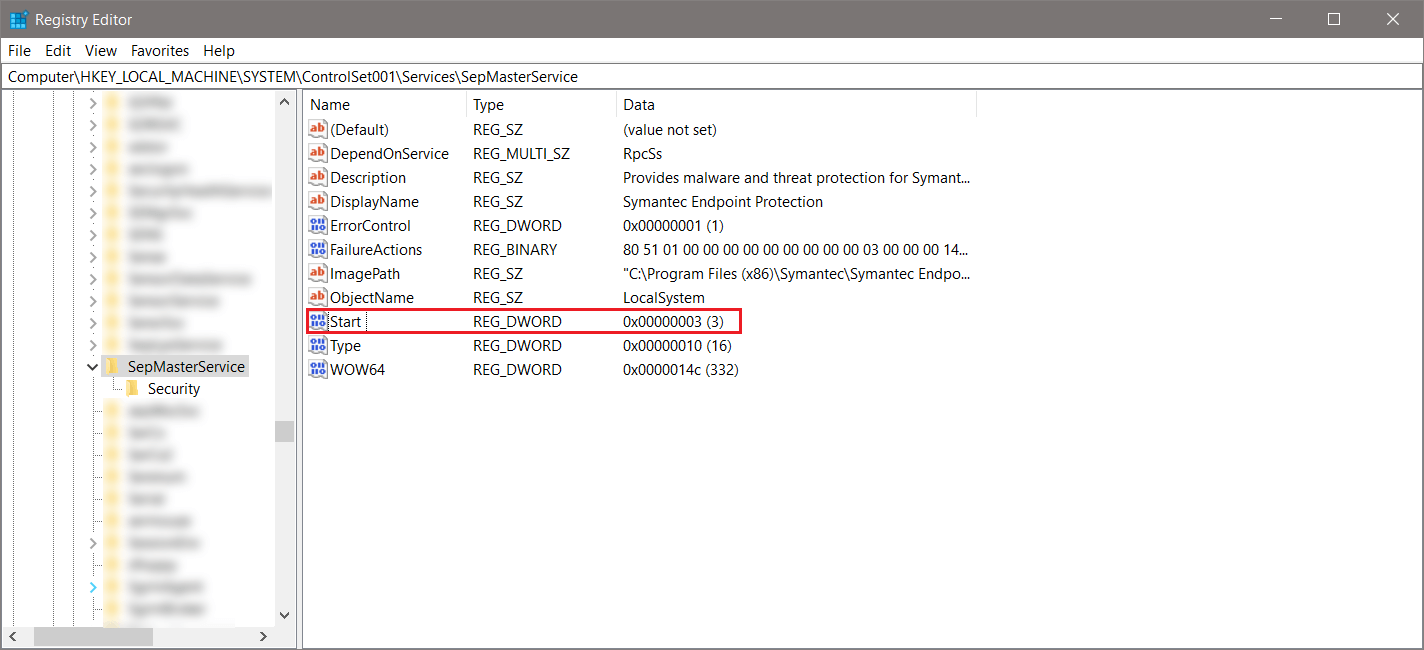
Registry values
Each value stands for the following:
- 2 = Automatic
- 3 = Manual
- 4 = Disabled
The next step is to quit safe boot and boot to the normal mode.
Boot to normal
Click on Windows Start and search for msconfig. Click on System Configuration. You can also start the program Run. Type msconfig and click on OK.
Select the Normal startup. Click on OK.
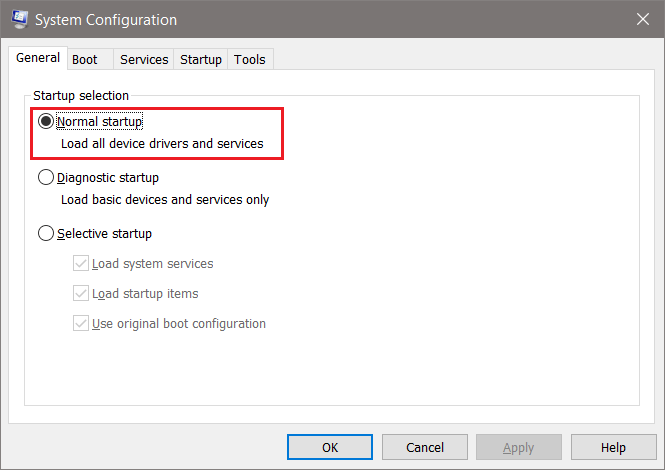
Do you have Bitlocker enabled? If yes, you will get a message. Click on Yes.
Click on Restart.
It will boot your machine into normal mode. Sign in after a reboot.
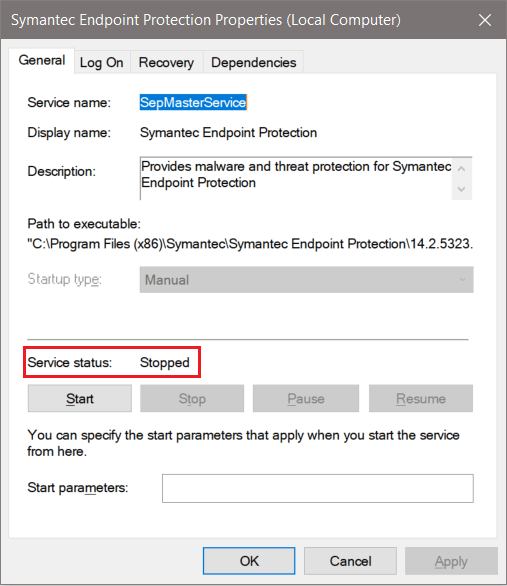
Result of Symantec Endpoint Protection (SEP)
Verify the result. Start Windows Services and search for Symantec Endpoint Protection. Symantec Endpoint Protection service is stopped.
Browse to the application with the false positive. You will not get a notification from Symantec Endpoint Protection. Start the application that you want to install. Mission accomplished. Don’t forget to change the start value to 2 to keep yourself protected against threats.
Keep reading: Turn off Windows Defender in Windows 10 permanently »
Conclusion
In this article, you learned how to disable Symantec Endpoint Protection on a machine. You must change the start value back after you finished with your work.
Did you enjoy this article? You may also like Move mailbox from Exchange Online to on-premises. Don’t forget to follow us and share this article.
Thanx its help me.
How can we change that specific registry value?
It seems we need high privilege and integrity to change that, as I am encountering errors