There are two ways to add an alternative UPN suffix to Active Directory (AD), one…
Enable Windows Firewall with PowerShell
How to enable the Windows Firewall with PowerShell in Windows Server 2012/2016/2019? I recommend turning on the Windows Firewall with PowerShell. But if you have a test lab and you want to keep it disabled for testing, go ahead. Don’t forget to enable the Firewall when you finished testing. In this article, you will learn how to enable the Firewall with PowerShell.
Table of contents
Windows Firewall profiles information
Windows Firewall offers three firewall profiles:
- Domain profile: applies to networks where the host system can authenticate to a domain controller.
- Private profile: a user-assigned profile and is used to designate private or home networks.
- Public profile: this is the default profile. It is used to designate public networks such as Wi-Fi hotspots at coffee shops, airports, and other locations.
Get status of the Windows Firewall with PowerShell
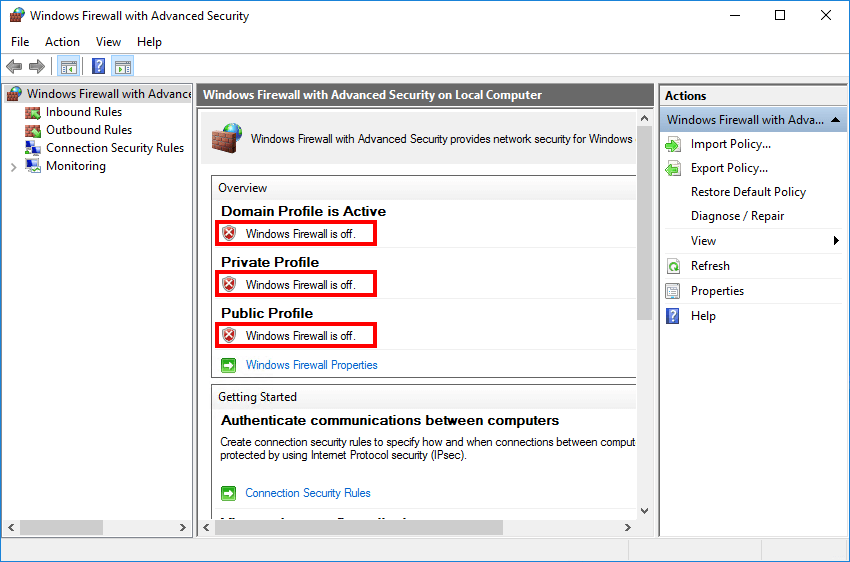
First, let’s get the current status of the Windows Firewall. We will be using the Get-NetFirewallProfile cmdlet.
PS C:\> Get-NetFirewallProfile | Format-Table Name, Enabled

Name    Enabled
----    -------
Domain    False
Private   False
Public    False
We have three profiles: Domain, Name, and Public. Windows Firewall is enabled on all three profiles.
In the next step, we are going to enable the Windows Firewall.
Enable Windows Firewall in Windows Server 2012/2016/2019
Enable Windows Firewall on all three profiles.
PS C:\> Set-NetFirewallProfile -Profile Domain, Public, Private -Enabled TrueCheck Windows Firewall status
Check the status after you enable the Firewall on all three profiles. Run the Get-NetFirewallProfile cmdlet.
PS C:\> Get-NetFirewallProfile | Format-Table Name, Enabled

Name    Enabled
----    -------
Domain     True
Private    True
Public     True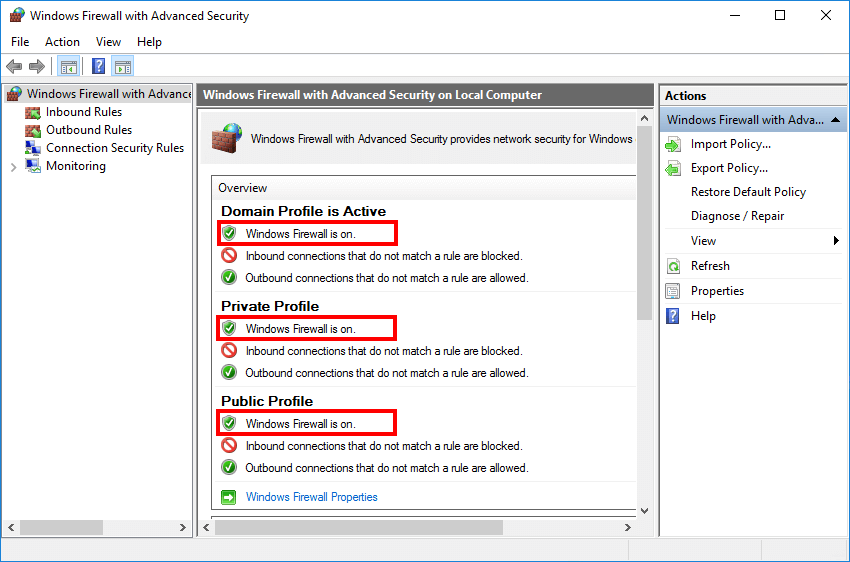
Windows Firewall is enabled on all three profiles in Windows Server. It’s important to keep the Windows Firewall turned on.
Conclusion
In this article, you learned how to enable the Firewall in Windows Server 2012/2016/2019. First, get the current status of the Windows Firewall. After that, enable the Windows Firewall with PowerShell.
Did you enjoy this article? If so, you may like Count mailboxes per database in Exchange with PowerShell. Don’t forget to follow us and share this article.
What Others Are Reading


Hi Ali, Thank you for information. I have a question.
Should the firewall of the servers be turned on? If we leave it open directly, do we need to add manual privileges for systems such as DC, Excange? Active Directory RCP ports and so on. They say DC security, enable the firewall for server security, but this time the systems are not working. How can we define privileges for which ports. Can we do this with powershell as you described here?
Thank you, Regards
Hi Hasan,
The correct way is to keep the Windows Firewall turned on. I have seen many environments where they disable the Windows Firewall, but that’s not good.
Exchange setup will add rules to the Windows Firewall to allow Exchange to work. You don’t have to do anything about that.
If you see other applications/services are not working as expected, add or adjust the rules. You can do that through the GUI or PowerShell.
Thank you for information my friend