You want to enable Azure AD Multi-Factor Authentication. There is a per-user MFA and Conditional…
How to Configure Microsoft Entra Privileged Identity Management (PIM)
Administrators need access to the organization so they can perform their tasks. However, you want to manage, control, and monitor their privileged access. That’s when Microsoft Entra PIM comes into the picture. In this article, you will learn how to configure Microsoft Entra Privileged Identity Management (PIM).
Table of contents
What is Microsoft Entra Privileged Identity Management?
Privileged Identity Management (PIM) is a service in Microsoft Entra ID that enables you to manage, control, and monitor access to important resources in your organization. These resources include Microsoft Entra ID, Azure, and other Microsoft Online Services such as Microsoft 365 or Microsoft Intune.
It provides time-based and approval-based role activation to mitigate the risks of excessive, unnecessary, or misused access permissions on resources that you care about. Here are some of the key features of Privileged Identity Management:
- Provide just-in-time privileged access to Microsoft Entra ID and Azure resources
- Assign time-bound access to resources using start and end dates
- Require approval to activate privileged roles
- Enforce multifactor authentication to activate any role
- Use justification to understand why users activate
- Get notifications when privileged roles are activated
- Conduct access reviews to ensure users still need roles
- Download audit history for internal or external audit
- Prevents removal of the last active Global Administrator and Privileged Role Administrator role assignments
Note: You need Microsoft Entra ID P2 to use the Privileged Identity Management feature in Microsoft Entra ID.
Set up Microsoft Entra Privileged Identity Management
Let’s look at how to assign a role, edit the role settings, and activate the role using PIM by signing in as a user.
1. Assign role
To assign users or current admins as eligible admins for specific Microsoft Entra roles, follow these steps:
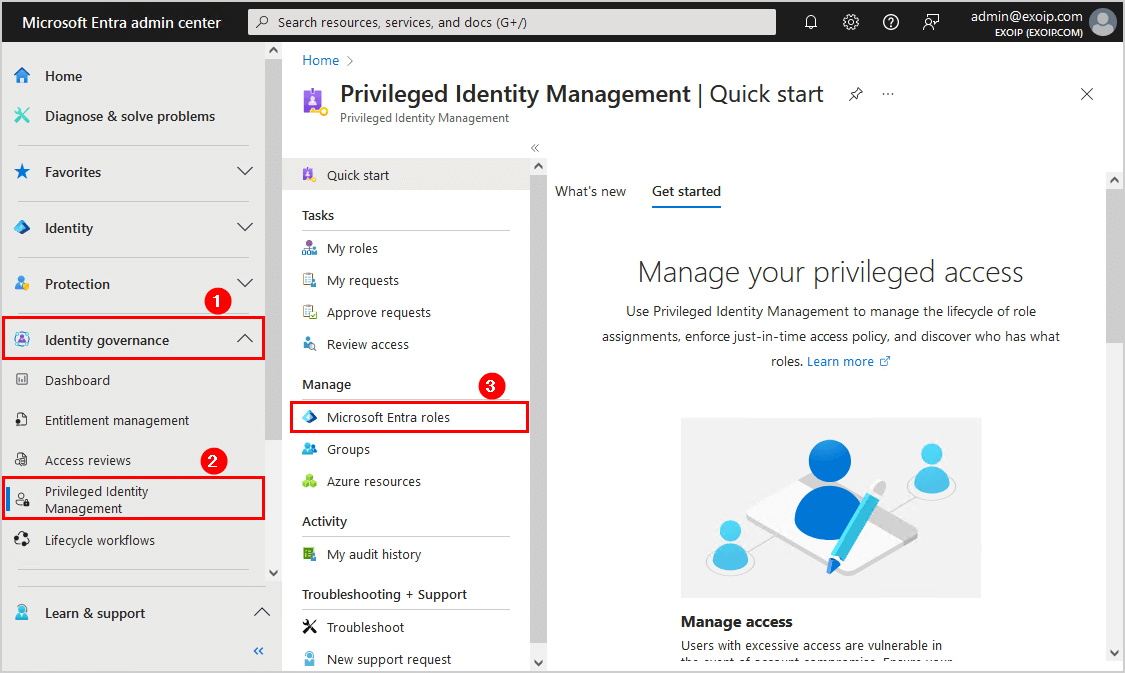
- Sign in to Microsoft Entra admin center
- Expand Identity governance > Privileged Identity Management
- Click on Microsoft Entra roles
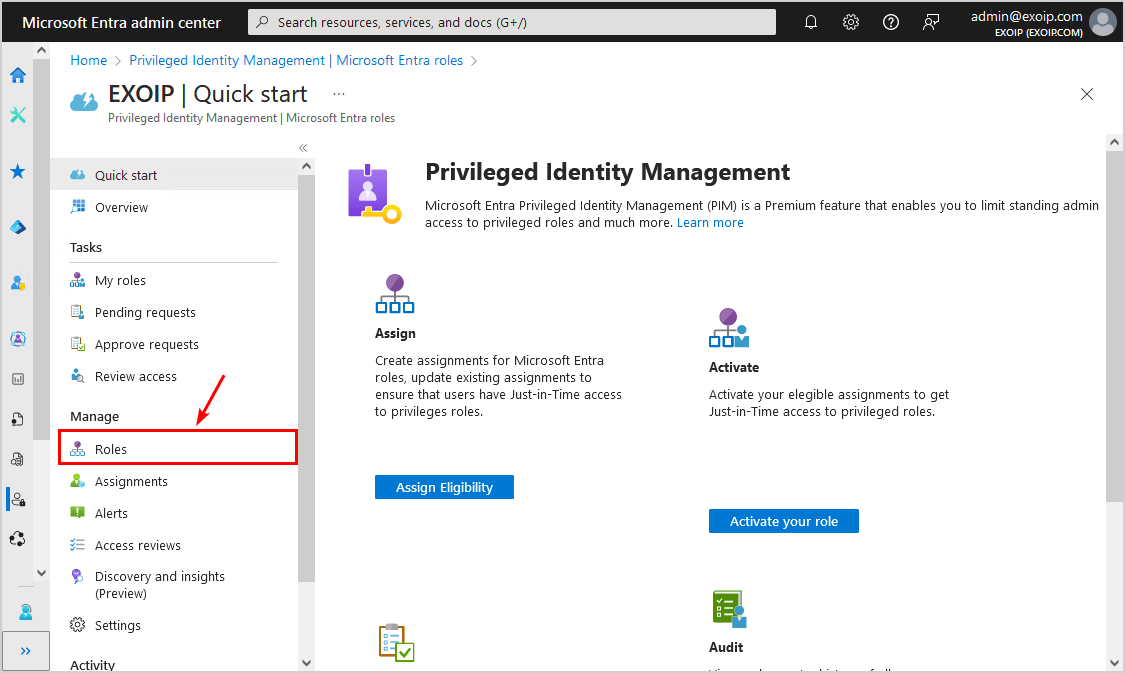
- Click on Roles
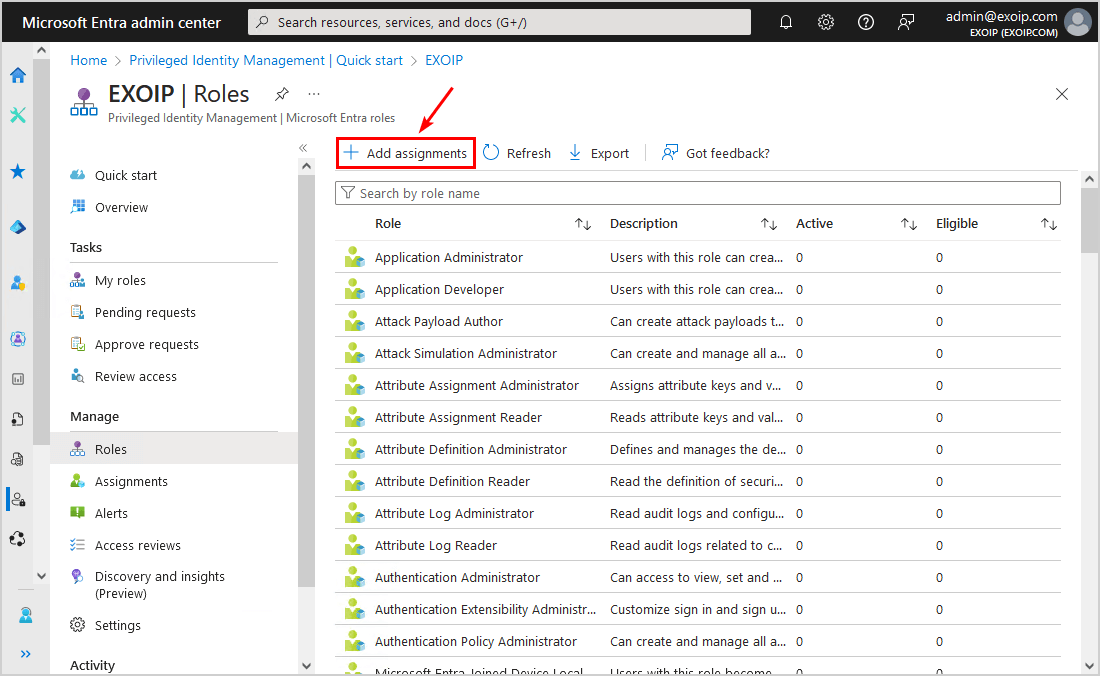
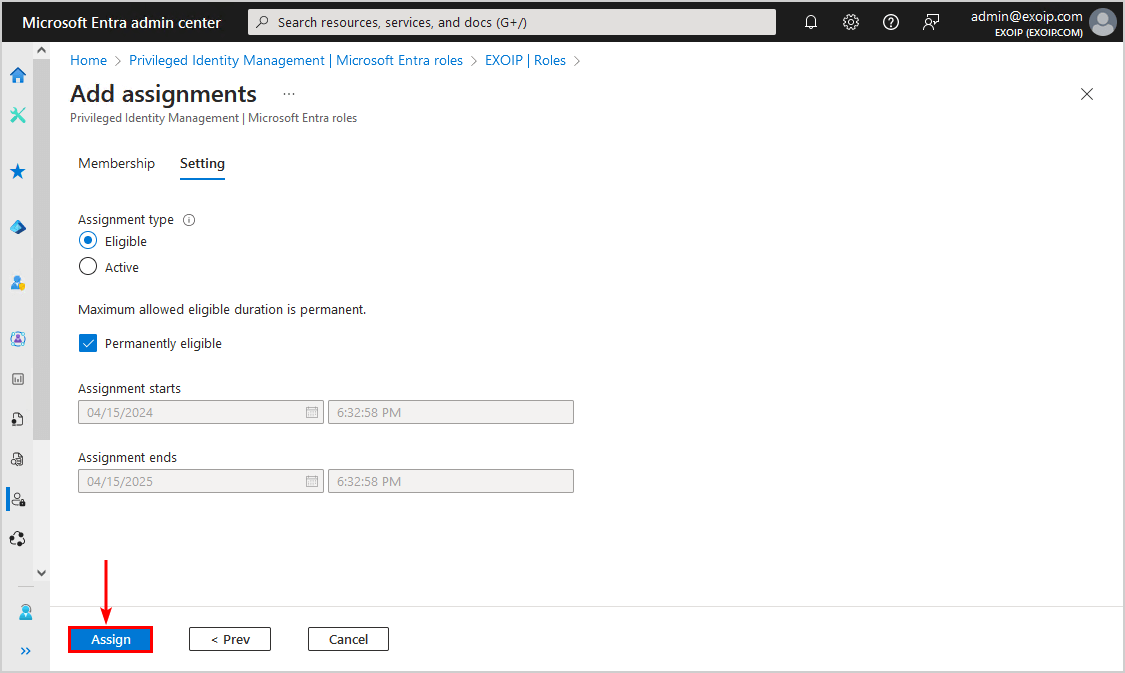
- Click Add assignments
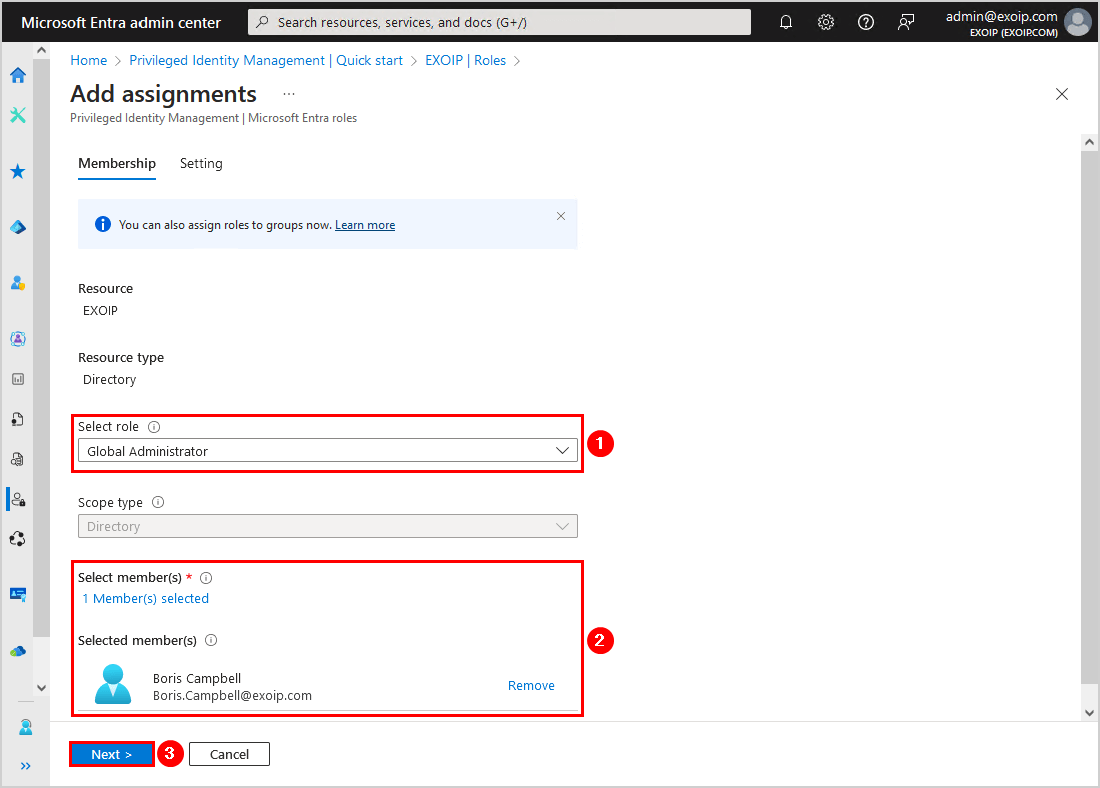
- Select a role that you want to assign to the member or the group
- Select the member
- Click Next
- Click Assign
The Microsoft Entra role is successfully assigned to the user. In the next step, we will look into the role settings.
2. Edit role settings
To configure the Microsoft Entra role setting in Privileged Identity Management, follow the below steps:
- Search for the role that you added the member to
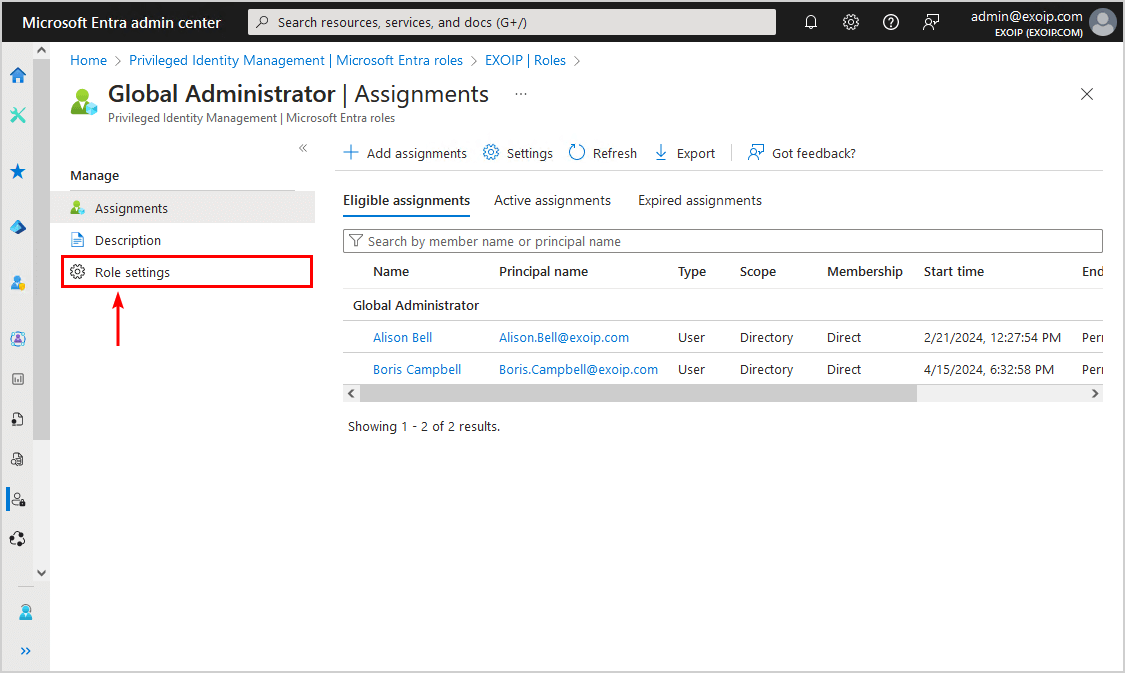
- Select the role
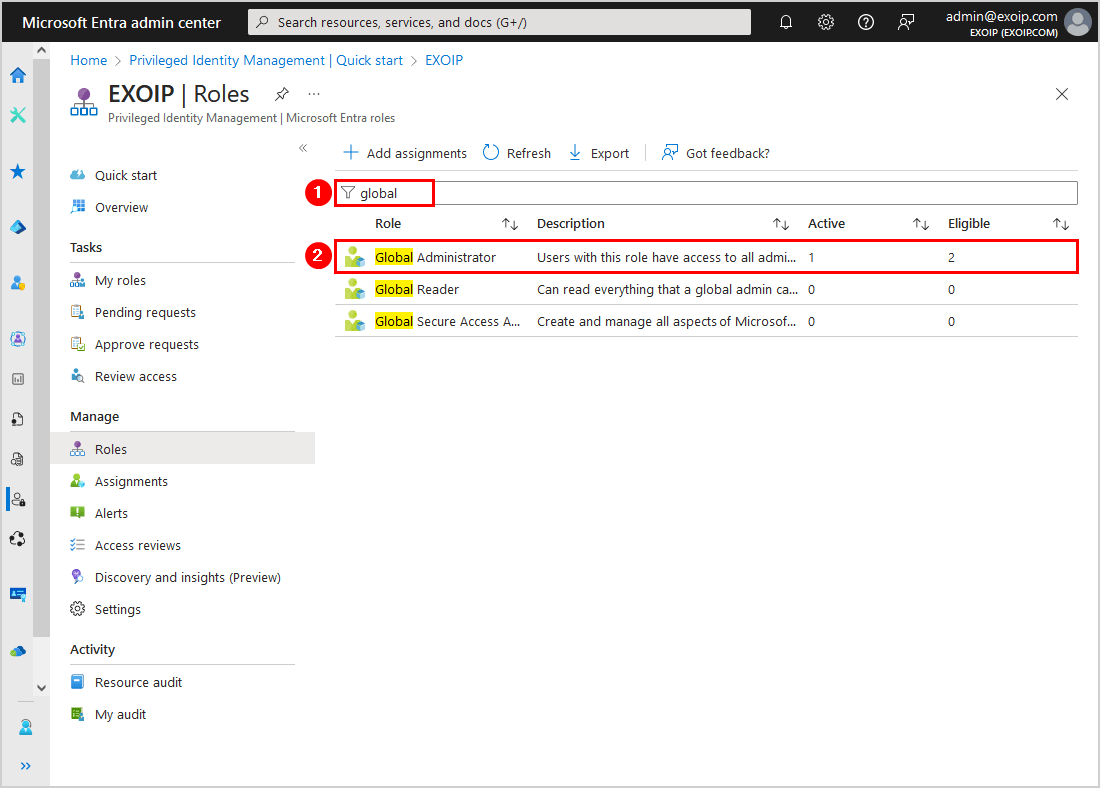
- Click Role settings
- Click on Edit
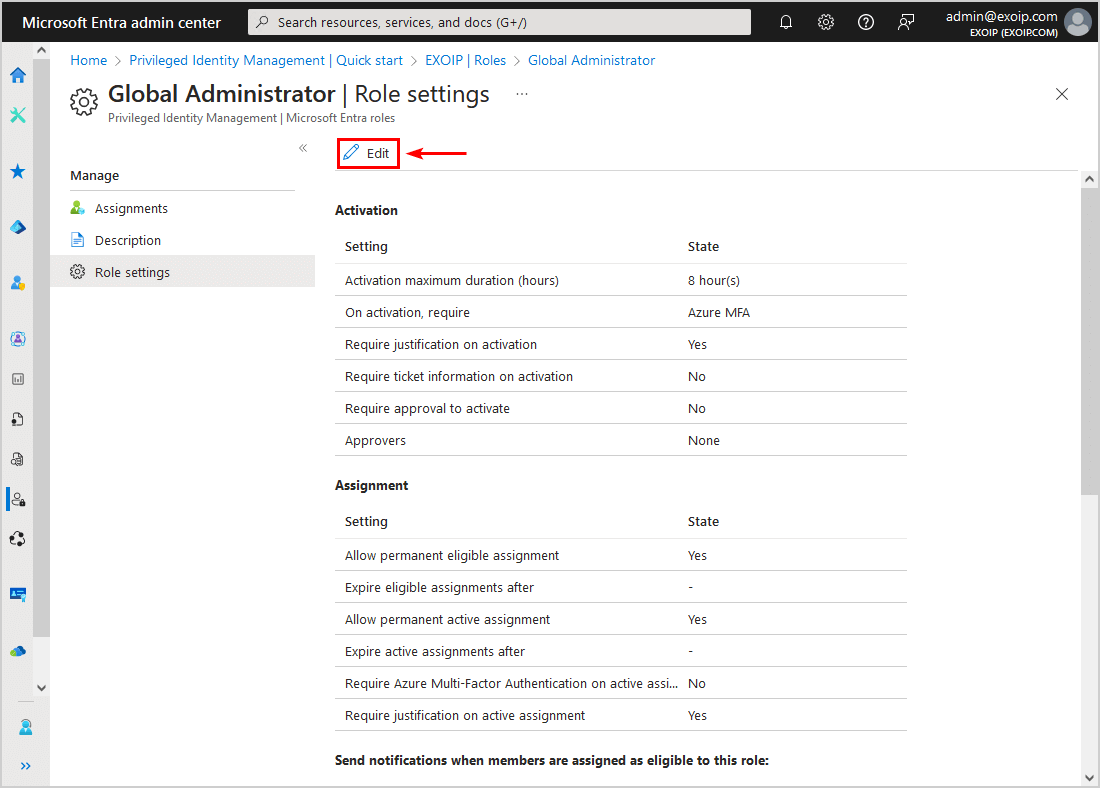
- Go through the activation settings and adjust where needed
- Click Next: Assignment

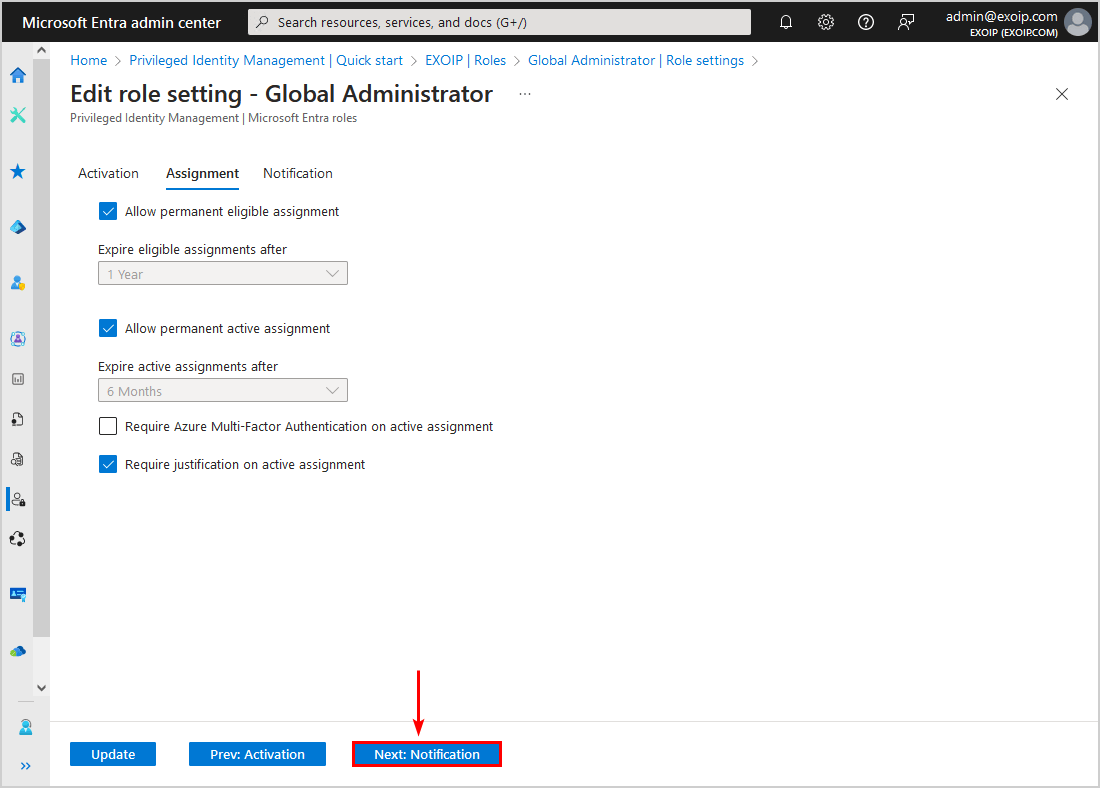
- Go through the assignment settings and adjust where needed
- Click Next: Notification
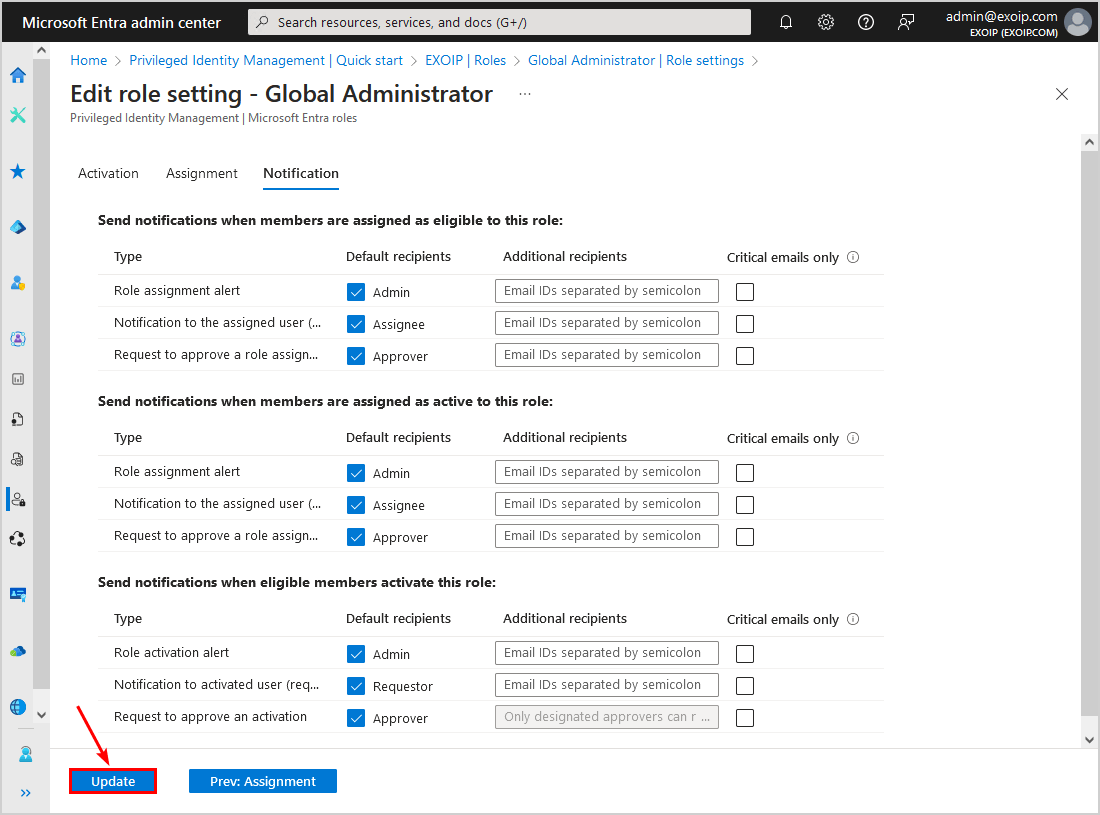
- Go through the notification settings and adjust where needed
- Click Update
Now that you have assigned the role to the member and checked the role settings, let’s look at the next step to activate the role with the user account.
3. Activate role
To activate the eligible admin roles using PIM in Microsoft Entra, follow these steps:
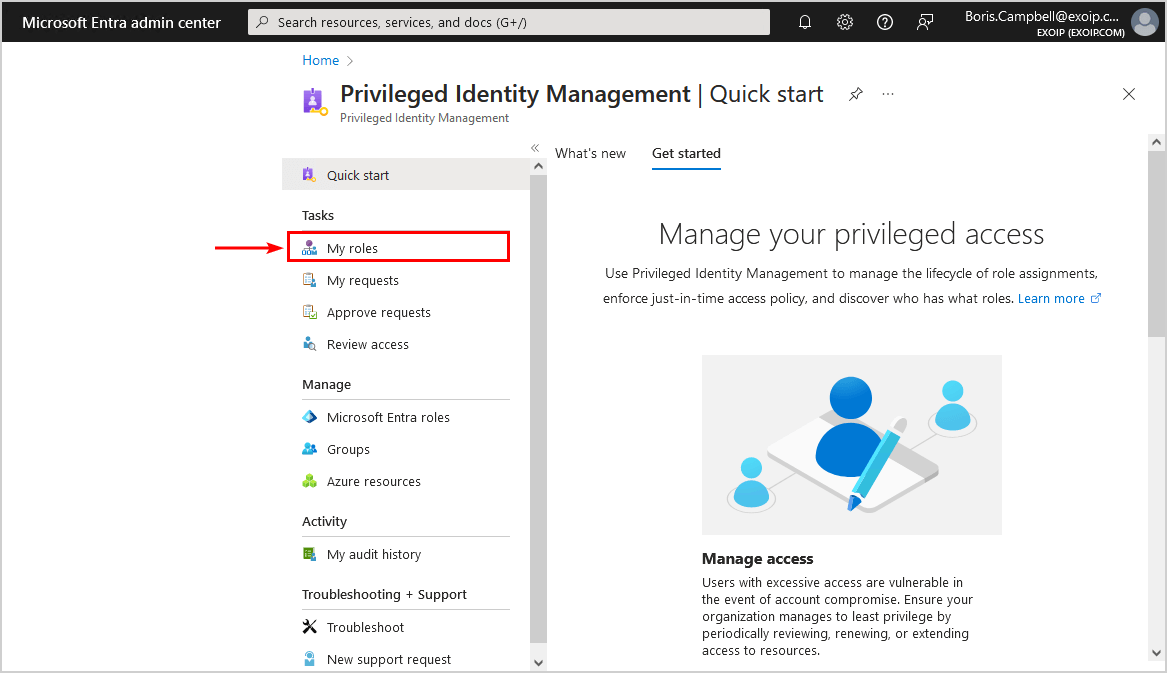
- Sign in to Microsoft Entra admin center or access the Privileged Identity Management (PIM) blade directly
- Click My roles
Note: We recommend to Restrict access to the Microsoft Entra admin center. The users will still be able to access the PIM blade to manage their privileged access.
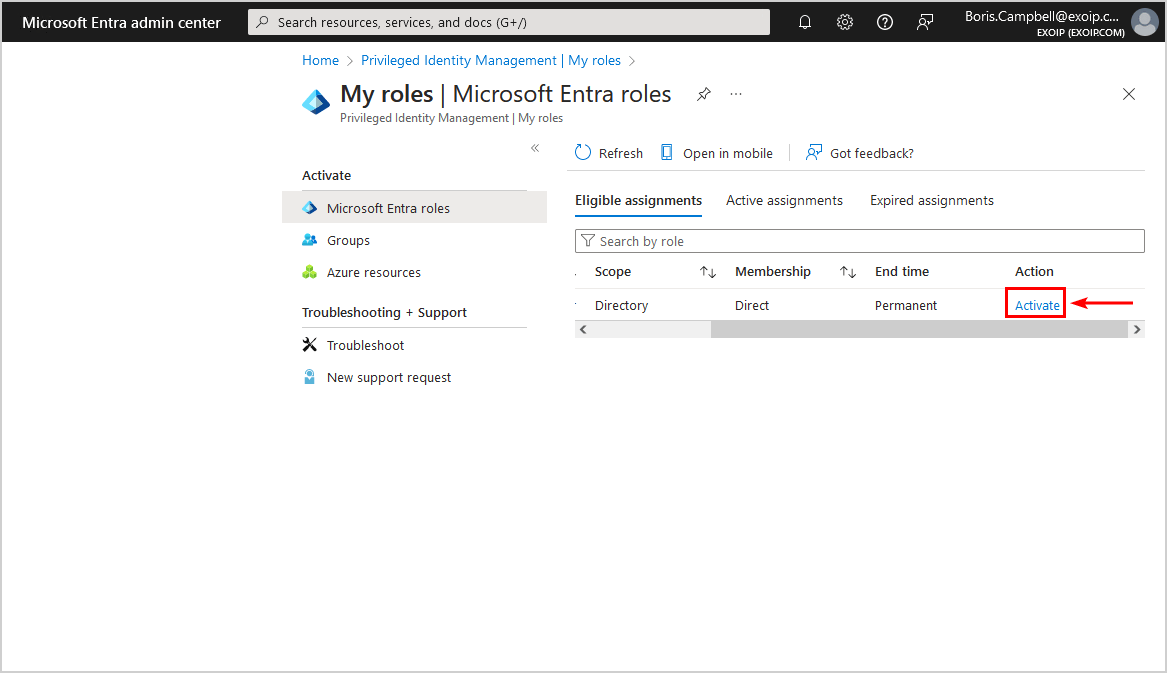
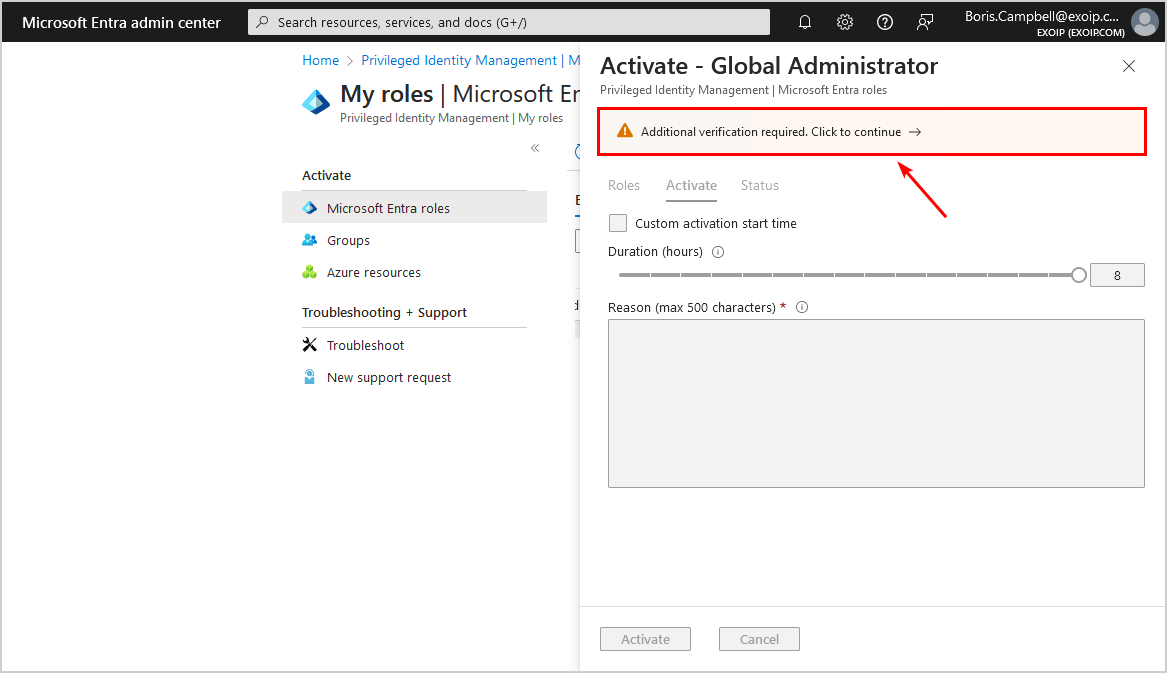
- Select Activate
- If you have not set up MFA, you cannot proceed further, and you will see a notification bar with the warning that additional verification is required
- Click Continue
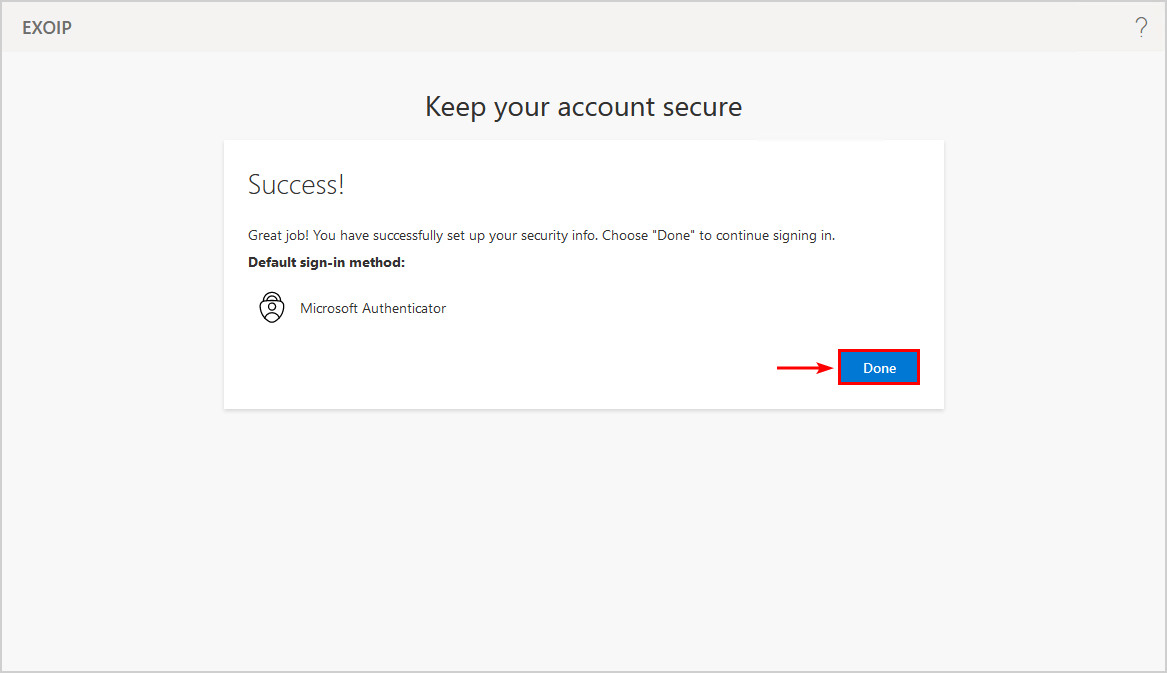
- Complete the MFA setup and click Done
- You will be automatically redirected to the PIM activate screen
- Fill in a reason
- Click Activate

- It will process the request and activate the role

- The browser will automatically refresh when the activation is complete

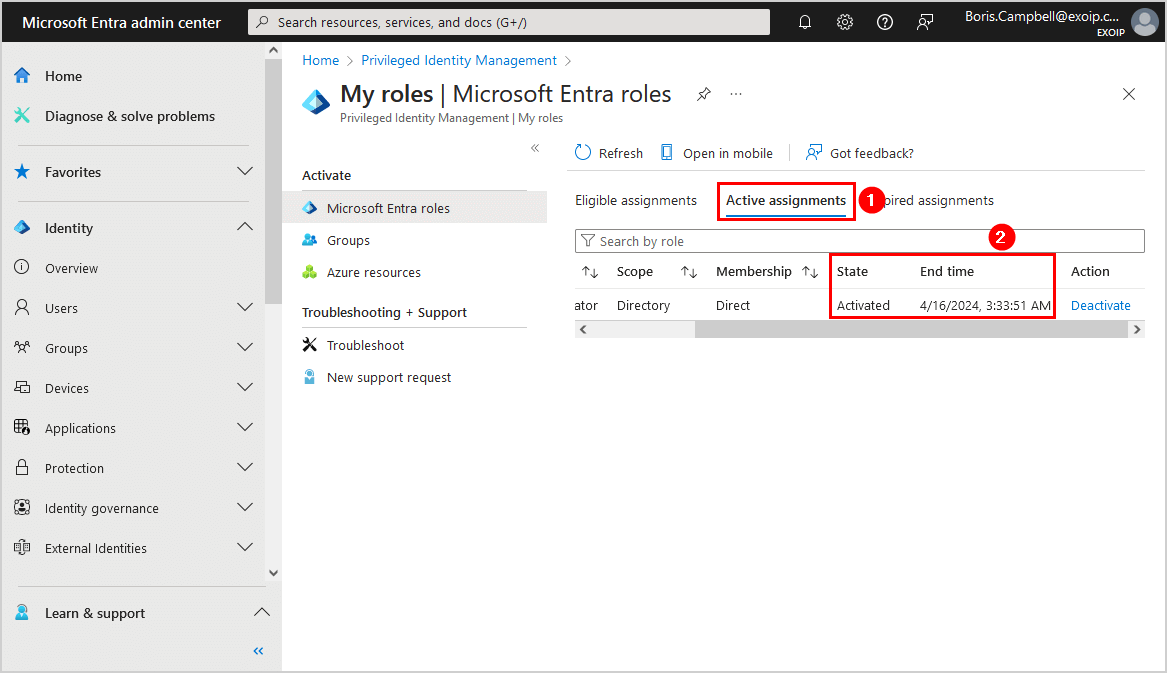
- Click on the notification bar to switch to the active assignments list

- Verify that the state shows Activated and that the End time appears correctly
That’s it!
Read more: Export Entra ID app registrations Certificates and Secrets expiry report »
Conclusion
You learned how to configure Microsoft Entra Privileged Identity Management (PIM). Don’t add roles to the users in the old-fashioned way. But give users just-in-time privileged access to Microsoft Entra ID and Azure resources using PIM instead. It’s an excellent feature to manage, control, and monitor access to important resources in the organization. Remember that you need a Microsoft Entra ID P2 license to use this feature.
Did you enjoy this article? You may also like Get MFA status in Microsoft Entra and PowerShell. Don’t forget to follow us and share this article.
This Post Has 0 Comments