Is it possible to automate the password workflow when creating new AD Users? The answer…
Add additional columns in Active Directory
Active Directory Users and Computers (ADUC) is the Microsoft Management Console snap-in to administer Active Directory (AD). Every IT engineer who works with Windows Server knows the Active Directory console. We can add and remove columns in ADUC, but we don’t have the option to choose more columns than the available list. What if we want to add an attribute to the Active Directory console column? In this article, we will show how to add additional columns in Active Directory.
Table of contents
Introduction
The IT service desk likes to have two columns in Active Directory Users and Computers (ADUC). These attributes are:
- Operating system
- Mobile
Discussing with the internal team that they can use PowerShell scripts to check both the values is not an option. Creating a PowerShell script with a GUI that will show the values was also an extra application for them to use what they didn’t want. That’s because they want to manage everything from the ADUC console, and it’s much easier for the team.
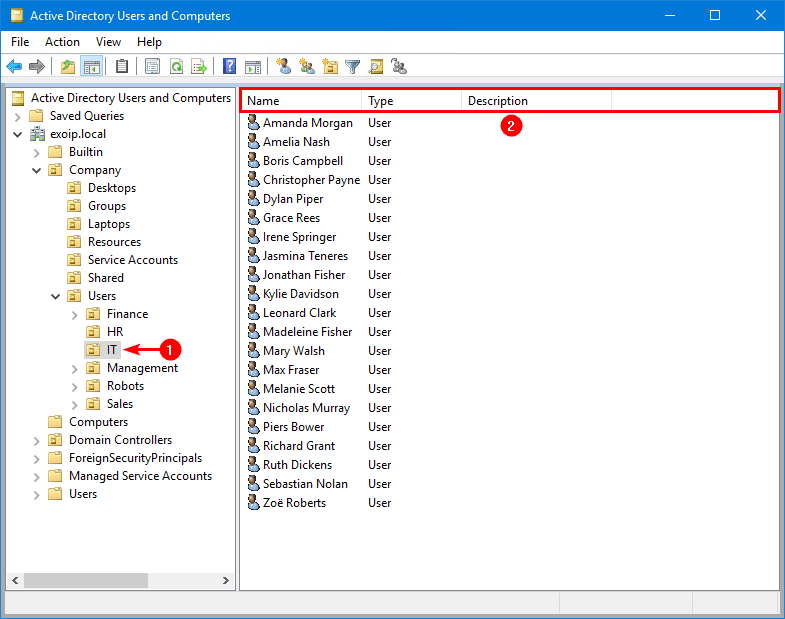
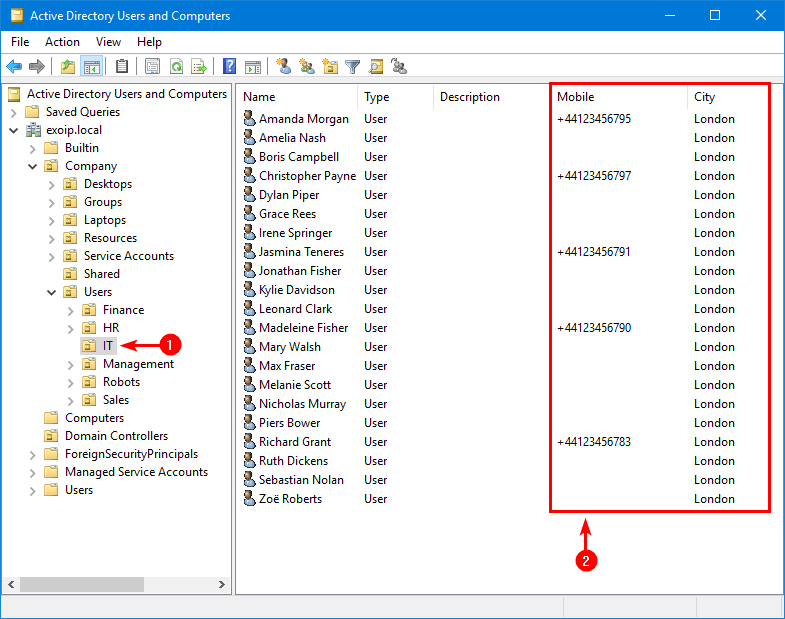
This is how it looks in the Organizational Unit Desktops.

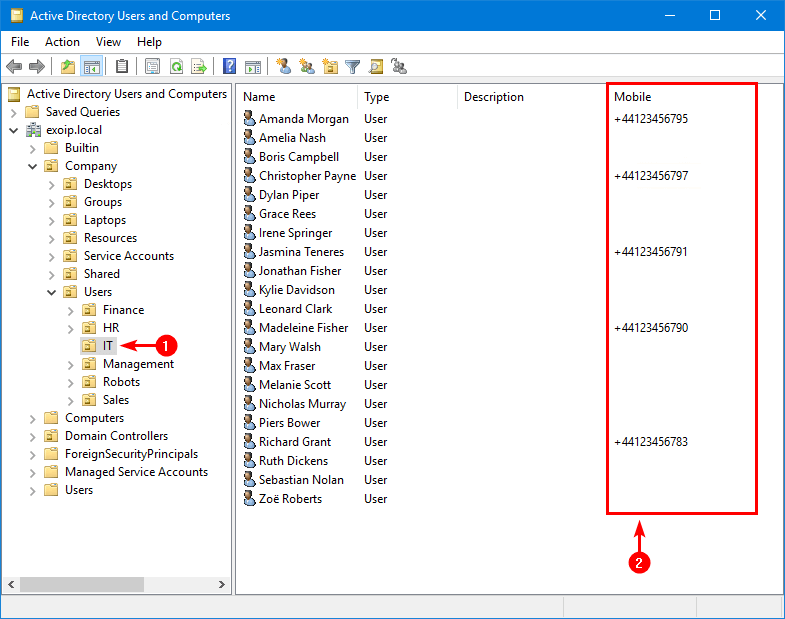
This is how it looks in Organizational Unit IT.
Now let’s look at how to add additional attributes to the Active Directory column.
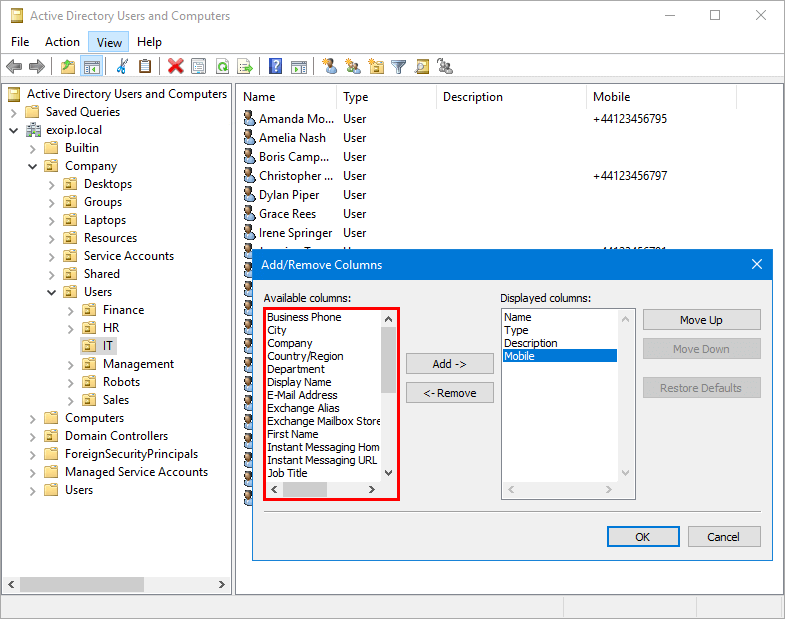
Available columns in Active Directory
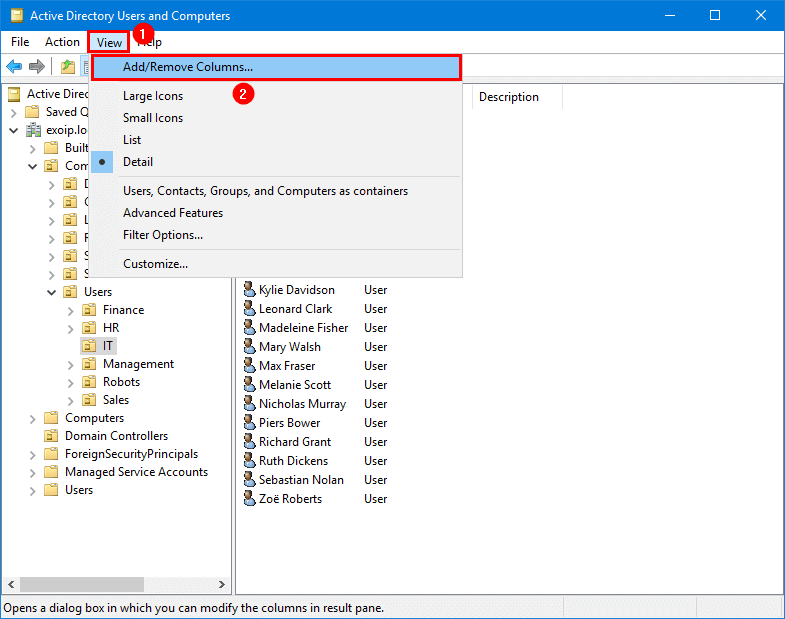
Check the available columns in Active Directory by following the below steps:
- Sign in to the Domain Controller
- Start Active Directory Users and Computers
- Click in the menu on View
- Select from the dropdown menu on Add/Remove Columns…
You will see Available columns and Displayed columns.
Note: The available columns can vary, and it depends on selecting Organizational Unit or Container.
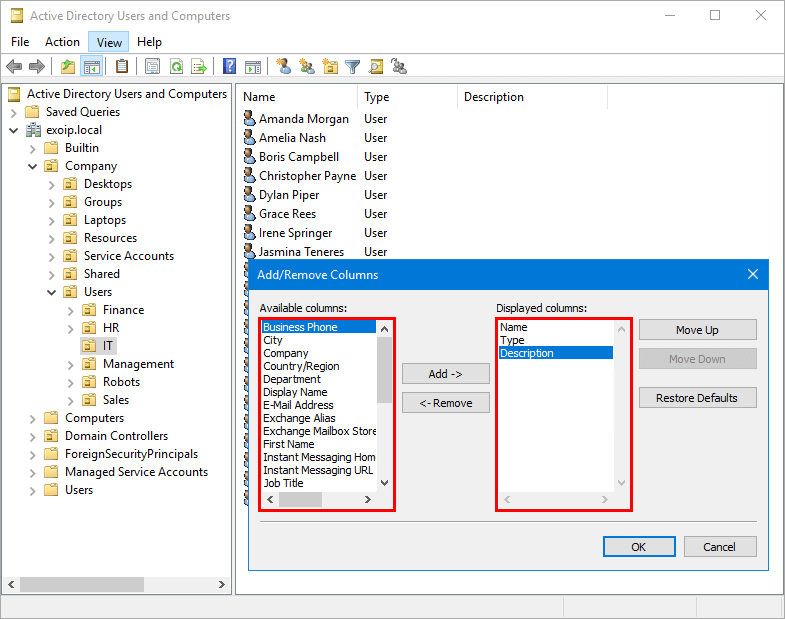
The below available columns show up, which are the default to select from:
| Available columns | Displayed columns |
|---|---|
| Business Phone | Name |
| City | Type |
| Company | Description |
| Country/Region | |
| Department | |
| Display Name | |
| E-mail Address | |
| Exchange Alias | |
| Exchange Mailbox Store | |
| First Name | |
| Instant Messaging Home Server | |
| Instant Messaging URL | |
| Job Title | |
| Last Name | |
| Modified | |
| Office | |
| Phonetic Company Name | |
| Phonetic Department | |
| Phonetic Display Name | |
| Phonetic First Name | |
| Phonetic Last Name | |
| Pre-Windows 2000 Logon Name | |
| State | |
| Target Address | |
| User Logon Name | |
| x.400 E-mail Address | |
| Zip Code |
There is no Mobile, Operating System, or other additional columns in the Add/Remove Columns window.
extraColumns attribute
To add a column to the list, add a value to the extraColumns attribute of the display specifier for the object type that the attribute is associated with. The extraColumns attribute is a multi-valued string attribute where each string is in the following format.
ldapdisplayname,column header,default visibility,width,unused| Value | Description |
|---|---|
| ldapdisplayname | Contains a string that represents the ldapDisplayName of the attribute. |
| column header | Contains a string that represents the text displayed in the header for the column. |
| default visibility | Contains a numeric value that is 0 if the attribute is hidden by default or 1 if the attribute is visible by default. |
| width | Contains the width of the column in pixels. If this value is -1, the width of the column is set to the width of the column header. |
| unused | Unused. Must be zero. |
Add additional columns in Active Directory
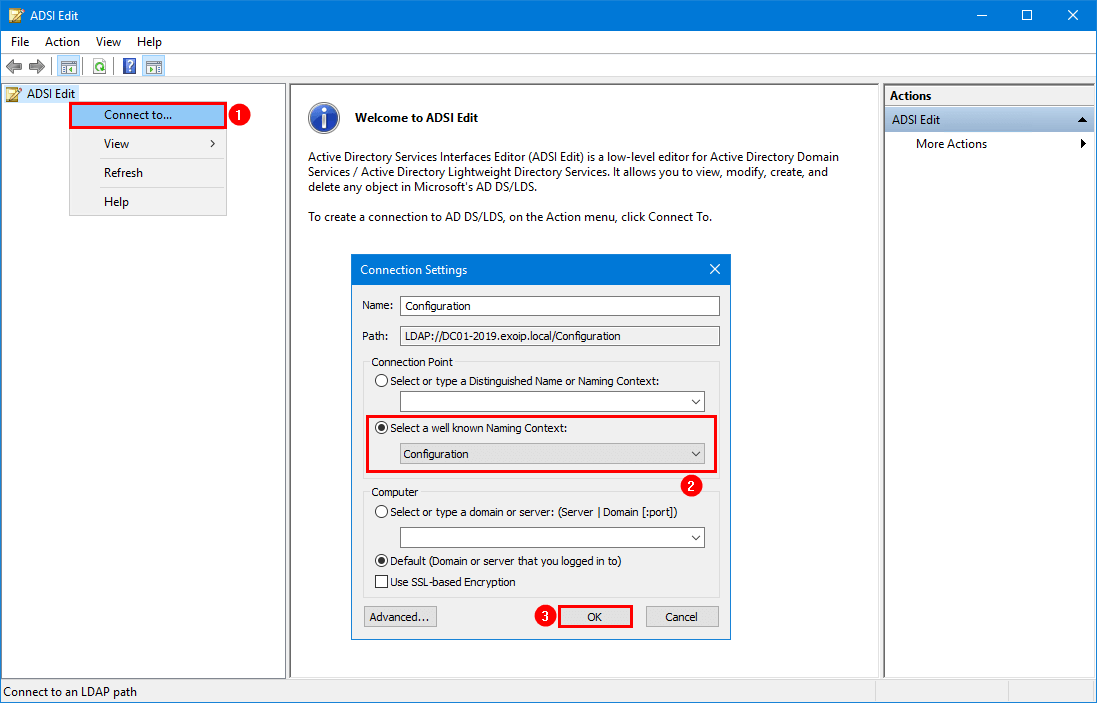
Let’s add additional columns in Active Directory Users and Computers console. Follow the below steps to connect to ADSI Edit:
- Open Administrative Tools or type adsiedit.msc in the Windows Search
- Start ADSI Edit
- Right-click ADSI Edit in the left pane and select Connect to
- Select Configuration in the well known Naming Context
- Click OK
Navigate in ADSI Edit:
CN=organizationalUnit-Display,CN=409,CN=DisplaySpecifiers,CN=Configuration,DC=exoip,DC=local
We did select the folder with number 409 in DisplaySpecifiers, which is the English language. If you have a different Windows Server language, choose that instead.
Right-click CN=organizationalUnit-Display and click Properties.
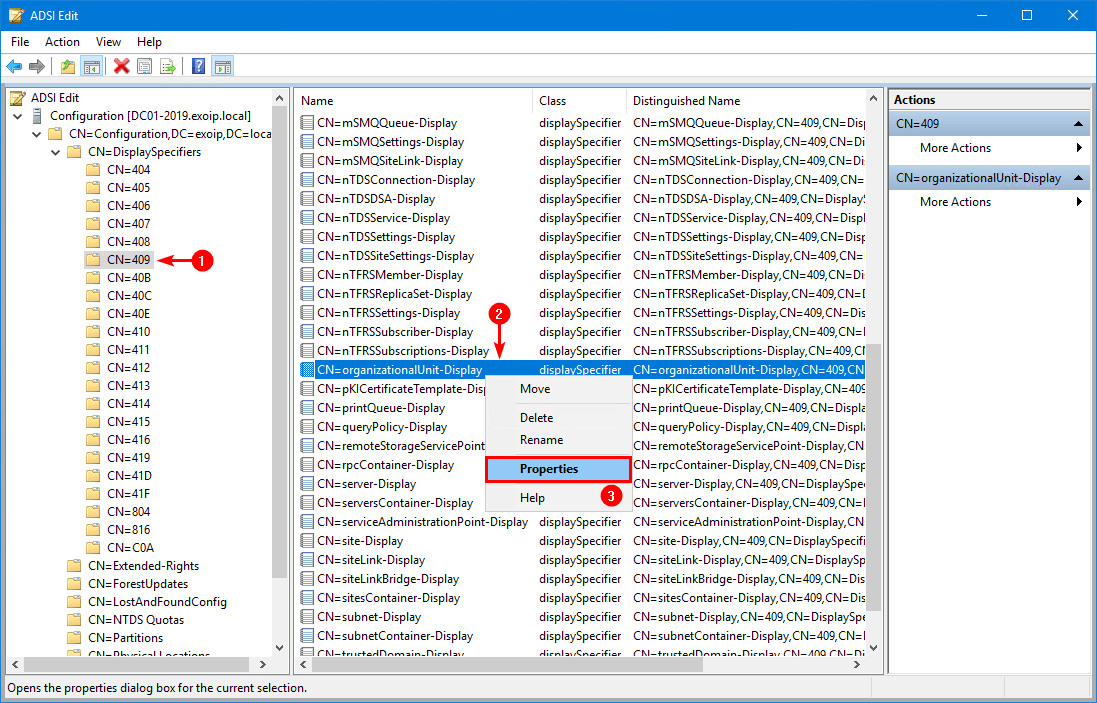
Find the attribute extraColumns. By default, it’s empty, and the value is not set.
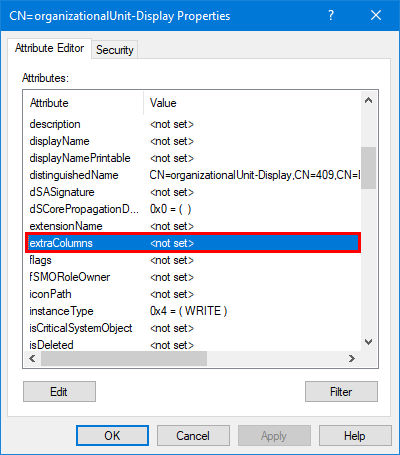
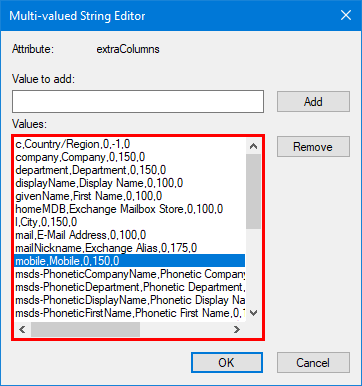
Add the below value to the attribute extraColumns to display the Mobile in Active Directory.
mobile,Mobile,0,150,0
Select custom column in Active Directory
Follow the steps below to add the custom column in Active Directory:
- Close ADUC and ensure that there are no sessions open
- Start ADUC
- Go to the OU with the users
- Click in the menu on View
- Select from the dropdown menu on Add/Remove Columns…
- Select Mobile from the Available columns
Note: You will only see the custom column to select from in the available columns section, which is the correct behavior. We will explain why this happens and how to correct this down below.
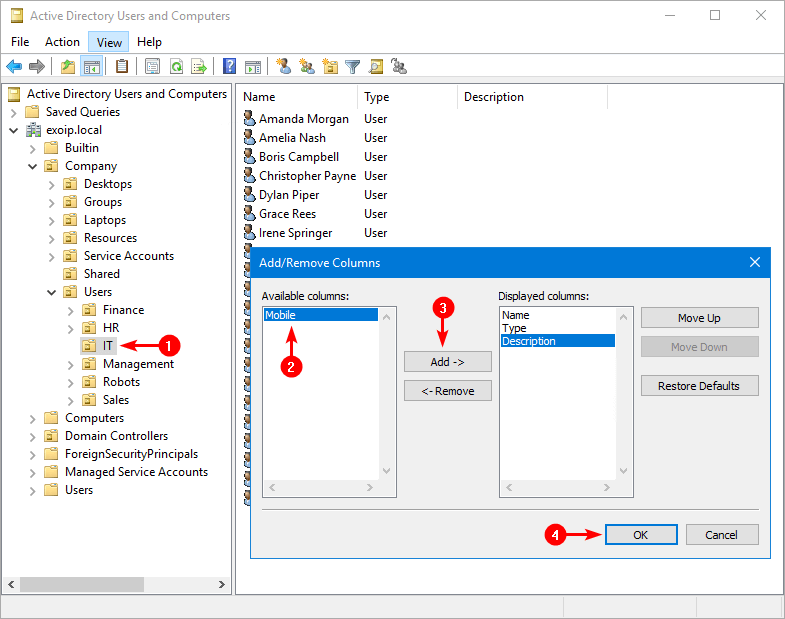
The Mobile column is successfully added to Active Directory console.
Copy extraColumns values
To add one or more columns to the list of columns for a specific object, you must copy all of the extraColumns values from the default-Display object to the target object and then add the custom columns.
If you specify the extraColumns attribute on a given class, then that class will use those columns and not merge them with the columns specified in the default-Display class. Therefore, further changes to the default-Display class will not affect that object.
Right-click on CN=default-Display and select Properties.
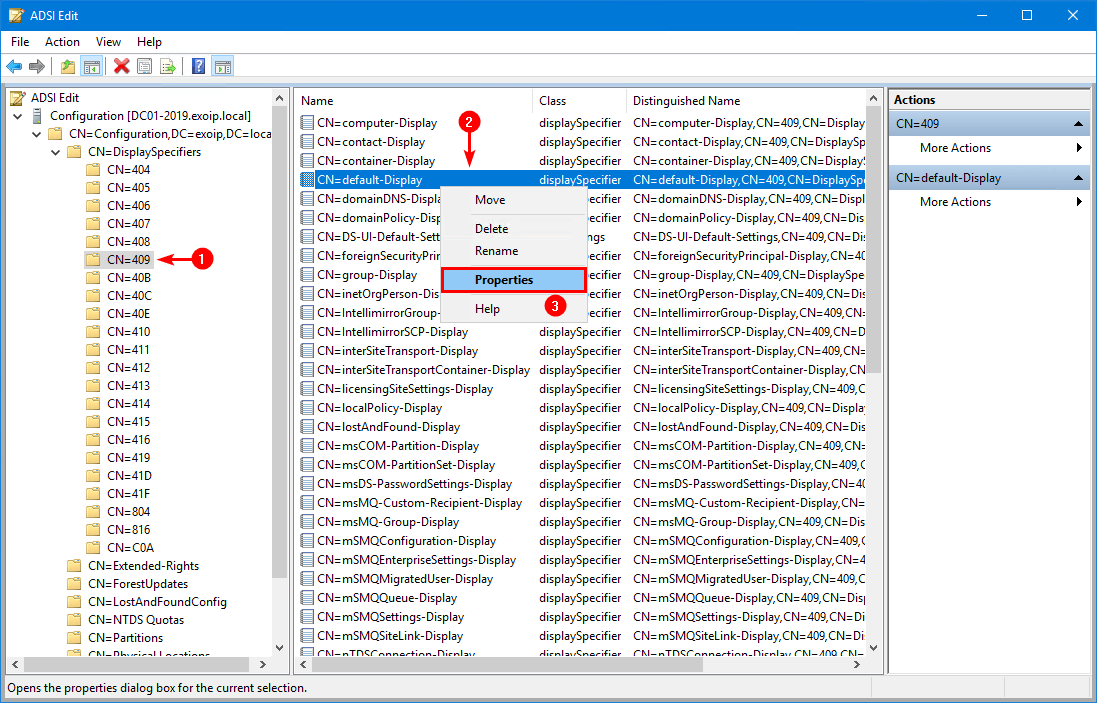
Find the attribute extraColumns and double-click on it.
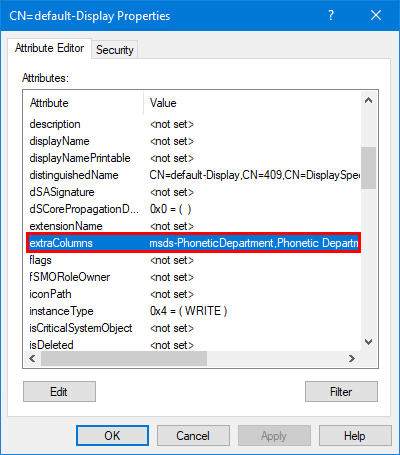
These are all the default values that you can select from in the Add/Remove Columns.

Let’s copy the CN=default-Display extraColumns attribute values to the CN=organizationalUnit-Display extraColumns attribute values.
You can write the values down and manually enter them over. Another way is to use PowerShell and copy all the extraColumns values from the Default-Display object. With PowerShell, it’s faster, and you will not make any mistakes.
- Run PowerShell as administrator
- Copy below script
- Change the language on line 1
- Run the script
In our example, we have the English language so we use the number 409.
$Language = 409
$Config = (Get-ADRootDSE).configurationNamingContext
$ouDisplaySpecifier = Get-ADObject -Identity "CN=organizationalUnit-Display,CN=$Language,CN=DisplaySpecifiers,$Config" -Properties *
$defaultDisplaySpecifier = Get-ADObject -Identity "CN=default-Display,CN=$Language,CN=DisplaySpecifiers,$Config" -Properties *
$extraColumns = $ouDisplaySpecifier.extraColumns
$extraColumns += $defaultDisplaySpecifier.extraColumns
Set-ADObject $ouDisplaySpecifier -Replace @{extraColumns=$extraColumns}
Everything is copied successfully and it preserved the mobile value, which we did set in earlier step.
Close ADUC and ensure that there are no sessions open. Next, start ADUC and go to the Add/Remove Columns window. The default available columns will show, and the additional column too.
Let’s select the column City from the available columns.
It looks great.
Add more additional columns in Active Directory
The same steps apply if you want to have other columns in Active Directory.
For example, we must add the below value to the CN=organizationalUnit-Display extraColumns attribute to display the Operating System in Active Directory.
operatingSystem,Operating System,0,150,0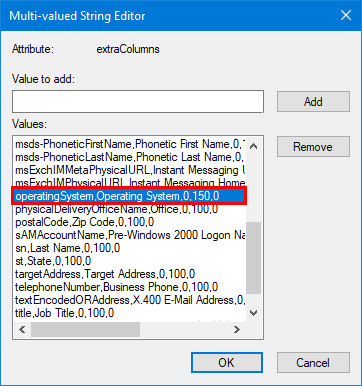
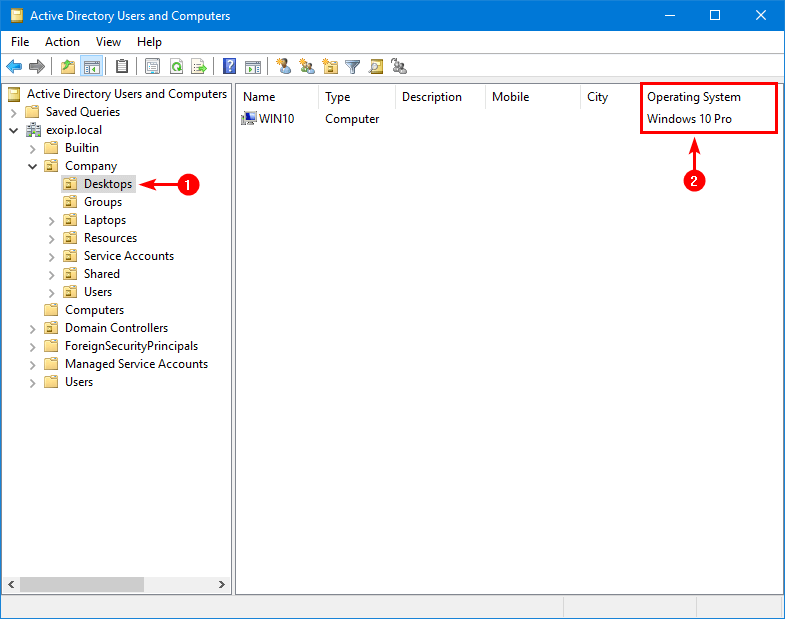
Close ADUC and ensure that there are no sessions open. Next, start ADUC and go to the Add/Remove Columns window. Select the column Operating System from the available columns.
The column Operating System will be visible in ADUC.
That’s it!
Read more: Get Active Directory count with PowerShell »
Conclusion
You learned how to add additional columns in Active Directory. First, copy the extraColumns values from default-Display object to organizationalUnit-Display object with PowerShell. After that, add the values in the extraColumns attribute that you want to see in Active Directory as columns. Don’t forget to close all ADUC sessions and start a new ADUC session before you can select the columns in Add/Remove columns.
Did you enjoy this article? You may also like Add UPN suffix in Active Directory. Don’t forget to follow us and share this article.
What Others Are Reading


How do I do this for queries under Saved Queries in ADUC?
Ah, add the new column to ‘extraColumns’ directly under ‘default-Display’
Brilliant in depth Article
Well Researched
Great write-up, thank you Ali! A quick question – I used this method to add “LastLogon” column for users; the column is added and is shown in the view, but it does not show the value of the “LastLogon” field of the user account – it shows blank instead. Is there a trick to display dates/times in this manner?
Thank you
Unfortunately, some attributes will not appear in ADUC when you add them into ADSI Edit. One of them is the LastLogon attribute.
I am afraid that the best way is using PowerShell to populate the LastLogon value.