We did migrate from ADFS to Password Hash Synchronization (PHS). The password sync time interval…
Change Azure AD Connector account
How to reset the Azure AD Connector account in Azure AD Connect? There are some problems with synchronizing to Azure AD, and we identified that we have to reset the Azure AD Connector account. In this article, you will learn how to change or reset the Azure AD Connector account in Azure AD Connect by creating a new account or reinitializing the account without downtime.
Table of contents
Azure AD Connect accounts
Before you start and change the Azure AD Connector account, go through the article Find Azure AD Connect accounts and make yourself familiar with the Azure AD Connect accounts that are being used.
How to change Azure AD Connector account
There are two methods to change the Azure AD Connector account:
- Change Azure AD Connector account: Create a new Azure AD user account and configure that in Azure AD Connect.
- Reset Azure AD Connector account: This will reset the password for the service account and update it both in Azure AD and the sync engine.
Method 1. Change Azure AD Connector account
Create Azure AD Connector account
Follow the steps below to create a new user account in Azure AD and give it the least privileges.
- Sign in to Microsoft 365 admin center.
- Go to Users > Active users.
- Click on Add a user.
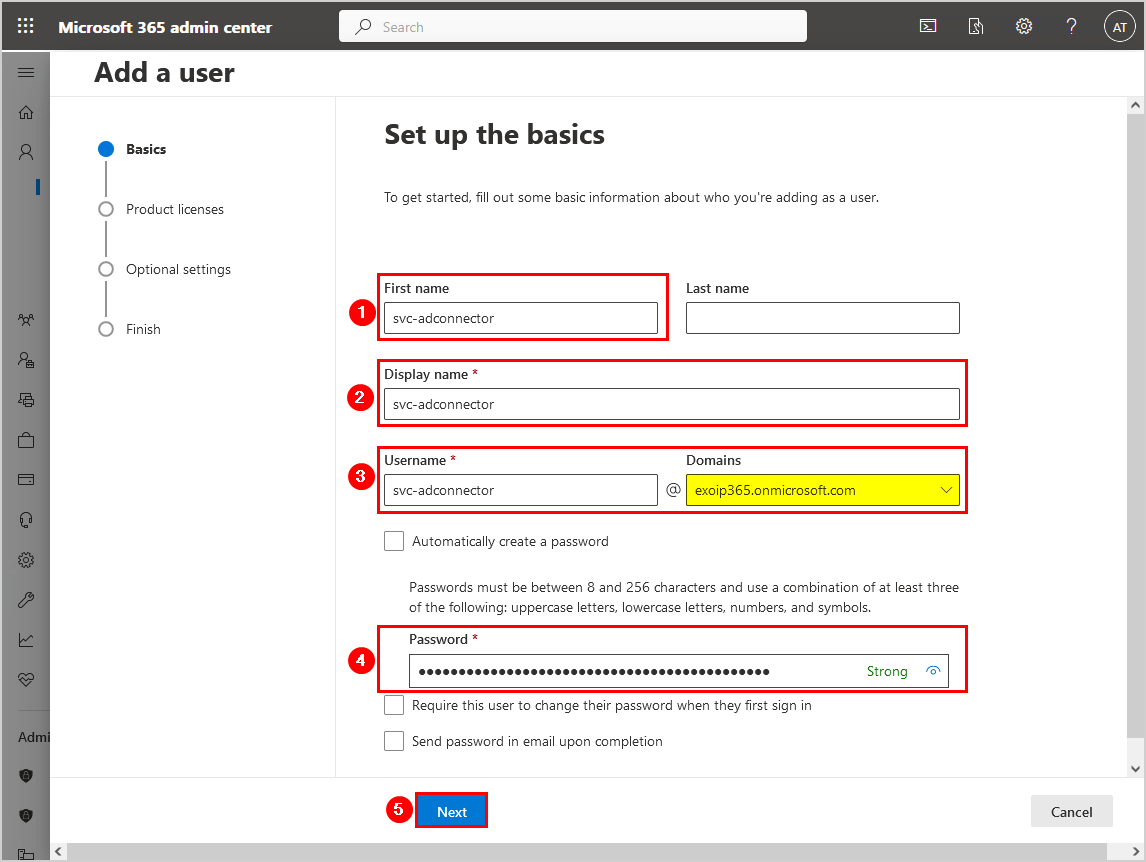
- Fill in the account basics.
- Click Next.
Choose the onmicrosoft.com domain and not the domain you added to the Microsoft tenant. That’s because domains can change, and it will give you issues with authentications, and syncing will not work. The onmicrosoft.com domain will always be active, and it’s the default configuration when installing Azure AD Connect.
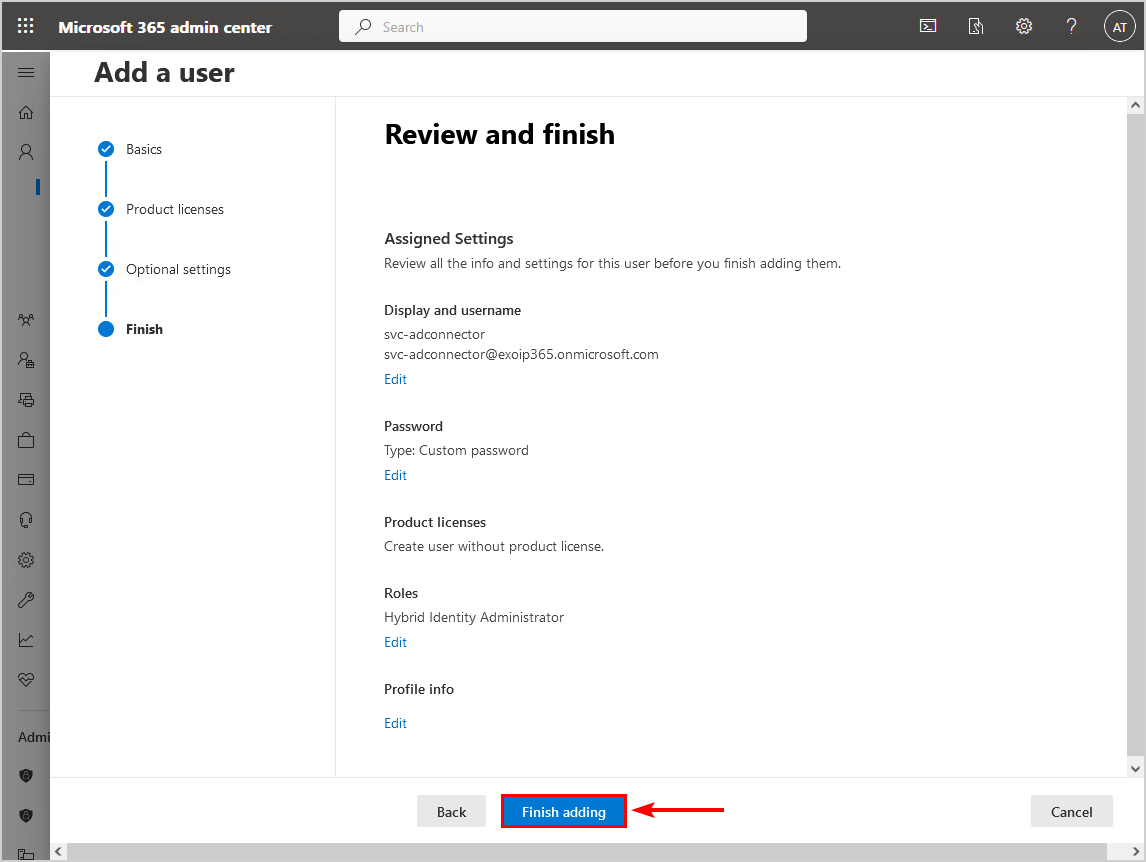
In our example, the Azure AD Connector account is svc-adconnector@exoip365.onmicrosoft.com.
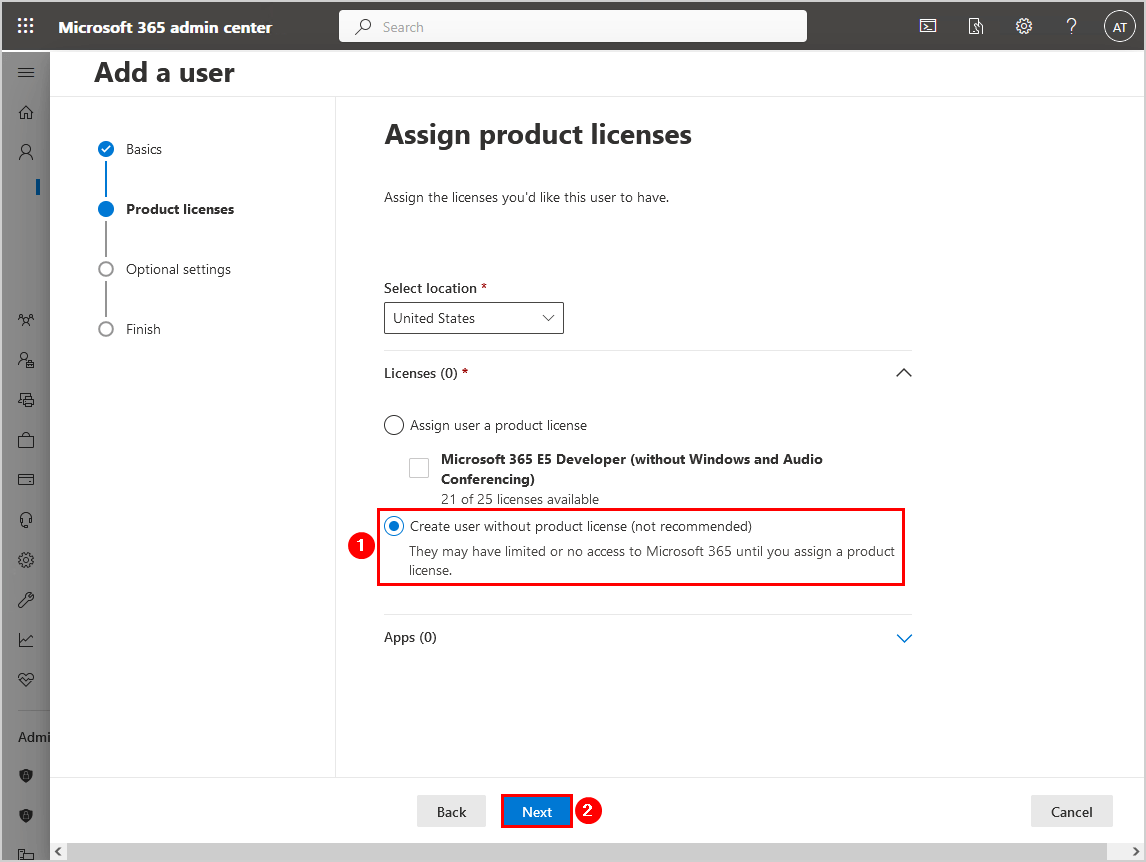
- Select Create user without product license.
- Click Next.
- Click on Roles to expand the section.
- Select Admin center access.
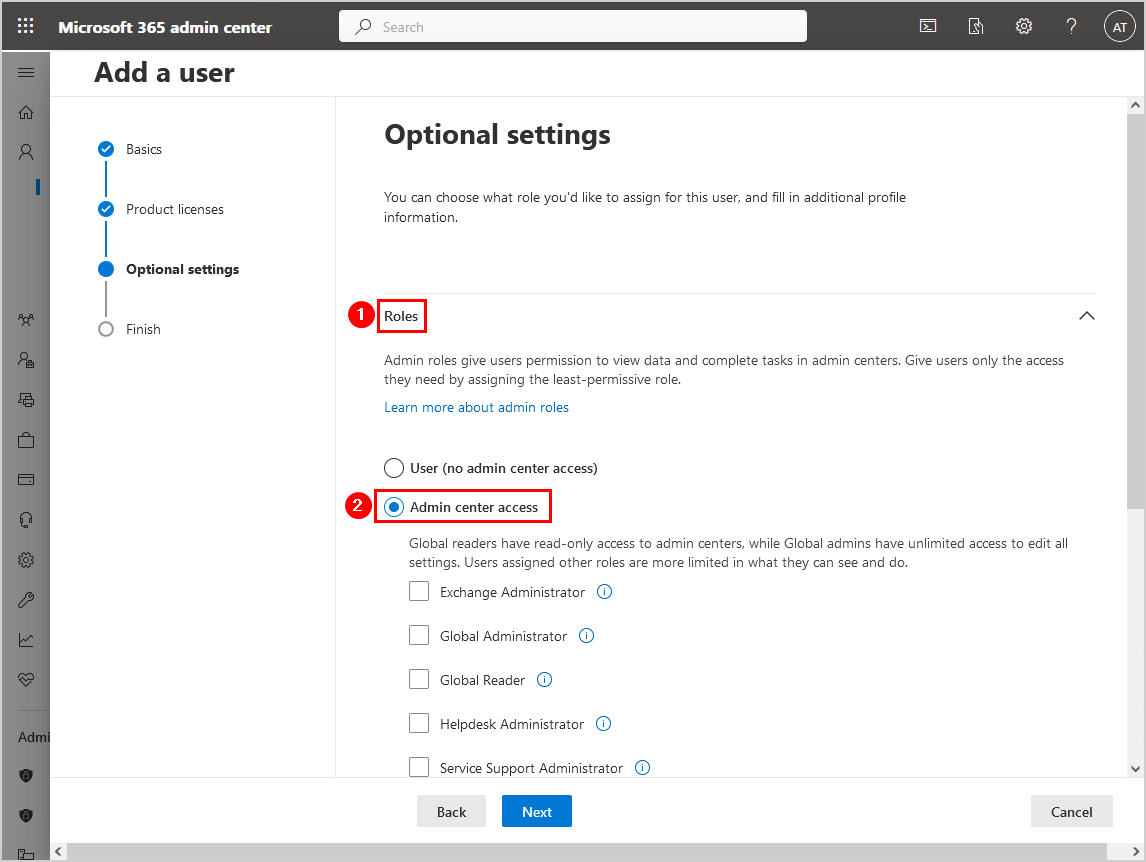
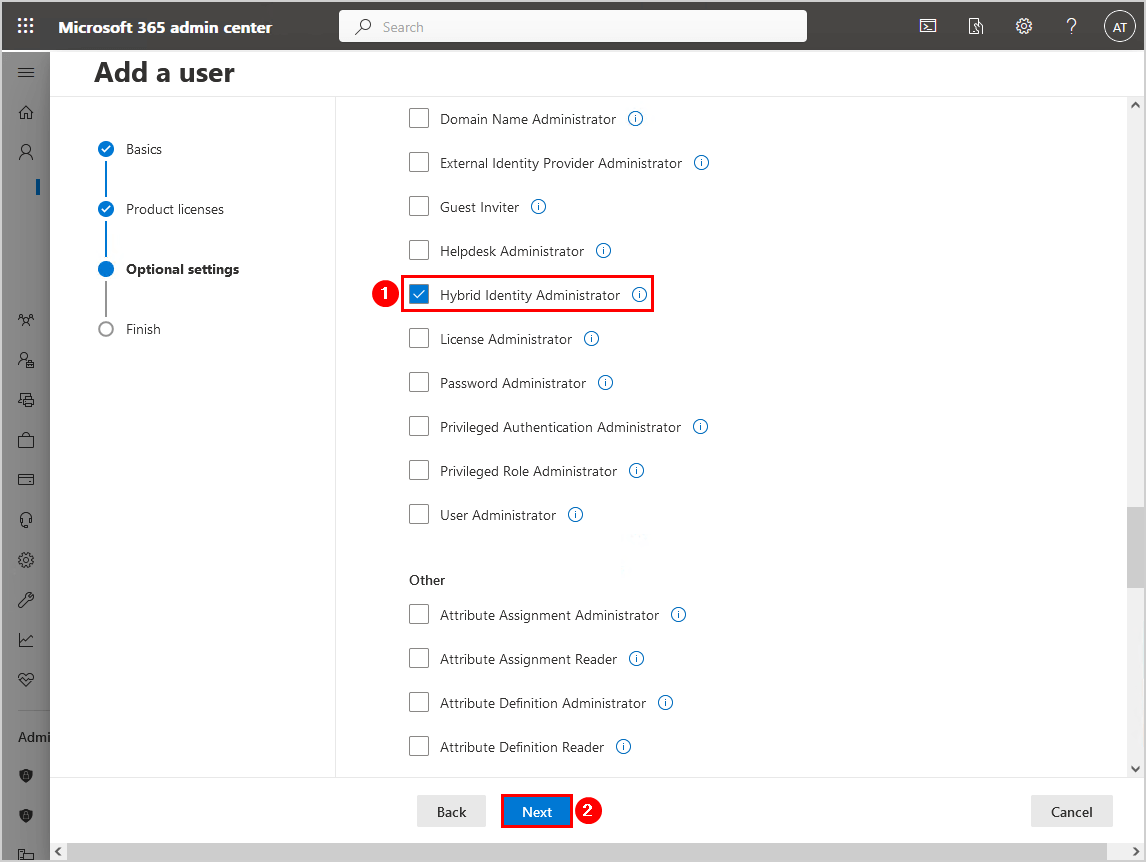
- Click on Show all by category to expand its section.
- Select the checkbox Hybrid Identity Administrator
- Click Next.
Read more about the Azure AD built-in roles.
- Review the account and click on Finish adding.
Configure Azure AD Connector account
- Sign in to the Azure AD Connect server.
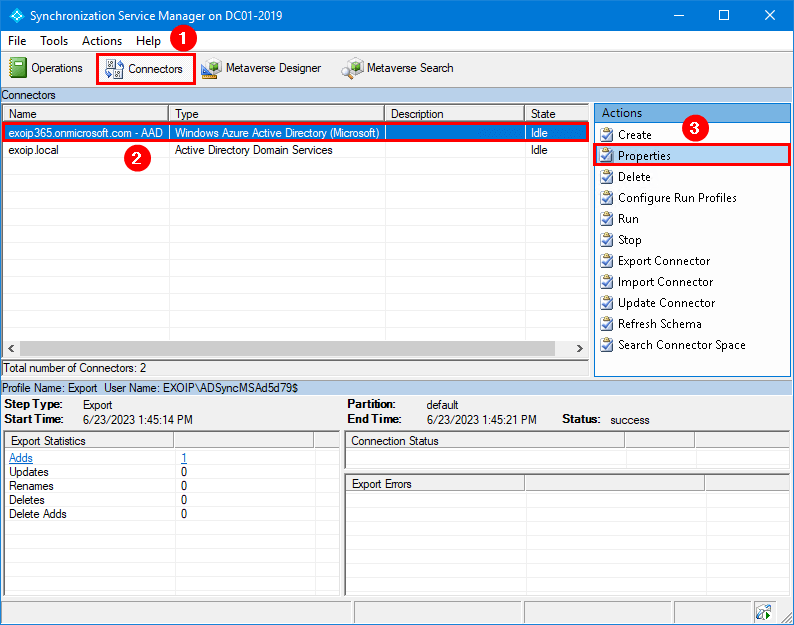
- Start Synchronization Service Manager.
- Click on Connectors.
- Select the Microsoft domain (.onmicrosoft.com).
- Click on Properties.
In our example, it’s the Microsoft domain exoip365.onmicrosoft.com – AAD.
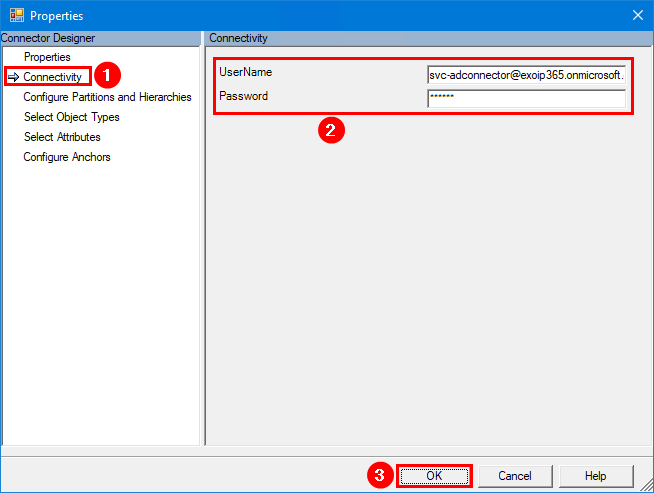
- Click on Connectivity.
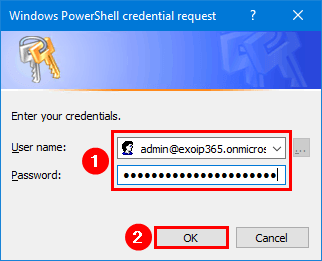
- Fill in the Azure AD Connector account credentials you created in the previous step.
- Click OK.
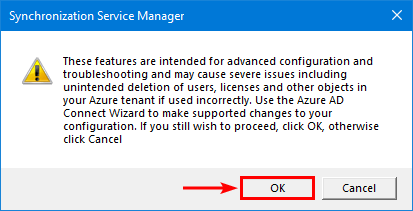
Note: If the credentials are incorrect, you will get an error because it will immediately check against Azure AD.
- Click OK.

- Click OK.
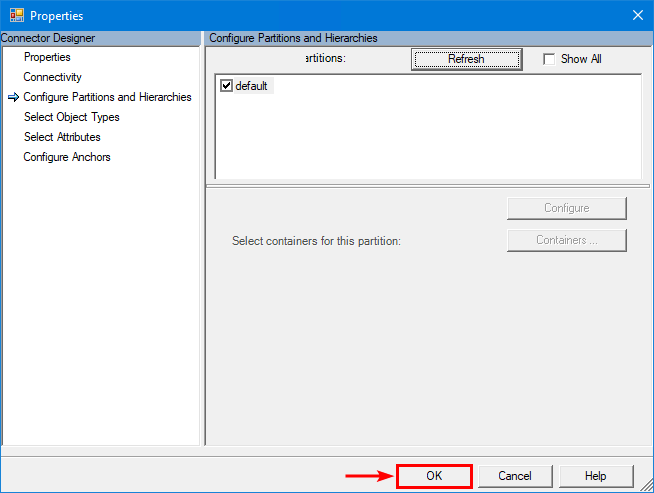
- Last time on OK.
Force sync Azure AD Connect
Now that the Azure AD Connector account has been successfully changed, force sync Azure AD Connect and verify that the sync works.
PS C:\> Start-ADSyncSyncCycle -PolicyType Initial
Result
------
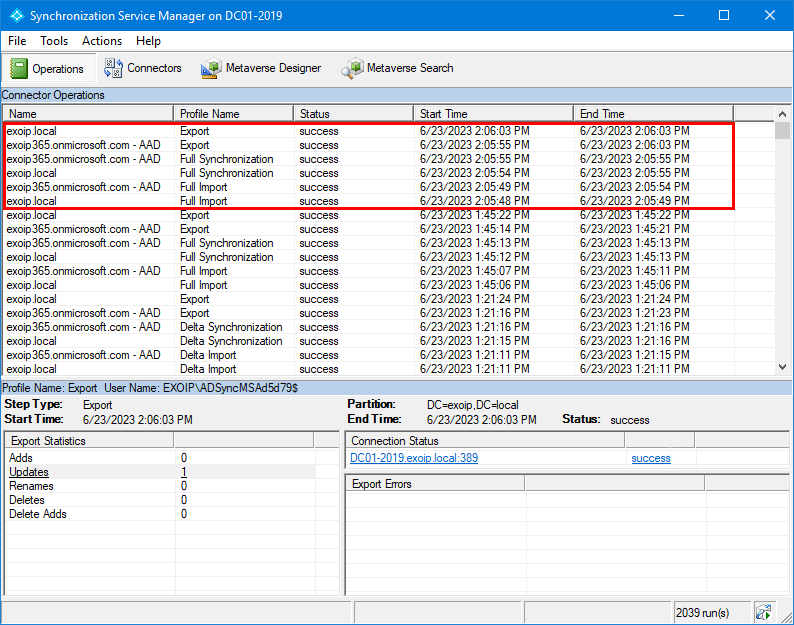
SuccessGo to the Azure AD Connect synchronization service manager and verify that there are no errors and that the sync status is a success.
Method 2. Reset Azure AD Connector account
You have to use the cmdlet Add-ADSyncAADServiceAccount to reinitialize the Azure AD Connector account. The cmdlet resets the account password and makes it available to the Azure AD Connect synchronization service.
Note: Nothing will happen to the other Azure AD connect accounts when running the cmdlet, and only the Azure AD Connector account will reinitialize.
Reinitialize Azure AD Connector account
Go through the below steps to reinitialize the Azure AD Connector account with PowerShell:
- Sign in to the Azure AD Connect server.
- Start Windows PowerShell as administrator.
- Import the module ADSync.
PS C:\> Import-Module ADSync- Run the Add-ADSyncAADServiceAccount cmdlet.
PS C:\> Add-ADSyncAADServiceAccount- The password prompt appears.
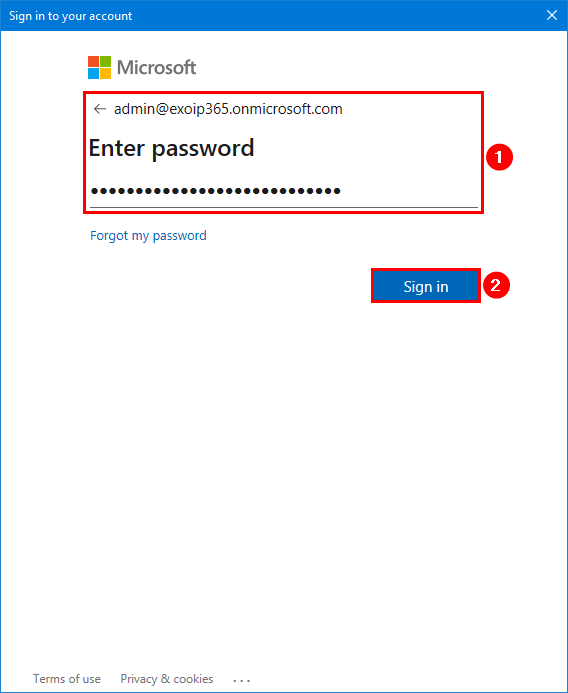
- Fill in the Microsoft 365 global administrator account credentials.
- Click on OK.
- The modern authentication window appears.
- Fill in the Microsoft 365 global administrator account again.
- Click Sign in.
The command is successfully run.
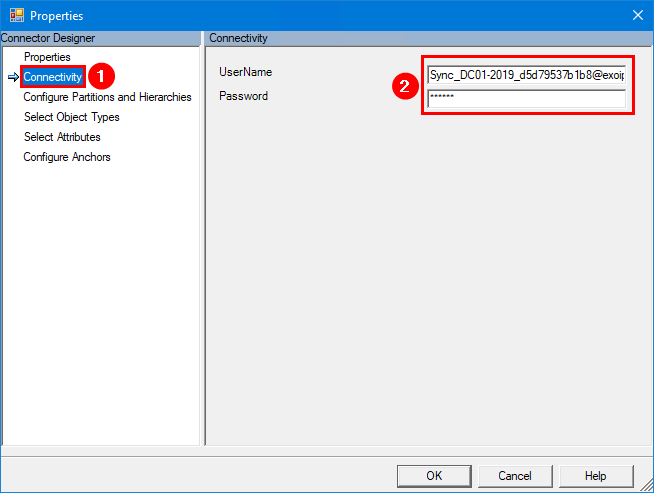
Verify Azure AD Connector account
- Sign in to the Azure AD Connect server.
- Start Synchronization Service Manager.
- Click on Connectors.
- Select the Microsoft domain (.onmicrosoft.com).
- Click on Properties.
- Click on Connectivity.
- Verify that the UserName starts with Sync_ and the Azure AD Connect server hostname.
In our example, Azure AD Connect is installed on Windows Server DC01-2019. So the UserName starts with Sync_DC01-2019_.
Force sync Azure AD Connect
Now that the Azure AD Connector account has been successfully reinitialized, force sync Azure AD Connect and verify that the sync works.
PS C:\> Start-ADSyncSyncCycle -PolicyType Initial

Result
------
Success
Go to the Azure AD Connect synchronization service manager and verify that there are no errors and that the sync status is a success.
That’s it!
Read more: Change AD DS Connector account »
Conclusion
You learned how to change the Azure AD Connector account. Choose a method that suits your organization’s preferences. Both of them work excellently. After that, there are no more sync issues to Azure AD Connect.
Did you enjoy this article? You may also like Upgrade Azure AD Connect to V2.x. Don’t forget to follow us and share this article.
What Others Are Reading
This Post Has 0 Comments