How to bulk add users to multiple AD groups from CSV file with PowerShell? You…
Windows Server post-installation configuration
After you install Windows Server, you’re not ready yet to add software on it. Therefore, you have to go through Windows Server post-installation configuration tasks and ensure that the Windows Server is ready. The best way to go through the Windows Server post-installation tasks is with a checklist. In this article, we will show the quickest and safest Windows Server post-install configuration.
Table of contents
- Windows Server post-installation checklist
- Do not start Server Manager automatically at logon
- Turn off Internet Explorer Enhanced Security Configuration
- Set time zone
- Change computer name
- Check Windows Server network card
- Configure static IP address
- Turn on Remote Desktop
- Configure Windows Firewall to allow pings
- Update Windows Server
- Join computer to domain (if needed)
- Active Windows Server
- Conclusion
Windows Server post-installation checklist
The checklist contains the following tasks:
- Do not start Server Manager automatically at logon
- Turn off Internet Explorer Enhanced Security Configuration
- Set time zone
- Change computer name
- Check Windows Server network card
- Configure static IP address
- Turn on Remote Desktop
- Configure Windows Firewall to allow pings
- Update Windows Server
- Join computer to the domain (if needed)
- Activate Windows Server
Let’s go through the checklist items one by one in the steps below.
Do not start Server Manager automatically at logon
By default, the Server Manager automatically starts when you sign in to Windows Server. You don’t need that, and you can always start the Server Manager manually. So let’s turn that setting off.
Go to Manage > Server Manager Properties. Check the checkbox Do not start Server manager automatically at logon.
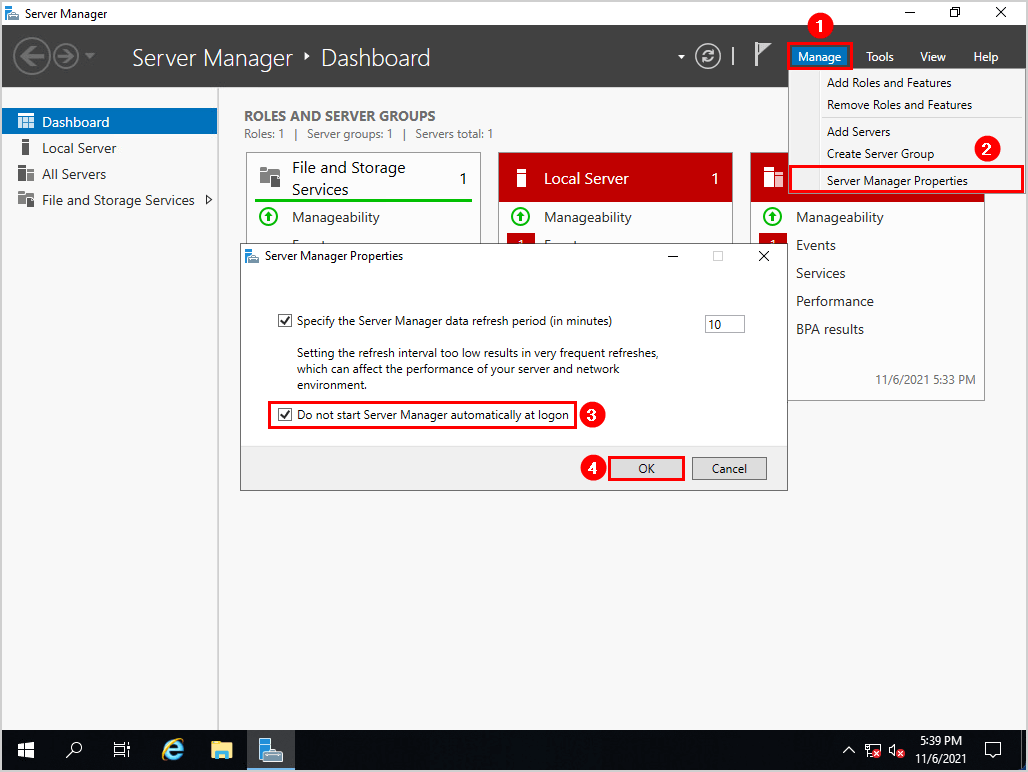
If you have a Domain Controller, create a Group Policy Object (GPO) that will not start Server Manager automatically at logon and link it to the appropriate Organizational Unit (OU).
Turn off Internet Explorer Enhanced Security Configuration
Click in Server Manager on Local Server. Turn off IE Enhanced Security Configuration for administrators and users.

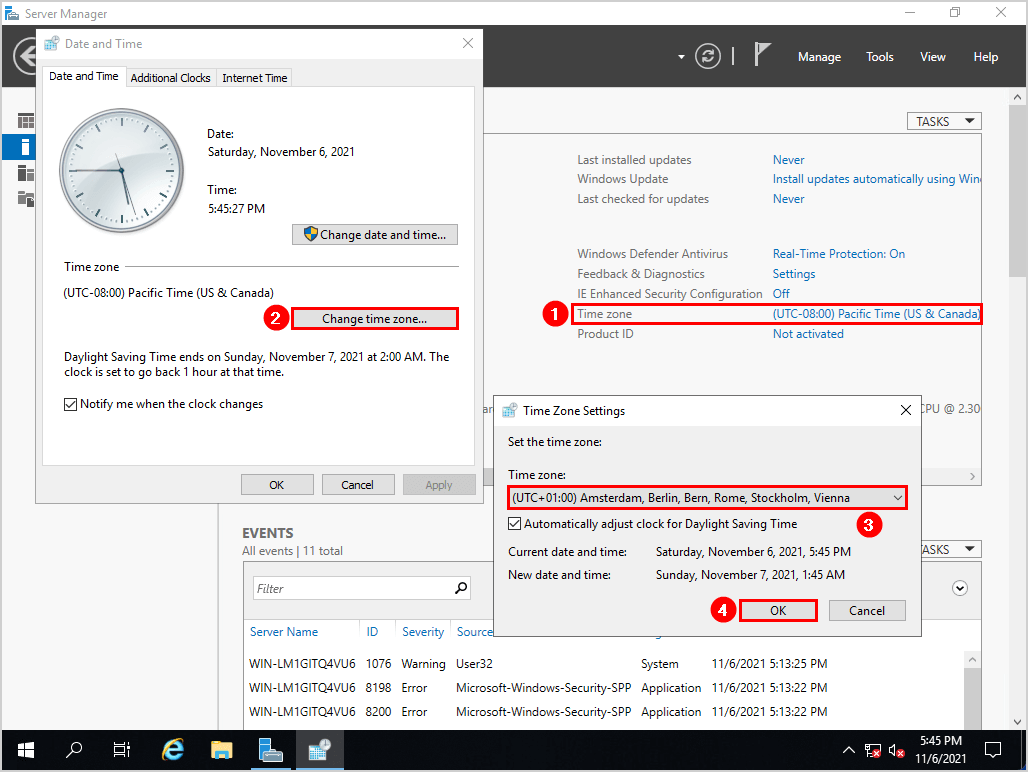
Set time zone
Adjust the Windows Server time zone. It’s possible that the time doesn’t show correctly after you set it. That’s because you don’t have an internet connection.
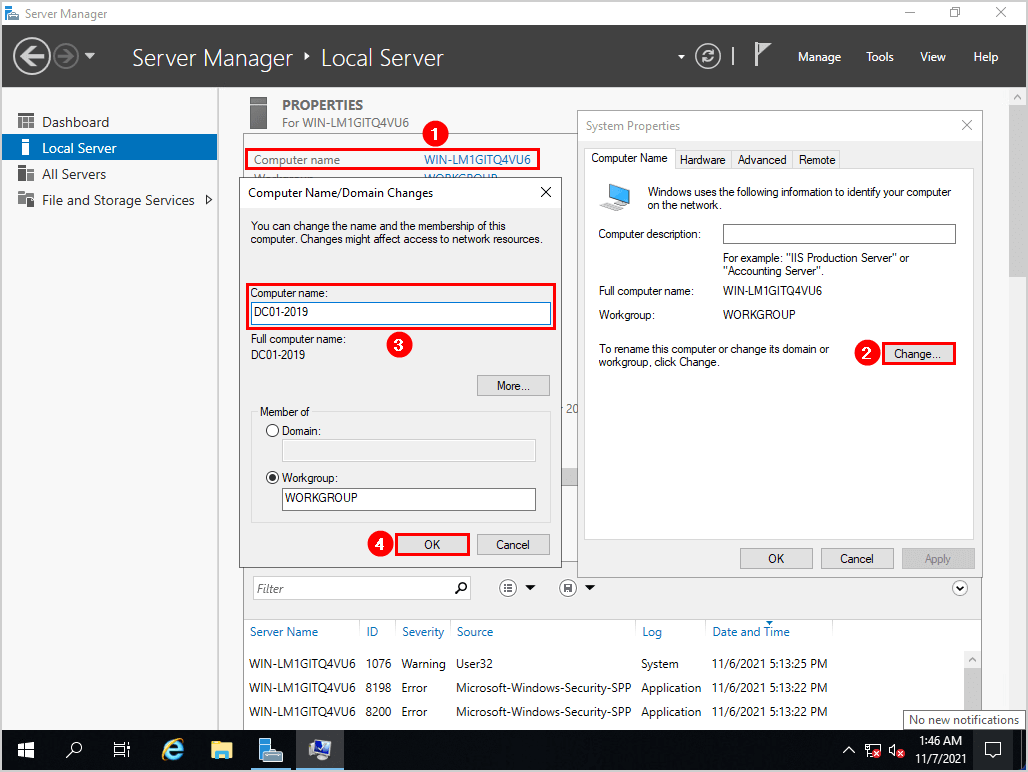
Change computer name
Change the computer name to a name that you can identify. In our example, the computer name is DC01-2019. It will be our first Windows Server 2019 Domain Controller. Reboot the Windows Server after applying.
Check Windows Server network card
It’s essential to have a network on the Windows Server. If you have Windows Server running in VMware ESXi and selected network adapter type VMXNET3, you have to install VMware tools.
Important: Always install VMware tools if you have a VM running on VMware ESXi.
Go through the VMware Tools setup. After the VMware Tools installation completes, reboot the Windows Server.
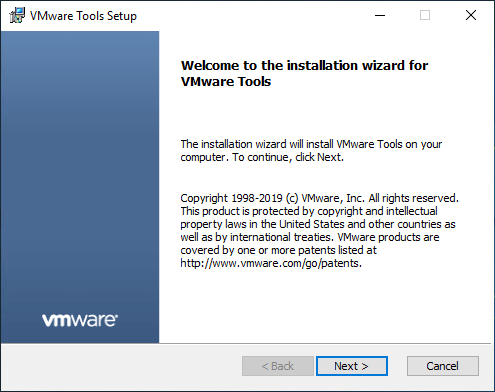
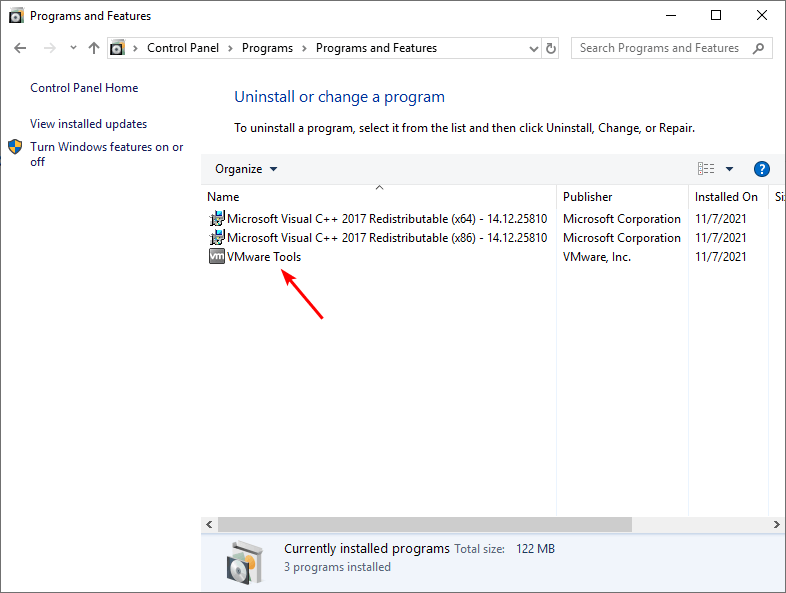
Go to Programs and Features and verify that VMware Tools is successfully installed.
Configure static IP address
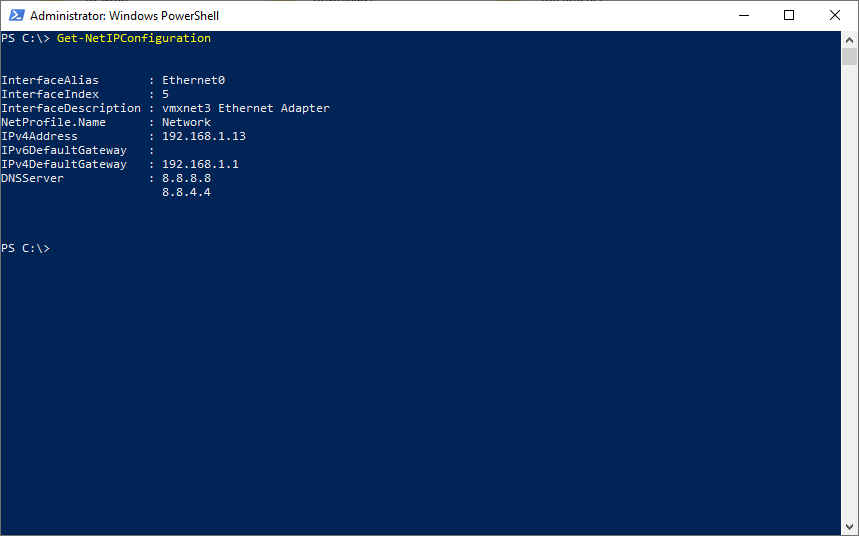
Open Command Prompt and run ipconfig/all or use Windows PowerShell and run the cmdlet Get-NetIPConfiguration.
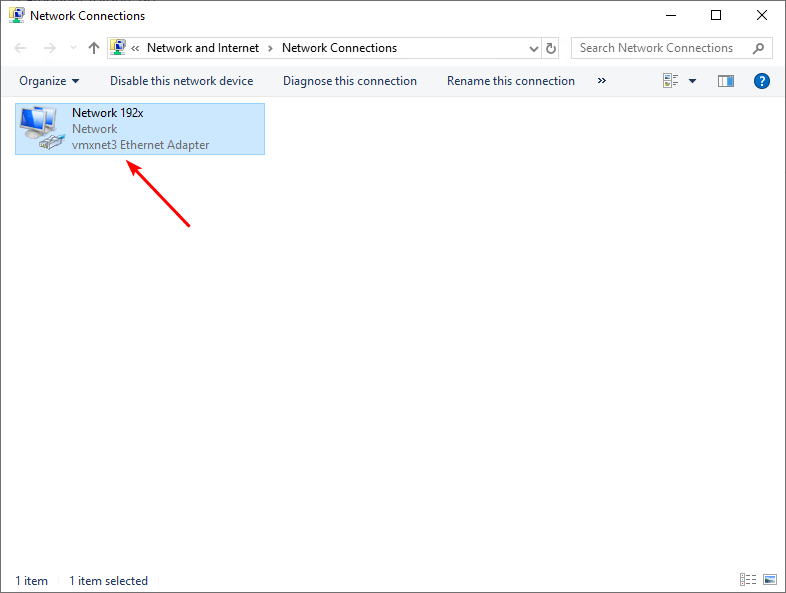
Change the network adapter name to a name that you can identify. For example, we will configure it on the 192.x network, so we name it Network 192x.
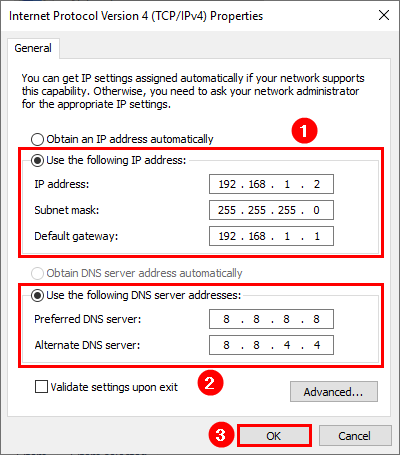
Configure a static IP address for the Windows Server. Change the Internet Protocol version 4 (TCP/IPv4) properties to a static IP address and use a preferred DNS server. For example, Google Public DNS is 8.8.8.8 and 8.8.4.4.
Note: Suppose you want to join this server to the domain, fill in your DNS in the DNS fields.
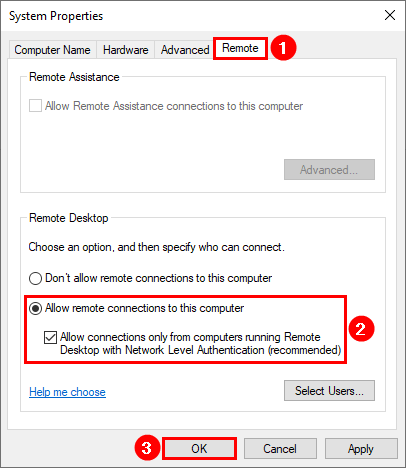
Turn on Remote Desktop
Enable Allow remote connections to this computer. It will let you remote access the Windows Server with a Remote Desktop Connection.
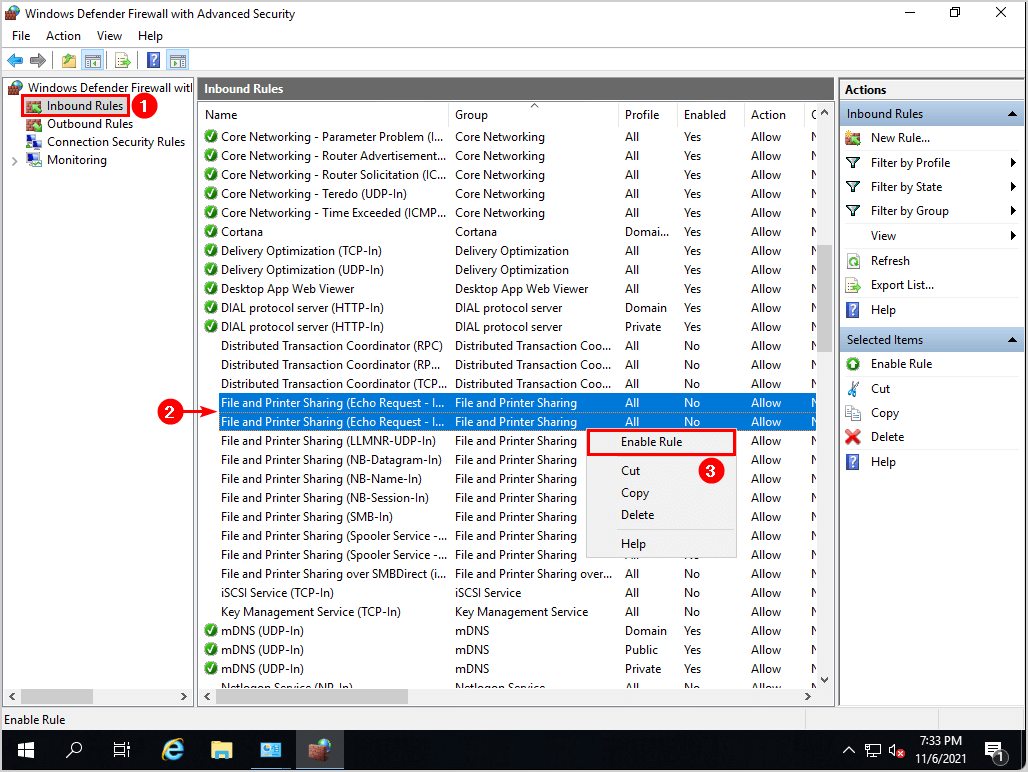
Configure Windows Firewall to allow pings
Ping requests are by default blocked in Windows Firewall. Most of the engineers disable Windows Firewall. This is not what we recommend. Leave the Windows Firewall enabled.
Search for Windows Defender Firewall with Advanced Security. From the left pane, select Inbound Rules and enable both the rules:
- File and Printer Sharing (Echo Request – ICMPv4-In)
- File and Printer Sharing (Echo Request – ICMPv6-In)
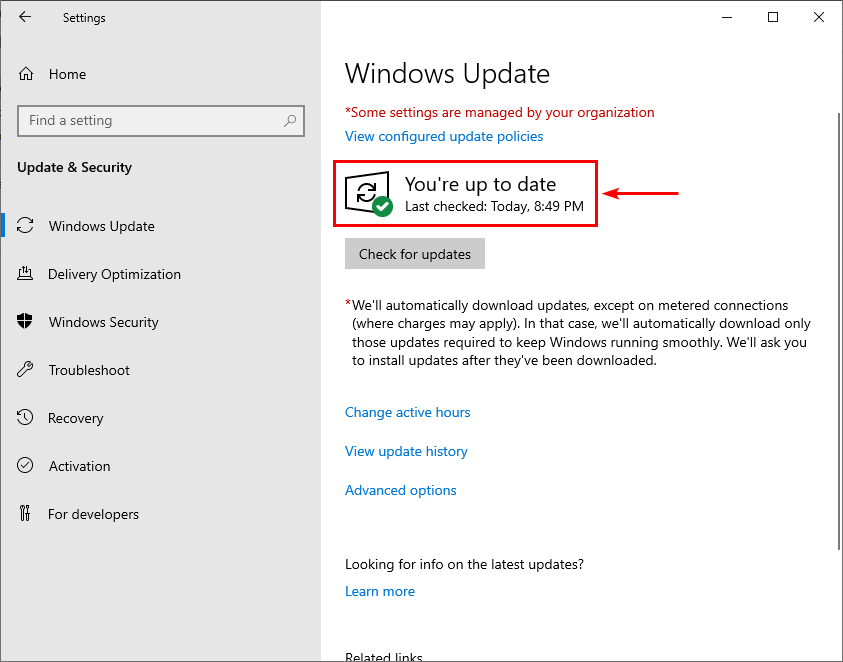
Update Windows Server
Go to Settings > Windows Update. Search and install Windows Updates. After a reboot, search again for Windows Updates.
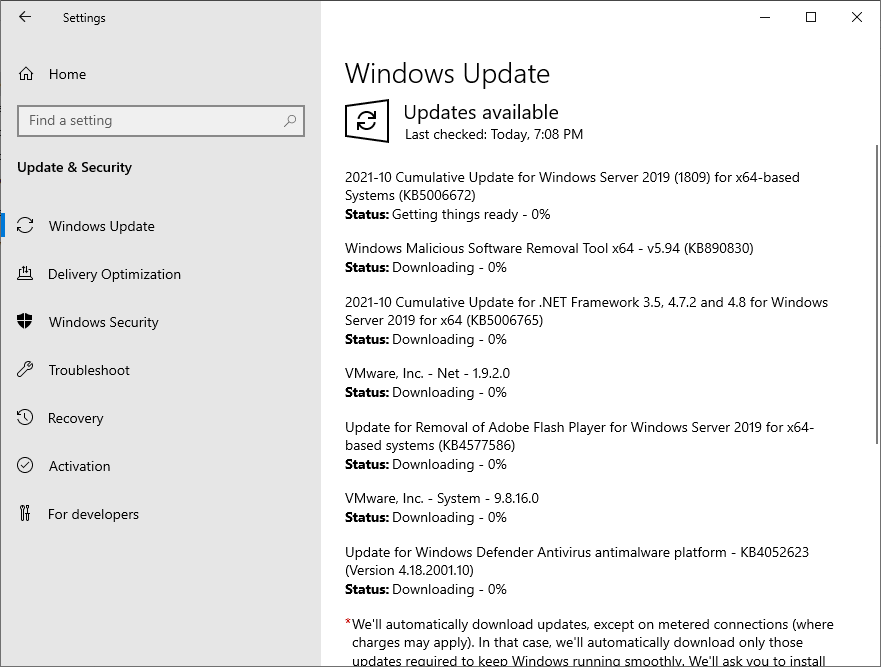
Keep searching and installing Windows Updates till you see the message that You’re up to date.
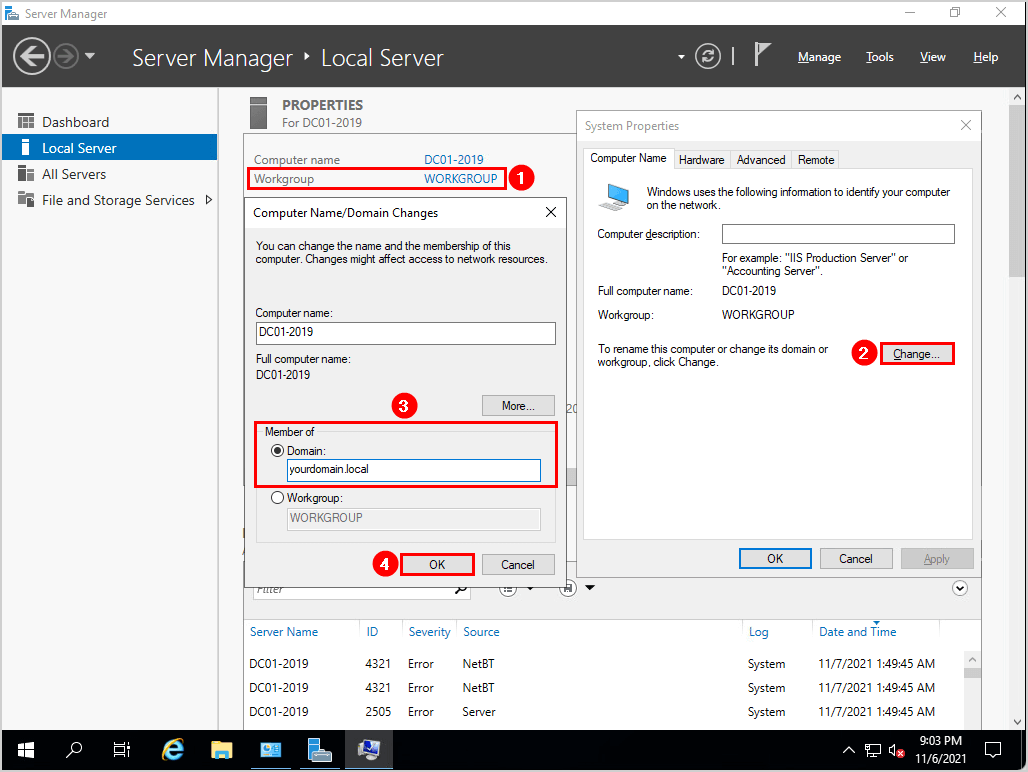
Join computer to domain (if needed)
Suppose this is a Windows Server that needs to be a member of a domain. Go to System Properties and type in the domain to be a member of. After that, enter the administrator credentials and reboot the Windows Server.
In our example, there is no domain, and we can’t make it a member. This server will be our Domain Controller.
Active Windows Server
Don’t forget to activate Windows Server. There are different ways to license Windows Server, and we will leave that up to you.
Conclusion
We showed how to go through the Windows Server post-installation configuration. As you can read, you have to configure a couple of settings after a Windows Server installation. Always use a checklist, so you don’t forget any of them.
Did you enjoy this article? You may also like Restart remote computer with PowerShell. Don’t forget to follow us and share this article.
What Others Are Reading


Really, it’s a fine article