Microsoft Teams can have stubborn issues and not download all the data correctly. By clearing…
Create an Office 365 trial tenant
You want to create mailboxes in Exchange Online and use Office 365. Before you can do that, you have to setup an Office 365 tenant and configure the tenant after that. The good thing is that you can create an Office 365 tenant without credit card and with a 30-day free trial, including 25 licenses. In this article, we will set up an Office 365 tenant step by step.
Table of contents
Create an Office 365 trial tenant
It’s great that you can create an Office 365 tenant trial for 30 days before you start paying for the licenses. Only great products come with free trials.
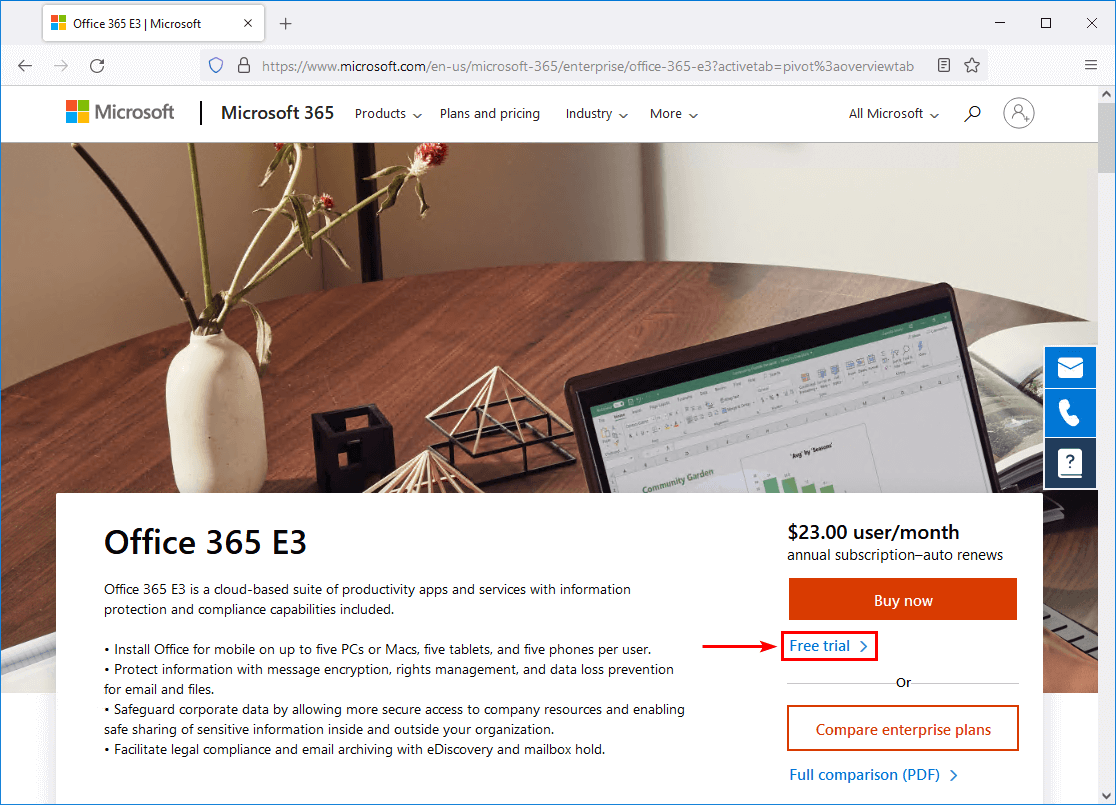
Start your favorite web browser and go to the Office 365 E3 product page. Click on Free trial.
Note: You must add credit card details to create an Office 365 tenant trial.
You will create the Office 365 tenant in four steps, and you can start to configure the Office 365 tenant.
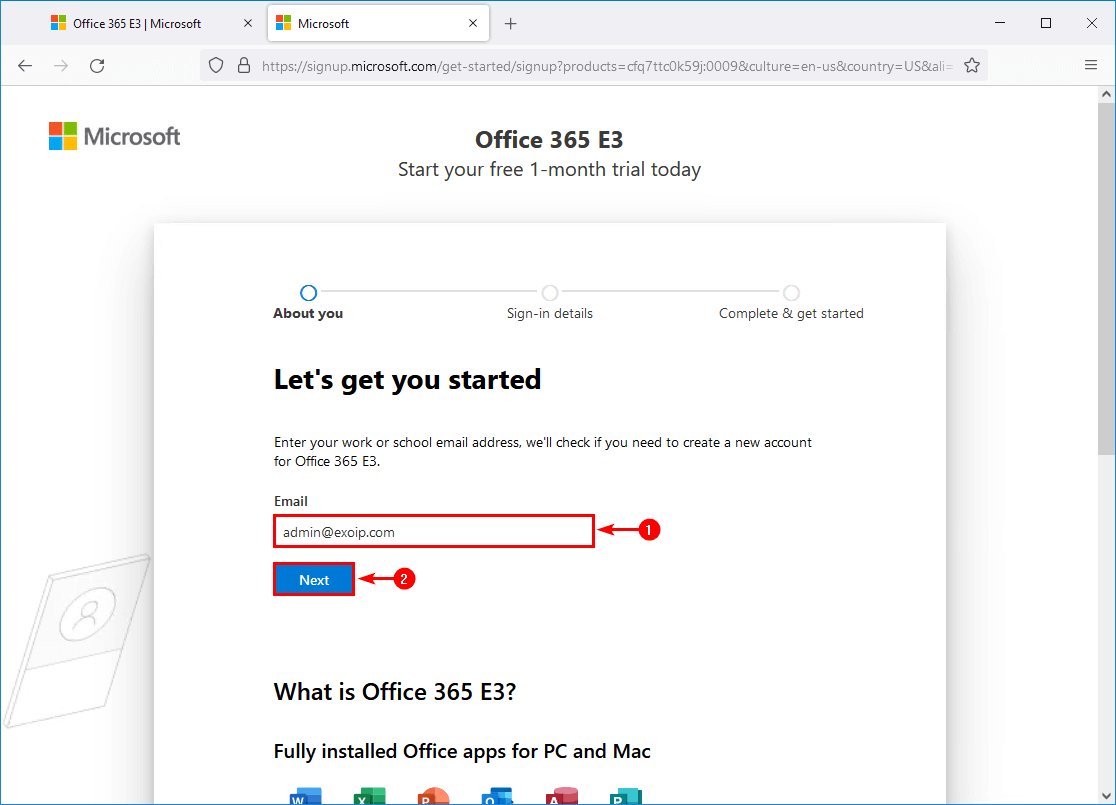
Step 1. Set up your account
Enter the email address that you want to configure with Office 365. Click Next.
Don’t worry; it will not immediately configure your domain. It’s just a check if that email address is already configured with Office 365.
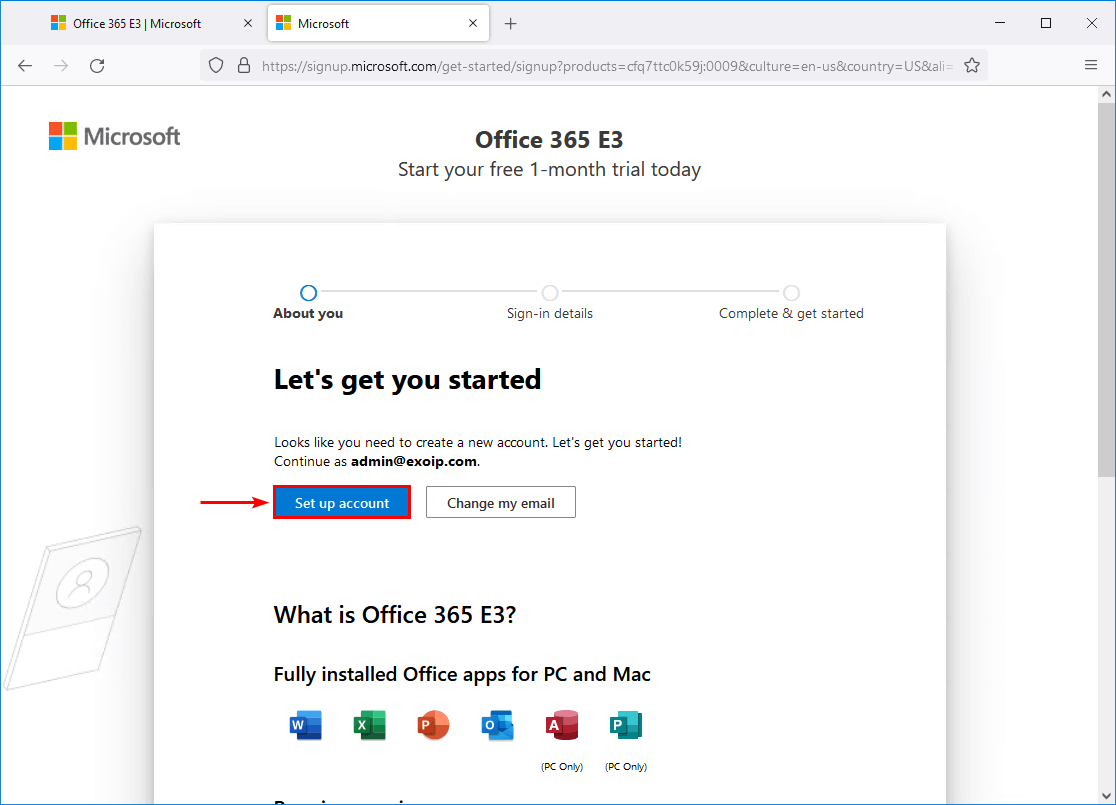
Click on Set up account.
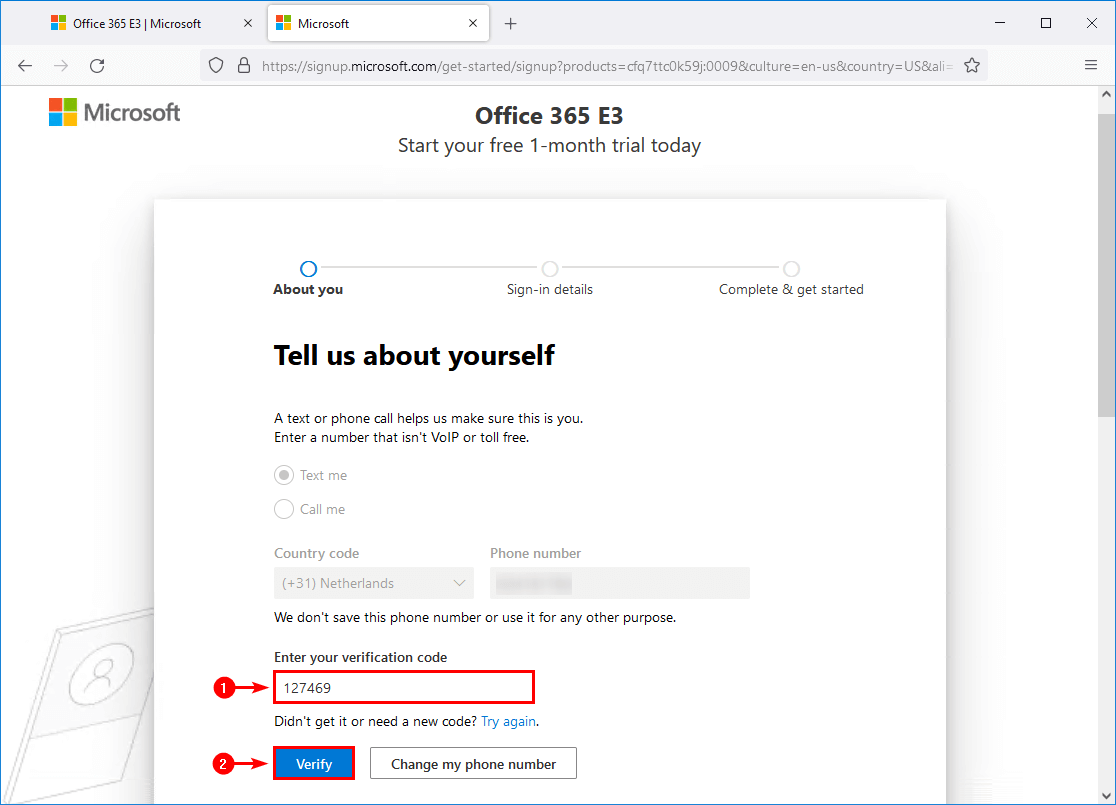
Step 2. Tell us about yourself
Fill in the information. Click Next.

Click Send verification code to verify your phone number.

Enter the verification code. Click Verify.
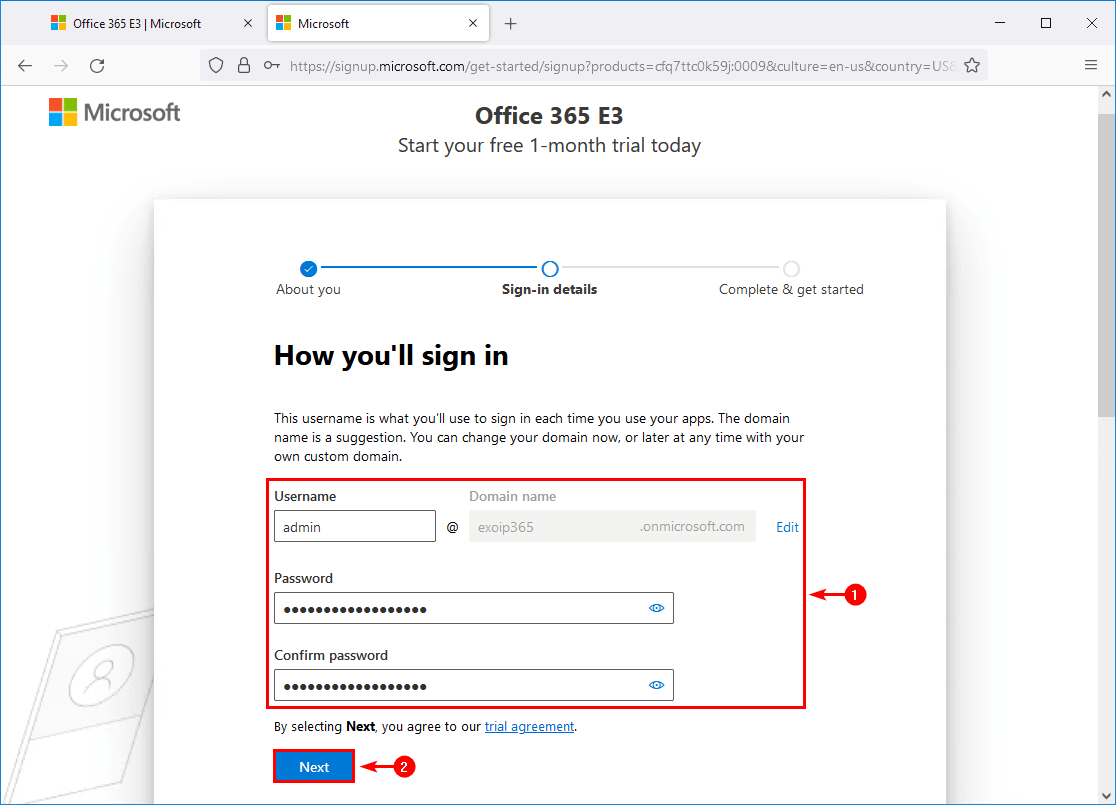
Step 3. Create your business identity
Fill in the username and domain name. Try to use the same domain name as your primary domain that you will configure later. Click Next.
Microsoft is creating the Office 365 tenant account. Wait for it to finish.
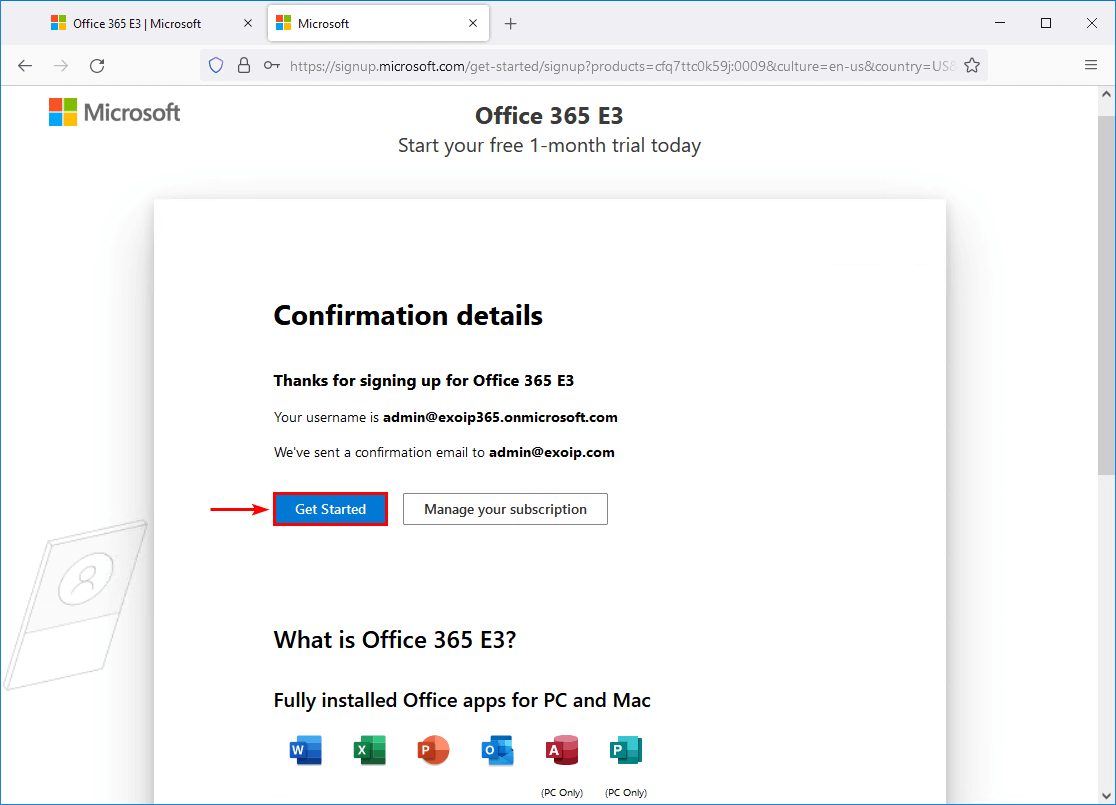
Step 4. You’re all set
That’s it. You did sign up for an Office 365 tenant. Click on Get Started.
The Microsoft 365 admin center page shows up.
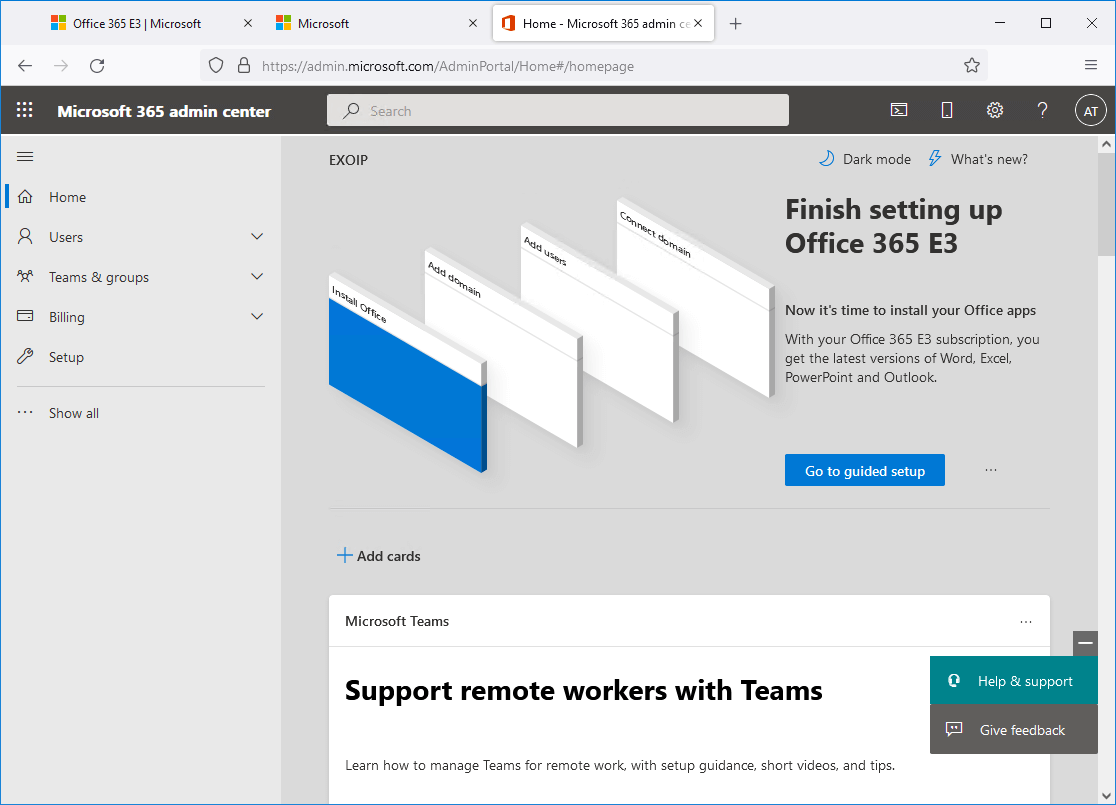
You can always reach the Microsoft 365 admin center page by going directly to https://admin.microsoft.com. Make sure to bookmark the page, as you will use it many more.
In the next article, we will add a domain to Office 365 tenant.
Conclusion
You learned how to create an Office 365 tenant. It’s a straightforward setup with four steps to set you a brand new Office 365 tenant. After the setup completes, you will carry on to the Microsoft 365 admin center.
Did you enjoy this article? You may also like Get mailbox size of all users in Exchange with PowerShell. Don’t forget to follow us and share this article.
What Others Are Reading

Thank you so much for your valuable guidance.
Why should be a payment info for a simple Trial?
I need it just to test something and this is blocking me with credit card information!!
Can this be rolled back?
From your screenshot I can see that this is the old way.
Also, previously, you could renew a trial, even past the 1 month timeframe (about a further 21 days) and without a credit card on file the extended trial would keep working for another 1 month + 28 days before being disabled. So a total of around 110 days of trial, per product.
Now this new policy which requires a valid credit card on file, locks you into an annual subscription if you don’t cancel the trial within the 28/30/31 days!!!