A hybrid environment is set up between Exchange on-premises and Office 365. This time you…
How to send WordPress emails via Microsoft 365
Around 43% of all websites use WordPress as their Content Management System. Most of the time, the email isn’t sent successfully from the default SMTP hosting, and it’s unreliable. It’s best to configure Microsoft 365 SMTP relay so the messages from WordPress are sent via Microsoft 365. In this article, you will learn how to send WordPress emails via Microsoft 365.
Table of contents
Send WordPress emails via Microsoft 365
There are different methods to send WordPress emails via Microsoft 365:
- Send emails using the Microsoft Graph API (article)
- Send mail using Microsoft 365 or Office 365 SMTP relay (this article)
Step 1: Configure Microsoft 365 SMTP relay
Go through the article Configure Office 365 SMTP relay to set up SMTP relay for Microsoft 365.
Step 2: Install Fluent SMTP WordPress plugin
Go through the below steps to install Fluent SMTP WordPress plugin:
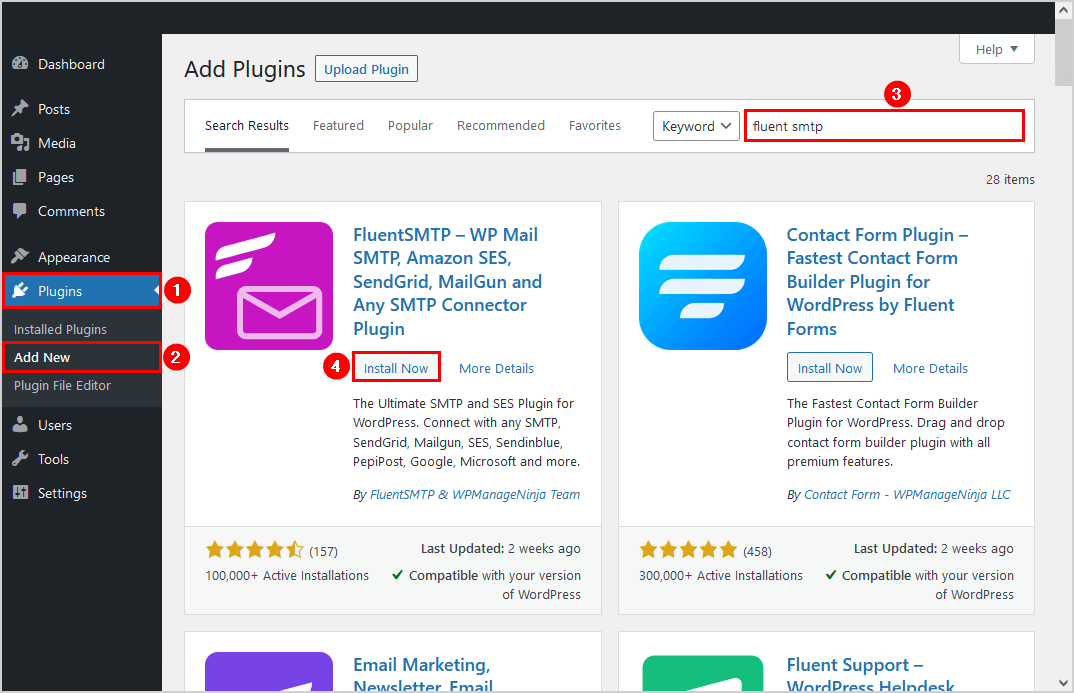
- Sign in to WordPress
- Click on Plugins > Add New
- Search for fluent smtp
- Click Install Now
- Click Activate
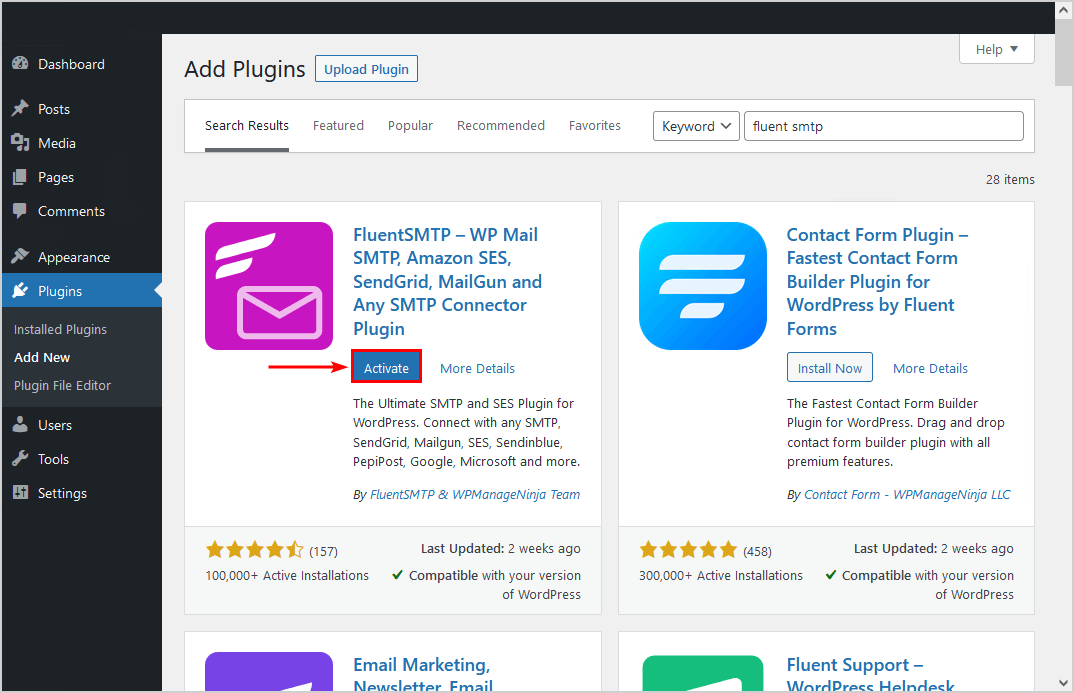
The Fluent SMTP plugin is successfully installed on WordPress.
Step 3: Configure Microsoft 365 SMTP settings
To configure Microsoft 365 SMTP settings, follow these steps:
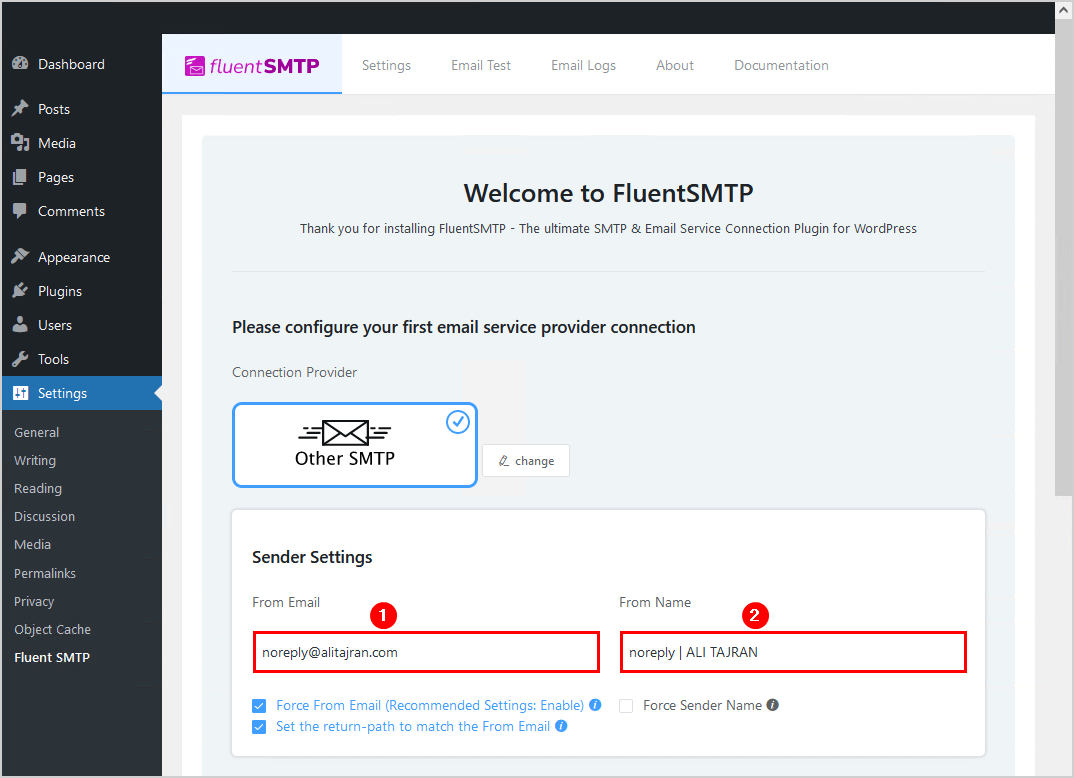
- Click Settings > Fluent SMTP
- Select Other SMTP

- Fill in the From Email field: the email that will be shown to the recipient
- Fill in the From Name field: the name that will be shown to the recipient
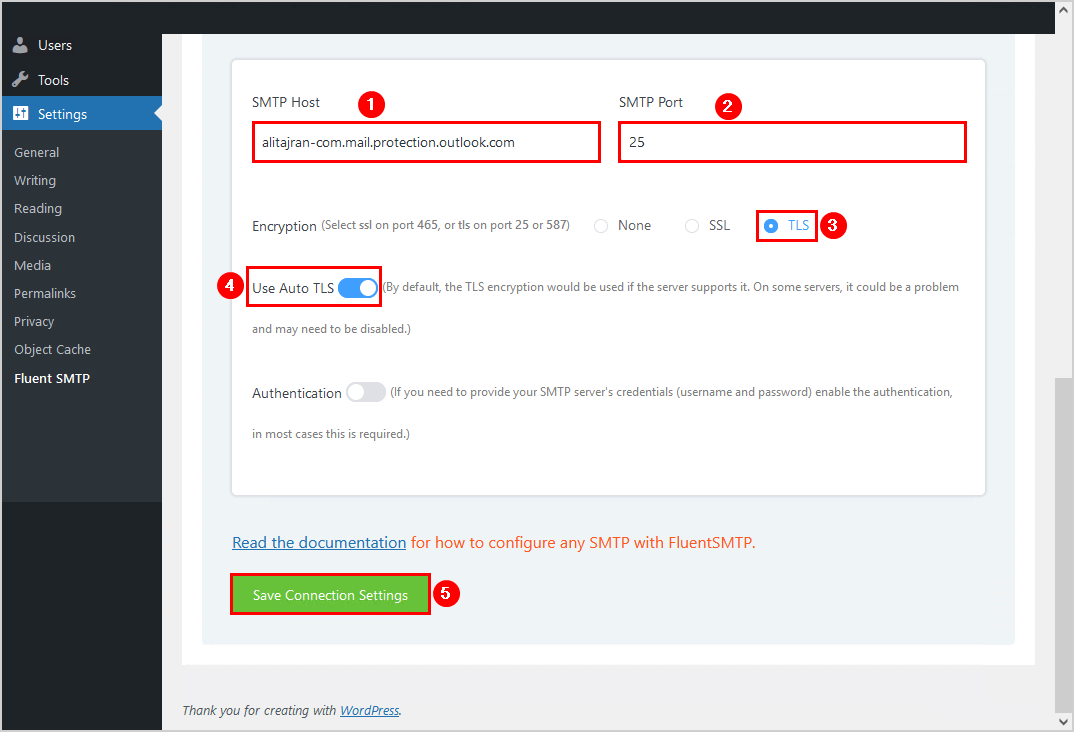
- Fill in SMTP Host: yourdomain.mail.protection.outlook.com
- Fill in SMTP Port: 25
- Enable Encryption: TLS
- Enable Use Auto TLS
- Click Save Connection Settings
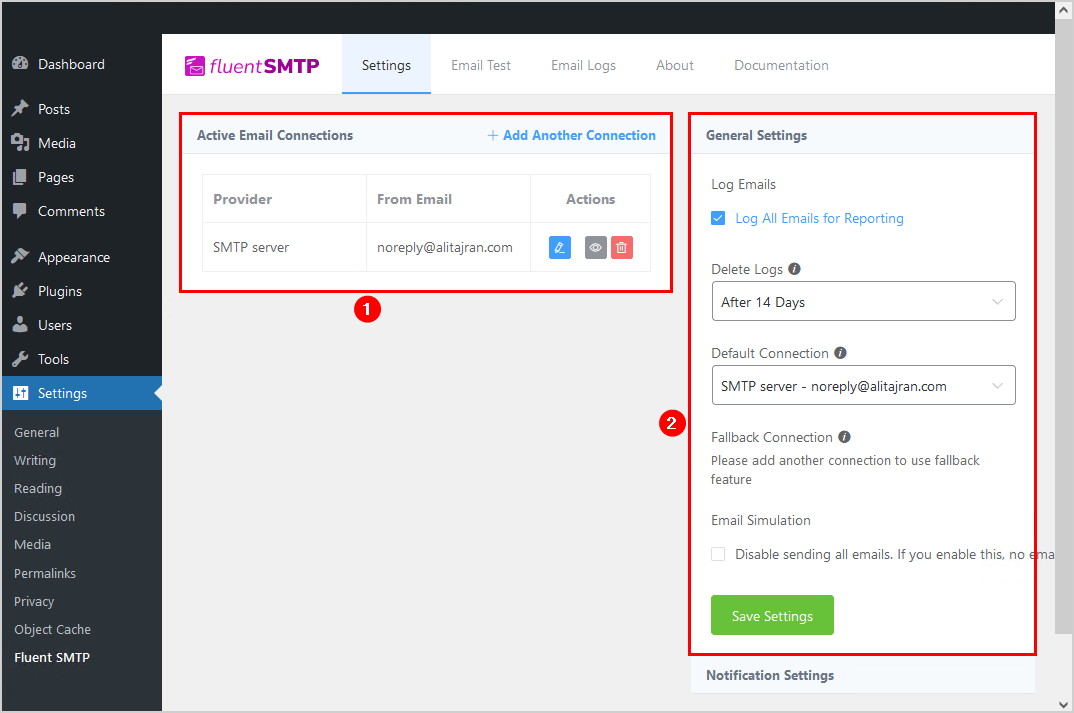
- The Active Email Connections and General Settings screen appears.
Step 4: Send WordPress test email
Test that everything works correctly and send a test email from the Fluent SMTP WordPress plugin:
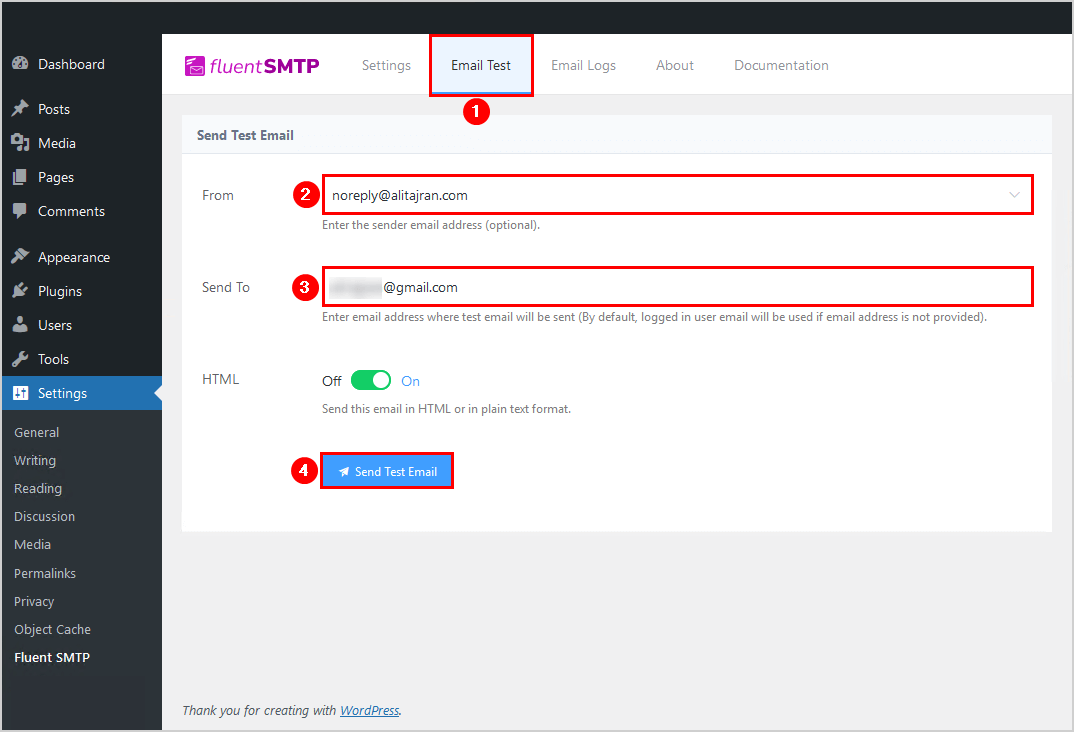
- Select the email from the From field
- Add the recipient in the Send To field
- Click on Send Test Email
In our example, a test email is sent to a Gmail address.
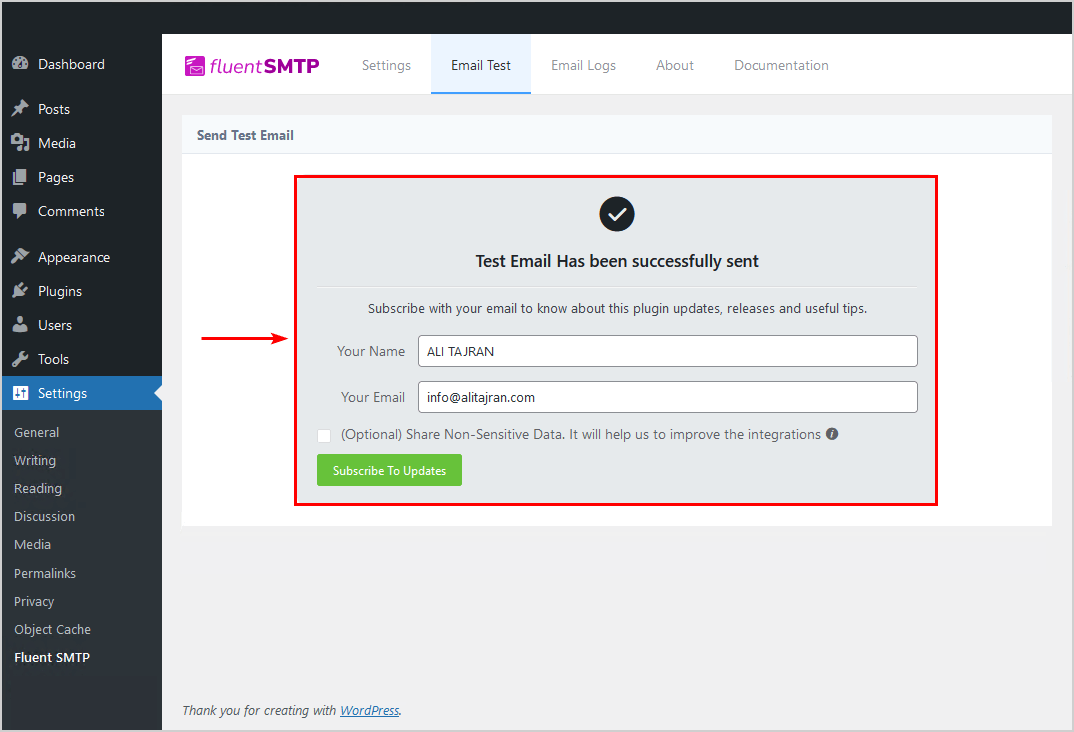
- The Test Email has been successfully sent message appears.
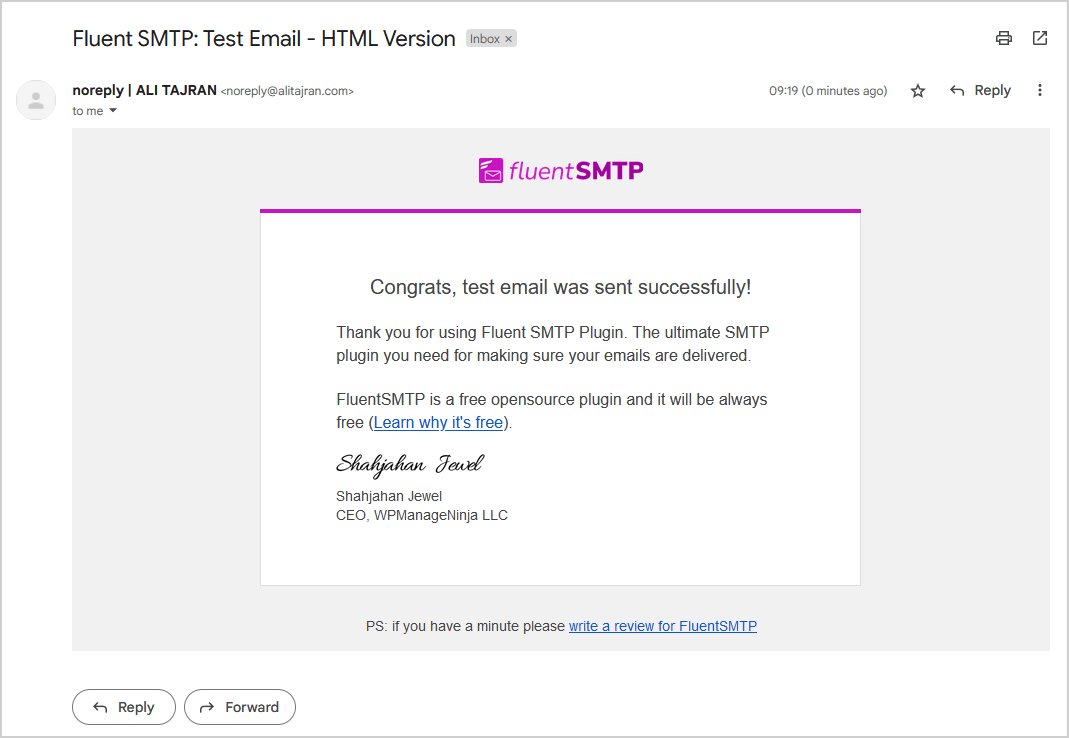
- The test email successfully arrives in the recipient’s inbox.
Step 5: Check email headers
To verify that everything is set up correctly, you should check the message headers.
- Click on More > Show Original
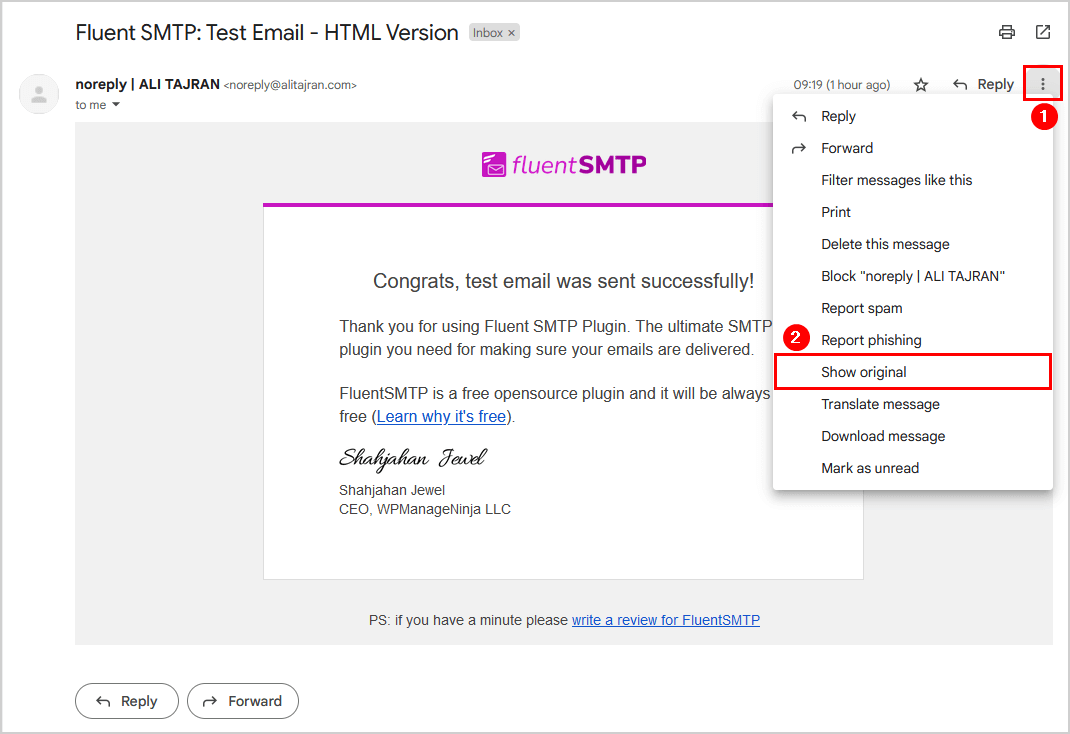
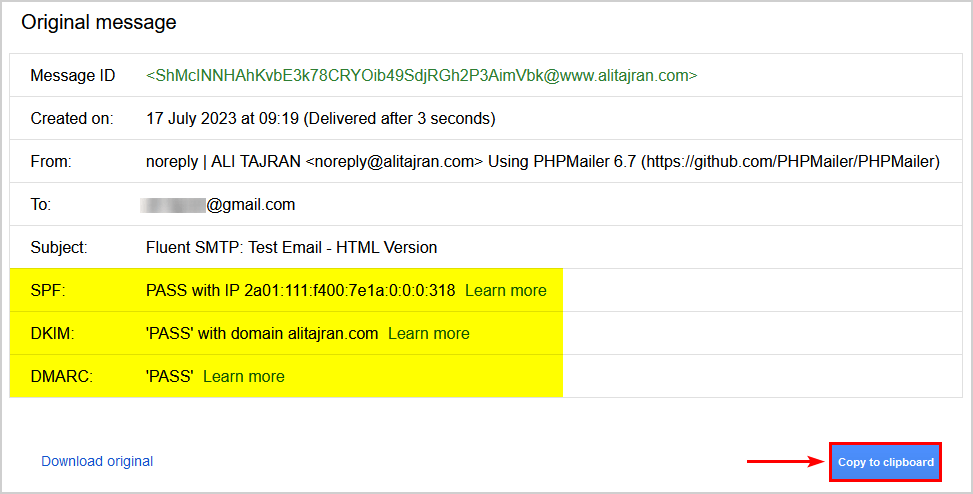
- Verify that the three email authentication methods show as follows:
- SPF: PASS
- DKIM: PASS
- DMARC: PASS
- Click Copy to clipboard
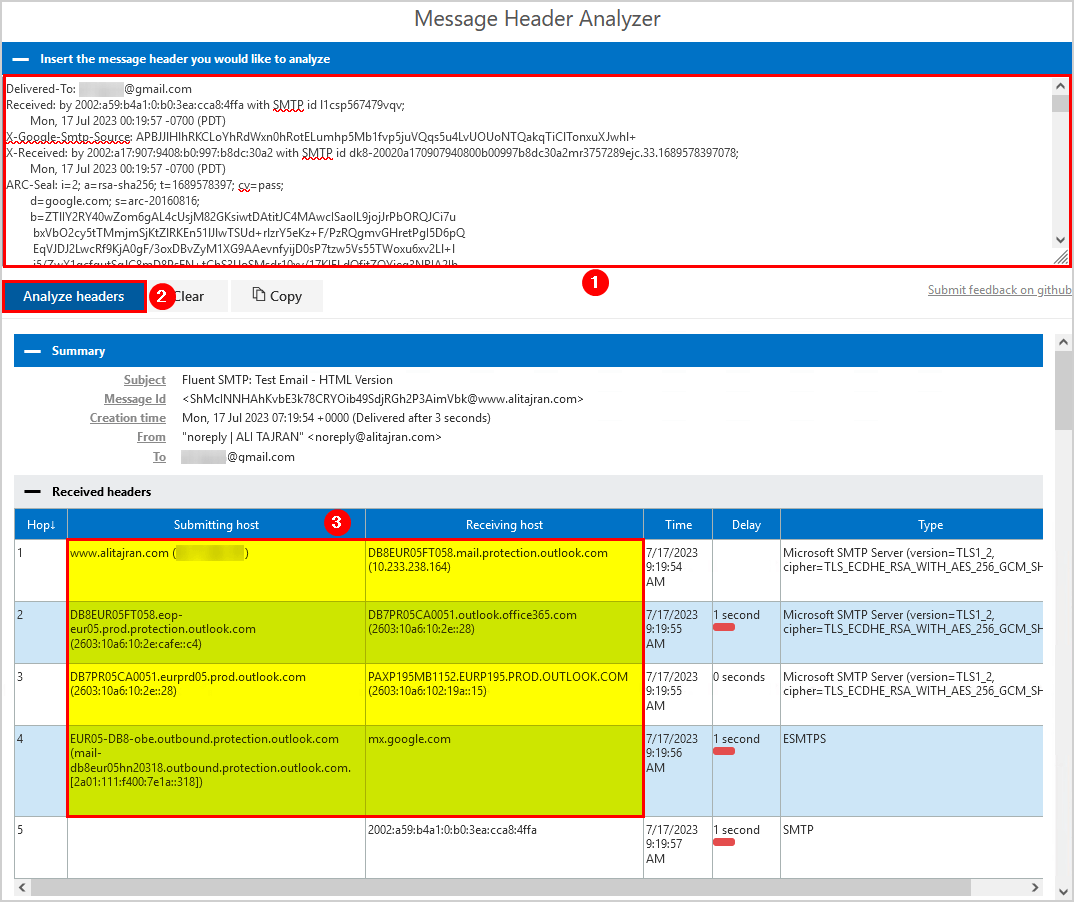
- Go to Message Header Analyzer
- Paste the message header information
- Click Analyze headers
Inspecting the headers from the Gmail address in Message Header Analyzer, we can see the message goes from the WordPress server via Microsoft 365 (Exchange Online) to Google servers.
That’s it!
You successfully did configure WordPress to send emails via Exchange Online – Microsoft 365.
Read more: How attackers bypass third-party spam filtering »
Conclusion
You learned how to send WordPress emails via Microsoft 365. Configure a Microsoft 365 connector in Microsoft 365 Exchange admin center and add the WordPress website IP address. Next, add the Fluent SMTP plugin and configure the Microsoft 365 SMTP settings. Remember to send a test email, verify that the authentication methods are passed and that the message headers show that the message is routed via Exchange Online.
Did you enjoy this article? You may also like Change Exchange Online deleted items retention period. Don’t forget to follow us and share this article.
This Post Has 0 Comments