How to send Out of Office reply every day? You moved from Exchange Server 2010…
How to enable external forwarding in Microsoft 365
Many organizations have external forwarding enabled in Microsoft 365. By default, it’s OFF, and you should keep it that way for most occasions. Suppose you want to enable external mail forwarding, then you should configure a new policy for the organization and only enable it for the users/groups that really need it. In this article, you will learn how to enable external forwarding in Microsoft 365.
Table of contents
Enable external forwarding in Microsoft 365
Go through the below steps to enable external forwarding in Microsoft 365 for specific groups/users.
Important: We recommend that every organization that wants to enable external auto-forwarding should enable it only for the users who need it and leave the default policy in a disabled state.
Step 1. Check default outbound policy status
To check the default outbound policy, follow these steps:
- Sign in to Microsoft 365 Defender
- Expand Email & collaboration and click on Policies & rules
- Click on Threat Policies > Anti-spam
- Select Anti-spam outbound policy (Default)
Another option is to go directly to: https://security.microsoft.com/antispam.

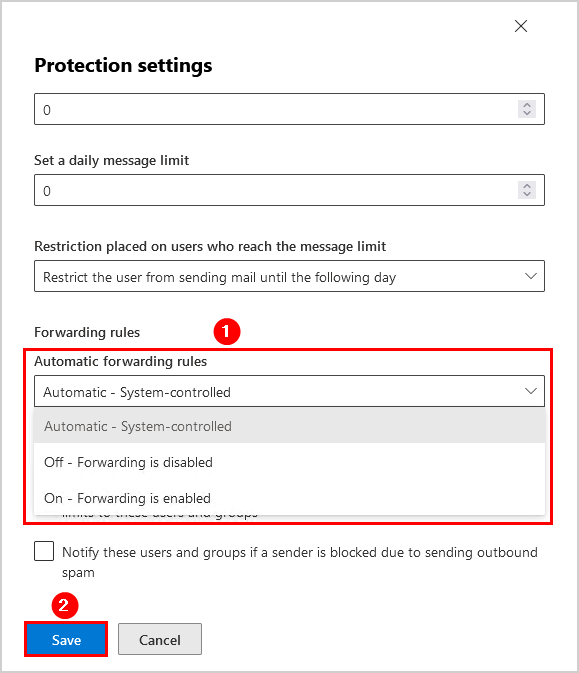
- Scroll down and click on Edit protection settings
- Ensure that the feature Automatic forwarding rules are set as Automatic – System-controlled or Off – Forwarding is disabled
- Click Save
Note: By default, the automatic forwarding rules options is set on Automatic – System-controlled, which means it’s disabled.
Step 2. Create new external forwarding policy
To create a new external forwarding outbound policy, follow these steps:
- Sign in to Microsoft 365 Defender
- Expand Email & collaboration and click on Policies & rules
- Click on Threat Policies > Anti-spam
- Select Anti-spam outbound policy (Default)
Another option is to go directly to: https://security.microsoft.com/antispam.
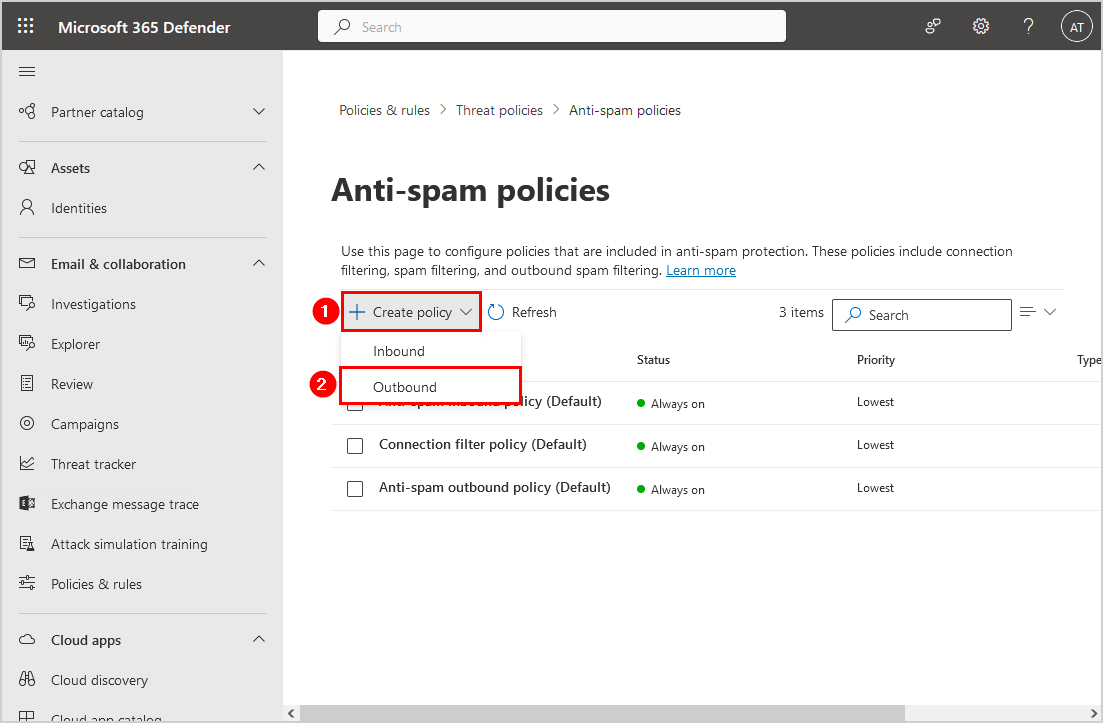
- Click on + Create policy and choose Outbound
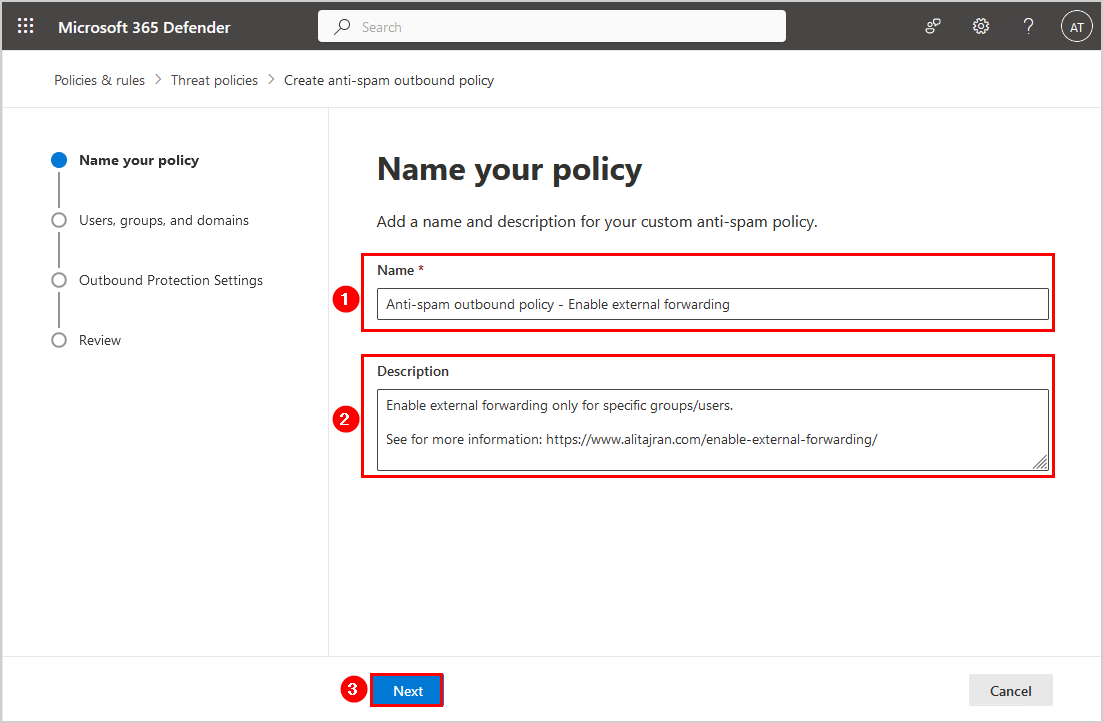
- Add the name: Anti-spam outbound policy – Enable external forwarding
- Add the description: Enable external forwarding only for specific groups/users. See for more information: https://www.alitajran.com/enable-external-forwarding/
- Click Next
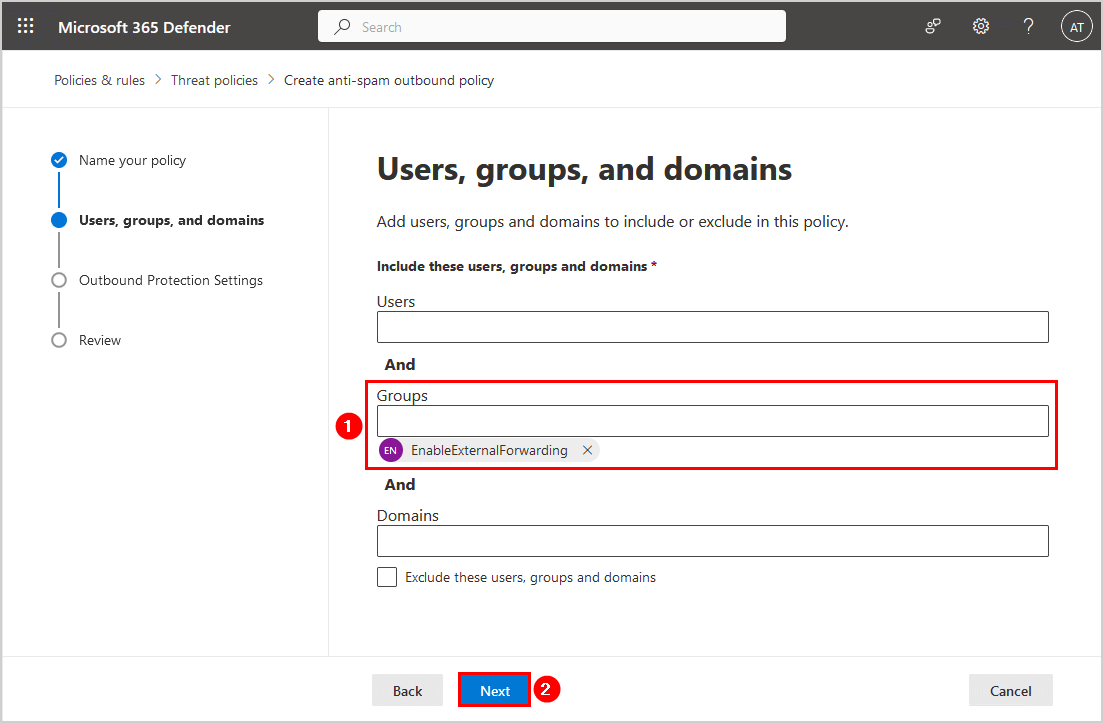
- Add the users or groups and click Next
In our example, we did add the group EnableExternalForwarding.
Note: The group must be a Microsoft 365, Distribution list, or Mail-enabled security group. A security group will not appear in the list.
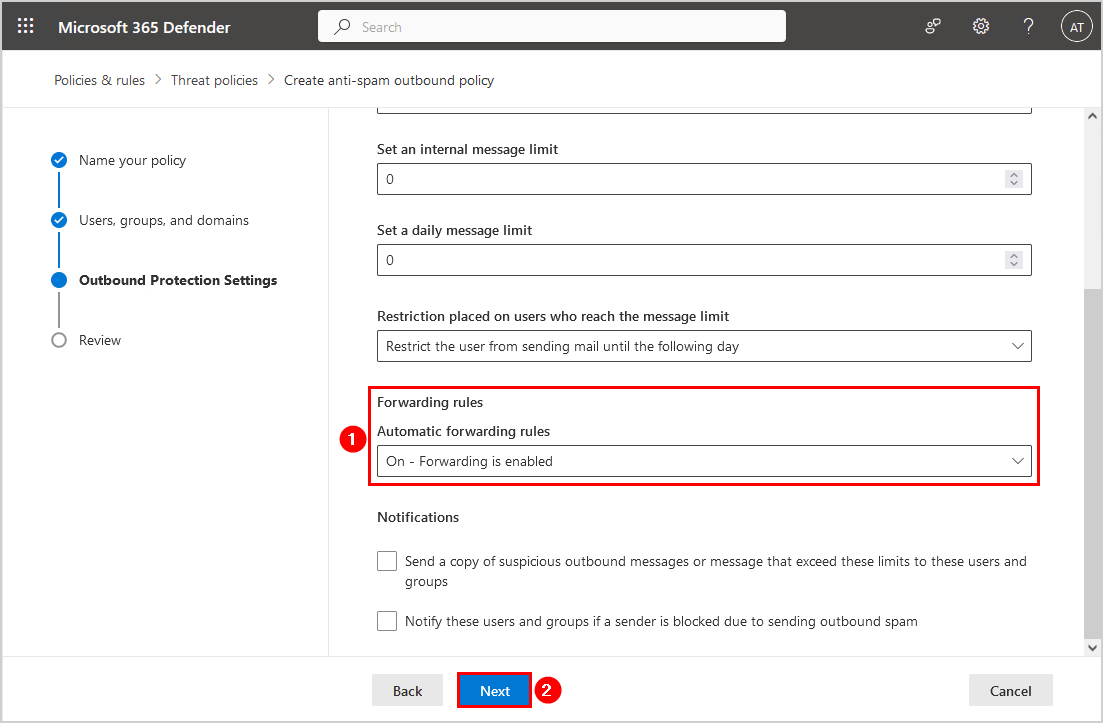
- Go to Automatic forwarding rules and choose On – Forwarding is enabled
- Click Next
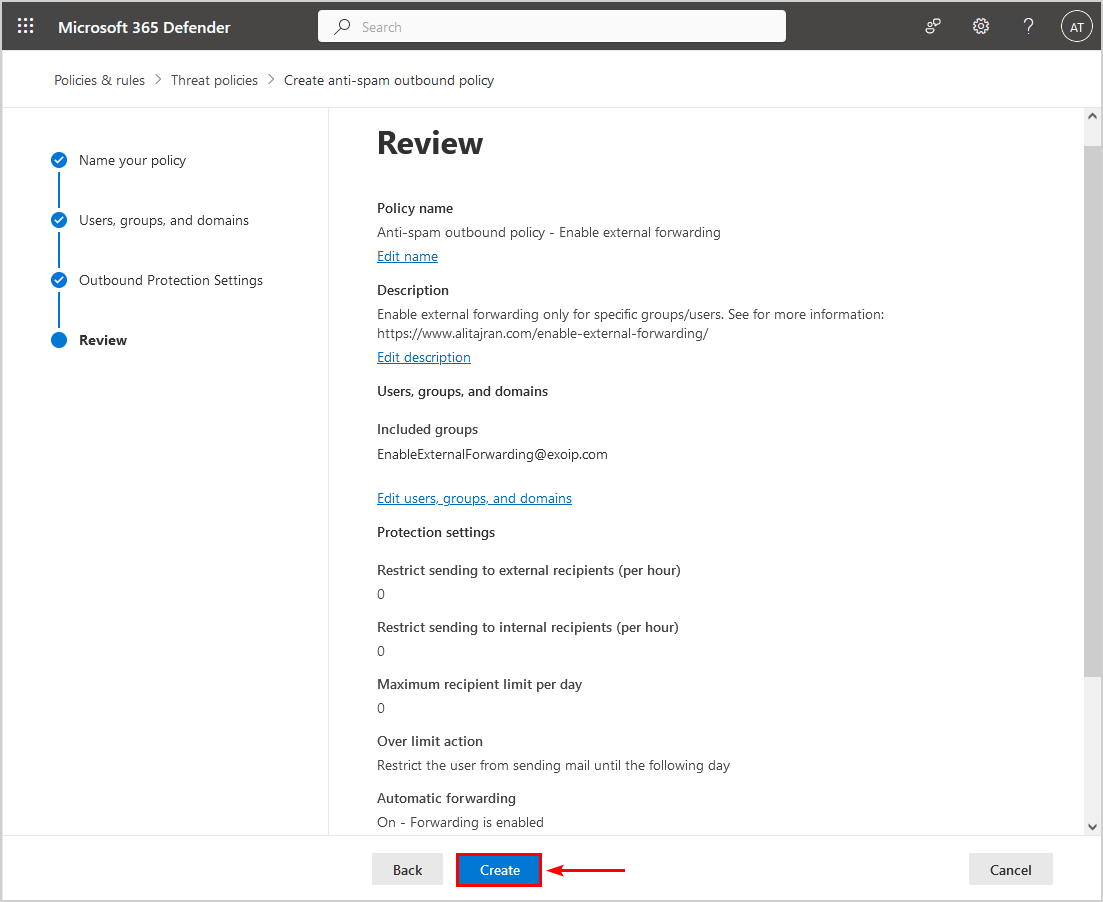
- Review the anti-spam outbound policy
- Click Create
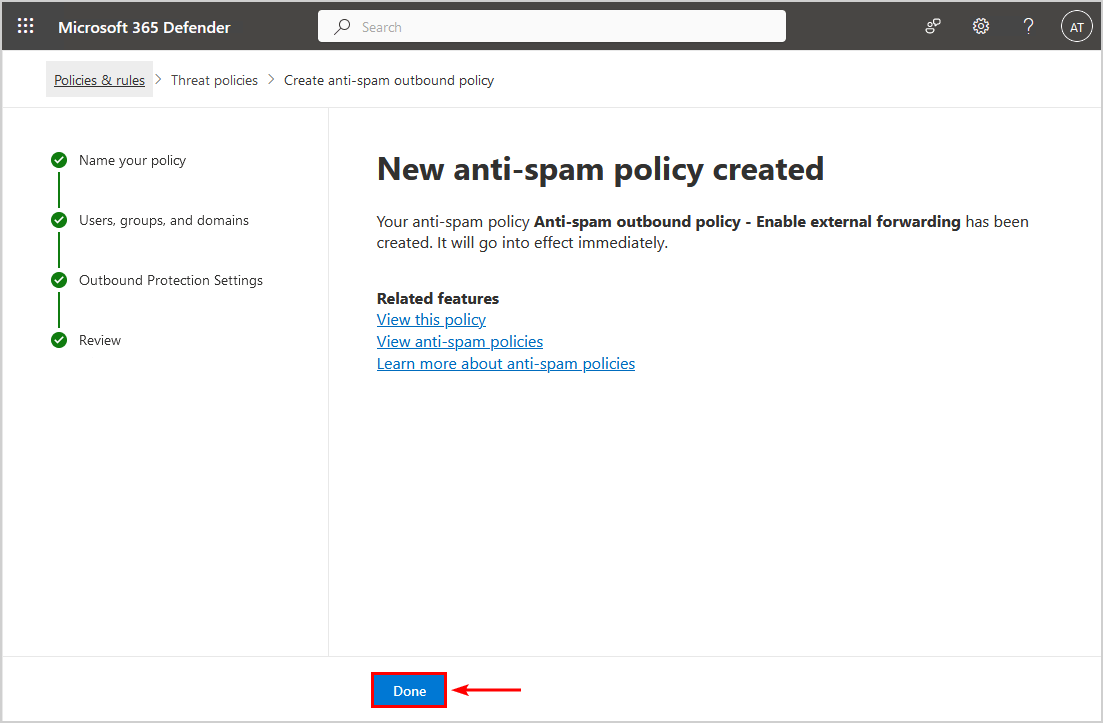
- The anti-spam policy has been created and will go into effect immediately
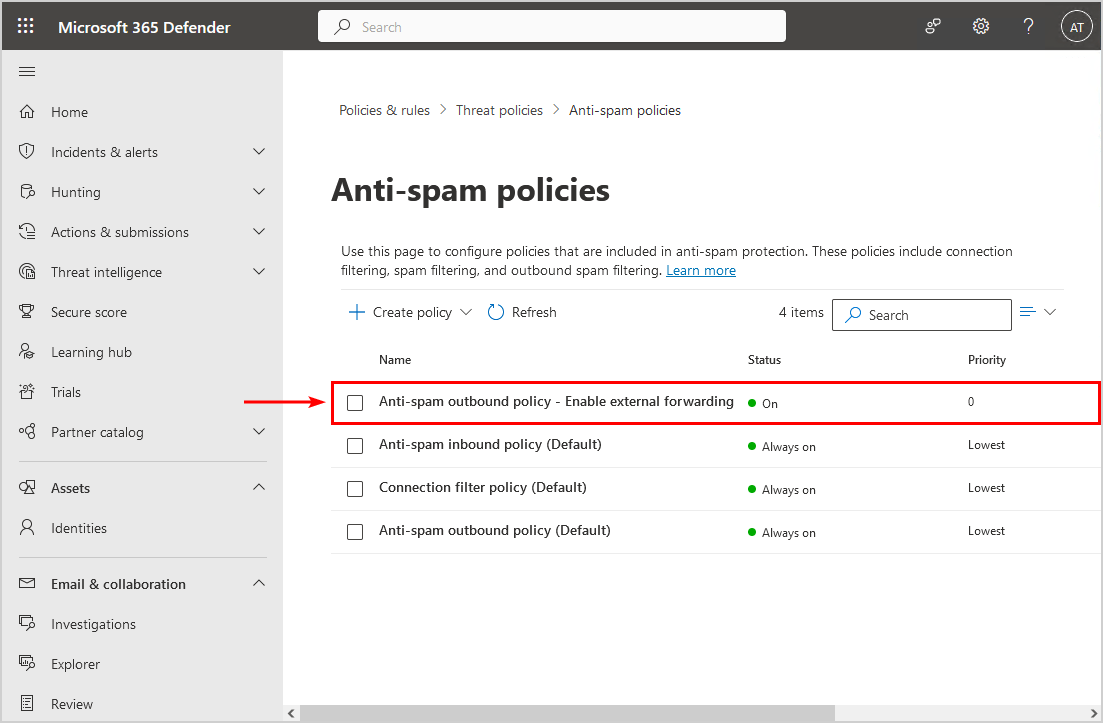
- Verify that the policy appears in the Anti-spam policies list and the status is On
Step 3. Verify external forwarding works
It’s essential to test your work and verify that external forwarding only works for the specific users and groups you added to the new external forwarding policy. All the other users should get an NDR message back.
The user Amanda is in the group EnableExternalForwarding, and the external forward message will send successfully to the external address that is added.
In this example, it’s forwarding to a Gmail address.
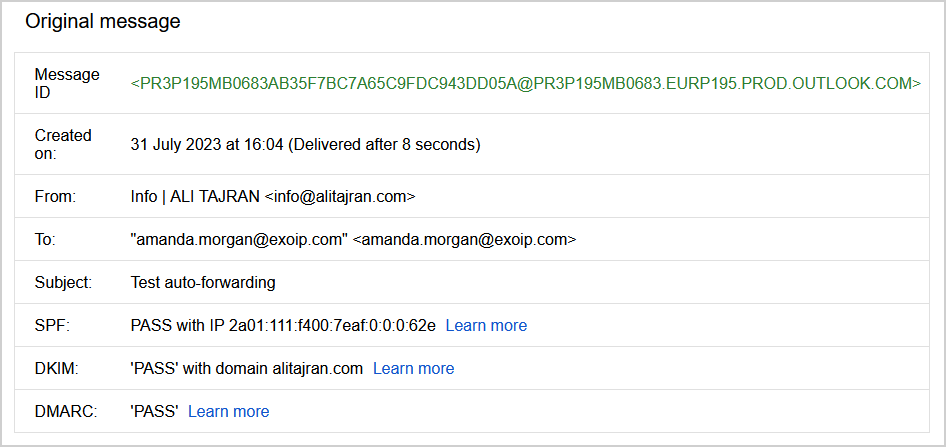
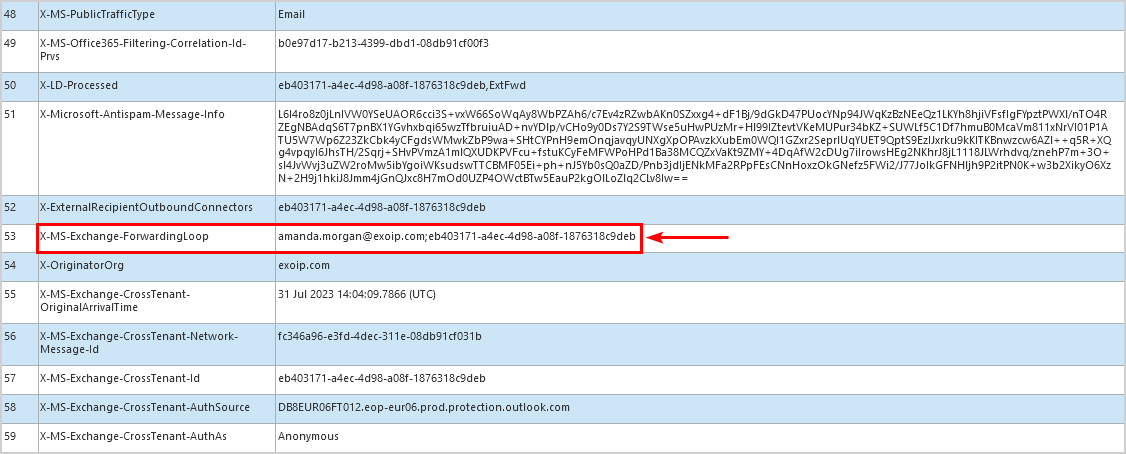
Copy the headers and paste them into the Microsoft Mesage Header Analyzer. Verify that the header X-MS-Exchange-ForwardingLoop appears.
The user Phil is not in the group EnableExternalForwarding, and the external forward message will not work. An NDR message will appear in Phil’s inbox with the messages:
Your email couldn’t be forwarded from phil.peters@exoip.com to another email address. Your message wasn’t delivered because the recipient’s email provider rejected it.
Remote Server returned ‘550 5.7.520 Access denied, Your organization does not allow external forwarding. Please contact your administrator for further assistance. AS(7555)’

Everything is correctly set.
Read more: How to get mailbox forwarding rules in Microsoft 365 »
Conclusion
You learned how to enable external forwarding in Microsoft 365. First, check the default Anti-spam outbound policy in Microsoft 365 Defender and ensure the automatic forwarding rules feature is disabled. Next, create a new outbound policy that allows automatic forwarding and assign it to specific mailboxes or groups only. As of last, test your work.
Did you enjoy this article? You may also like Office 365 Recommended Configuration Analyzer. Don’t forget to follow us and share this article.
This Post Has 0 Comments