Microsoft is discontinuing Group Writeback in June 2024. It's essential to check if your organization…
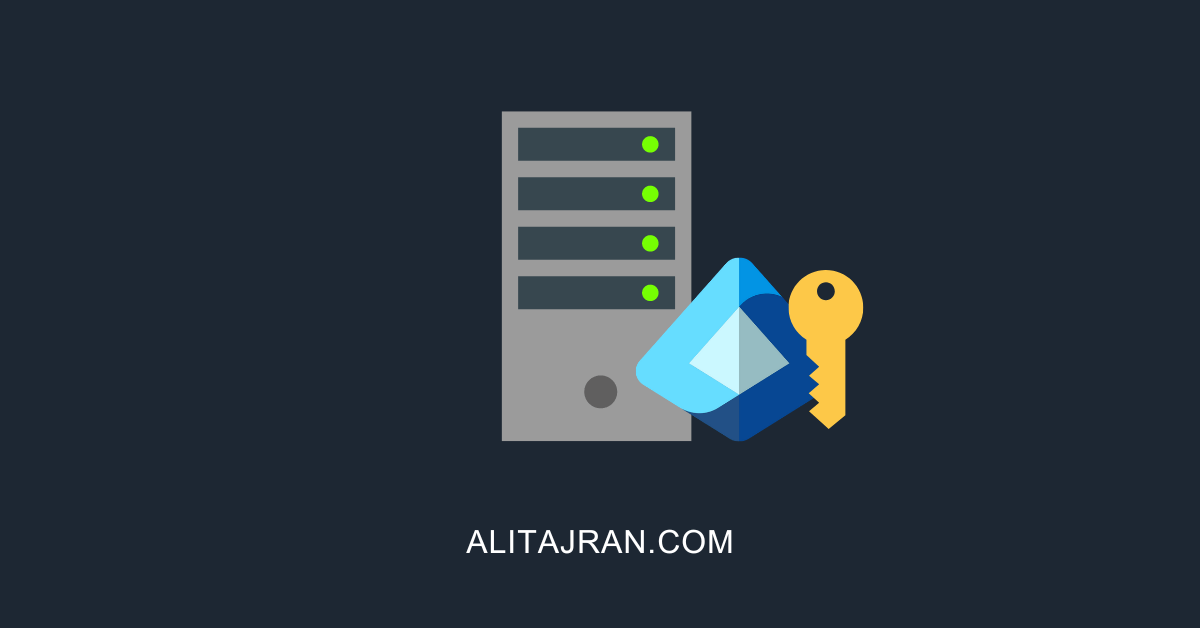
Secure MFA and SSPR registration with Conditional Access
After you configure Azure AD MFA and SSPR, you might want to look at how to secure both registrations. For example, you don’t want a spray attack carried out, and the attacker registers for MFA or SSPR. You can secure Azure MFA registration and SSPR registration with Azure Conditional Access.
Introduction
You did deploy MFA using Azure AD Conditional Access and enabled Self-Service Password Reset (SSPR). Both features are enforced for the users. It means that all the users will be asked to register MFA and SSPR after they sign in.
Does that mean it’s secure? No, it’s not. Let’s see how the registration works with and without securing the MFA and SSPR registration.
Good to know is that if you only have MFA or SSPR enabled, you can follow the article. But, we recommend configuring both MFA and SSPR in the organization.
Azure MFA and SSPR registration not secure
When you don’t secure MFA and SSPR registration with trusted locations, it will look as follows:
- You create an account for the user
- Hacker will carry a spray attack
- Hacker will succeed
- Hacker signs in with credentials
- Hacker will get a message to go through the MFA/SSPR setup
- The hacker will set up MFA/SSPR
- Hacker is successfully signed in
Azure MFA and SSPR registration secure
When you secure MFA and SSPR registration with trusted locations, it will look as follows:
- You create an account for the user
- Hacker will carry a spray attack
- Hacker will succeed
- Hacker signs in with credentials
- Hacker will get a message that access is restricted
- The hacker can’t proceed further
- Hacker is not successfully signed in
Let’s look at the next step at securing Azure MFA registration and SSPR registration with Conditional Access in Azure Active Directory.
Secure Azure MFA and SSPR registration
Go through the steps to secure MFA and SSPR registration from trusted locations.
Step 1: Create Conditional Access named location
Do you have the public IPs added in the named location section? If yes, you can skip this step.
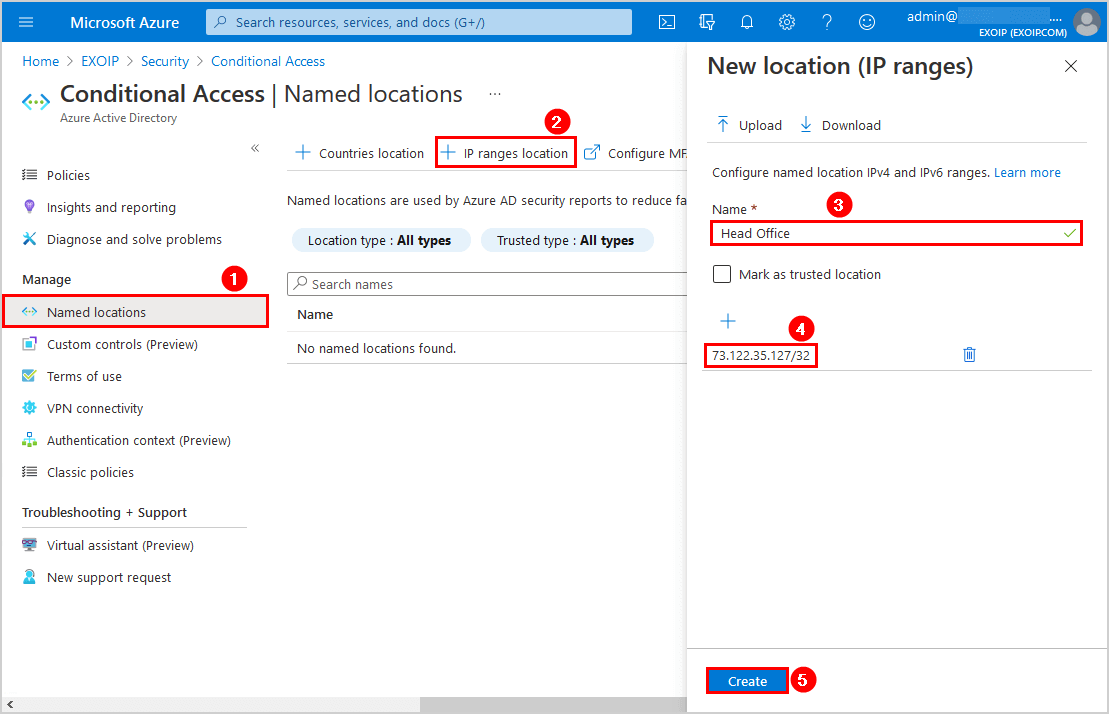
Navigate to Azure Active Directory > Security > Conditional Access. Click on Named location > IP ranges location. Add the IP address and give it a name (description). We will add the Head Office IP address.
Note: Make sure to add the public IP of the organization and not the internal IP of a device.
You can select the checkbox Mark as trusted location. We will leave it unchecked.
In our example, we will add the second IP address, which is the Branch Office.
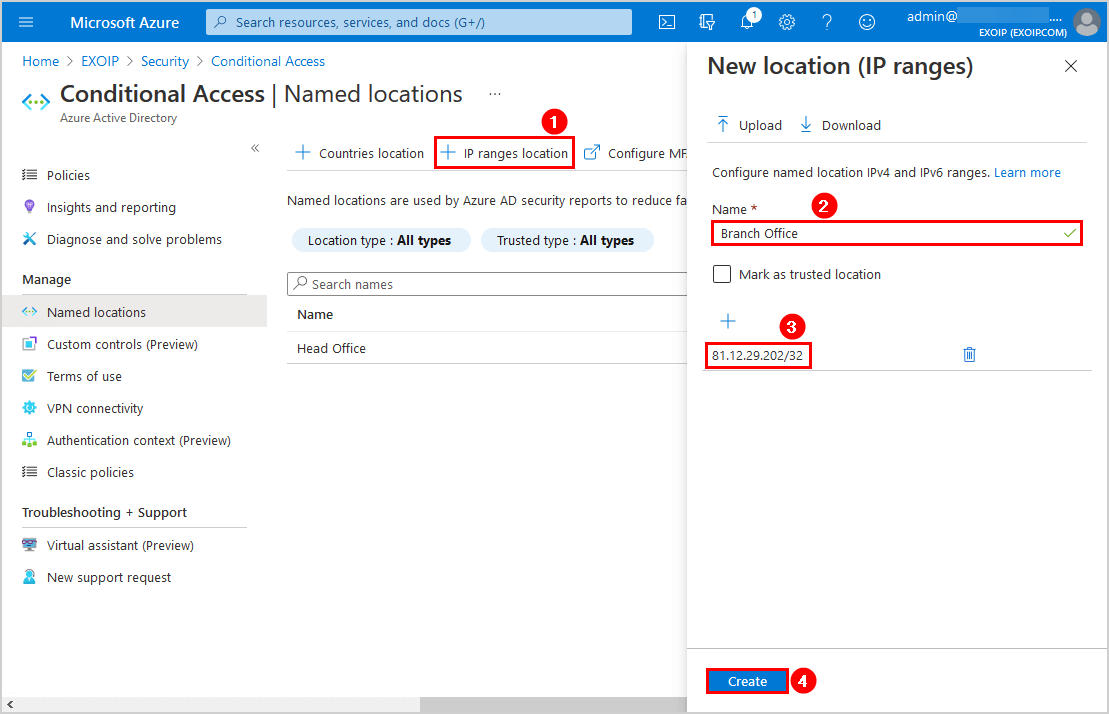
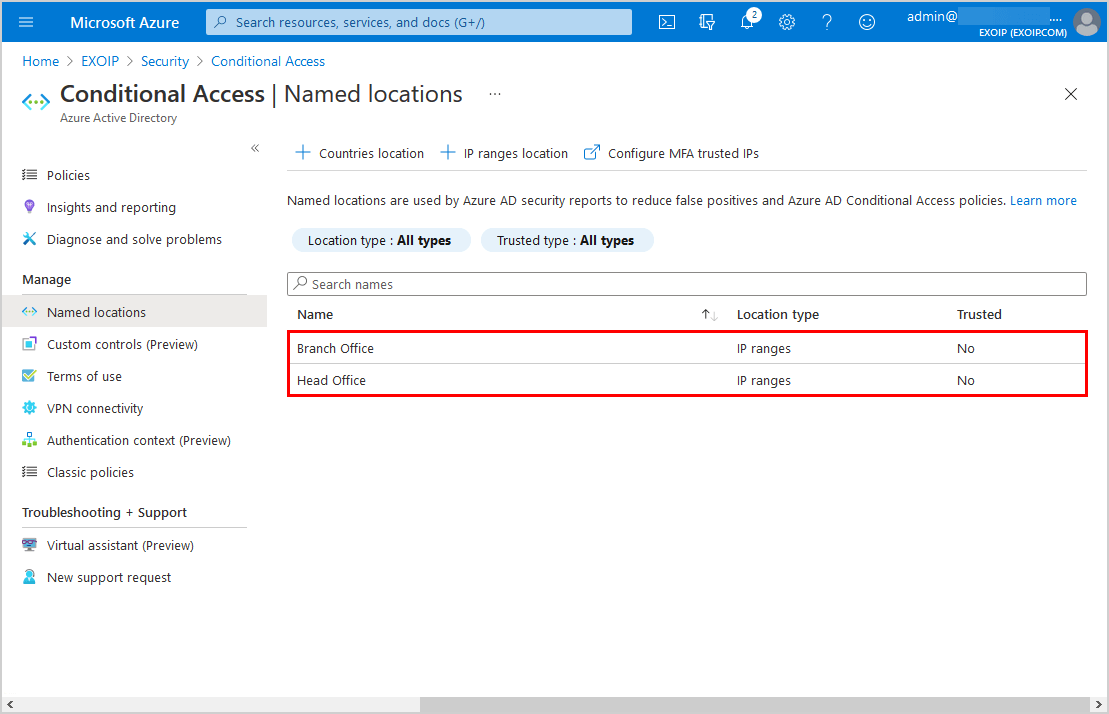
Both the organization’s public IPs are added as named locations.
Step 2: Create Conditional Access policy
Click Policies > New policy.

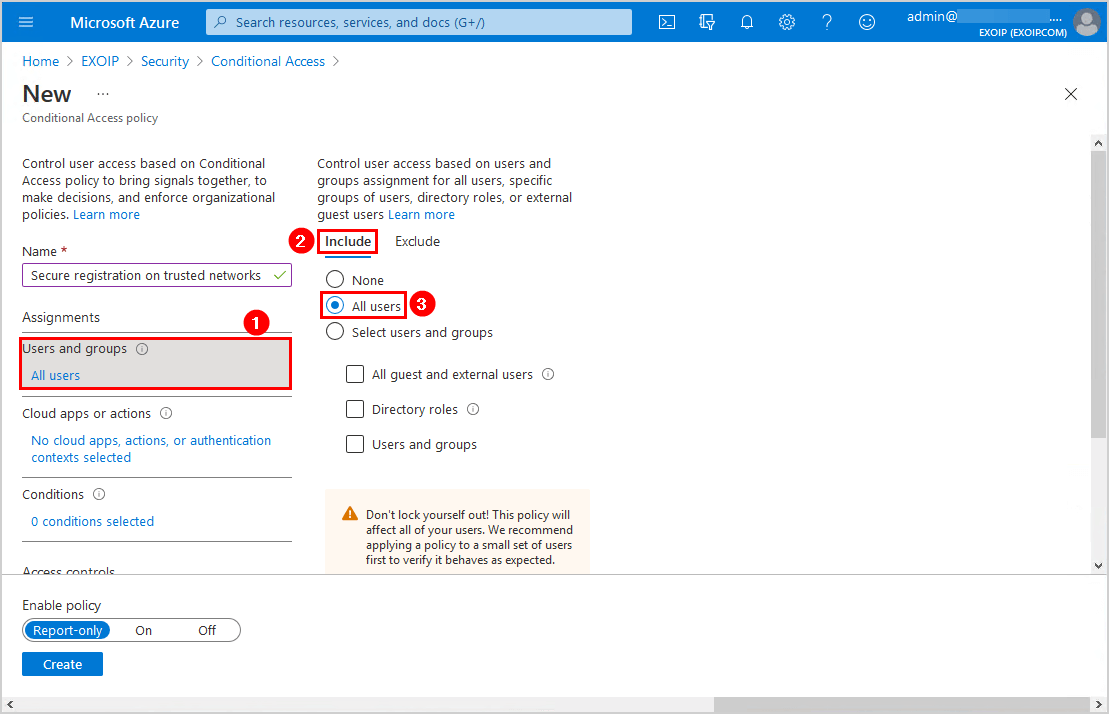
Give it the name Secure registration on trusted networks.
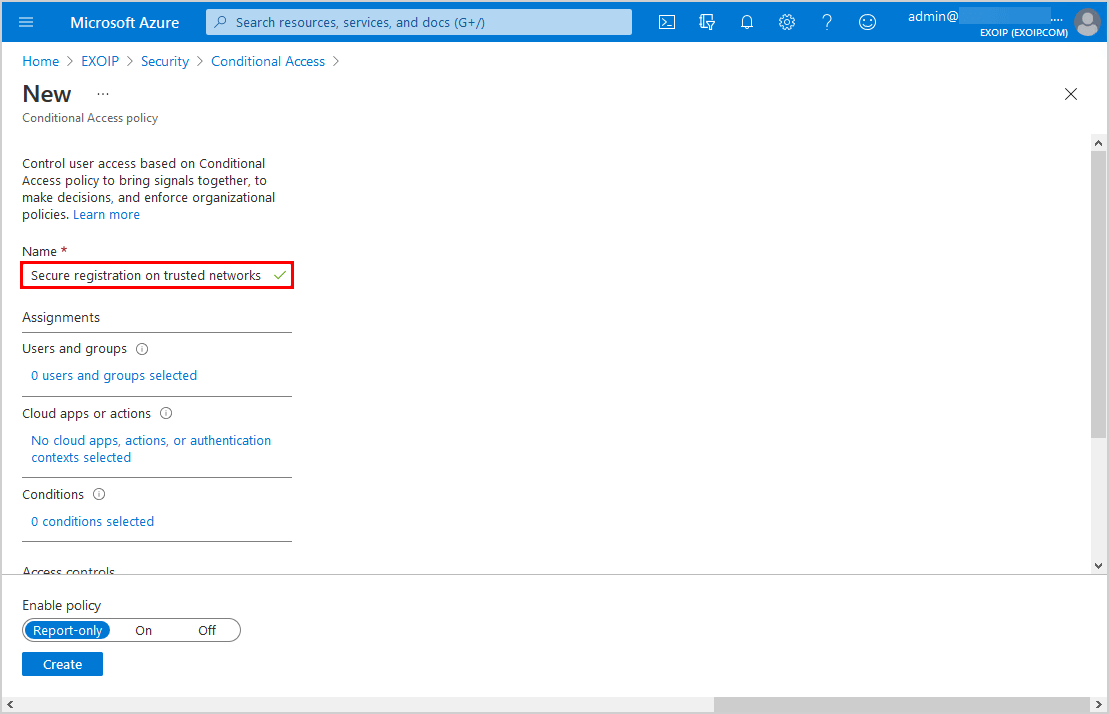
Click Users and groups and follow with Include. Select All users.
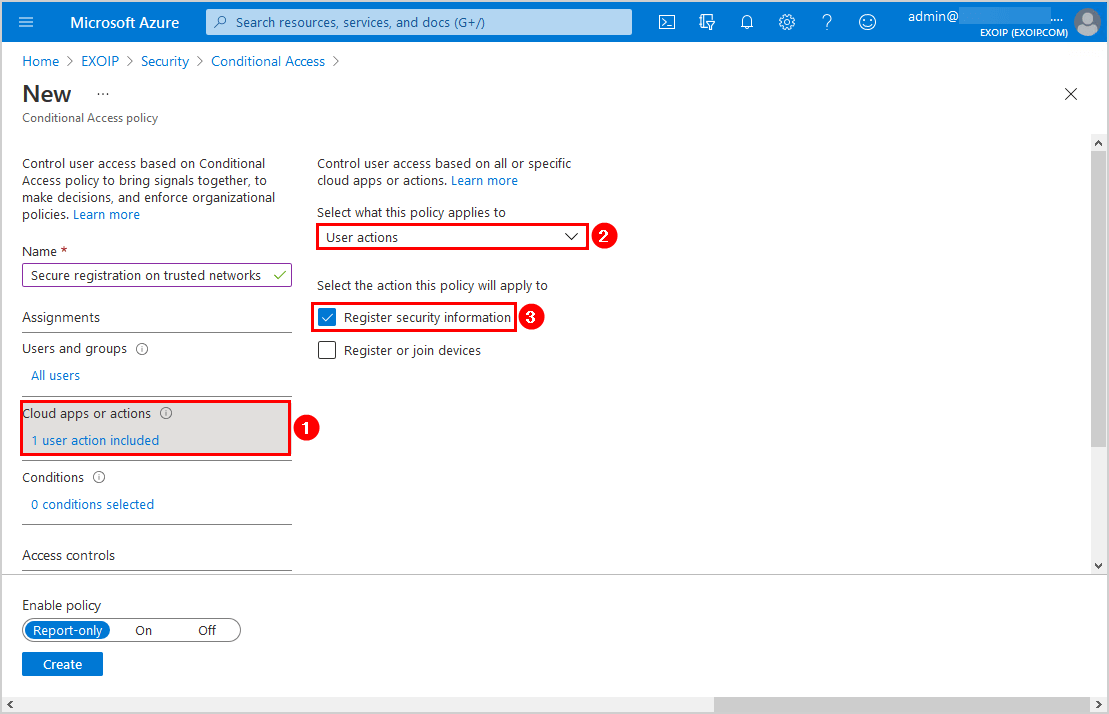
Click Cloud apps or actions. Select User actions. Check the checkbox Register security information.
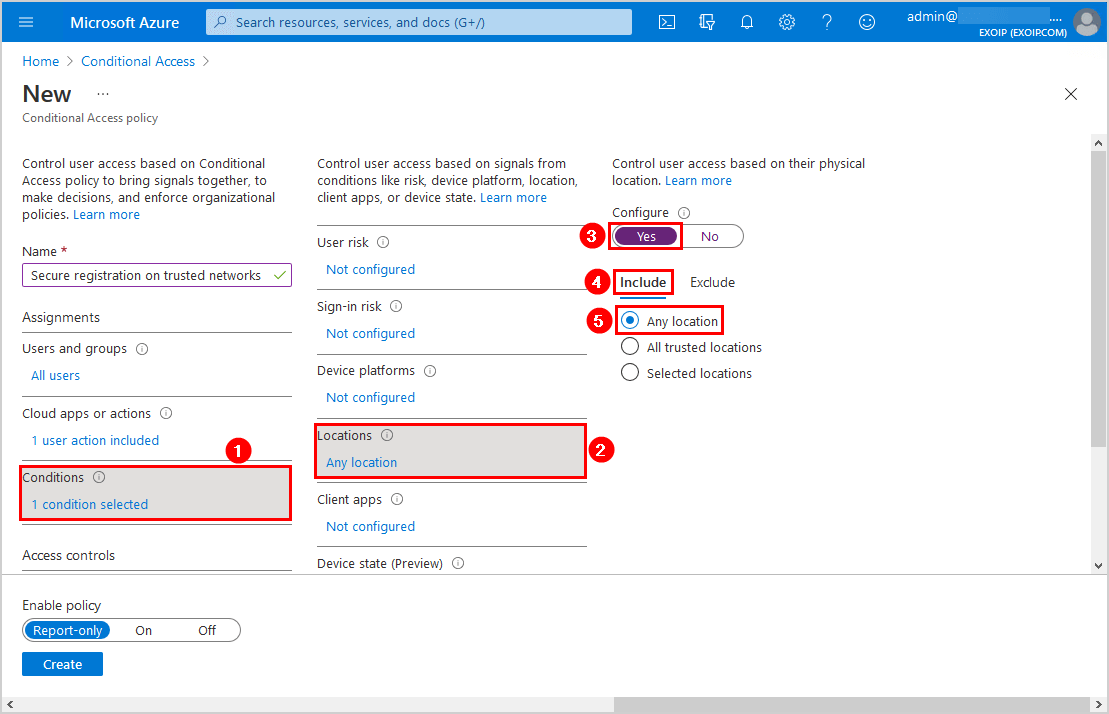
Click Conditions and follow with Locations. Click on Yes. Click on Include and select Any location.
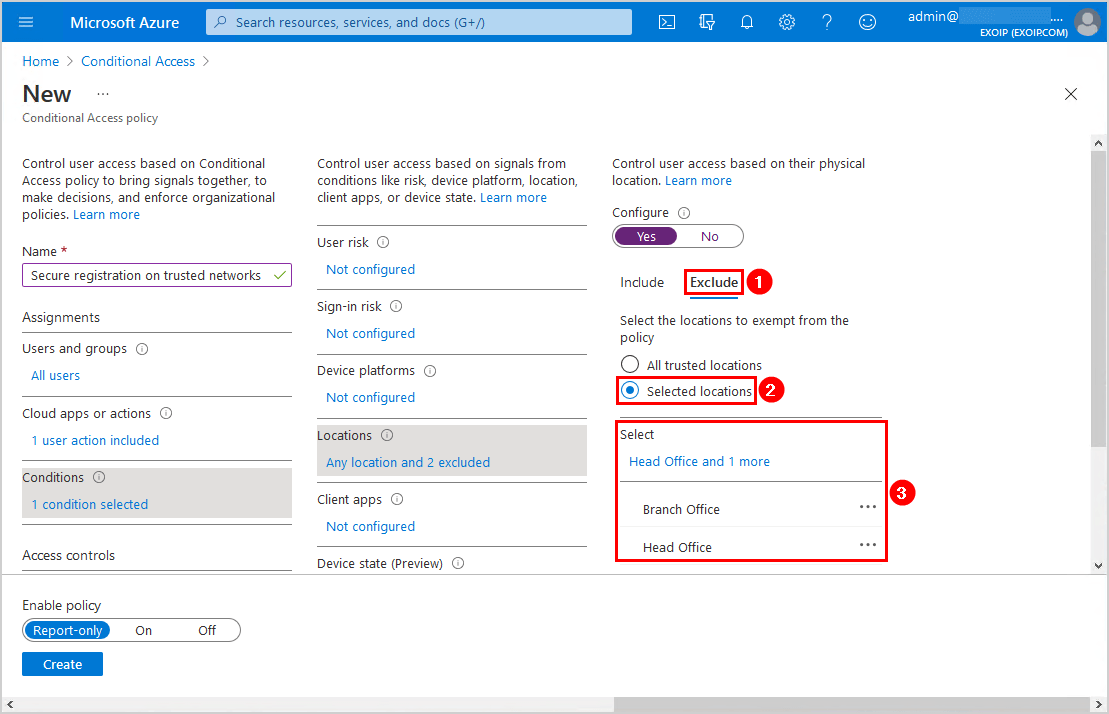
Click Exclude and select Selected locations. Select the named locations that you created in the previous steps.
Click Grant. Select Block access. Click on Select.
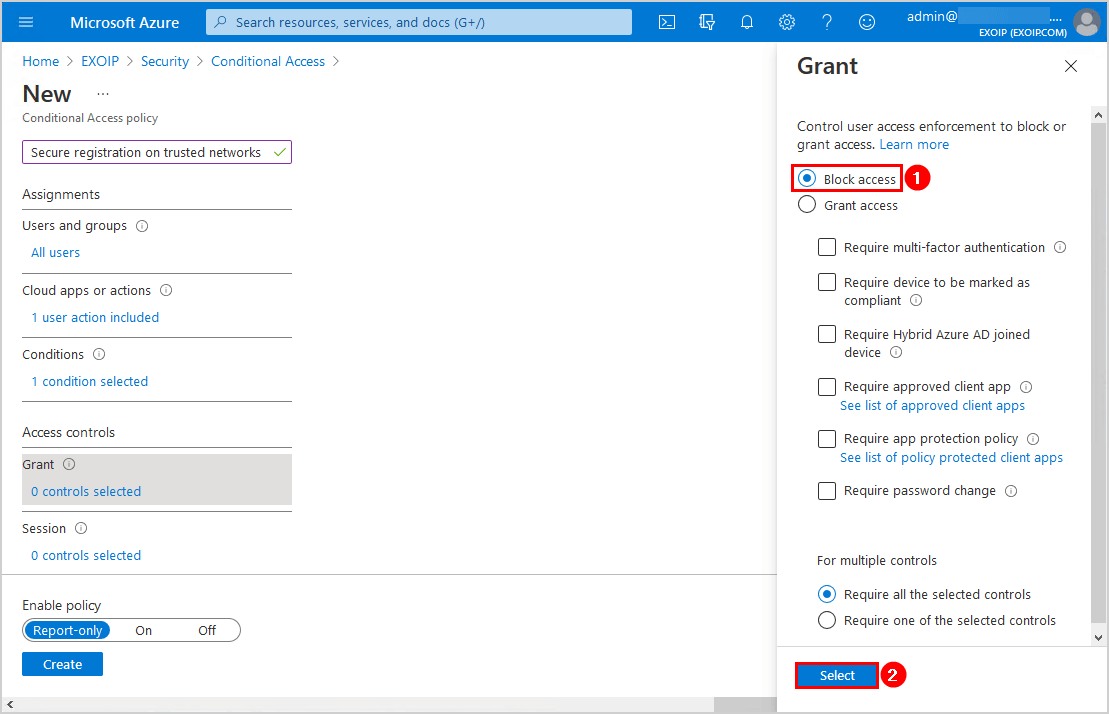
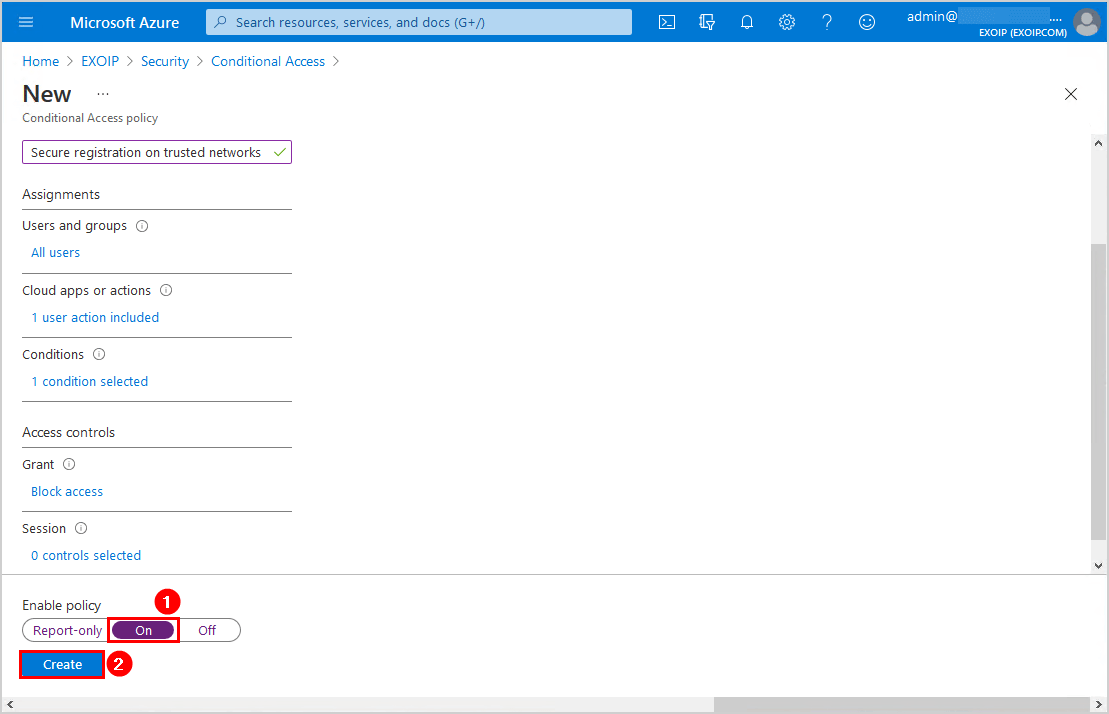
Click the On switch to enable the policy. Click Create.
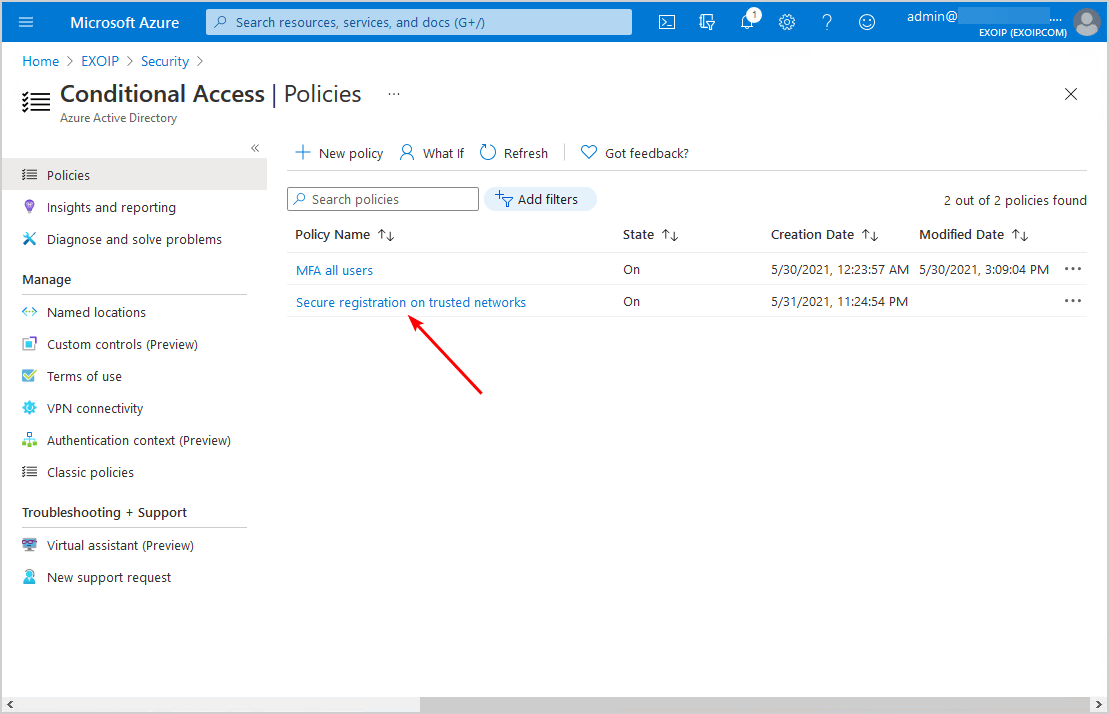
The policy Secure registration on trusted networks shows up in the Conditional Access policies list.
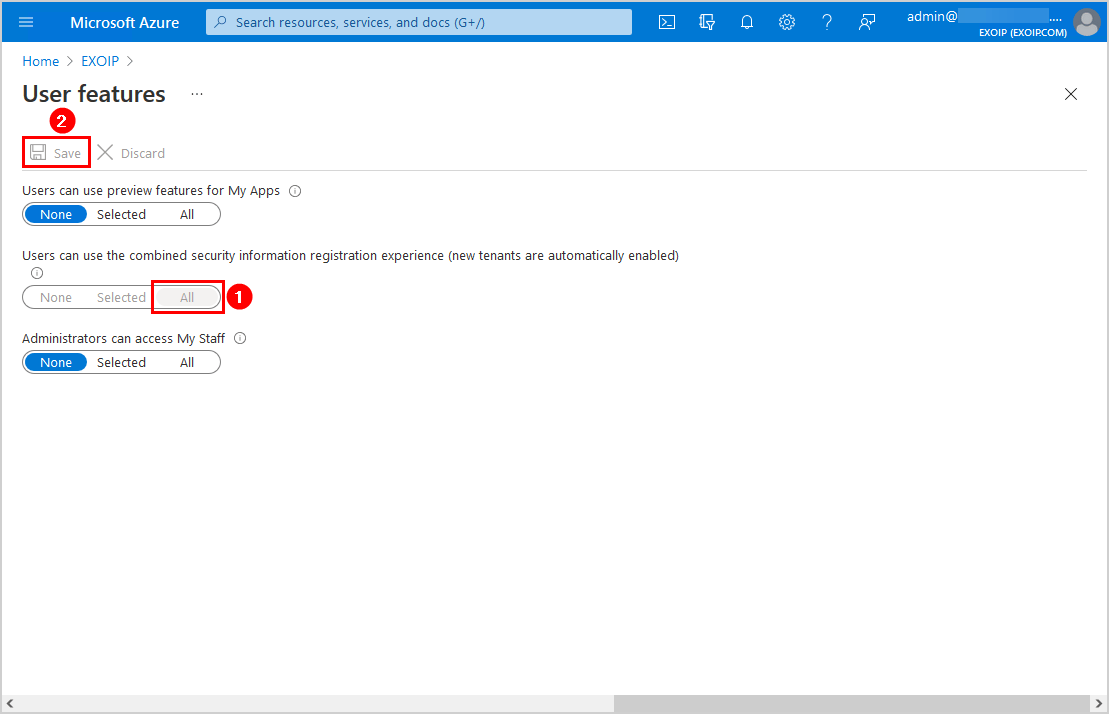
Step 3: Enable combined security information registration experience
Navigate to Azure Active Directory > User settings > Manage user feature settings.
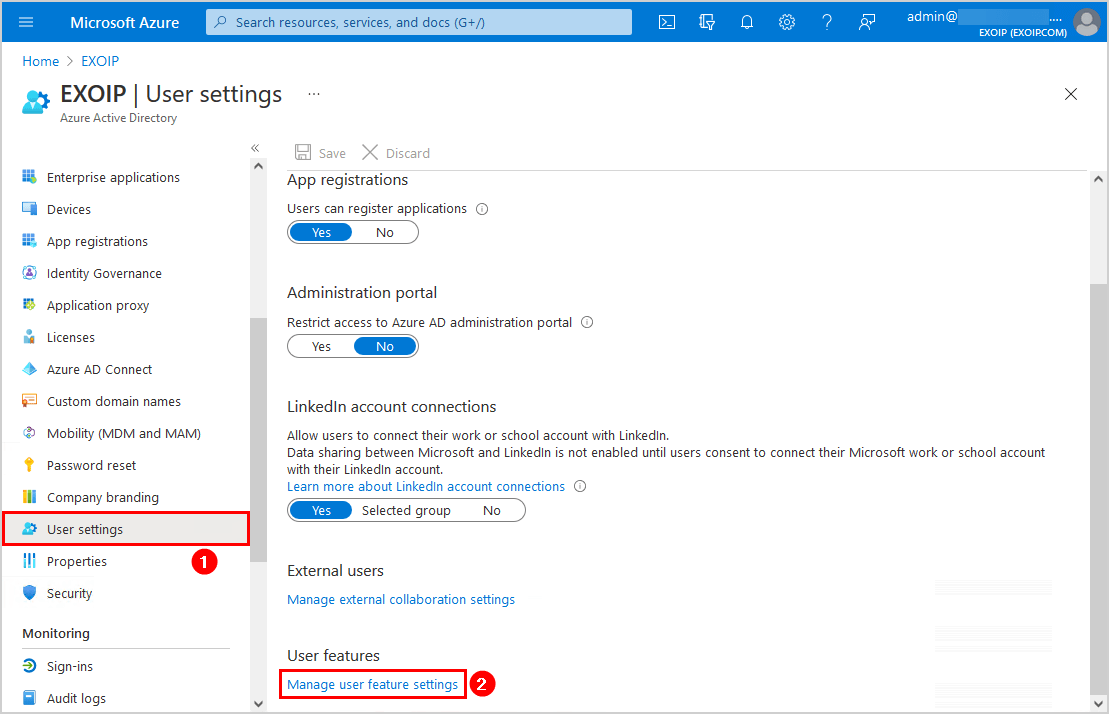
Click on All and Save. In our example, the setting is already set to All and greyed out because it’s a new tenant.
Note: Since September 30, 2022, the combined security information registration is automatically enabled for everyone, and the setting is greyed out.
In the next step, you will verify your work and see the user experience.
Verify your work
After creating the policy, sign in with a user to the Microsoft 365 portal for testing purposes and check the user experience.
Test from both the not excluded public IP and the excluded public IP (Head Office or Branch Office).
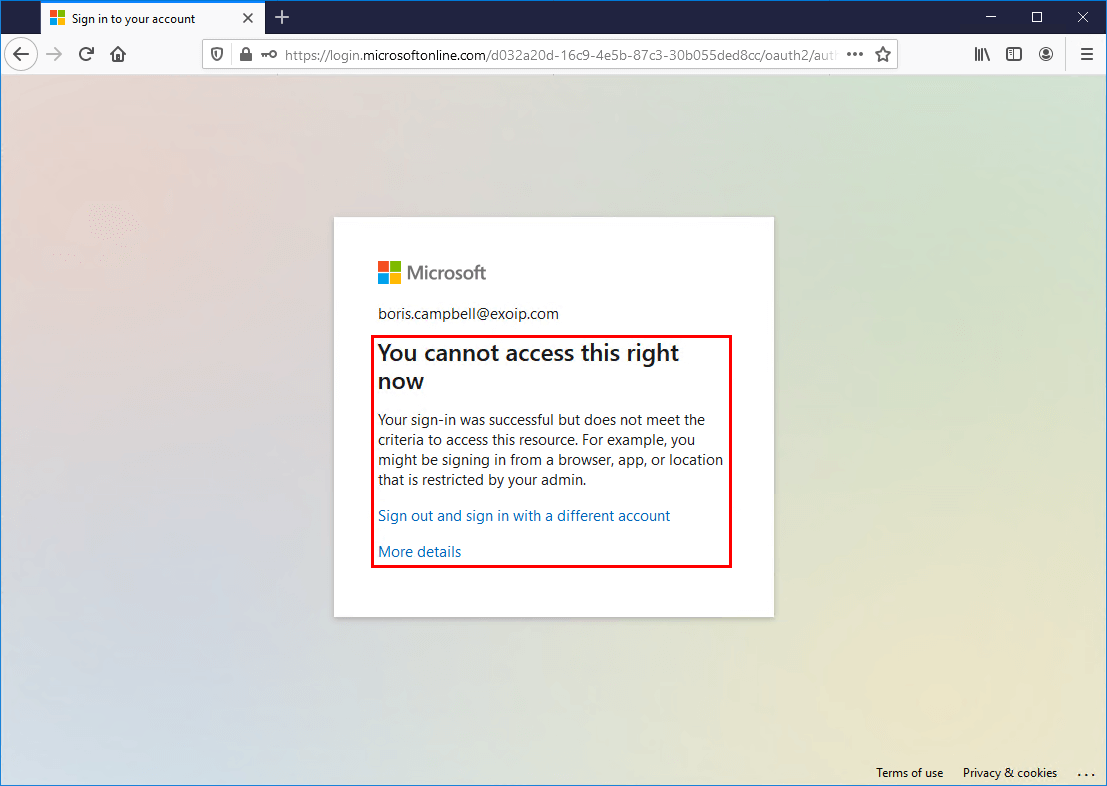
Not trusted location
Below is an example of how it looks when a user signs in to Microsoft 365 portal from a not trusted location.
You cannot access this right now. Your sign-in was successful but does not meet the criteria to access this resource. For example, you might be signing in from a browser, app, or location that is restricted by your admin.
Trusted location
Sign in to Microsoft 365 portal from a trusted location. If you only configured MFA in the tenant, the user will see the MFA configuration wizard.
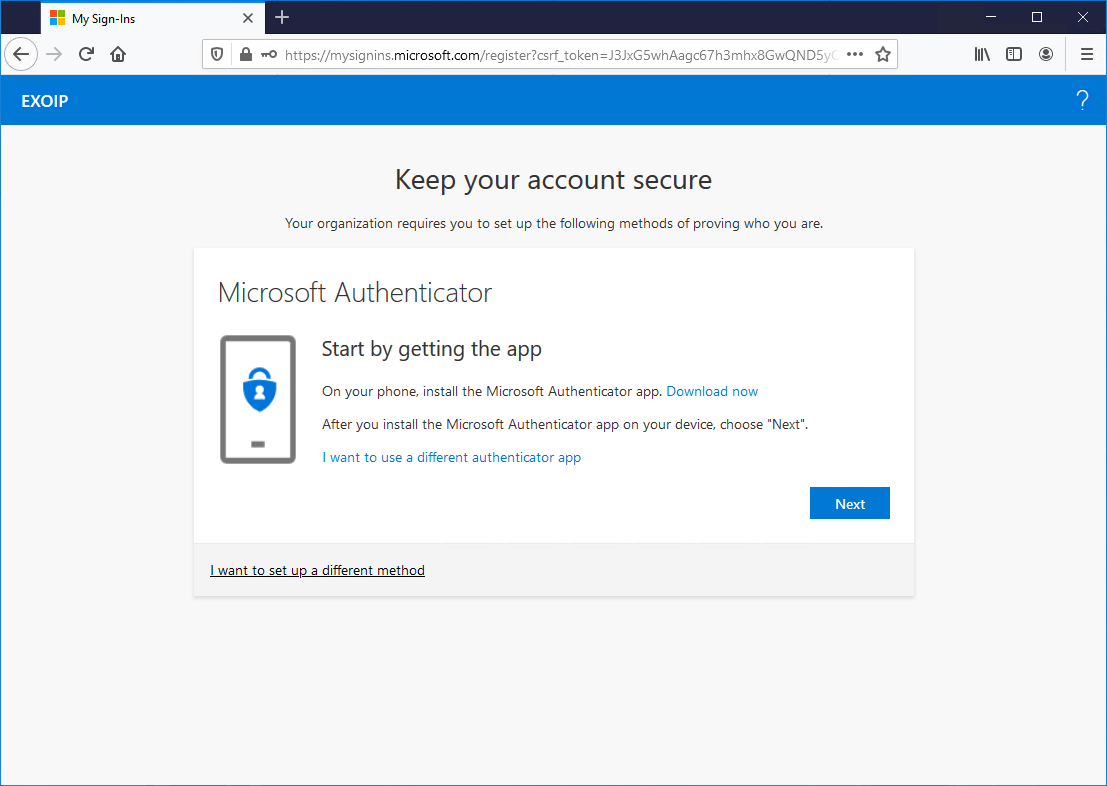
Do you have MFA and SSPR configured in the tenant? The user will see the SSPR configuration wizard.
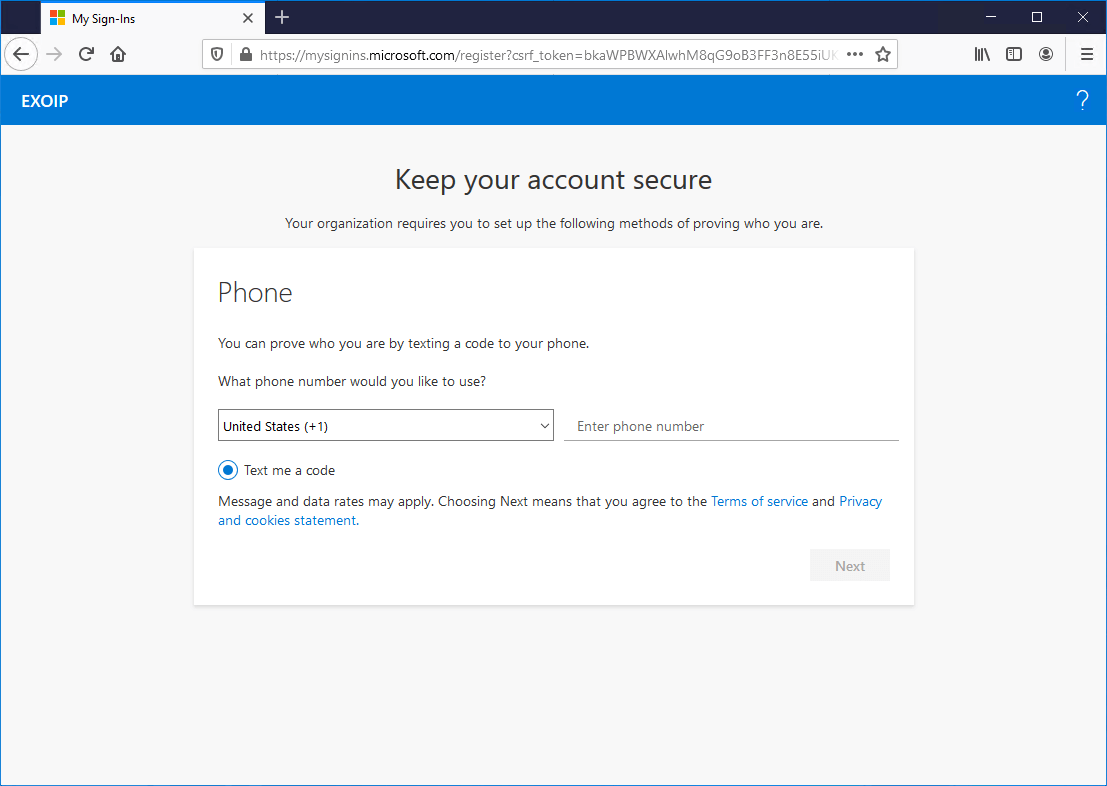
Everything looks great!
Read more: Move from MFA trusted IPs to Conditional Access named locations »
Conclusion
You learned how to secure Azure MFA and SSPR registration. Follow the steps, and the users can register for MFA and SSPR only on the excluded trusted locations. Extra security is always better than less security.
You don’t want an attacker to sign in to the organization with the compromised credentials and register for MFA or SSPR. If the account is compromised, this extra security step will help.
Did you enjoy this article? You may also like Conditional Access MFA breaks Azure AD Connect synchronization. Don’t forget to follow us and share this article.
What Others Are Reading


MFA enabled, when a new user or an existing user who did not register trying to login , we want the user to be notified to contact IT Admin to add his Phone number in Authentication contact info to proceed further. Don’t want to be redirected to add his /her info unless he is able to login using the phone number added by admin. Basically access should be denied if phone number is not added in
Authentication contact info.
How we can setup a conditional access policy to satisfy above.
When CA Policies are enabled to force MFA but exclud Trusted IPs or Entra Joined Devices, then we the internal push to configure MFA via the polciy above doesnt work. It works as expected from all other locations, which is half the battle.
Any ideas on how to push for registration if IPs/Devices are excluded for MFA?
Thanks for the article!
While this policy prevents a signed in user from completing the flow. If you get a CLEAN sign in prompt by going into incognito, select the I am having trouble signing in (before entering anything), you get go through the complete self serve password reset bypassing any policy.