How to bulk add users to multiple AD groups from CSV file with PowerShell? You…
Export DNS records to CSV with PowerShell
You want to have a backup of all the DNS records from your Windows DNS. The DNS Manager is very limited with such exports. The only way to get a good DNS records export is with PowerShell. In this article, you will learn how to export DNS records to CSV file with PowerShell.
Table of contents
Export single DNS zone from DNS Manager
Let’s look at how to export all records from a single DNS zone in DNS Manager:
- Open DNS Manager
- Right-click on a zone
- Select Export List…
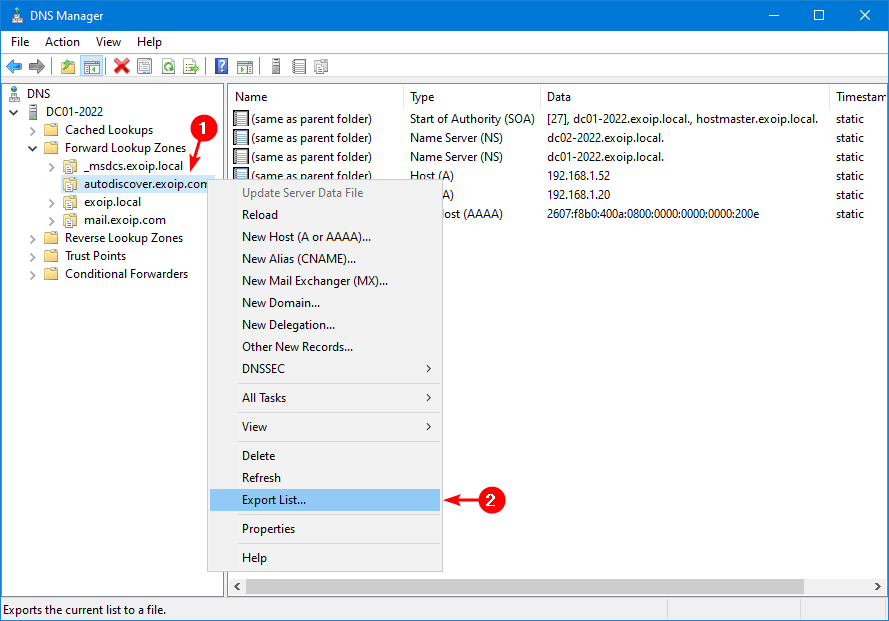
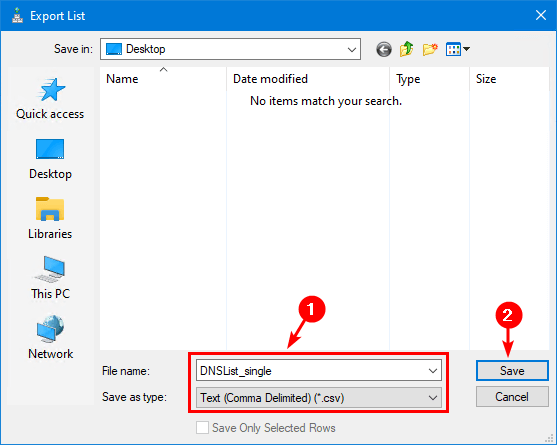
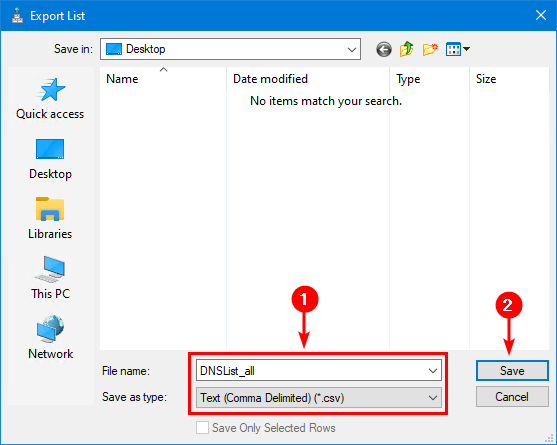
- Give the export file a name
- Save as type Text (Comma Delimited) (*.csv)
- Click Save
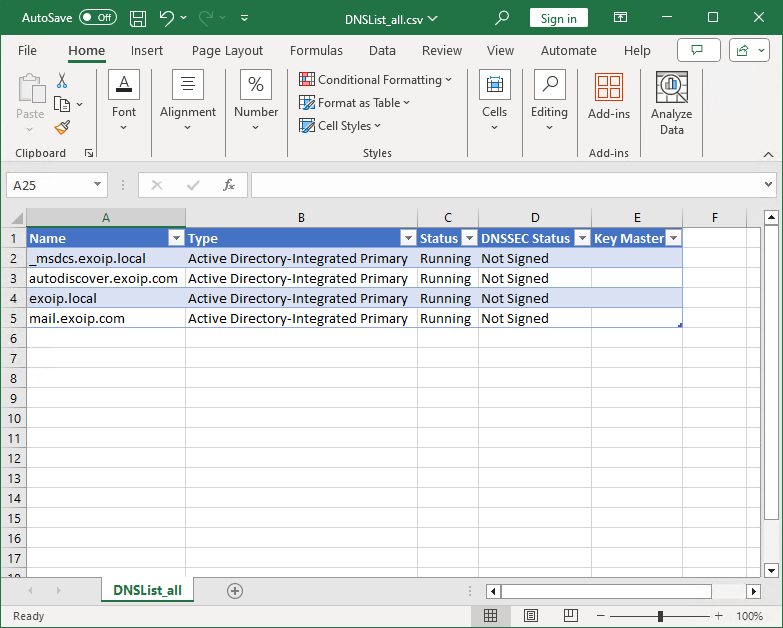
- Open the CSV file with Microsoft Excel or another program
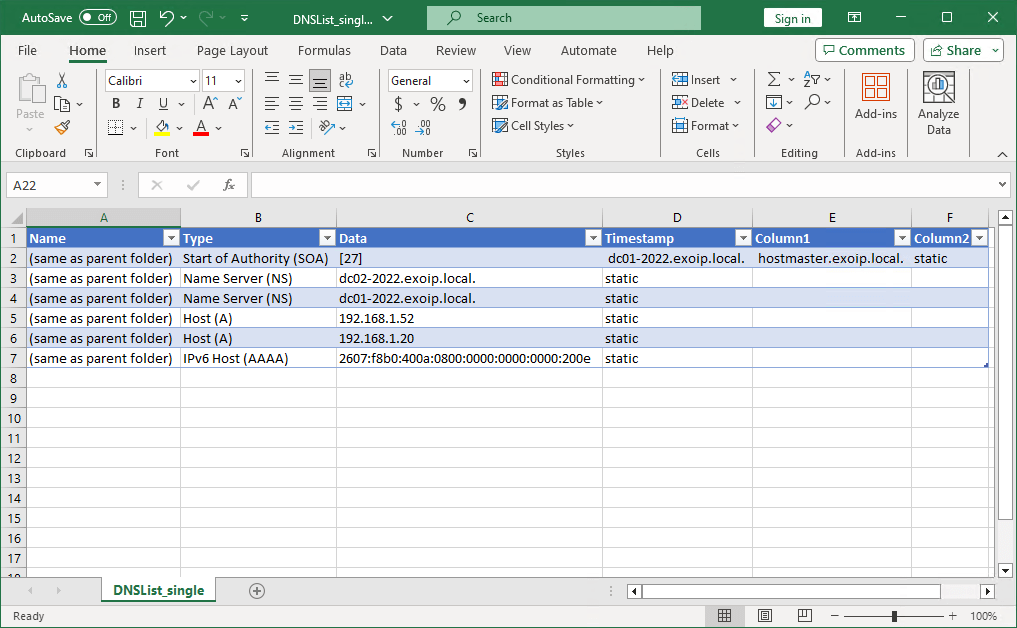
Exporting a single zone from DNS Manager is fast. The CSV file values show the same values as the DNS Manager. The only issue is that the columns are not displaying like they should when there is a comma (,) in the file.
Export all Forward Lookup Zones from DNS Manager
To export all Forward Lookup DNS Zones records from the DNS Manager:
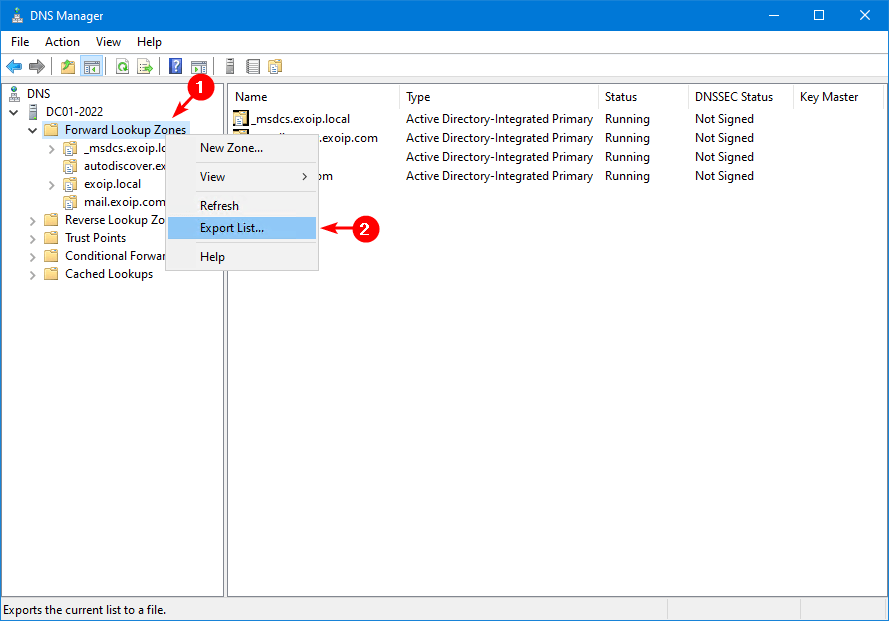
- Open DNS Manager
- Right-click on a zone
- Select Export List…
- Give the export file a name
- Save as type Text (Comma Delimited) (*.csv)
- Click Save
- Open the CSV file with Microsoft Excel or another program
The big problem is that it’s not showing any DNS records. So, you must export every DNS server zone individually from the DNS Manager to see the records.
Also, what if you want to have another property? For example, the Time to Live property is excellent to have in the export. The only way to get this is with PowerShell. Let’s look into that in the next step.
Export single zone DNS records to CSV file with PowerShell
An excellent way to export the records from a single DNS zone to a CSV file is with a PowerShell script. It will use the Get-DnsServerResourceRecord cmdlet to retrieve the DNS resource records from the specified zone.
Note: The PowerShell script will also export the DNS record Time to Live (TTL) property. So you can check that easily in the CSV file. The Time to Live appears as total seconds in the column.
- Run Windows PowerShell ISE as administrator
- Copy and paste below script in PowerShell
- Change the DNS zone name on line 2
- Run the PS script
$dnsRecords = @()
$zoneName = "autodiscover.exoip.com"
$zoneInfo = Get-DnsServerResourceRecord -ZoneName $zoneName
foreach ($info in $zoneInfo) {
    $timestamp = if ($info.Timestamp) { $info.Timestamp } else { "static" }
    $timetolive = $info.TimeToLive.TotalSeconds
    $recordData = switch ($info.RecordType) {
        'A' { $info.RecordData.IPv4Address }
        'CNAME' { $info.RecordData.HostnameAlias }
        'NS' { $info.RecordData.NameServer }
        'SOA' { "[$($info.RecordData.SerialNumber)] $($info.RecordData.PrimaryServer), $($info.RecordData.ResponsiblePerson)" }
        'SRV' { $info.RecordData.DomainName }
        'PTR' { $info.RecordData.PtrDomainName }
        'MX' { $info.RecordData.MailExchange }
        'AAAA' { $info.RecordData.IPv6Address }
        'TXT' { $info.RecordData.DescriptiveText }
        default { $null }
    }
    $dnsRecords += [pscustomobject]@{
        Name       = $zoneName
        Hostname   = $info.Hostname
        Type       = $info.RecordType
        Data       = $recordData
        Timestamp  = $timestamp
        TimeToLive = $timetolive
    }
}
$dnsRecords | Export-Csv "C:\temp\SingleDNSZoneRecords.csv" -NoTypeInformation -Encoding utf8
The CSV file export will be in C:\temp. Here is what the CSV file looks like.
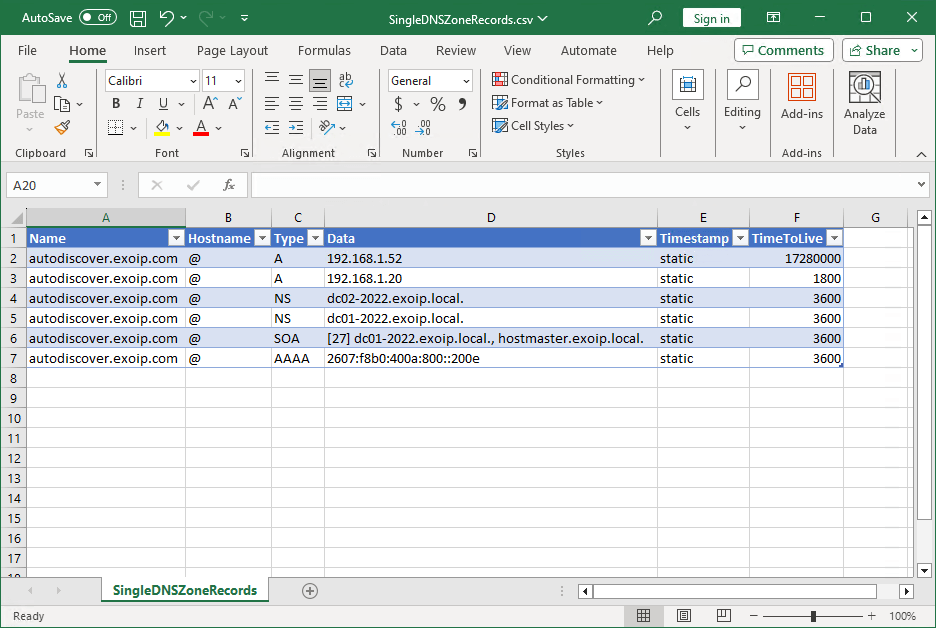
Going through all the zones and exporting them takes time. It’s handy if you only want to export a single DNS server zone but not if you’re going to export all DNS zones records.
Export all DNS zones records to CSV file with PowerShell
To export all DNS zones records, run the below PowerShell script. It will use the Get-DnsServerZone cmdlet to retrieve the DNS zones on a DNS server and the Get-DnsServerResourceRecord cmdlet to retrieve the DNS resource records from all zones.
The script will go through both the Windows DNS zones:
- Forward Lookup Zones
- Reverse Lookup Zones
$dnsRecords = @()
$zones = Get-DnsServerZone
foreach ($zone in $zones) {
    $zoneInfo = Get-DnsServerResourceRecord -ZoneName $zone.ZoneName
    foreach ($info in $zoneInfo) {
        $timestamp = if ($info.Timestamp) { $info.Timestamp } else { "static" }
        $timetolive = $info.TimeToLive.TotalSeconds
        $recordData = switch ($info.RecordType) {
            'A' { $info.RecordData.IPv4Address }
            'CNAME' { $info.RecordData.HostnameAlias }
            'NS' { $info.RecordData.NameServer }
            'SOA' { "[$($info.RecordData.SerialNumber)] $($info.RecordData.PrimaryServer), $($info.RecordData.ResponsiblePerson)" }
            'SRV' { $info.RecordData.DomainName }
            'PTR' { $info.RecordData.PtrDomainName }
            'MX' { $info.RecordData.MailExchange }
            'AAAA' { $info.RecordData.IPv6Address }
            'TXT' { $info.RecordData.DescriptiveText }
            default { $null }
        }
        $dnsRecords += [pscustomobject]@{
            Name       = $zone.ZoneName
            Hostname   = $info.Hostname
            Type       = $info.RecordType
            Data       = $recordData
            Timestamp  = $timestamp
            TimeToLive = $timetolive
        }
    }
}
$dnsRecords | Export-Csv "C:\temp\AllDNSZonesRecords.csv" -NoTypeInformation -Encoding utf8
It will export all the DNS records to a CSV file in C:\temp. This is what the CSV file looks like.
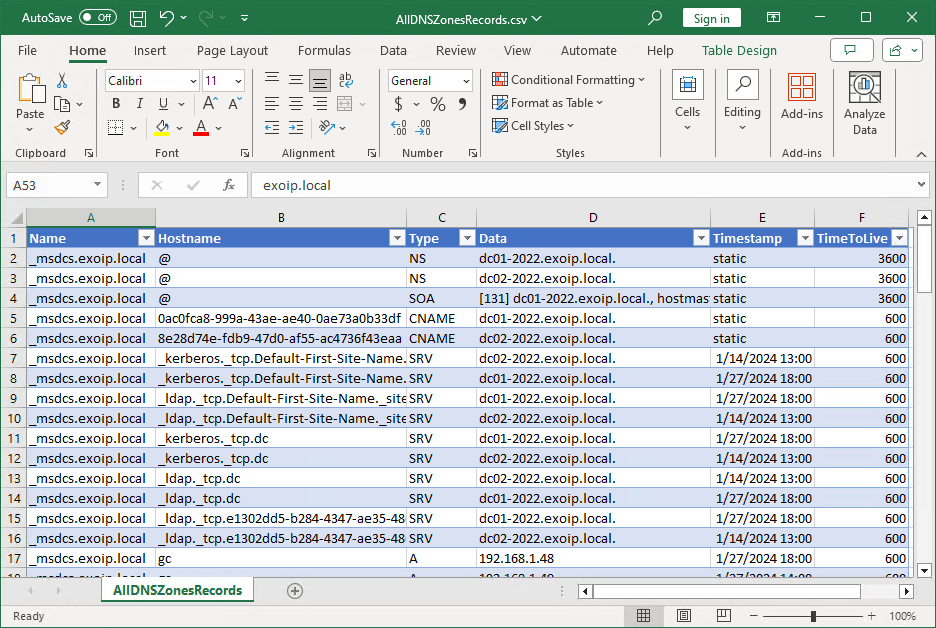
That’s it!
Read more: How to Clean up stale DNS records with PowerShell »
Conclusion
You learned how to export DNS records to CSV with PowerShell. There are limitations when you want to export DNS records with DNS Manager. With PowerShell, you can tweak the export results to your liking. Having a DNS records backup before making significant changes is always good. The PowerShell script will cover your needs.
Did you enjoy this article? You may also like Active Directory health check with PowerShell script. Don’t forget to follow us and share this article.
This Post Has 0 Comments