We like to uninstall Azure AD Connect. The organization will no longer use Azure AD…
Send as Alias from Microsoft Outlook mobile app (iOS and Android)
Microsoft Outlook mobile app for iOS and Android is free and excellent. But how does it work in the Microsoft Outlook mobile app once you enable send from alias address in Office 365/Microsoft 365? There is no option to select the alias address and no input field to enter an alias address. So how do we get this working? In this article, you will learn how to send as alias from Microsoft Outlook mobile app.
Table of contents
Send as alias from Outlook mobile app not working
Let’s look at what happens when we like to select an alias address from the mobile app Microsoft Outlook for iOS and Android.
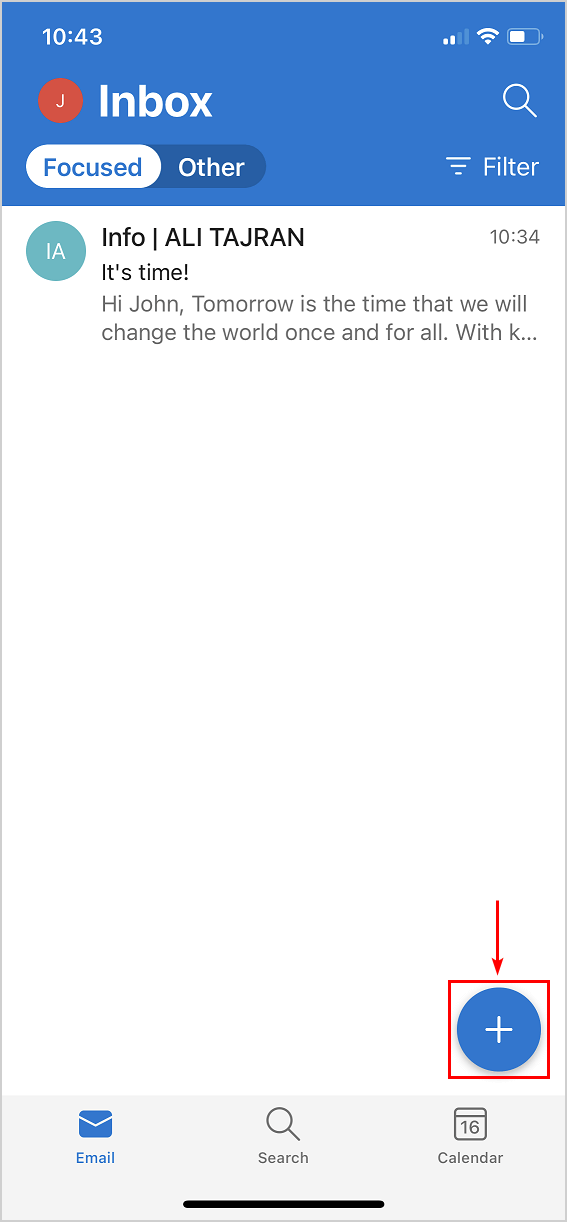
Open the Outlook mobile app and configure the Office 365/Microsoft 365 account.
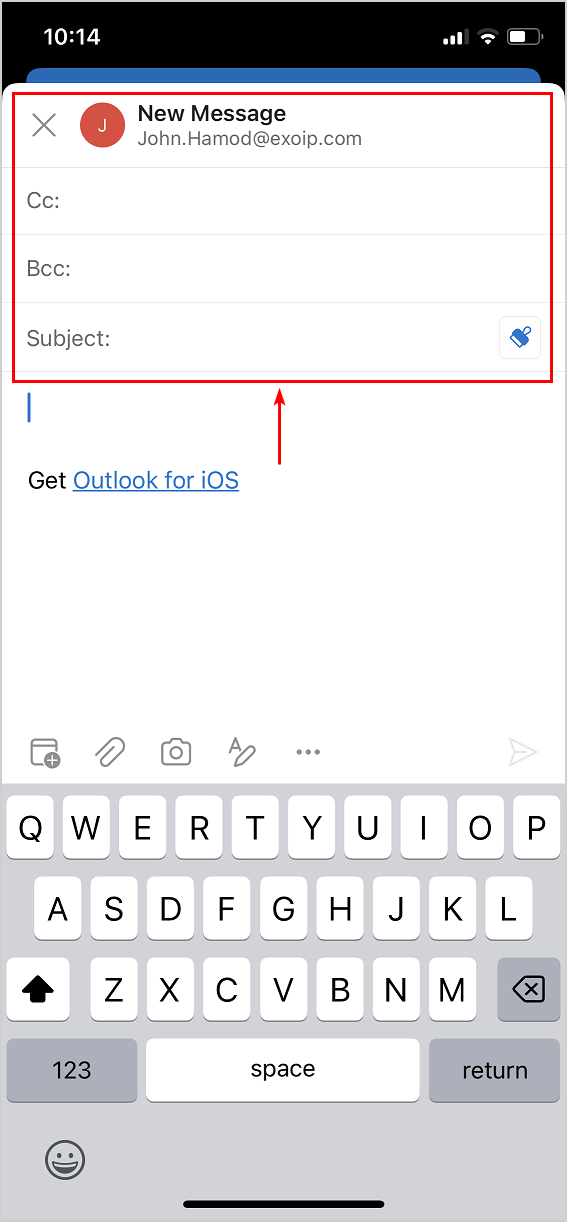
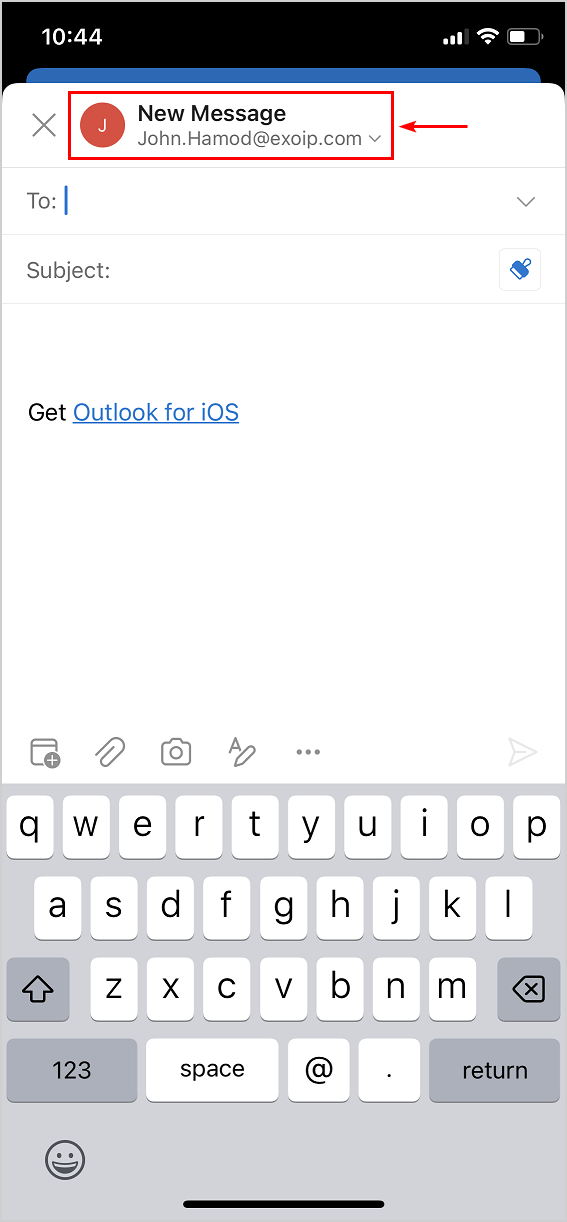
Compose a new message. Only the primary email address is available. You can’t select an alias address from the From field. Also the settings will not show any alias addresses to enable for that account.
In this example, John.Hamod@exoip.com is the primary SMTP address.
So how can we enable alias addresses in Microsoft Outlook mobile app?
How to enable Send as Alias in Outlook mobile app
To enable send as alias address in Outlook mobile app, go through these three steps.
1. Enable alias addresses to send from
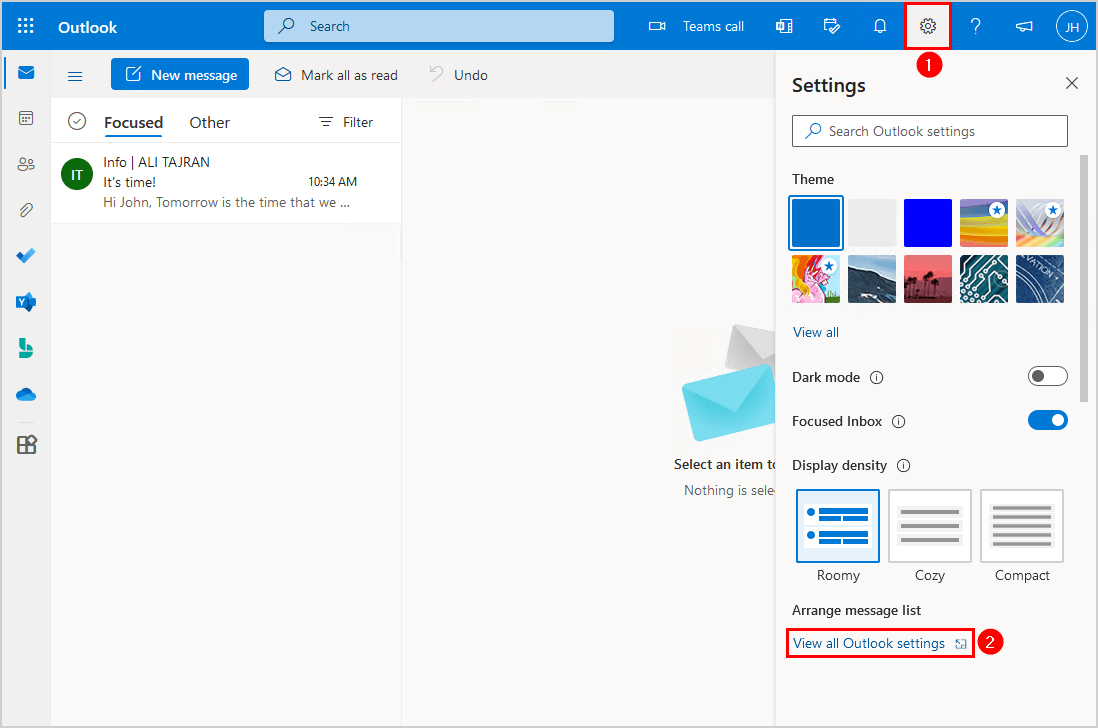
Sign in to Outlook on the web. Click on Settings > View all Outlook settings.
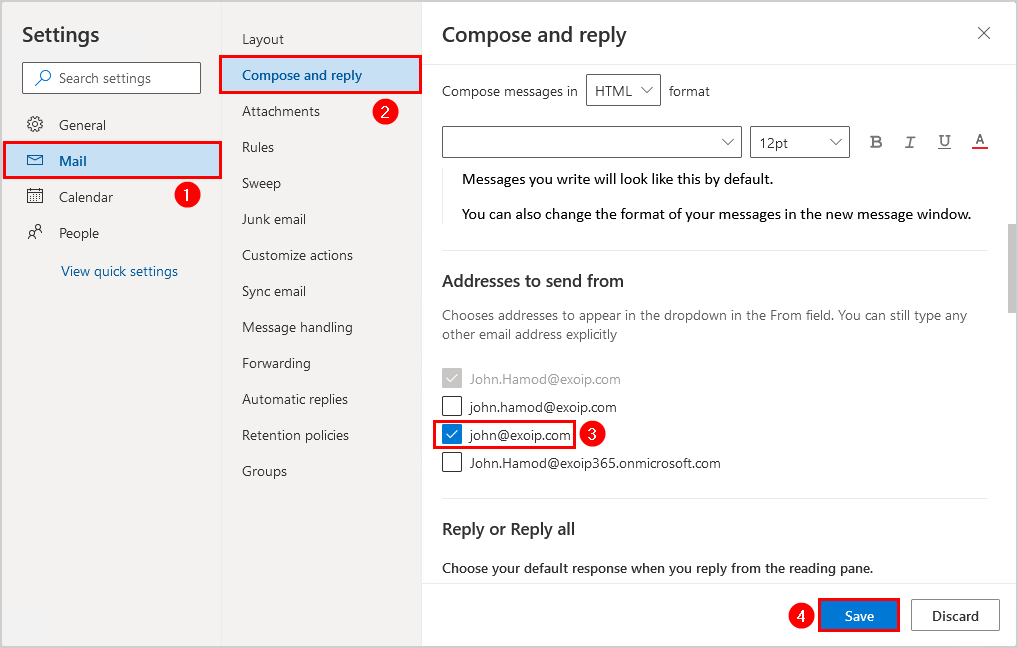
Click on Mail > Compose and reply. Go to the section Addresses to send from.
You will see a list of the aliases that you can send from. Enable the alias addresses you want to appear in the Outlook mobile app.
Click on Save.
In this example, the alias address john@exoip.com is selected.
2. Reset account settings
Go to the Outlook mobile app > Settings.
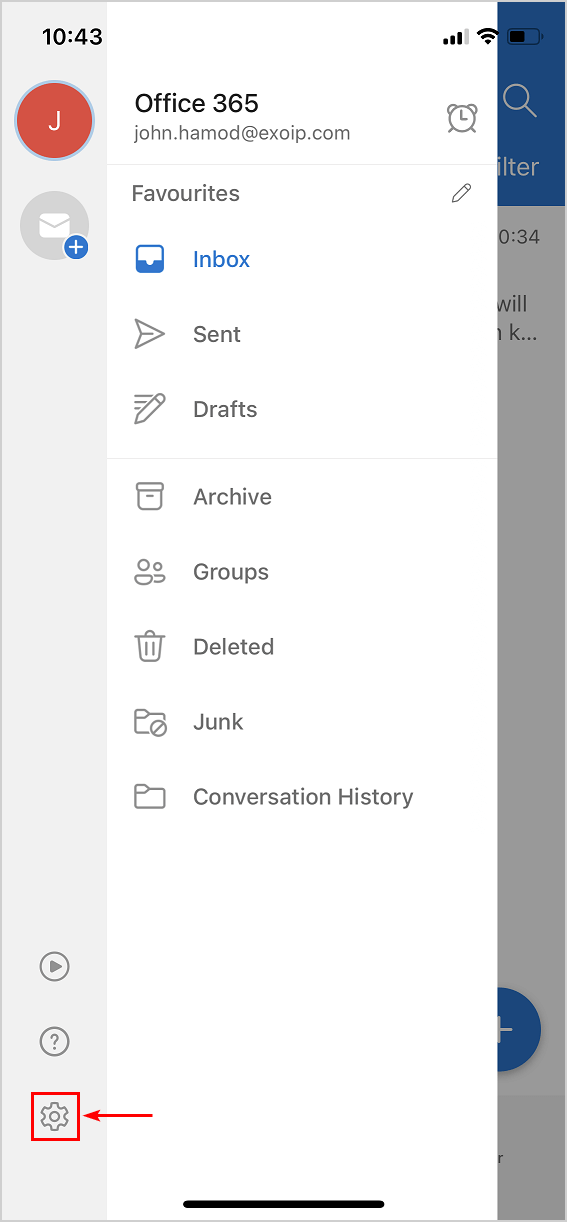
Select the Office 365/Microsoft 365 account.
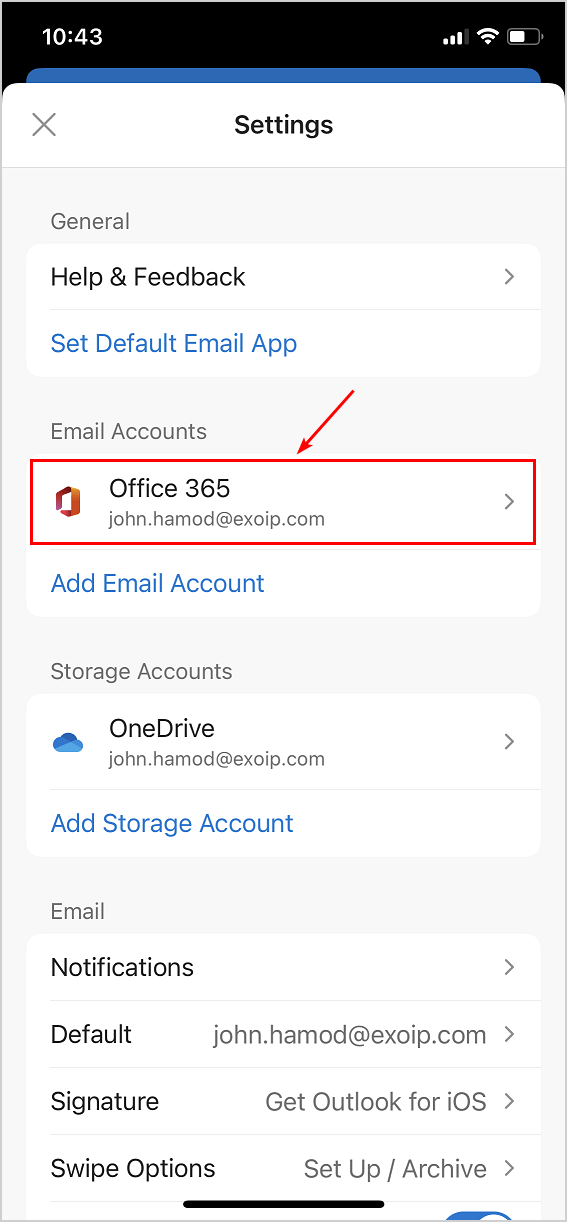
Click on Reset Account.

Click on OK to restart the app.
Note: Outlook will force restart and sync items and settings from the Office 365/Microsoft 365 server to Outlook mobile app. Nothing will happen to the Outlook mobile app settings.

Send as alias from Microsoft Outlook mobile app
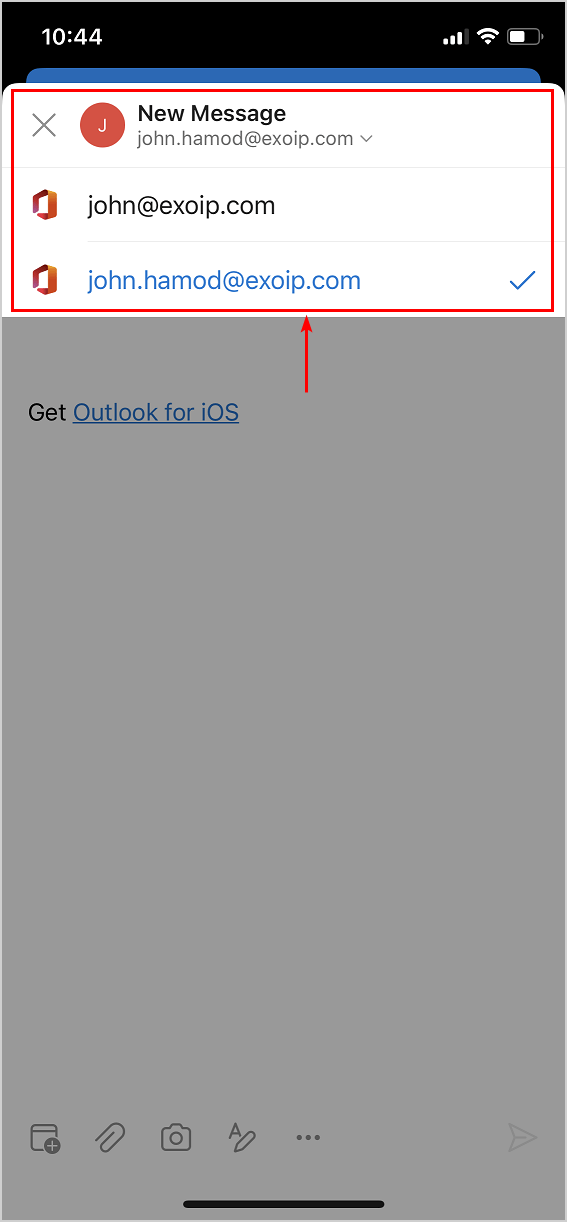
Open the Outlook mobile app and click on compose email.
The From field shows a dropdown icon next to the primary SMTP address, which you can click on.
Select the alias address that you want to send from.
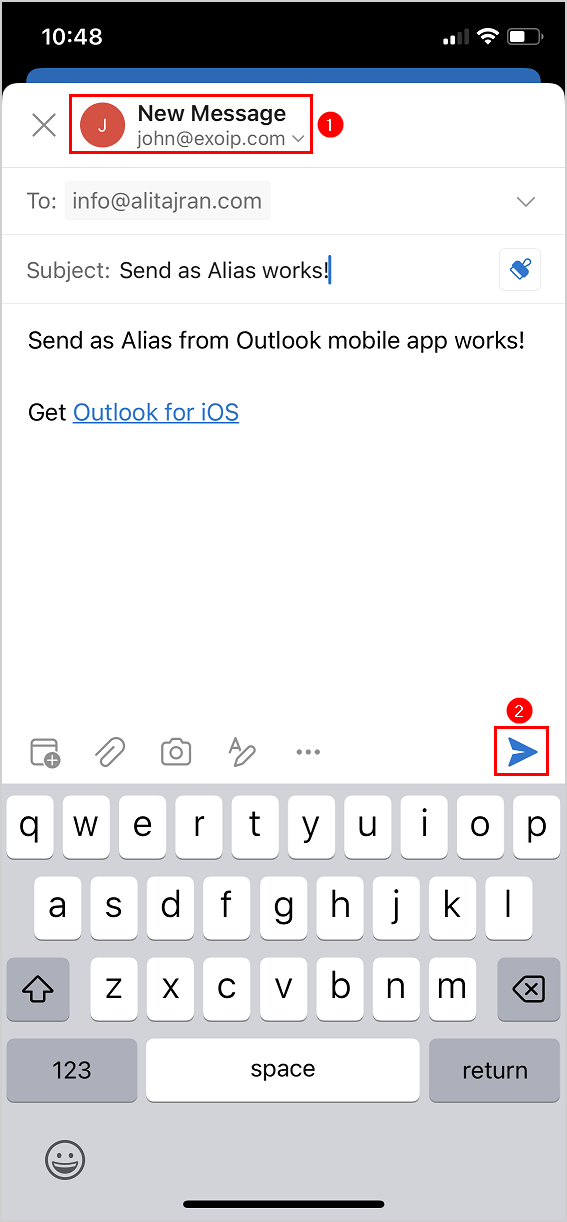
Verify that the alias address appears at the top. Next, send the email.
In our example, the alias address is john@exoip.com.
The alias address john@exoip.com appears on the recipient side.
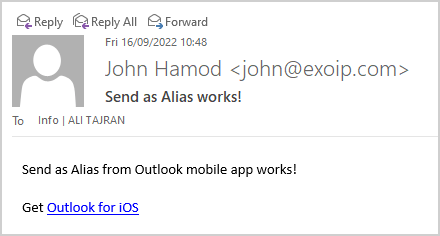
Everything looks great.
Read more: Change default mailbox language »
Conclusion
You learned how to send as alias from Microsoft Outlook mobile app. After you enable Send from Alias feature in the tenant, it’s essential to enable the alias addresses in Outlook on the web settings. After that, reset the account in Microsoft Outlook mobile app so it will show the alias address from the send dropdown when composing an email.
Did you enjoy this article? You may also like Mailbox still visible in Outlook after removing permission. Don’t forget to follow us and share this article.
What Others Are Reading


Can this work for shared mailbox aliases as well on iOS?
After some tries, I can now send from Alias on the mobile app.
But sending from a Group is still not possible on the mobile app! I do can send from a Group in the Web app, where I have the possibillity to manual enter the group email address as ‘Other email address’, where it is saved in the list for future use then. But these don’t show in the mobile app.
I prefer sendig from a group over an alias. In outlook for Windows I can have a To: column where I can see the email that was used by the sender. But in web app there is no To: column…. 🙁
I have one client running Exchange 2013, and another running Exchange 2016. I don’t see any option to change the “Mail > Compose and reply > Addresses to send from” using OWA.
Or is that a setting within the Exchange server itself?
This feature is only available in Exchange Online and not in Exchange Server on-premises.
Perfect, many thanks
Thanks for the article, however it leaves me with a question left unanswered regarding what happens when you reply to an incoming email:
If you receive an email at the ALIAS address, then when you click REPLY will the app automatically populate the ‘from’ address using the alias by default, or will it reply from the main address unless you change it manually?
I can confirm that “Addresses to send from” was not an option, but after many visits to that settings page and a few “Reset Account” in the Outlook for iOS app, it is there now. Not sure what eventually allowed it to appear.
Many thanks for this tutorial!
Believe it or not Microsoft 365 support sent me here. It didn’t work for me for some reason. I’m waiting to see if it takes a while to reset.
But thanks for putting this together.
They seem to have removed Addresses to send from, as it’s not listed in any of the options.
I tried it right now on a new Microsoft tenant with a new Exchange Online mailbox. Everything works as described in the article.
Double-check everything again at your end.
I had the same issue but after manually entering the alias in the ‘from’ field on outlook and sending a few test emails to/from myself, the “Addresses to send from” suddenly appeared in Compose and Reply Settings.
I can confirm the same situation here. First the Addresses to send from was not there, and suddenly appears.
I wonder if it has something to do with Exchange option ‘Turn On sending from aliasses’ you need to activate first, and can take upto to become live.
Hi, thanks for this article, very helpful. Any chance you know how to achieve the same thing in New Outlook for MacOS?
@Dan Harrison
Once you set it in the online Webmail Outlook, the desktop application updates automatically (30 minutes or so).
But I agree: Thank you ALI TAJRAN!!!!