Learn how to enable TLS 1.2 and TLS 1.3 on Windows Server and disable the…
How to Change IP address of Domain Controller
The Domain Controller is the most important server in an organization because its responsibility is to authenticate and validate user access on the network. Sometimes you must change the IP address, and you want to do that without causing any issues. In this article, you will learn how to change the IP address of a Domain Controller.
Table of contents
Before you start
It’s recommended to have two Domain Controllers in an organization. If something happens to one, the other one will be available so users can keep authenticating when they sign in.
Suppose you want to use the old Domain Controller IP address on the new Domain Controller, you first have to demote the Domain Controller.
Change Domain Controller IP address
Go through the below steps to change the IP address on a Domain Controller:
Step 1. Change Domain Controller IP address
Important: Changing the IP Address will disrupt the connection for a couple of seconds. Therefore, you need to sign in to the Domain Controller using console access, not remote access.
- Sign in on the Domain Controller
- Run the below command in Command Prompt to open Network Connections
ncpa.cpl- Right-click the network and select Properties
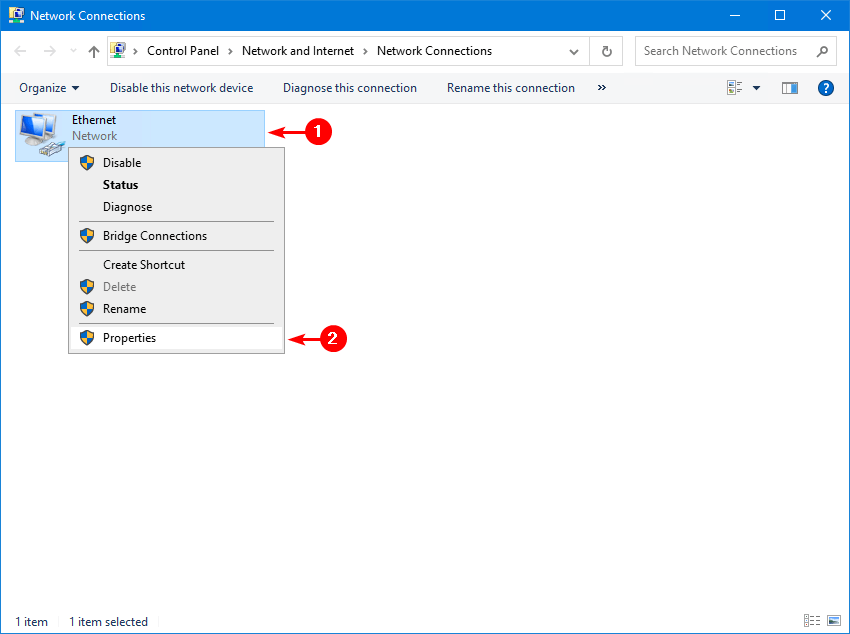
- Click on Internet Protocol Version 4 (TCP/IPv4) and select Properties
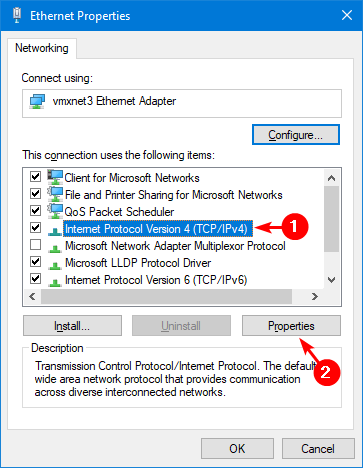
- Change the IP address
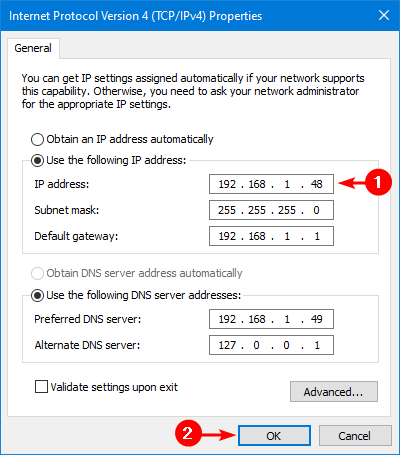
- Click OK twice to finish
Step 2. Register Domain Controller new IP address
Start Command Prompt or PowerShell as administrator and run the below commands to register the Domain Controller’s new IP address and verify that it’s registered successfully in DNS.
- Run ipconfig /flushdns to remove cached DNS entries created by the local DNS server.
ipconfig /flushdns- Run ipconfig /registerdns command to register the host record with DNS.
ipconfig /registerdns- Run nltest /dsregdns to force register all its records with DNS.
nltest /dsregdns- Run dcdiag /fix command to ensure that service records are appropriately registered with DNS.
dcdiag /fixNote: We recommend to check the Domain Controller health using the PowerShell script.
Step 3. Update old Domain Controller IP address
Set the new Domain Controller IP address on all the devices that use the DC for authentication, such as printers or software. Otherwise, they will stop communicating.
Read more: Export inactive users from Active Directory report »
Conclusion
You learned how to change the IP address of the Domain Controller. Before you start, ensure that you have console access. It’s essential that after you change the IP address, you run the correct commands to register the records with DNS. Remember to check the Domain Controller health with the PowerShell script.
Did you like this article? You may also like How to Create an Active Directory Security Assessment report. Don’t forget to follow us and share this article.
What Others Are Reading

This Post Has 0 Comments