The organization got a parent and child domain. Both the domains contain criss-cross members and…
How to Remove (Demote) a Domain Controller
Now that you have a new Domain Controller running in Active Directory, it’s time to demote the old Domain Controller. There are two options to remove a Domain Controller. It depends on whether the Domain Controller is accessible or not. In this article, you will learn how to remove a Domain Controller step-by-step.
Table of contents
Domain Controller removal options
The preferred method to demote a Domain Controller is using Server Manager or PowerShell. Which one you choose is up to you. They are, in the end, the same. But there are times when the Domain Controller can’t boot anymore, and you can’t bring it back up anymore. Then, you must choose the method to remove it manually.
To make it easier, you have the below options:
- Option 1: Domain Controller is accessible – Remove the Domain Controller with Server Manager or PowerShell.
- Option 2: Domain Controller is NOT accessible – Remove the Domain Controller manually.
Let’s look at both options to delete a Domain Controller in Active Directory and its cleanup process.
Remove Domain Controller with Server Manager
To demote a Domain Controller using Server Manager, go through the below steps:
Step 1. Move FSMO roles (optional)
The FSMO roles will automatically move to another Domain Controller when you remove the Domain Controller through the removal wizard. If you would like to move the FSMO roles and not let the uninstall process do it automatically for you, you can do so.
The DC02-20222 in the below command is the target Domain Controller hostname where we will transfer the FSMO roles too.
Move-ADDirectoryServerOperationMasterRole "DC02-2022" -OperationMasterRole 0,1,2,3,4 -Force -Confirm:$falseStep 2. Test Domain Controller uninstallation
An excellent way is to run the Test-ADDSDomainControllerUninstallation cmdlet before you start with the Domain Controller removal. This will check and alert if everything is set or if there are any issues.
Test-ADDSDomainControllerUninstallationIf the above command doesn’t work, run the below command.
Test-ADDSDomainControllerUninstallation -LocalAdministratorPassword (Read-Host -Prompt "password" -AsSecureString)Fill in the local admin password and confirm it again.
LocalAdministratorPassword: ************
Confirm LocalAdministratorPassword: ************
In our example, the below output shows the status Succes. So, everything looks good, and we can proceed further.
Message                          Context                                  RebootRequired  Status
-------                          -------                                  --------------  ------
Operation completed successfully Test.VerifyDcPromoCore.DCPromo.General.1          False Success
Step 3. Demote Domain Controller
In our example, we will remove Domain Controller DC01-2019.
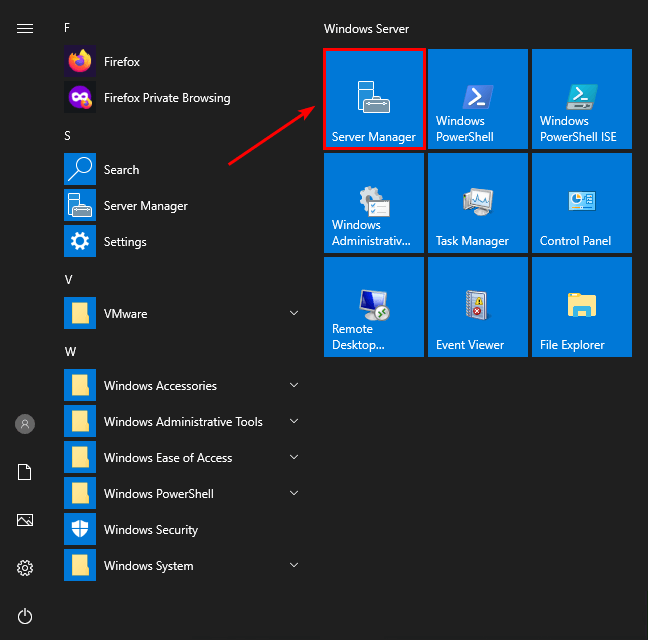
- Open Server Manager
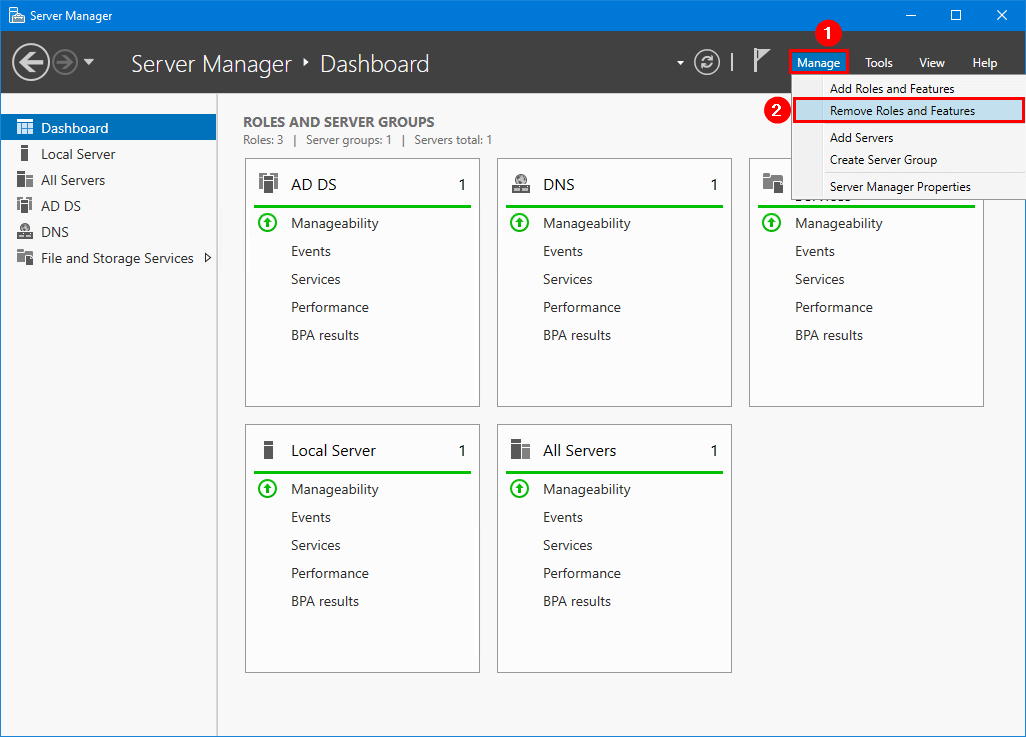
- Click on Manage and select Remove Roles and Features
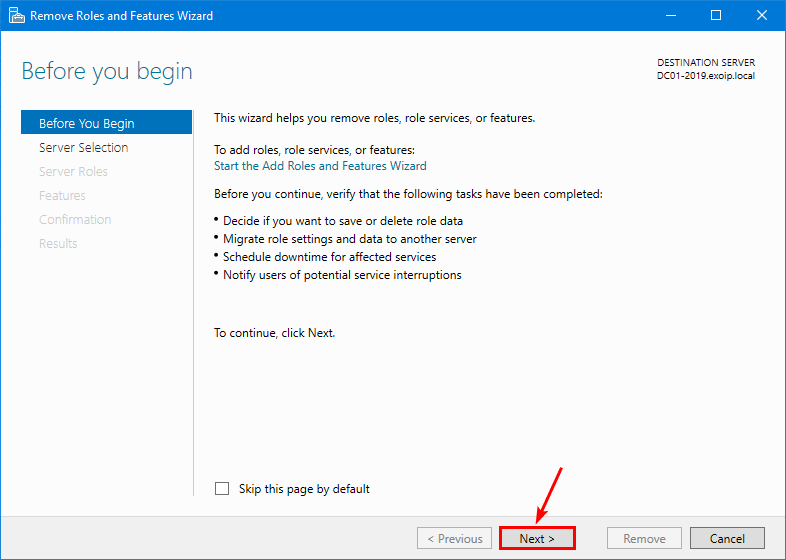
- Select Next
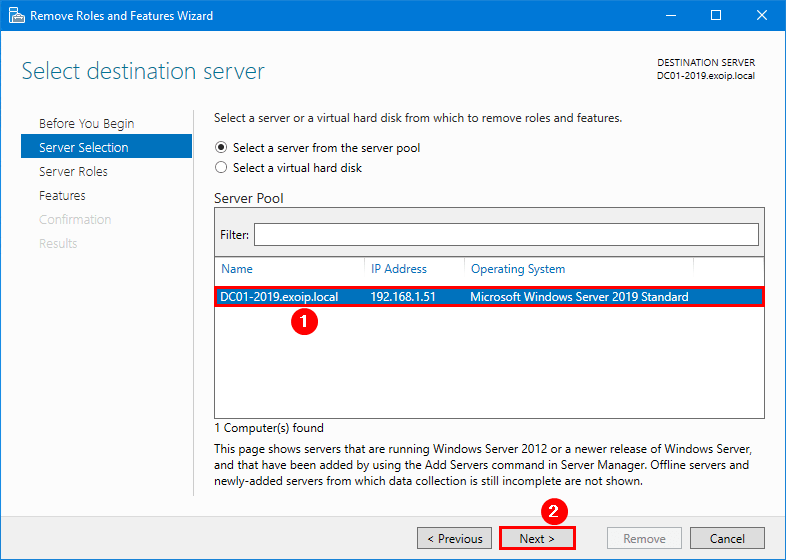
- Select the server from the pool and click Next
- Clear the checkbox Active Directory Domain Services
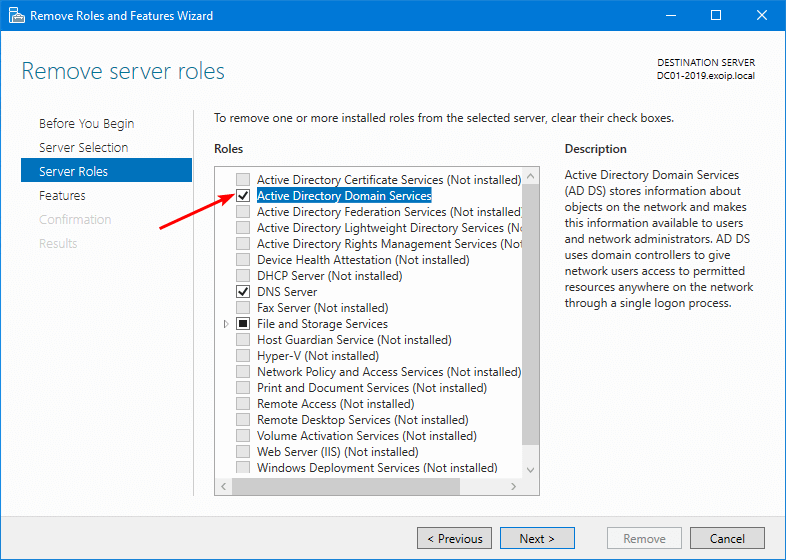
- Click Remove Features

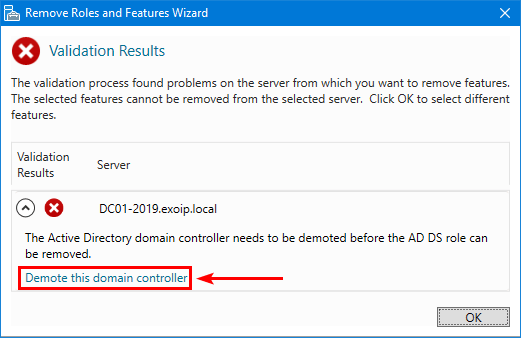
- Click on Demote this domain controller
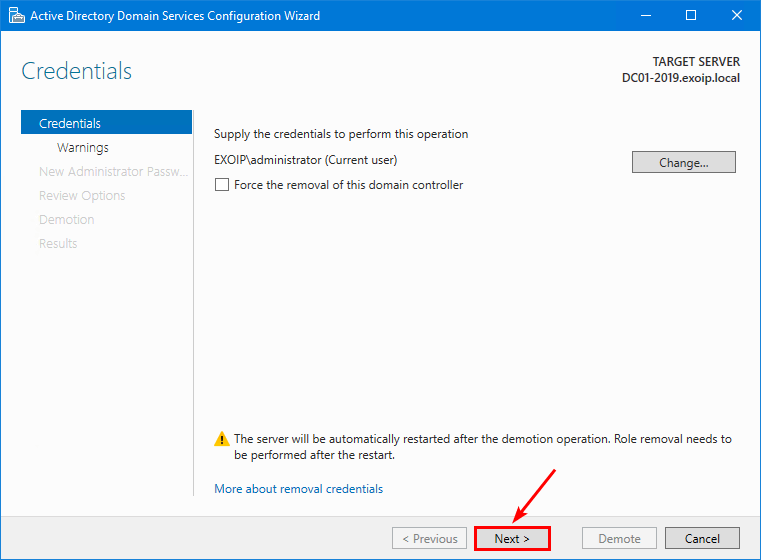
- Supply the admin credentials if needed and click Next
Note: Do NOT select the option Force the removal of this domain controller and leave it unchecked.
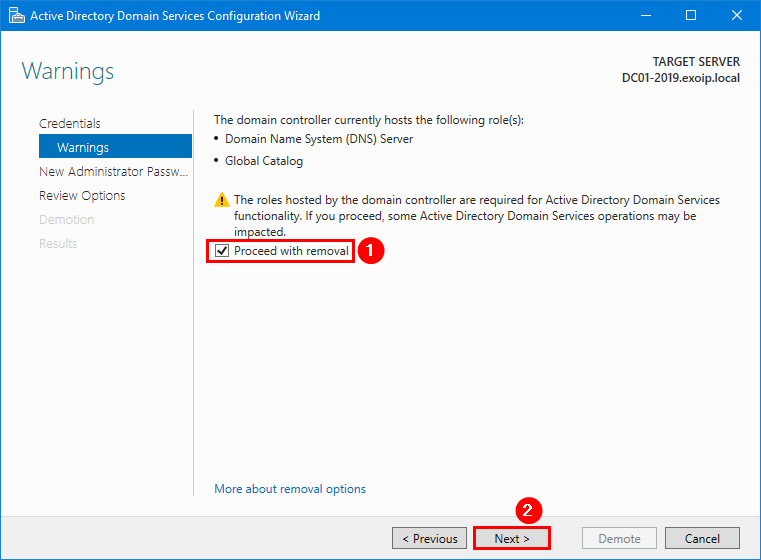
- Check Proceed with removal and click Next
- Enter a new administrator password for the local administrator account after the Domain Controller is demoted
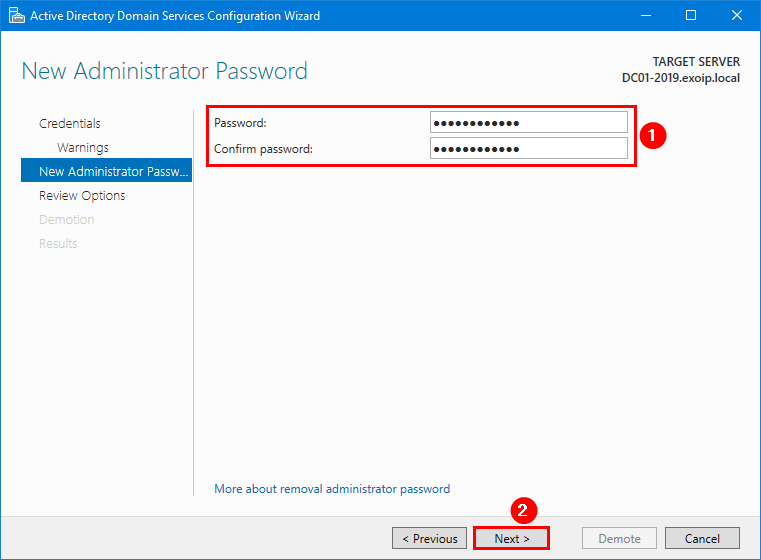
- Click on Demote
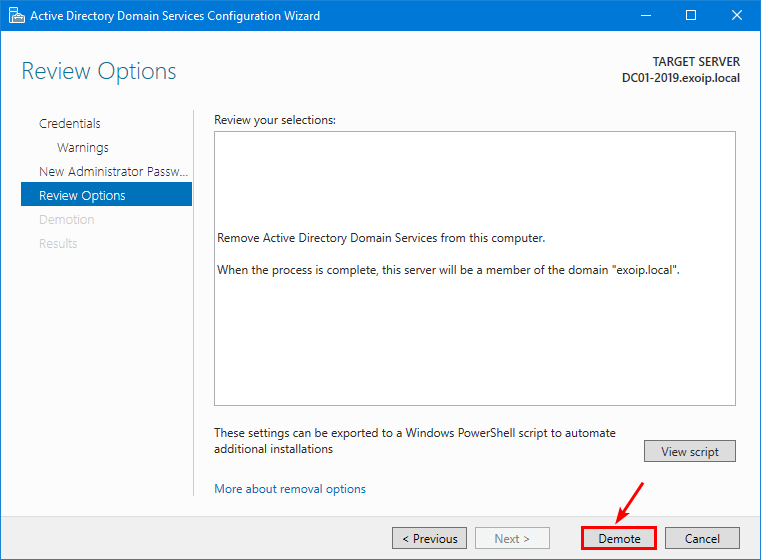
- The server will go through the demotion process
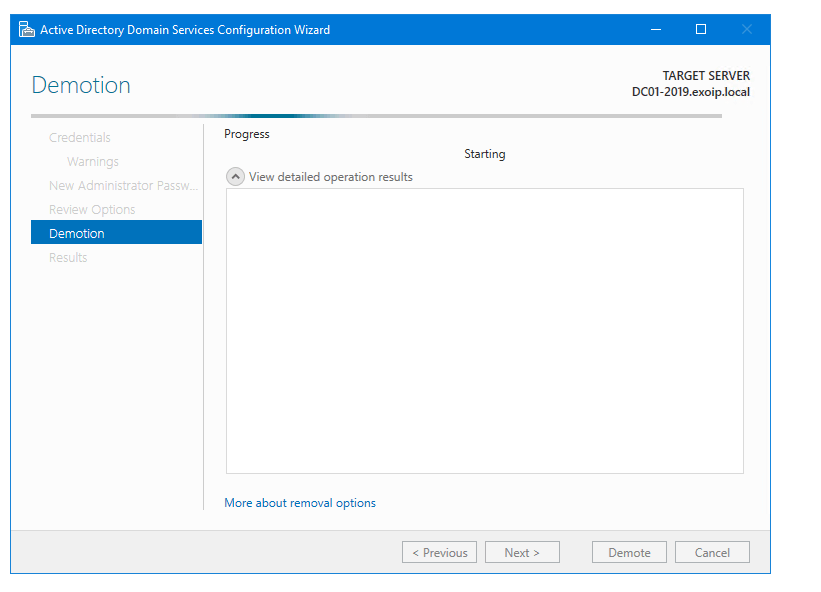
- Once the demote is done, the Windows Server will restart automatically
Step 4. Remove Active Directory Domain Services role
After the restart, you need to remove the ADDS role with the below steps:
- Open Server Manager
- Click on Manage and select Remove Roles and Features
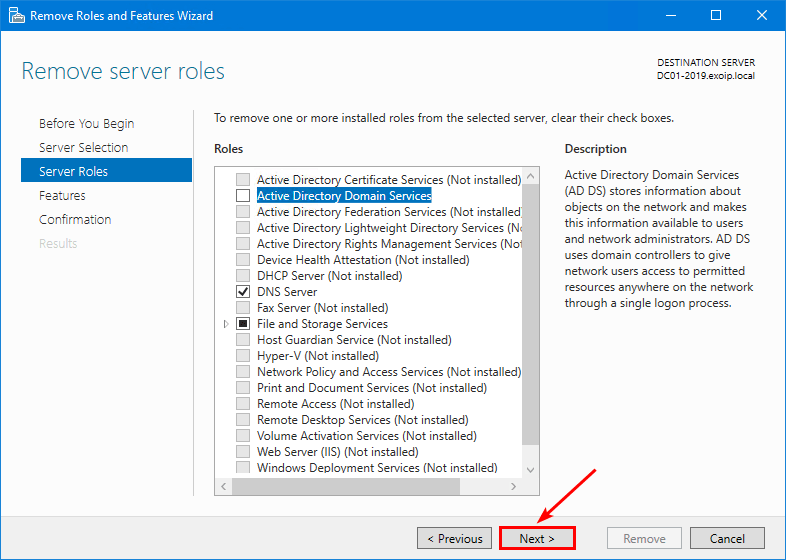
- Select the server from the pool and click Next
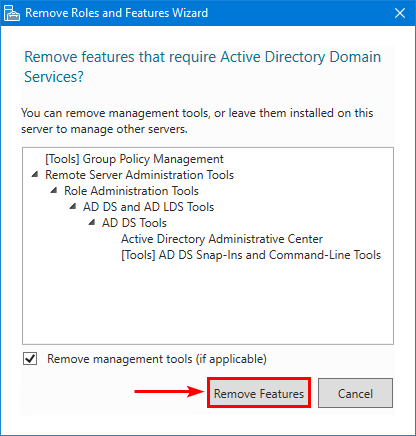
- Clear the checkbox Active Directory Domain Services
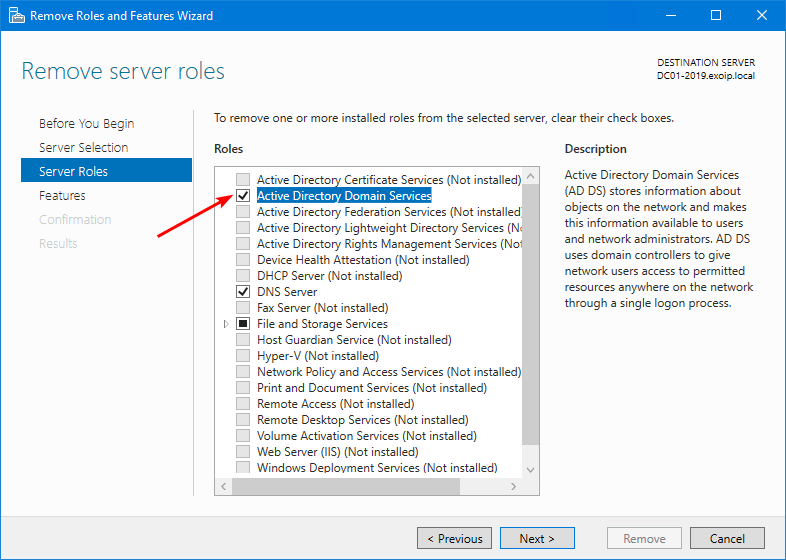
- Click Remove Features
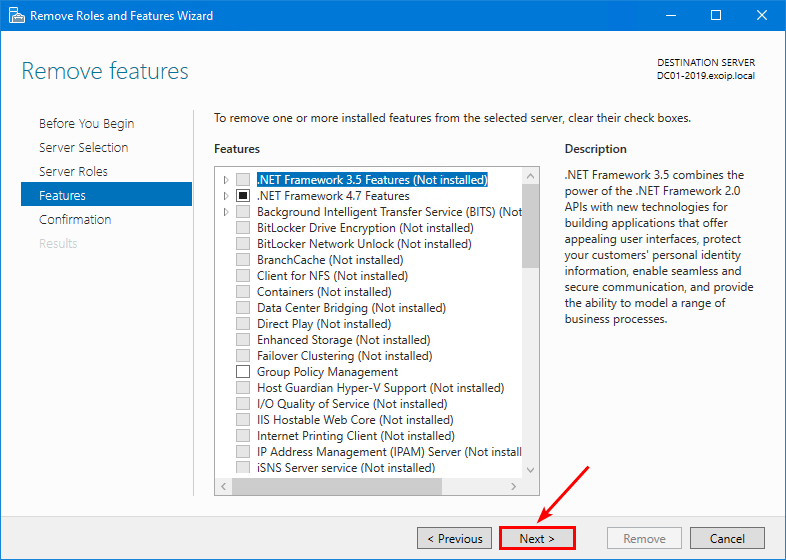
- Click Next
- Click Next
- Check the checkbox Restart the destination server automatically if required.
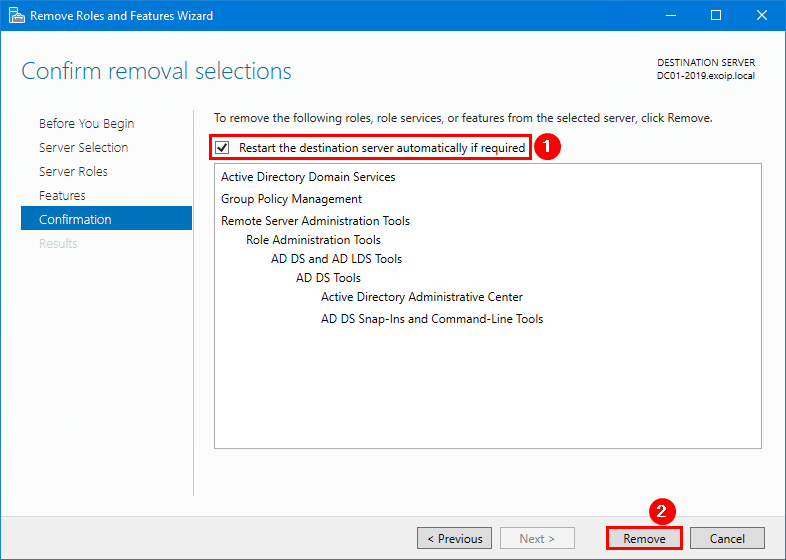
- The removal is in progress
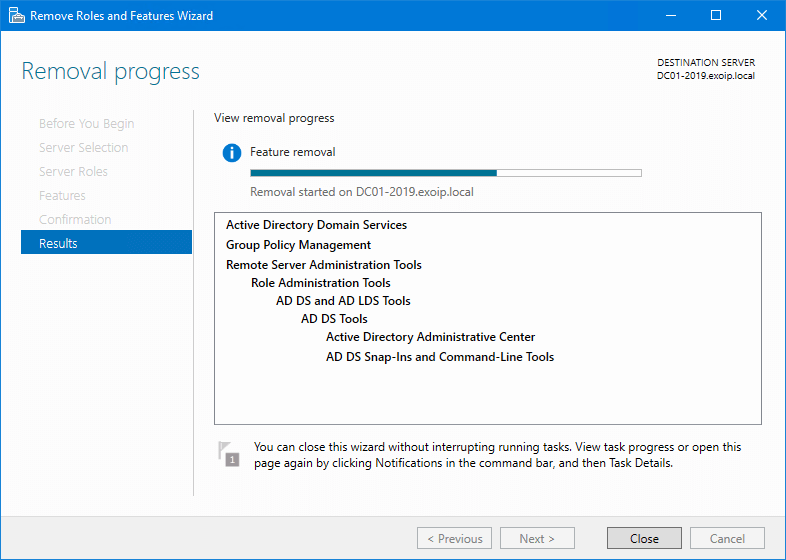
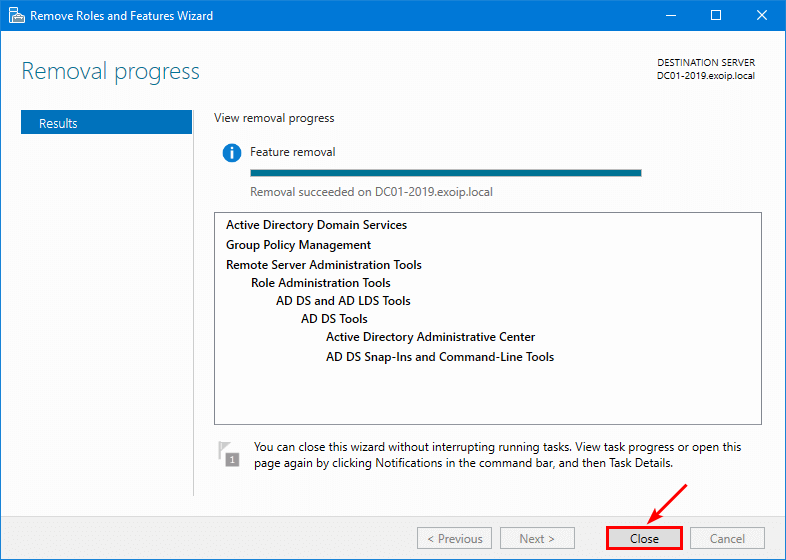
- The Windows Server will restart and proceed further with the removal and finishes. Click Close.
- Shut down the server.
Step 5. Remove AD computer object
Once the server is shutdown, remove the AD computer object with the below steps:
- Sign in on another Domain Controller
- Start Active Directory Users and Computers
- Click in the menu on the Computers container
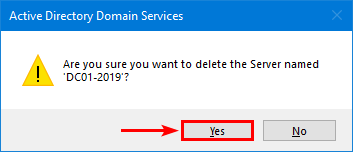
- Right-click the server and click Delete
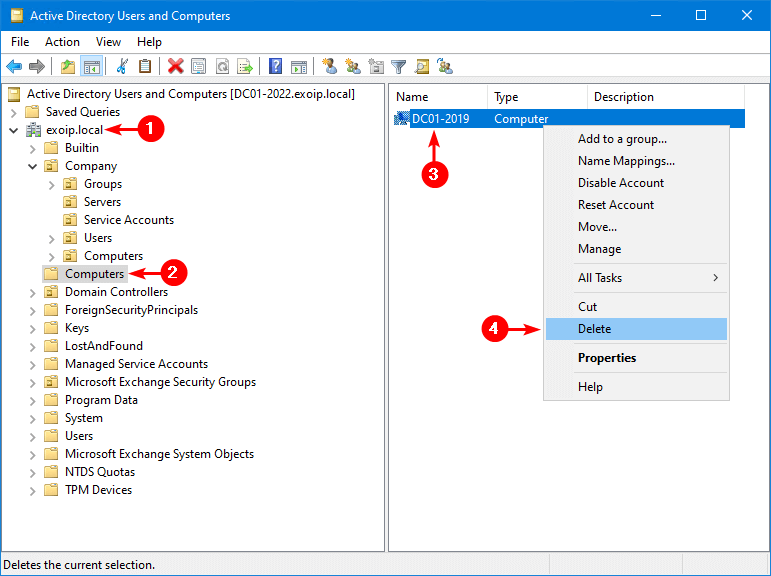
- Confirm with Yes

You successfully deleted the AD computer object.
Step 6. Remove server from Active Directory Sites and Services
Remove the server from Active Directory Sites and Services with the below steps:
- Open Active Directory Sites and Services
- Expand Sites > Default-First-Site-Name > Servers
- Right-click the Server and select Delete

- Confirm with Yes
You successfully deleted the server from Active Directory Domain Services (ADDS).
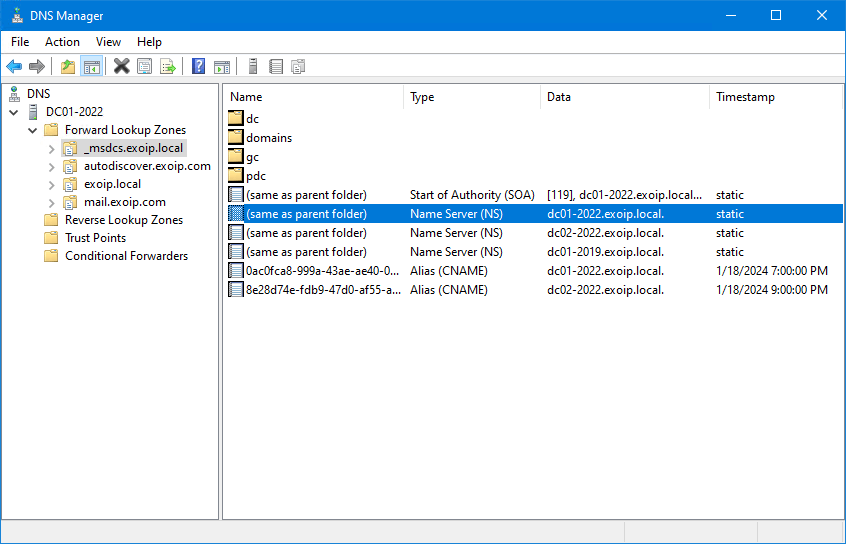
Step 7. Remove DNS leftovers
There are leftovers in DNS after you remove the Domain Controller. Even if you have Setup DNS Aging and Scavenging in Active Directory. That’s because it will remove the stale dynamic DNS records and not the stale static DNS records.
You can go through every zone in DNS Manager and remove the DNS records associated with the old Domain Controller. But that takes time.

The below script will clean up all stale records in DNS. It will go through DNS and search for the old Domain Controller FQDN, Hostname, and IP address. You only have to change lines 1, 2, and 3.
Suppose you kept the same IP address for the new Domain Controller, and only want to check for the old FQDN and Hostname in DNS, uncomment line 3 in the script.
Note: The script has the -WhatIf parameter, so nothing will happen to the environment when you run the script. Once you identify the stale records, remove the -WhatIf parameter and rerun the script. Read more about the script in the article How to Clean up stale DNS records with PowerShell.
$ServerFQDN = "dc01-2019.exoip.local." #Keep the dot (.) at the end
$ServerHostname = "dc01-2019"
$IPAddress = "192.168.1.51"

$Zones = Get-DnsServerZone | Where-Object { $_.ZoneType -eq "Primary" } |
Select-Object -ExpandProperty ZoneName

foreach ($Zone in $Zones) {
    Get-DnsServerResourceRecord -ZoneName $Zone | Where-Object {
        $_.RecordData.IPv4Address -eq $IPAddress -or
        $_.RecordData.NameServer -eq $ServerFQDN -or
        $_.RecordData.DomainName -eq $ServerFQDN -or
        $_.RecordData.HostnameAlias -eq $ServerFQDN -or
        $_.RecordData.MailExchange -eq $ServerFQDN -or
        $_.HostName -eq $ServerHostname
    } | Remove-DnsServerResourceRecord -ZoneName $Zone -Force -WhatIf
}
You successfully did demote a Domain Controller from Active Directory and followed the necessary cleanup steps afterward.
Remove Domain Controller manually
When you can’t start a Domain Controller anymore, you must manually remove it.
The above steps are the proper way to remove a Domain Controller from Active Directory when you can access it. There are situations when the Domain Controller server crashes, and you can’t bring it up anymore. This requires manual removal of the Domain Controller from Active Directory.
Note: Do the below steps if you have Windows Server 2008 R2 and higher.
Go through the below steps to force remove a Domain Controller:
Step 1. Move FSMO roles (optional)
The FSMO roles will automatically move to another Domain Controller when you remove the Domain Controller through the removal wizard. If you would like to move the FSMO roles and not let the uninstall process do it automatically, you can do so.
The DC02-20222 in the below command is the target Domain Controller hostname where we will transfer the FSMO roles too.
Move-ADDirectoryServerOperationMasterRole "DC02-2022" -OperationMasterRole 0,1,2,3,4 -Force -Confirm:$falseStep 2. Force delete Domain Controller computer object
Remove the AD computer object with the below steps:
- Sign in on another Domain Controller
- Open Active Directory Users and Computers
- Click in the menu on the Domain Controllers Organizational Unit
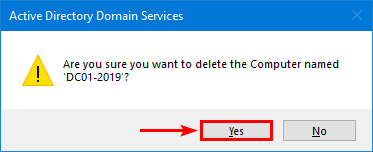
- Right-click the server and click Delete
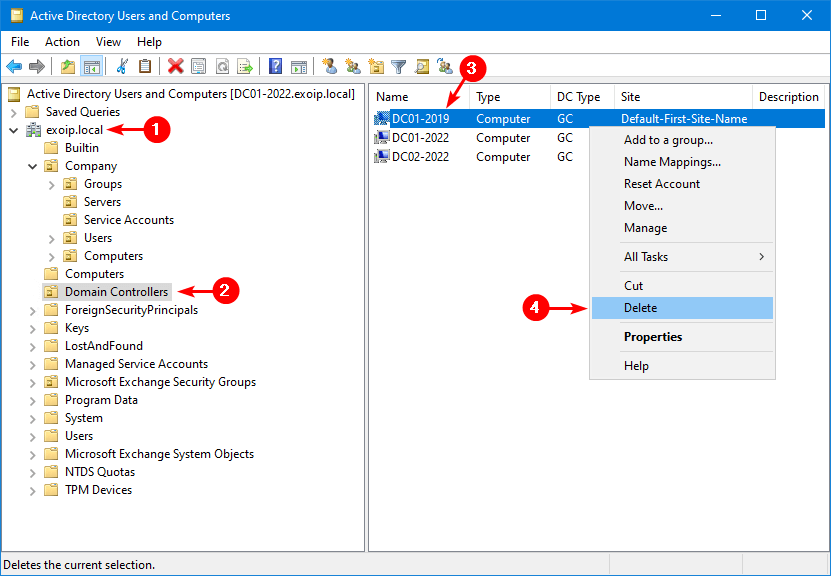
- Select Yes to confirm the computer object deletion
- Check the checkbox Delete this Domain Controller anyway. It’s permanently offline and can no longer be removed using the removal wizard
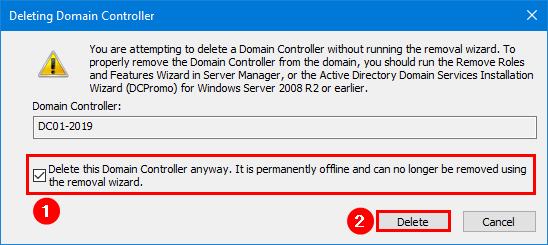
- Confirm with Yes
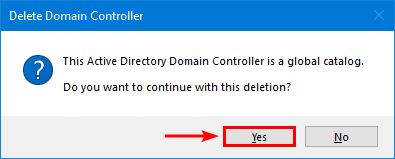
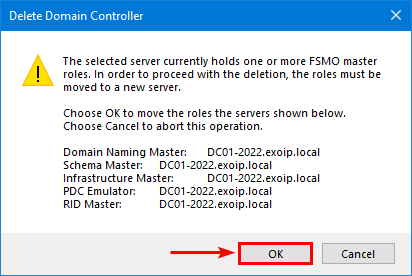
- Select OK if you get a warning message about the FSMO roles that need to be moved to a new server
You successfully deleted the Domain Controller.
Step 3. Remove server from Active Directory Sites and Services
Remove the server from Active Directory Sites and Services with the below steps:
- Open Active Directory Sites and Services
- Expand Sites > Default-First-Site-Name > Servers
- Right-click the Server and select Delete

- Confirm with Yes

You successfully deleted the server from Active Directory Domain Services (ADDS).
Step 4. Remove DNS leftovers
There are leftovers in DNS after you remove the Domain Controller. Even if you have Setup DNS Aging and Scavenging in Active Directory. That’s because it will remove the stale dynamic DNS records and not the stale static DNS records.
You can go through every zone in DNS Manager and remove the DNS records associated with the old Domain Controller. But that takes time.
The below script will clean up all stale records in DNS. It will go through DNS and search for the old Domain Controller FQDN, Hostname, and IP address. You only have to change lines 1, 2, and 3.
Suppose you kept the same IP address for the new Domain Controller, and only want to check for the old FQDN and Hostname in DNS, uncomment line 3 in the script.
Note: The script has the -WhatIf parameter, so nothing will happen to the environment when you run the script. Once you identify the stale records, remove the -WhatIf parameter and rerun the script. Read more about the script in the article How to Clean up stale DNS records with PowerShell.
$ServerFQDN = "dc01-2019.exoip.local." #Keep the dot (.) at the end
$ServerHostname = "dc01-2019"
$IPAddress = "192.168.1.51"

$Zones = Get-DnsServerZone | Where-Object { $_.ZoneType -eq "Primary" } |
Select-Object -ExpandProperty ZoneName

foreach ($Zone in $Zones) {
    Get-DnsServerResourceRecord -ZoneName $Zone | Where-Object {
        $_.RecordData.IPv4Address -eq $IPAddress -or
        $_.RecordData.NameServer -eq $ServerFQDN -or
        $_.RecordData.DomainName -eq $ServerFQDN -or
        $_.RecordData.HostnameAlias -eq $ServerFQDN -or
        $_.RecordData.MailExchange -eq $ServerFQDN -or
        $_.HostName -eq $ServerHostname
    } | Remove-DnsServerResourceRecord -ZoneName $Zone -Force -WhatIf
}
You successfully did force remove a Domain Controller from Active Directory manually and followed the necessary cleanup steps afterward.
Verify Domain Controller health
Now that the old Domain Controller is removed, it’s good to check the new Domain Controller health.
Go through the article Active Directory health check with PowerShell script and create a report. The HTML report will show the status of all the Domain Controllers in Active Directory.
That’s it!
Read more: Rename administrator account with Group Policy »
Conclusion
You learned how to demote a Domain Controller from Active Directory. It’s important that you remove the Domain Controller from the domain using the Remove Roles and Features Wizard in Server Manager. If the Domain Controller is inaccessible, delete it from Active Directory Users and Computers.
Did you enjoy this article? You may also like Change TTL for DNS record in Windows Server. Don’t forget to follow us and share this article.
What Others Are Reading

Hey,
many thanks for this guide.