Azure AD Connect Synchronization Service Manager shows the status completed-export-errors. However, when we want to…
How to connect to Microsoft Graph PowerShell
There are different methods to connect to Microsoft Graph PowerShell to manage your Microsoft 365 and Azure tenant. Which one of the methods suits you depends on what you want. A good example is to connect to Microsoft Graph PowerShell to automate Microsoft Graph PowerShell scripts without user interaction. In this article, you will learn how to connect to Microsoft Graph PowerShell with three different methods.
Table of contents
Prerequisites
You need to Install the Microsoft Graph PowerShell modules on your system.
Start Windows PowerShell as administrator and run the below commands.
Install-Module Microsoft.Graph -ForceInstall-Module Microsoft.Graph.Beta -AllowClobber -ForceImportant: Always install the Microsoft Graph PowerShell and Microsoft Graph Beta PowerShell modules. That’s because some cmdlets are not yet available in the final version, and they will not work. Update both modules to the latest version before you run a cmdlet or script to prevent errors and incorrect results.
Method 1 – How to connect to Microsoft Graph with user interaction
The first method is the method that you will use most of the time because you want to connect to Microsoft Graph with your account and use the commands.
Connect-MgGraph -Scopes "User.Read.All"Verify with your credentials, and you will return to the PowerShell window.
Method 2 – How to connect to Microsoft Graph with Certificate Based Authentication CBA
The second method is to register an application in Azure with the permissions. Let’s go through the below steps and set up Microsoft Graph Certificate Based Authentication for unattended scripts.
1. Register application in Azure
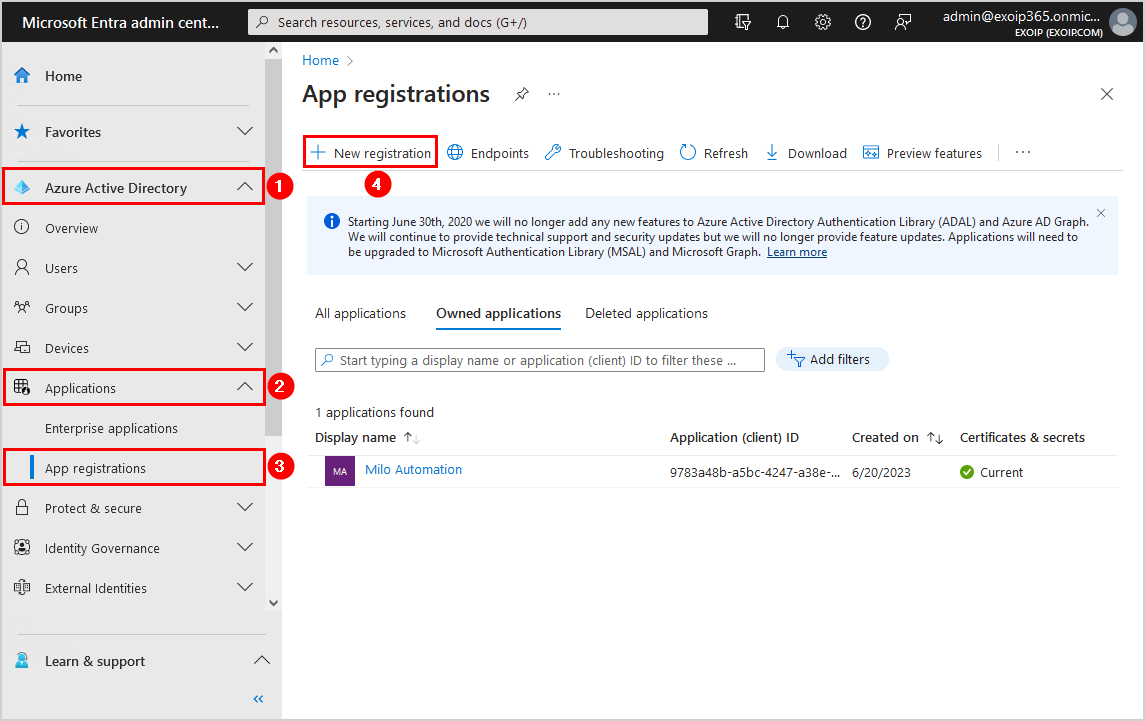
To register an application in Azure AD, follow these steps:
- Sign in to Microsoft Entra admin center
- Expand Azure Active Directory
- Click on Applications > App registrations
- Select New registration
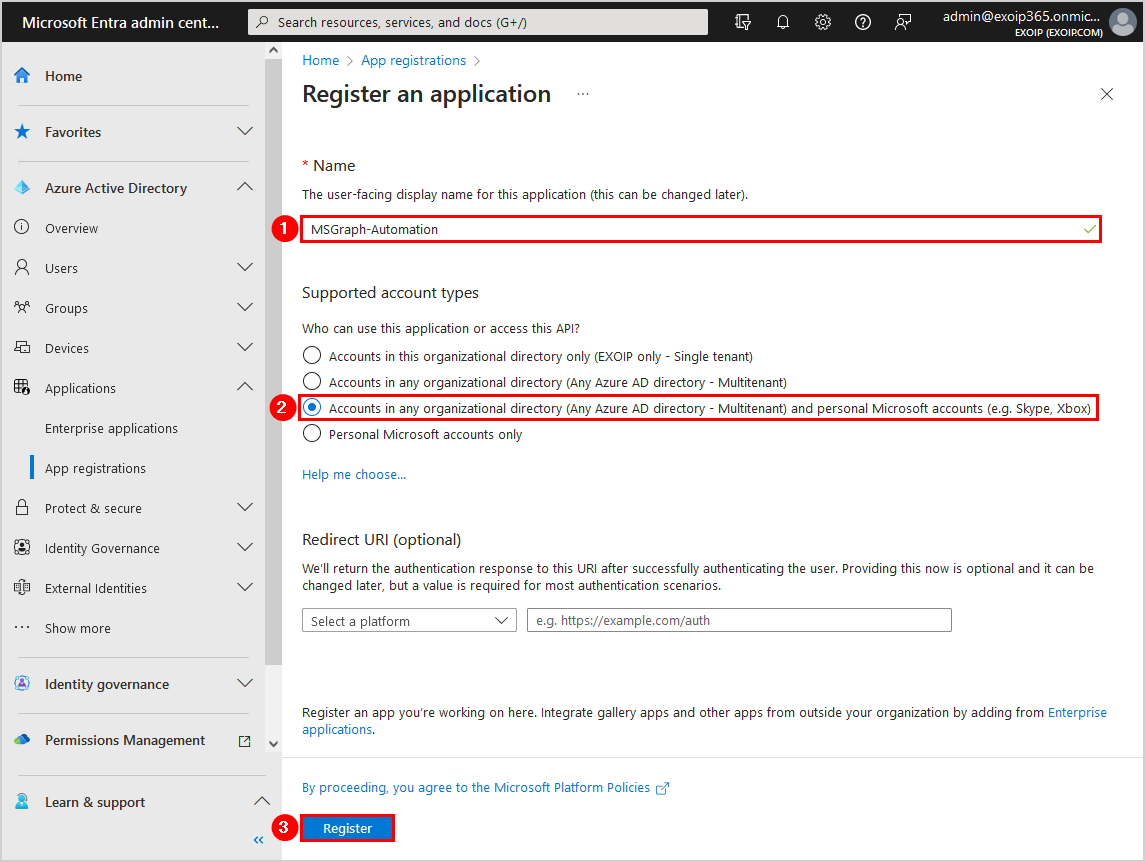
- Fill in the name MSGraph-Automation
- Select Accounts in any organizational directory (Any Azure AD directory – Multitenant) and personal Microsoft accounts
- Click Register
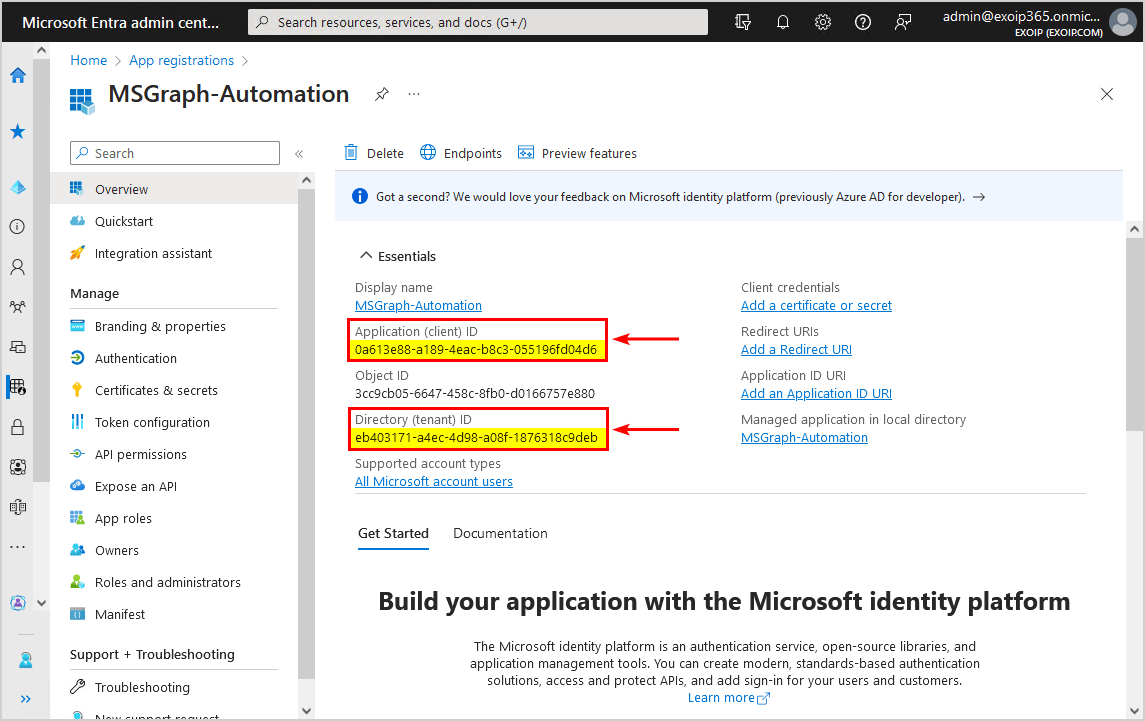
- The MSGraph-Automation application Overview appears
- Copy the Application (client ID) and Directory (tenant) ID and paste it into Notepad because you will need it later when connecting to Microsoft Graph
2. Configure Azure application API permissions
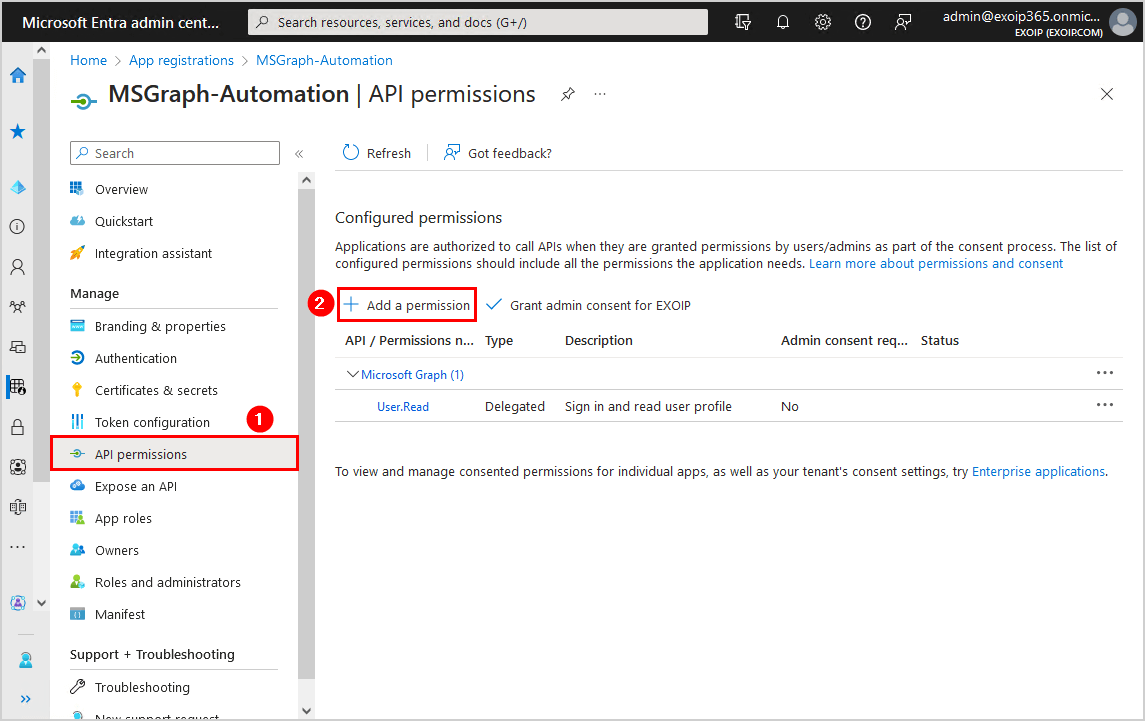
You need to add API permissions to the MSGraph-Automation application you created, by following the below steps:
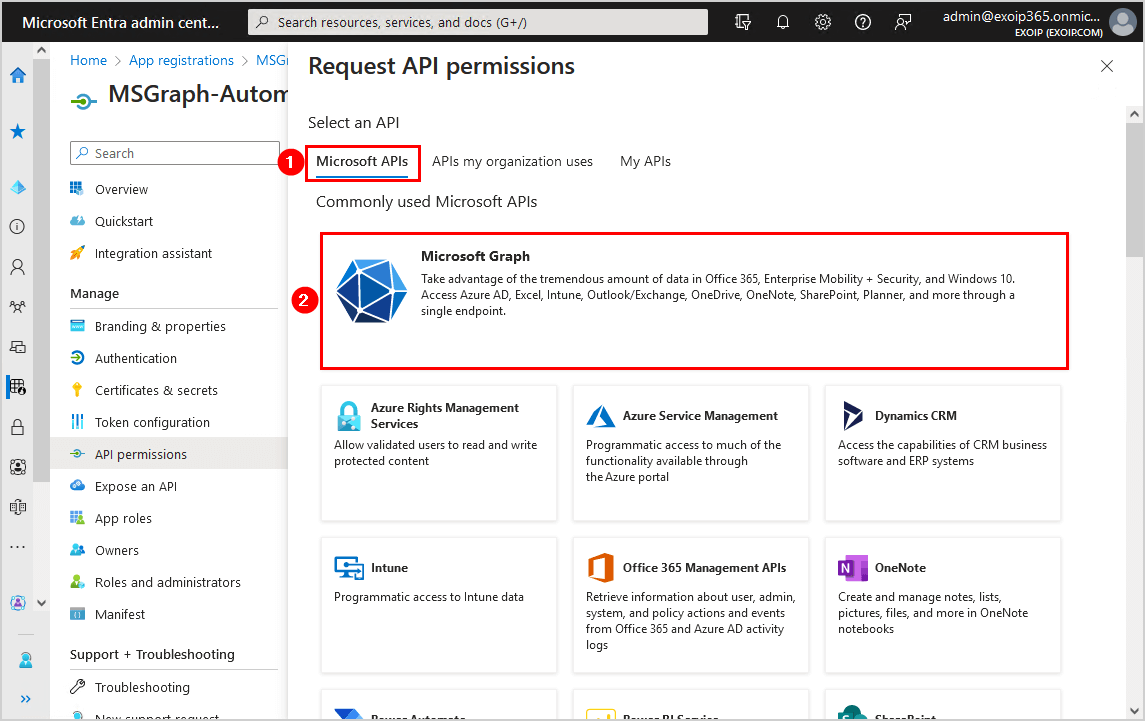
- Click on API permissions > Add a permission
- Select Microsoft APIs > Microsoft Graph
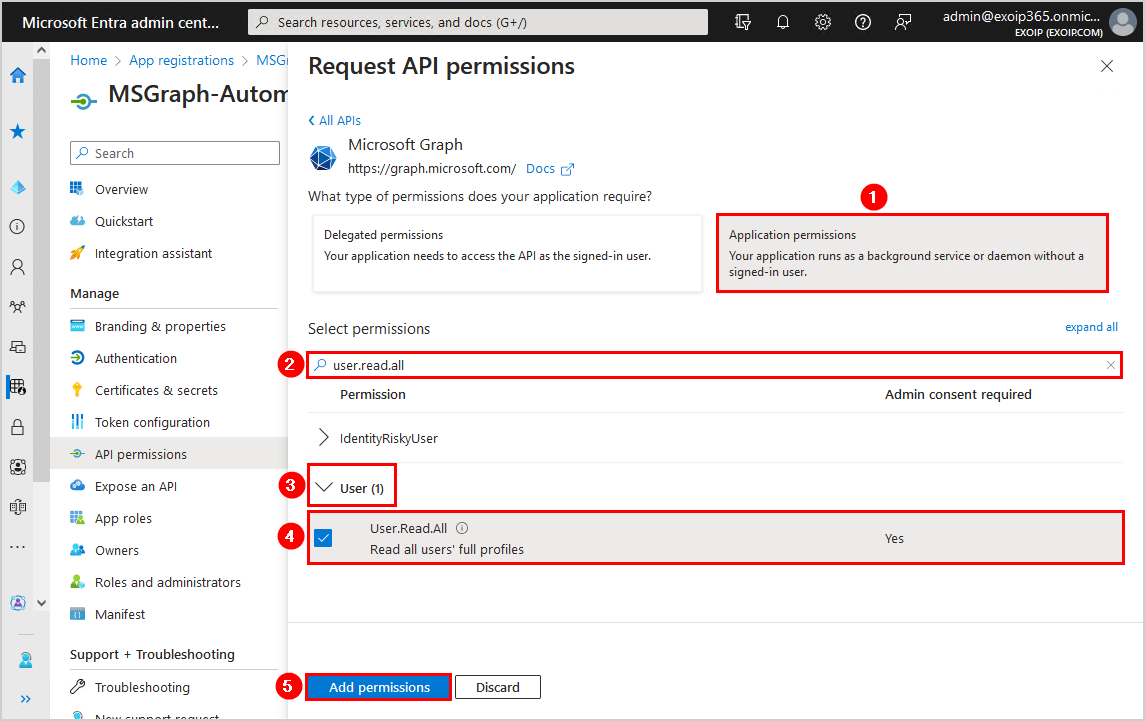
- Select Application permissions
- Search for user.read.all
- Expand User and select User.Read.All
- Click Add permissions
- Click on Grant admin consent
- Click Yes
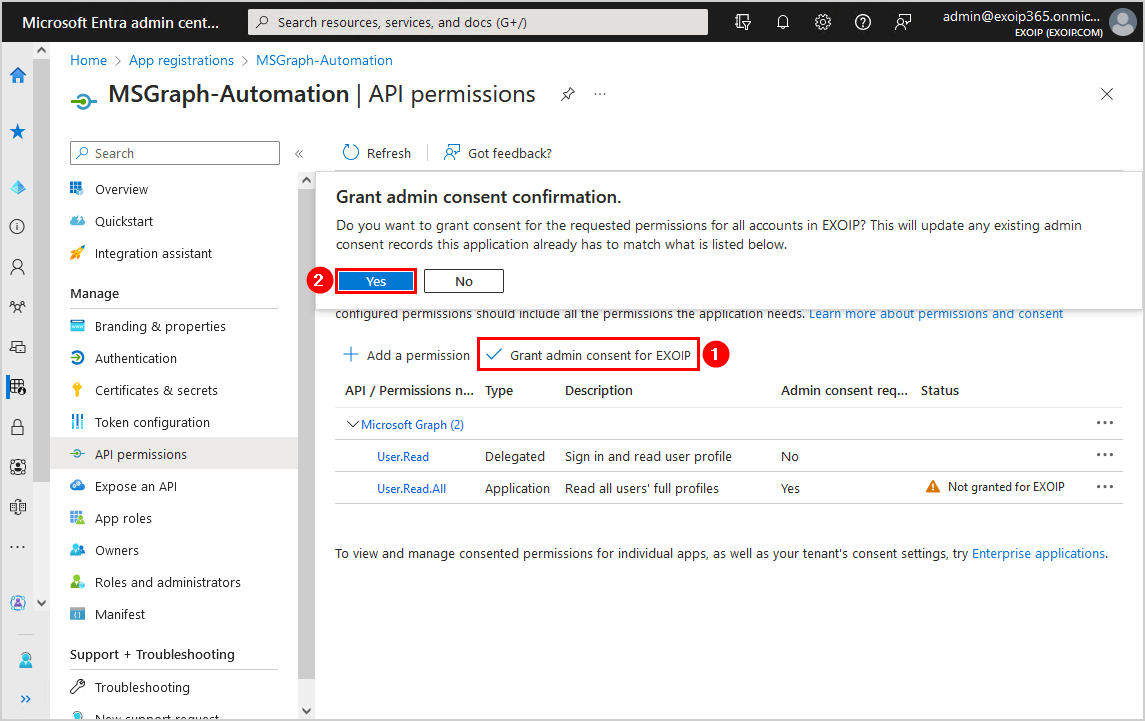
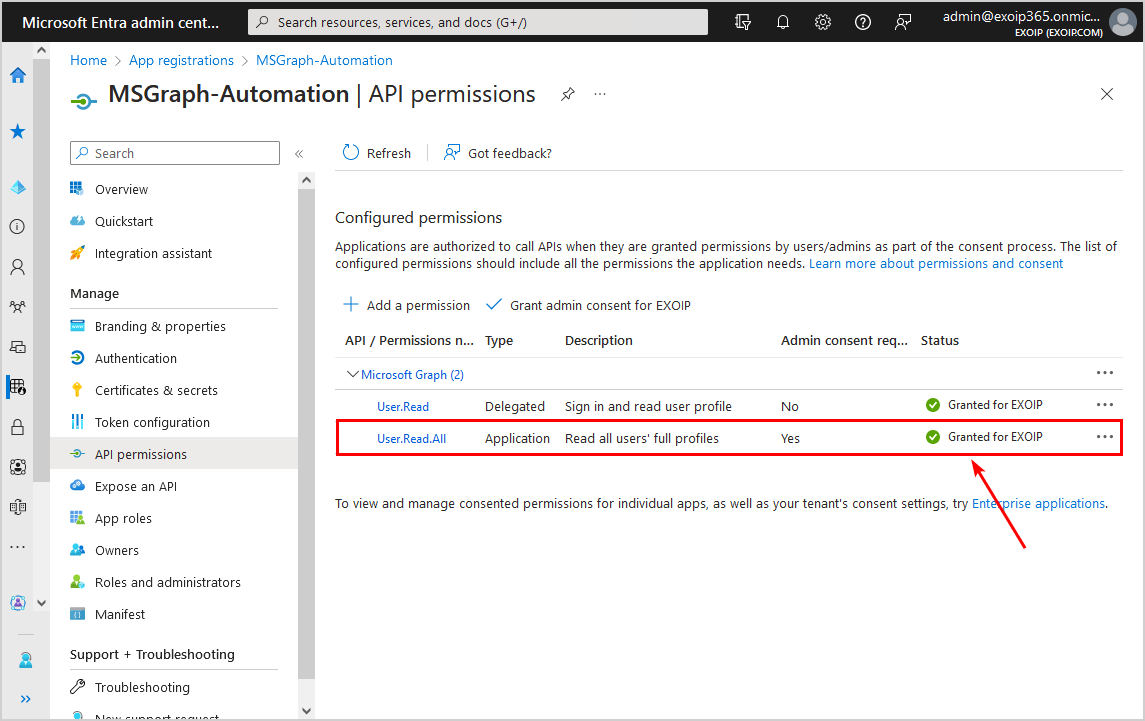
- The status shows a green checkmark
Now that the application is registered and the API permissions are set, we can configure two methods for authentication; Certificate or Client Secret.
3. Generate self-signed certificate
To generate a self-signed certificate, log onto any Windows Server or Desktop with Windows PowerShell. It’s best to generate the certificate on the machine you want to run the unattended PowerShell script.
You need the self-signed certificate later in the steps when you upload it to the application in Azure and if you want to use the certificate on other systems.
Note: By default, self-signed certificates are valid for one year.
In this case, we added 5 years to the self-signed certificate, so we don’t have to renew it yearly.
$mycert = New-SelfSignedCertificate -DnsName "exoip.com" -CertStoreLocation "cert:\LocalMachine\My" -NotAfter (Get-Date).AddYears(5) -KeySpec KeyExchange -FriendlyName "MSGraph Automation"Confirm the certificate and copy the ThumbPrint and paste it into Notepad. You will need it later when connecting to Microsoft Graph.
$mycert | Select-Object -Property Subject,Thumbprint,NotBefore,NotAfterThis is what the output looks like.
Subject      Thumbprint                               NotBefore           NotAfter
-------      ----------                               ---------           --------
CN=exoip.com 384010504F6B495B6D53B1C55DC6C1A7273081AC 7/7/2023 6:14:36 PM 7/7/2028 6:24:36 PM
Export certificate to .cer file.
You will need that .cer file when you upload it to the Azure application, which you will create in the next steps.
$mycert | Export-Certificate -FilePath "C:\temp\MSGraphAutomationCert.cer"The output appears.
    Directory: C:\temp


Mode                LastWriteTime         Length Name
----                -------------         ------ ----
-a----         7/7/2023   6:25 PM            796 MSGraphAutomationCert.cer
Export certificate to .pfx file.
You will need that .pfx file when using another machine to connect with Certificate Based Authentication. Copy or send the .pfx file and install it on other machines.
$mycert | Export-PfxCertificate -FilePath "C:\temp\MSGraphAutomationCert.pfx" -Password $(ConvertTo-SecureString -String "P@ssw0Rd1234" -AsPlainText -Force)The output appears.
    Directory: C:\temp


Mode                LastWriteTime         Length Name
----                -------------         ------ ----
-a----         7/7/2023   6:26 PM           2717 MSGraphAutomationCert.pfx
4. Upload certificate to application
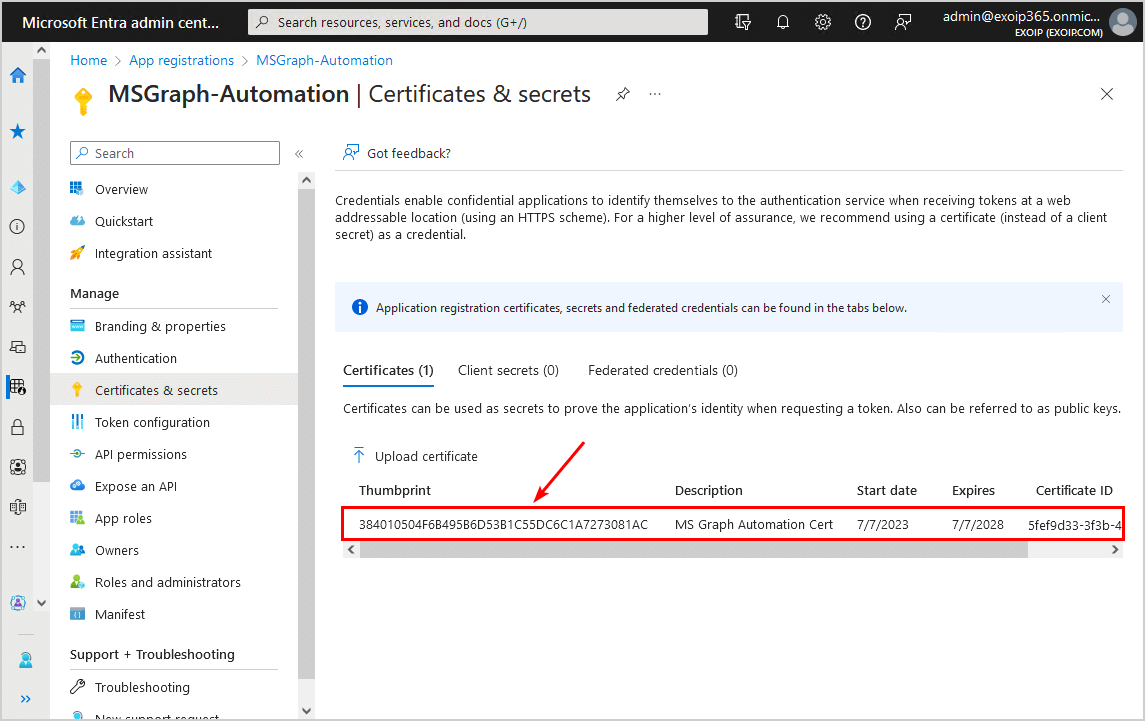
You need to upload the self-signed certificate you created in the previous step:
- Click on Certificates & secrets
- Click Certificates > Upload certificate
- Click on the browse icon and select the self-signed MSGraphAutomationCert.cer file in C:\temp
- Add the description MS Graph Automation Cert
- Click Add

- The certificate appears in the list
Note: Confirm that it has the same certificate thumbprint as the one you exported in the previous step.
5. Connect to Microsoft Graph with Certificate Based Authentication
Start Windows PowerShell ISE or Visual Studio Code and fill in the below three variables to connect to Microsoft Graph PowerShell with Certificate Based Authentication:
- $ClientId
- $TenantId
- $CertificateThumbPrint
# Configuration
$ClientId = "0a613e88-a189-4eac-b8c3-055196fd04d6"
$TenantId = "eb403171-a4ec-4d98-a08f-1876318c9deb"
$CertificateThumbprint = "384010504F6B495B6D53B1C55DC6C1A7273081AC"

# Connect to Microsoft Graph with CBA
Connect-MgGraph -ClientId $ClientId -TenantId $TenantId -CertificateThumbprint $CertificateThumbprint
Now that you are connected to Microsoft Graph PowerShell, run the Get-MgUser cmdlet to retrieve the users.
Get-MgUserMethod 3 – How to connect to Microsoft Graph with Client Secret
The third method is to register an application in Azure with the permissions. Let’s go through the below steps and set up Microsoft Graph Client Secret for unattended scripts.
1. Register an application in Azure
Go through the above step to register an application in Azure if you didn’t do this.
2. Configure Azure application API permissions
Go through the above step to configure Azure application API permissions if you didn’t do this.
3. Add a Client Secret
You need to add a Client Secret that the application uses to prove its identity when requesting a token.
- Click on Certificates & secrets
- Click Client secrets > New client secret
- Give it the description MS Graph Automation Secret
- Select the expires date 730 days (24 months)
- Click Add
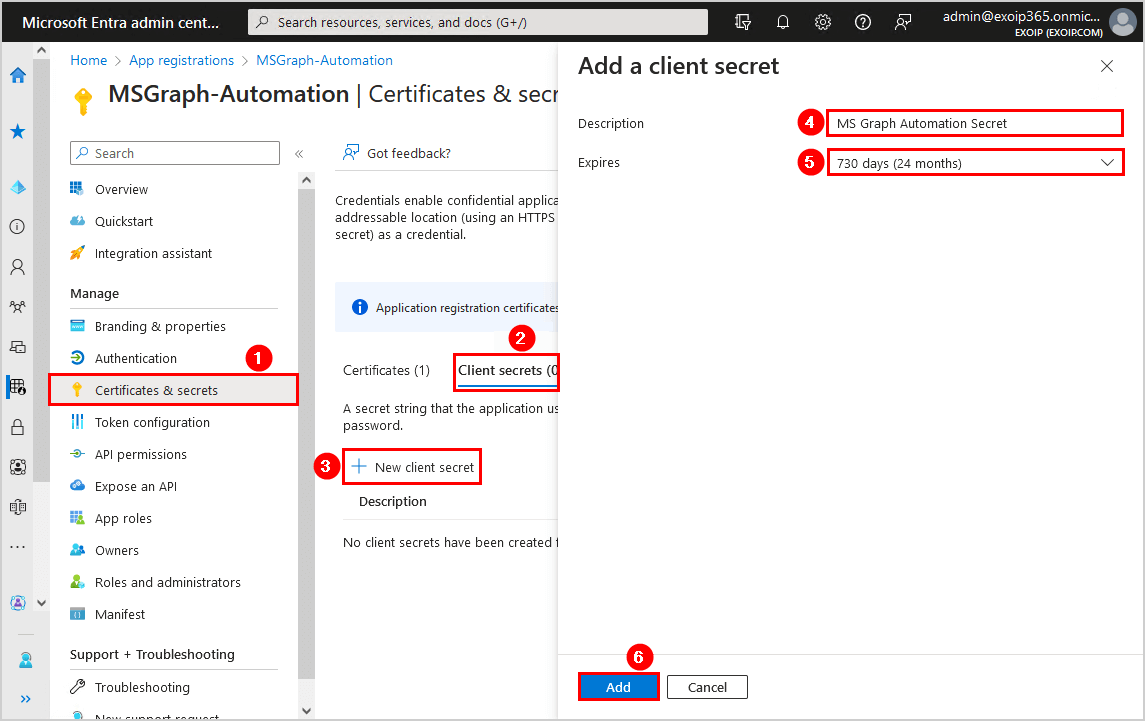
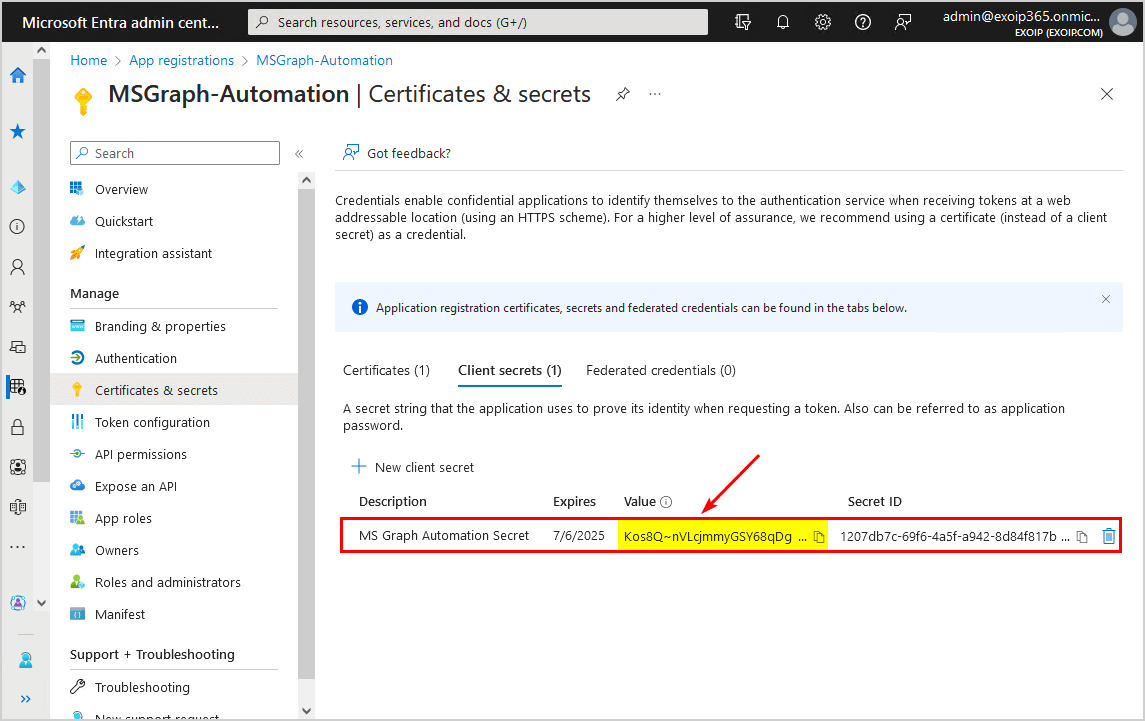
- Copy the Client Secret Value and paste it into Notepad because you will need it in the next step when connecting to Microsoft Graph
4. Connect to Microsoft Graph with Client Secret
Start Windows PowerShell ISE or Visual Studio Code and fill in the below three variables to connect to Microsoft Graph PowerShell with Client Secret:
- $ClientId
- $TenantId
- $ClientSecret
# Configuration
$ClientId = "0a613e88-a189-4eac-b8c3-055196fd04d6"
$TenantId = "eb403171-a4ec-4d98-a08f-1876318c9deb"
$ClientSecret = "Kos8Q~nVLcjmmyGSY68qDg4zbdF8f51L2EM50ac5"

# Convert the client secret to a secure string
$ClientSecretPass = ConvertTo-SecureString -String $ClientSecret -AsPlainText -Force

# Create a credential object using the client ID and secure string
$ClientSecretCredential = New-Object -TypeName System.Management.Automation.PSCredential -ArgumentList $ClientId, $ClientSecretPass

# Connect to Microsoft Graph with Client Secret
Connect-MgGraph -TenantId $tenantId -ClientSecretCredential $ClientSecretCredential
Now that you are connected to Microsoft Graph PowerShell, run the Get-MgUser cmdlet to retrieve the users.
Get-MgUserThat’s it!
Read more: Renew Client Secret in Microsoft Entra ID »
Conclusion
You learned how to connect to Microsoft Graph PowerShell with three methods. Go through the step-by-step guide, and you can authenticate with Microsoft Graph PowerShell with user interaction (method 1) or without user interaction for unattended scripts (method 2/3). All these methods are excellent to work with.
Did you enjoy this article? You may also like Create Microsoft Entra ID Users from CSV with PowerShell. Don’t forget to follow us and share this article.
This Post Has 0 Comments