We have to export an Office 365 mailbox to PST file. An excellent way to…
Convert shared mailbox to user mailbox with PowerShell
The fastest way to convert the shared mailbox to user mailbox in Exchange Server/Exchange Online is with PowerShell. That’s because you can do the conversion for a single user or multiple users. In this article, you will learn how to convert the user mailbox to shared mailbox with PowerShell.
Table of contents
Why convert from shared mailbox to user mailbox?
Why you want to convert a shared mailbox to user mailbox:
- A shared mailbox is created, but it should be a user mailbox.
- Access to the user mailbox with credentials.
Note: It’s impossible to convert the shared mailbox to user mailbox in Exchange admin center on-premises. This is only possible for cloud mailboxes in Microsoft 365 Exchange admin center. Don’t panic, as PowerShell will get the job done.
Important: If your organization uses an Exchange Hybrid environment, you need to manage your mailboxes using the on-premises Exchange management tools. Follow the article Convert user mailbox to shared mailbox in Exchange Hybrid.
Suppose you want an export of all the mailboxes, read the article Get mailbox size of all users in Exchange with PowerShell.
Convert to different mailbox type
Do you want to set the mailbox to a different type? The Type parameter specifies the type of the mailbox. Choose one of the valid values:
- Regular (this article)
- Room
- Equipment
- Shared
Convert shared mailbox to user mailbox
Run Exchange Management Shell as administrator. Run the Set-Mailbox cmdlet and specify the shared mailbox. You can fill in the display name or email address of the mailbox. You will not get an output showing it succeeded after running the cmdlet.
[PS] C:\>Set-Mailbox "Info" -Type Regular

[PS] C:\>Set-Mailbox "info@exoip.com" -Type Regular
Verify converted mailbox type
How do you know if converting the shared mailbox to user mailbox worked? Run the Get-Mailbox cmdlet, and it will show the output. It will show as UserMailbox, as seen below.
[PS] C:\>Get-Mailbox -Identity "Info" | Format-Table Name, RecipientTypeDetails

Name RecipientTypeDetails
---- --------------------
Info UserMailbox


[PS] C:\>Get-Mailbox -Identity "Info@exoip.com" | Format-Table Name, RecipientTypeDetails

Name RecipientTypeDetails
---- --------------------
Info UserMailbox
Everything looks great!
Bulk convert shared mailbox to user mailbox
There are a couple of methods to bulk convert shared mailbox to user mailbox:
- CSV file
- TXT file
Bulk convert shared mailbox to user mailbox with CSV file
Converting the shared mailbox to user mailbox with a CSV file by following the below steps.
1. Prepare user mailbox CSV file
Start Microsoft Excel and write Email in the left top cell (A1). Write below cell A1 all the shared mailboxes that you like to convert to user mailbox. Write the display name or the email address of the shared mailbox. Both will work when converting the shared mailbox.
In our example, the mailboxes display name is written.
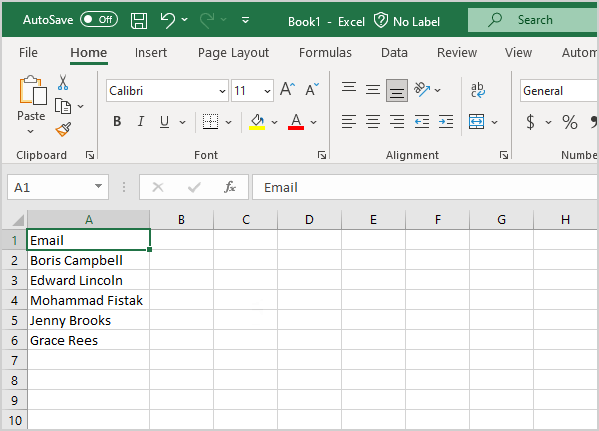
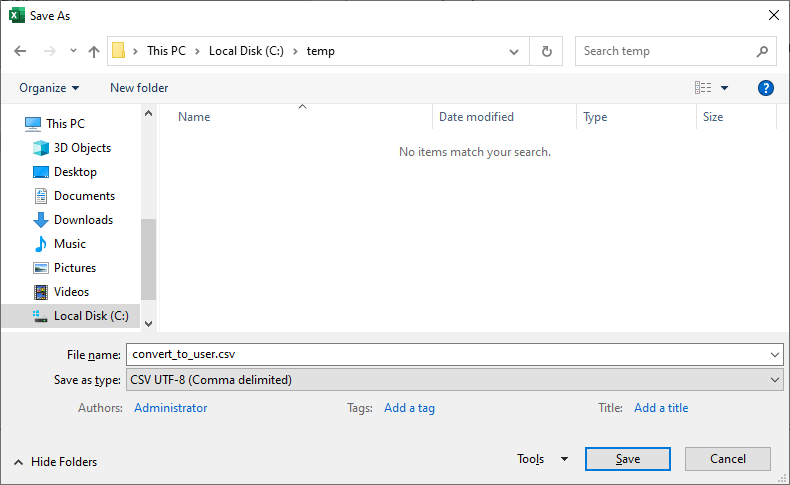
Save it as a CSV file in the folder temp on the (C:) drive with the name convert_to_user.csv.
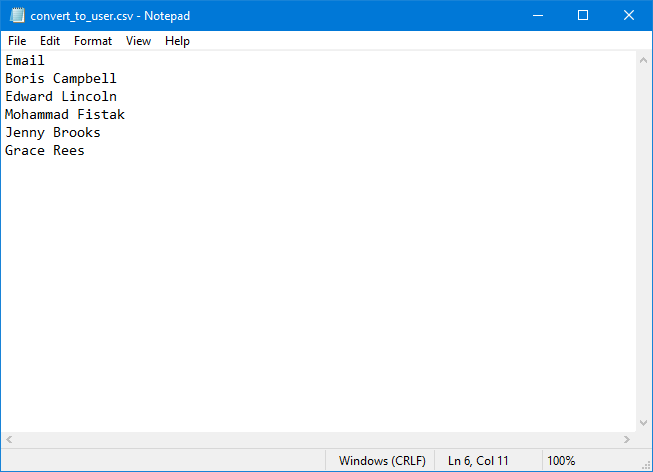
Open the CSV file with your favorite text editor. For example, the text editor Notepad and have a look that everything looks great.
2. Check content in CSV file
Run Exchange Management Shell as administrator. Run the Import-Csv cmdlet to verify that the content is readable in PowerShell.
[PS] C:\>Import-Csv "C:\temp\convert_to_user.csv"

Email
-----
Boris Campbell
Edward Lincoln
Mohammad Fistak
Jenny Brooks
Grace Rees
You can check the current mailbox type from the CSV file. In our example, different types of mailboxes are shown.
[PS] C:\>Import-Csv "C:\temp\convert_to_user.csv" | foreach {Get-Mailbox -Identity $_.Email} | ft Name, RecipientTypeDetails

Name            RecipientTypeDetails
----            --------------------
Boris Campbell         SharedMailbox
Edward Lincoln         SharedMailbox
Mohammad Fistak        SharedMailbox
Jenny Brooks           SharedMailbox
Grace Rees               UserMailbox
Filter only on the shared mailbox because these are the mailboxes that we want to convert to user mailbox.
[PS] C:\>Import-Csv "C:\temp\convert_to_user.csv" | foreach {Get-Mailbox -Identity $_.Email | Where-Object {$_.RecipientTypeDetails -eq "SharedMailbox"}} | ft Name, RecipientTypeDetails

Name            RecipientTypeDetails
----            --------------------
Boris Campbell         SharedMailbox
Edward Lincoln         SharedMailbox
Mohammad Fistak        SharedMailbox
Jenny Brooks           SharedMailbox
3. Convert mailboxes to user mailbox with PowerShell script
Time to bulk convert the shared mailbox to user mailbox. Run the below PowerShell script to import the CSV and bulk set mailboxes as user.
The PowerShell script will show you the following:
- If a mailbox is not found
- Already is a user mailbox
- Converted to user mailbox successfully
$MailboxNames = "C:\temp\convert_to_user.csv"

Import-Csv $MailboxNames | foreach {
    $Email = $_.Email
    $Mailbox = Get-Mailbox -Identity $Email -ErrorAction SilentlyContinue

    if ($Mailbox -eq $null) {
        Write-Host "Mailbox '$Email' not found." -ForegroundColor Red
    }
    elseif ($Mailbox.RecipientTypeDetails -eq "UserMailbox") {
        Write-Host "Mailbox '$Email' is already a user mailbox." -ForegroundColor Cyan
    }
    else {
        Set-Mailbox -Identity $Email -Type Regular -ErrorAction SilentlyContinue

        $UpdatedMailbox = Get-Mailbox -Identity $Email

        if ($UpdatedMailbox.RecipientTypeDetails -eq "UserMailbox") {
            Write-Host "Mailbox '$Email' converted to a user mailbox successfully." -ForegroundColor Green
        }
        else {
            Write-Host "Failed to convert mailbox '$Email' to a user mailbox." -ForegroundColor Red
        }
    }
}
4. Verify converted mailbox type
Verify that all the user mailbox are converted to type user mailbox.
[PS] C:\>Import-Csv "C:\temp\convert_to_user.csv" | foreach {Get-Mailbox -Identity $_.Email} | ft Name, RecipientTypeDetails

Name            RecipientTypeDetails
----            --------------------
Boris Campbell           UserMailbox
Edward Lincoln           UserMailbox
Mohammad Fistak          UserMailbox
Jenny Brooks             UserMailbox
If you like to use a TXT file instead of a CSV file, read the next part.
Bulk convert shared mailbox to user mailbox with TXT file
Converting the shared mailbox to user mailbox with a TXT file by following the below steps.
1. Prepare user mailbox TXT file
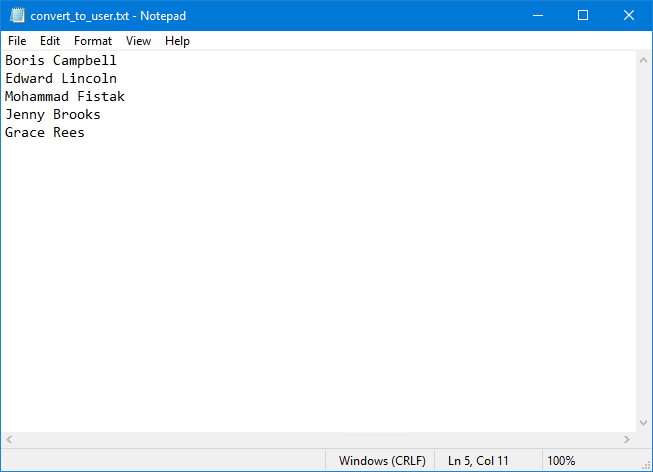
Place the display names or email addresses of the user mailbox in a text file. Save the text file in C:\temp as convert_to_user.txt. This time Email is not showing at the top. That’s because we don’t need it.
2. Check content in TXT file
Run the Get-Content cmdlet, including Get-Mailbox cmdlet, to check the current mailbox type.
[PS] C:\>Get-Content "C:\temp\convert_to_user.txt" | Get-Mailbox | Format-Table Name, RecipientTypeDetails

Name            RecipientTypeDetails
----            --------------------
Boris Campbell         SharedMailbox
Edward Lincoln         SharedMailbox
Mohammad Fistak        SharedMailbox
Grace Rees             SharedMailbox
3. Convert mailboxes to user mailbox with PowerShell script
Time to bulk convert the shared mailbox to user mailbox. Run the below PowerShell script to import the TXT file and bulk set mailboxes as user.
The PowerShell script will show you the following:
- If a mailbox is not found
- Already is a user mailbox
- Converted to user mailbox successfully
$MailboxNames = Get-Content "C:\temp\convert_to_user.txt"

foreach ($MailboxName in $MailboxNames) {
    $Mailbox = Get-Mailbox -Identity $MailboxName -ErrorAction SilentlyContinue

    if ($Mailbox -eq $null) {
        Write-Host "Mailbox '$MailboxName' not found." -ForegroundColor Red
    }
    elseif ($Mailbox.RecipientTypeDetails -eq "UserMailbox") {
        Write-Host "Mailbox '$MailboxName' is already a user mailbox." -ForegroundColor Cyan
    }
    else {
        Set-Mailbox -Identity $MailboxName -Type Regular -ErrorAction SilentlyContinue

        $UpdatedMailbox = Get-Mailbox -Identity $MailboxName

        if ($UpdatedMailbox.RecipientTypeDetails -eq "UserMailbox") {
            Write-Host "Mailbox '$MailboxName' converted to user mailbox successfully." -ForegroundColor Green
        }
        else {
            Write-Host "Failed to convert mailbox '$MailboxName' to user mailbox." -ForegroundColor Red
        }
    }
}
4. Verify converted mailbox type
It’s good to have a final check and verify that it shows the type user mailbox.
[PS] C:\>Get-Content "C:\temp\convert_to_user.txt" | Get-Mailbox | Format-Table Name, RecipientTypeDetails

Name            RecipientTypeDetails
----            --------------------
Boris Campbell           UserMailbox
Edward Lincoln           UserMailbox
Mohammad Fistak          UserMailbox
Grace Rees               UserMailbox
That’s it!
Which method did you use to convert the shared mailbox to user mailbox?
Conclusion
You learned how to convert shared mailbox to user mailbox with PowerShell. Start Exchange Management Shell or Exchange Online PowerShell and run the commands. After that, verify the RecipientTypeDetails appear as UserMailbox.
It’s faster to set the mailbox in bulk instead of running the set mailbox one by one. It’s good to know that you can bulk convert shared mailbox to user mailbox with a CSV file or TXT file. Both methods work great.
Did you enjoy this article? You may also like Get shared mailbox size in Office 365 with PowerShell. Don’t forget to follow us and share this article.
This Post Has 0 Comments