You like to show the week number in Outlook 2016 calendar. Sometimes you want to…
How to automate mailbox configuration in Outlook
Users start Outlook for the first time and must go through the Outlook wizard to set up their email account. This should not be the case, and the users should automatically sign into their Outlook with minimal user interaction. In this article, you will learn how to automate the mailbox configuration, also known as the Outlook profile configuration, for mailboxes in Exchange Server and Exchange Online.
Table of contents
Outlook new setup wizard
Let’s look at how it looks without setting up the automatic Outlook profile configuration.
- The user starts Outlook for the first time
- The email address is filled in, or the user has to fill in the email address
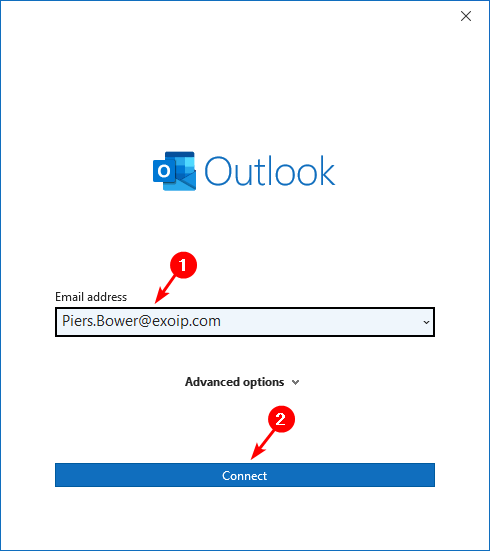
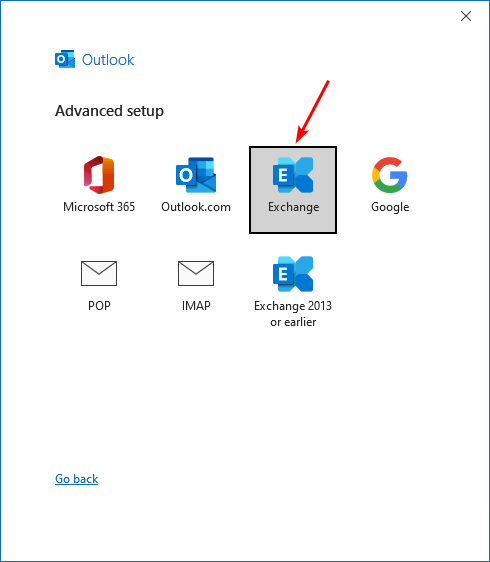
- Choose the email service
Note: Automating the Outlook profile creation works for Microsoft 365, Exchange, and Exchange 2013 or earlier.
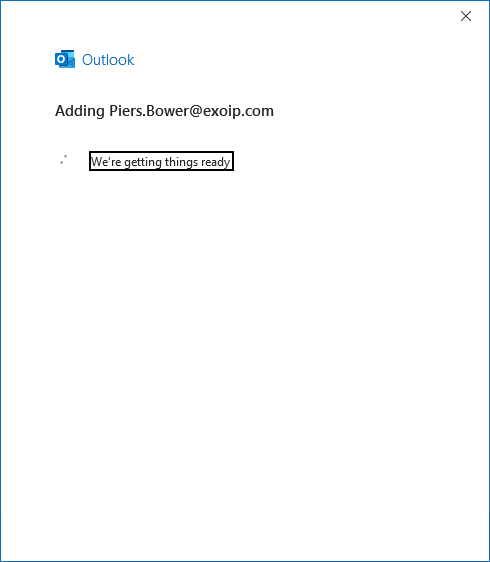
- Outlook is adding the account
- The account is successfully added
- Click Done
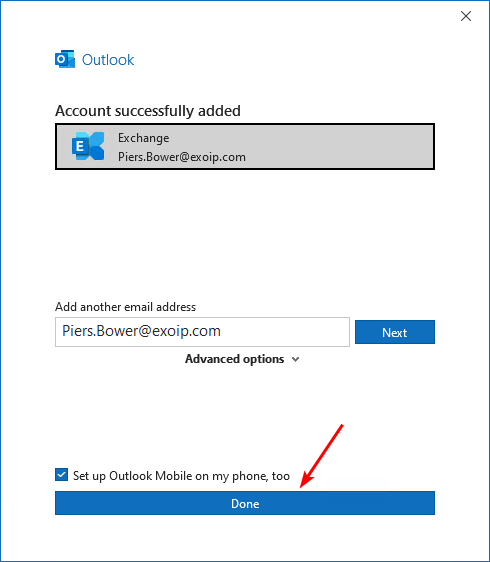
Many clicks before the Outlook profile is set up for the users. Something that you should automate and make it easier for the user.
Users should not have to see the Outlook setup wizard when they use Outlook for the first time. Everything should happen automatically, and Outlook needs to start successfully.
Let’s look at how to automate the Outlook configuration when starting Outlook for the first time.
How to configure Outlook automatic profile creation
The ZeroConfigExchange registry key will automatically configure the Outlook profile based on Active Directory’s primary SMTP address policy. Using Autodiscover, Outlook finds a new connection point made up of the user’s mailbox GUID + @ + the domain portion of the user’s primary SMTP address.
The automatic profile creation works for:
- Exchange Server on-premises
- Exchange Hybrid
- Exchange Online (Microsoft 365)
To automate the Outlook profile creation, follow the below steps.
Create a GPO
Sign in to your Domain Controller, create a new GPO, and link the GPO to the user group.
Create three registry keys
Edit the new GPO and create 3 registry keys:

To better understand what you need to fill in for every registry key, let’s look at them one by one.
Important: The number in the key path represents the Outlook version.
16.0 = 2016/2019/2021/365
15.0 = 2013
14.0 = 2010
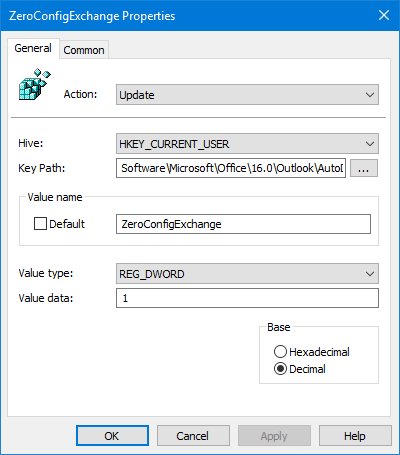
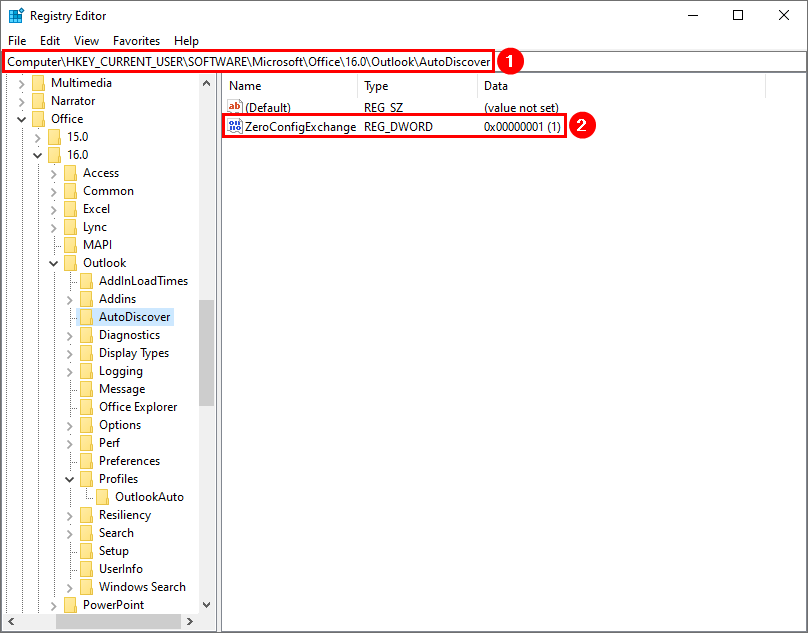
This is what the registry keys look like for ZeroConfigExchange:
- Hive: HKEY_CURRENT_USER
- Key Path: Software\Microsoft\Office\16.0\Outlook\AutoDiscover
- Value name: ZeroConfigExchange
- Value type: REG_DWORD
- Value data: 1
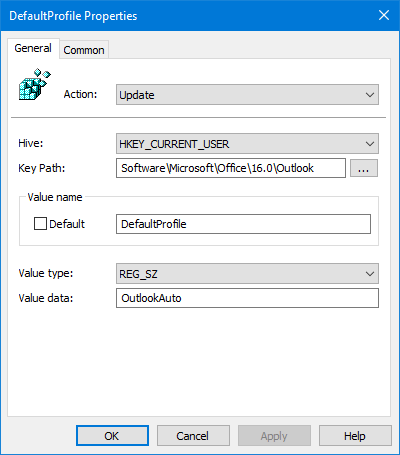
This is what the registry keys look like for DefaultProfile:
- Hive: HKEY_CURRENT_USER
- Key Path: Software\Microsoft\Office\16.0\Outlook
- Value name: DefaultProfile
- Value type: REG_SZ
- Value data: OutlookAuto
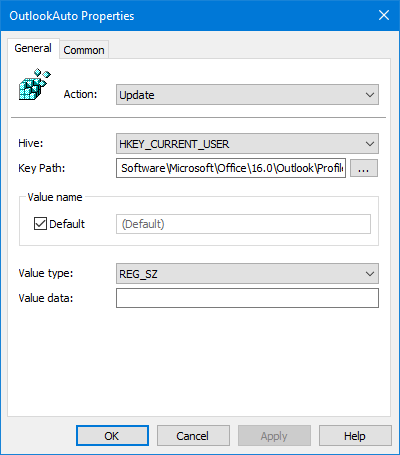
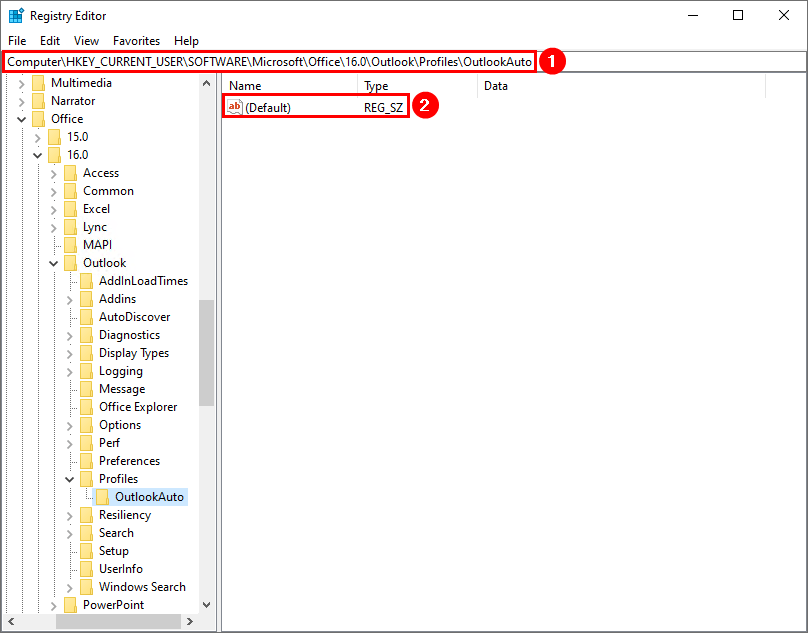
This is what the registry keys look like for OutlookAuto:
- Hive: HKEY_CURRENT_USER
- Key Path: Software\Microsoft\Office\16.0\Outlook\Profiles\OutlookAuto
- Value name: Default
- Value type: REG_SZ
- Value data: empty
Verify registry keys
Start Command Prompt and run gpupdate /force to retrieve the new GPO with the added registry keys. Next, sign off the user and sign in again. Or reboot the machine to have the changes take effect.
Start Registry Editor on the computer and check that the three registry keys are added.
DefaultProfile with the data OutlookAuto.
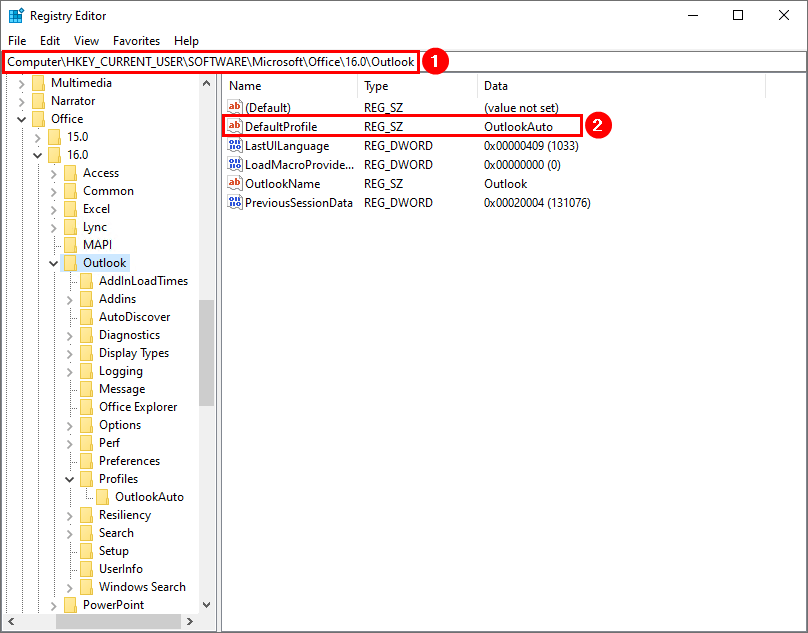
ZeroConfigExchange with the data 1.
OutlookAuto registry key added with the Default name.
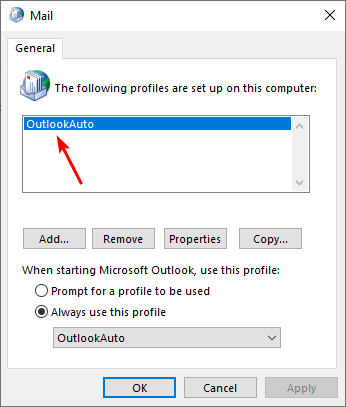
Go to Control Panel and click on Mail (Microsoft Outlook). Verify that you see the OutlookAuto profile
Note: Suppose you remove the Outlook profile. Run gpupdate /force or sign off and sign in with the user so a couple of the registry keys get added again before you start Outlook.
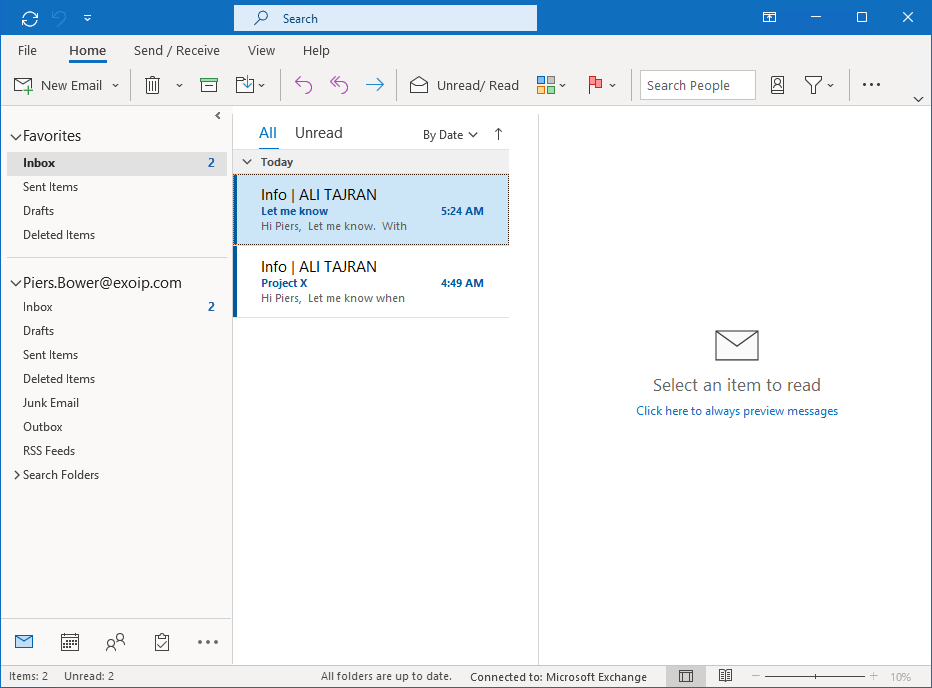
How it works after automating Outlook profile creation
After implementing the above three registry keys, let’s see how it looks when the user starts Outlook for the first time.
Start Outlook and it will load the mailbox.
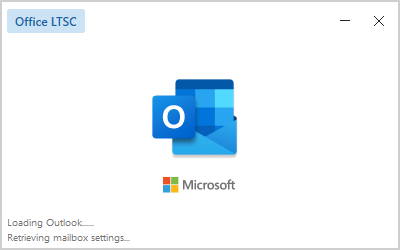
There are no steps involved to set up Outlook for the user. Everything works seamlessly.
That’s it!
Read more: Prevent Outlook from connecting to Office 365 »
Conclusion
You learned how to automate mailbox configuration in Outlook. Set the registry keys with a GPO and check they are set correctly on the computer. Start Outlook and verify that it signs in automatically without showing the Outlook setup wizard.
Did you enjoy this article? You may also like Mark all messages as read in Outlook. Don’t forget to follow us and share this article.
@Epigraphe: Use Action: Create instead of Update to have the registry setting applied only when it’s not created yet.
@Greggo: In Scopy > Security Filtering of a GPO you can set the useraccount the policy will be applied to (remove Authenticated Users here, but allow this group to read the policy via Delegation > Advanced > Add Authenticated Users, Allow Read)
Thanks and good stuff. Question? Can this be applied to everyone in my organization. I have all mailboxes in the cloud. How can I test for only one user first before deploying for other users “Production”.
Please can you explain this further “This can only be solved by forcing old users to assign their old profile.” not clear how would you force old user to assign their old profile? Will have to contact each user or help each user to do this. Can it be done from the back end without interreacting with the users to do this and how can this be done from the backend. Thanks
This policy also works for mailboxes that have already been created. That is, if the user worked with mail before enabling the policy, then a new profile will also be created for him. Specifically, in my case, the old mail was not pulled into the new profile. This can only be solved by forcing old users to assign their old profile.