You want to get the Offline Address Book with Exchange Online PowerShell. But, the following…
Update MX records to Office 365
In the previous article, we did configure permissions in Exchange Hybrid. This time we will look at how to change the MX records to point to Office 365. That way, the mail will arrive first to Office 365, and Exchange Online Protection (EOP) will protect the organization against spam, malware, and other email threats.
Table of contents
Introduction
When we add a domain in Office 365, it tells us what we should update the domain’s MX records to. That’s for the incoming emails from the internet to be delivered to Exchange Online.

Since this domain adding step occurs before the hybrid configuration is in place, we didn’t touch the MX records at that time. So, normal inbound mail flow to the Exchange on-premises organization will continue interrupted.
Now that we have the hybrid configuration in place with its secure hybrid mail flow, and want to cutover mail flow to Office 365, let’s take that value and update the MX records in the Public DNS zone.
Note: You don’t need to rerun the Hybrid Configuration Wizard after changing the MX records to Office 365 or back to on-premises in a hybrid deployment.
If you did not yet check the previous articles, we recommend you go through them by visiting the course Exchange Hybrid. This will make it easier for you to follow along.
Find Office 365 MX record
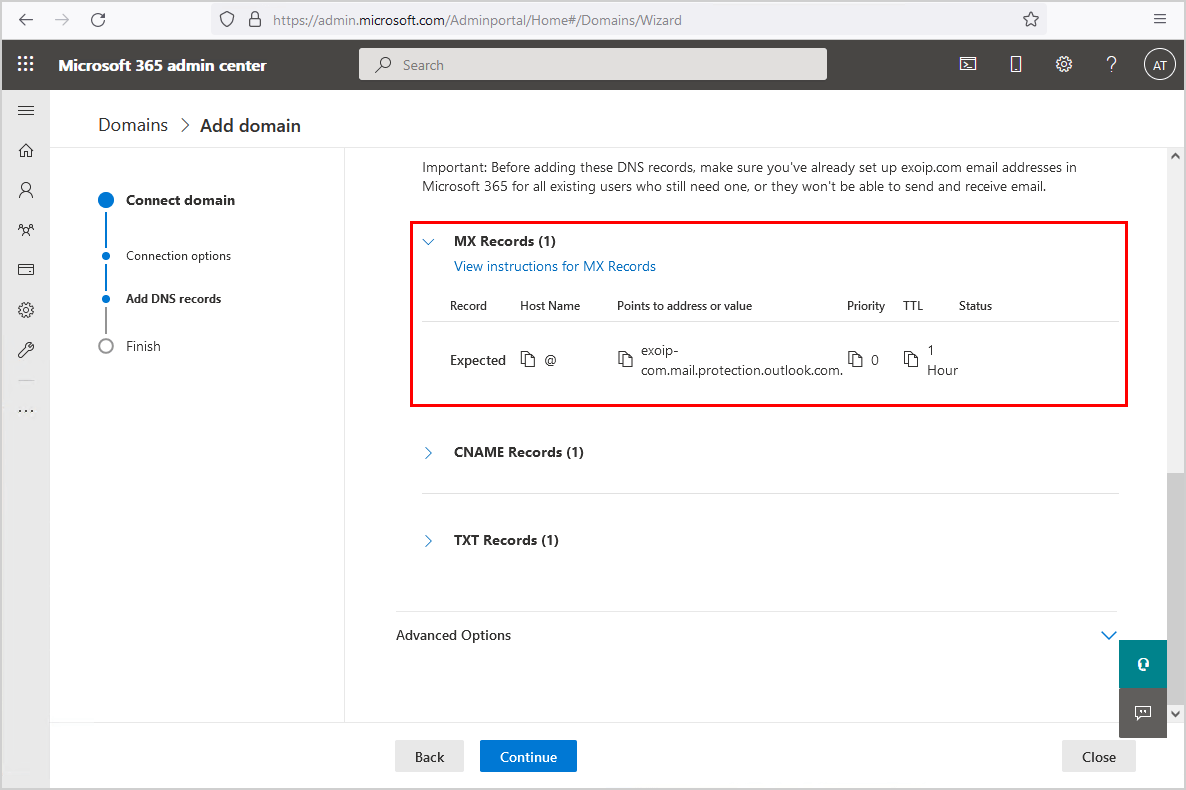
Sign in to the Microsoft 365 portal. Click on Settings > Domains. Click on the added domain. Go through the wizard and find the MX records.
In our example, it’s exoip-com.mail.protection.outlook.com.
In the next step, we will sign in the Public DNS and update the MX records to Office 365.
Change MX records to Office 365
Sign in to the domain name registrar. That’s where you have the domain registered. Next, let’s find the MX records. You can have one or more MX records at the moment.
Note: Lower the TTL (Time To Live) on your MX records to a low value, such as 5 minutes or even 1 minute a few days before you plan to make the MX record change. It will ensure that the MX records change takes effect very quickly and that you can switch it back fairly quickly if you need to.
Since hybrid mail flow works with it, whether the mail goes to the on-premises server first or to Office 365 first. Therefore, we are not concerned about TTL and propagation delays in our example.
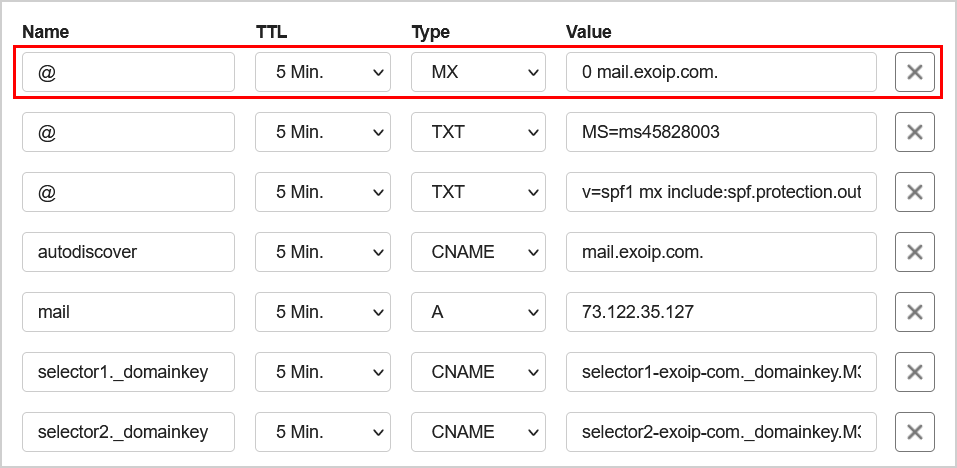
Remove MX records
Remove the MX records that point to Exchange on-premises. Most of the case the MX records are pointed to the on-premises or cloud spam filter.
Add Office 365 MX records
Add the Office 365 MX records which you copied in the previous step.
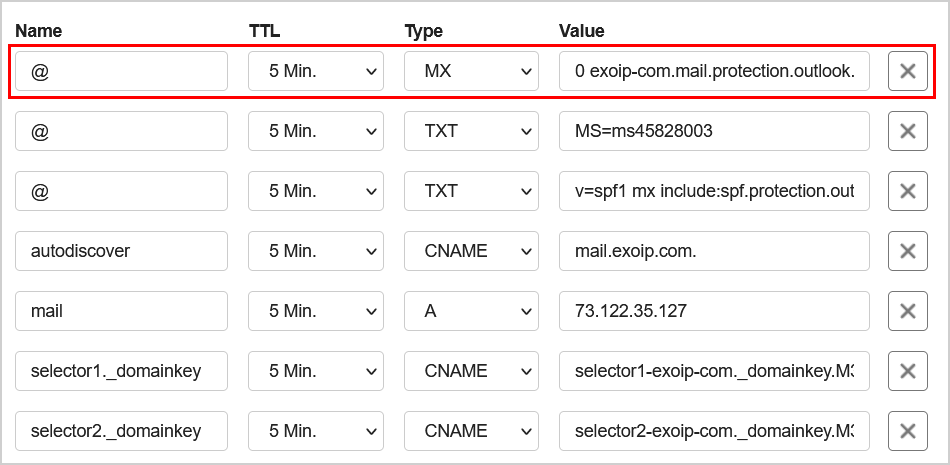
In the next step, we will verify the MX records.
Verify Office 365 MX records
It’s always good to verify that the MX records are successfully changed. Let’s look at a couple of examples.
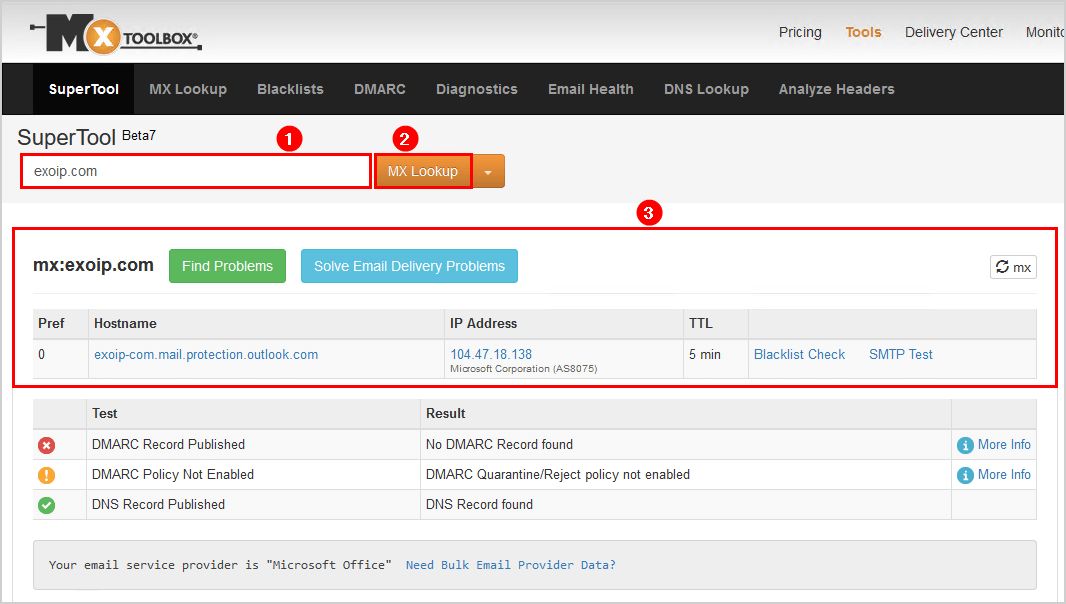
Option 1: MxToolbox
An excellent way to check the MX records is using MxToolbox MX Lookup. Fill in the domain and click on MX Lookup.
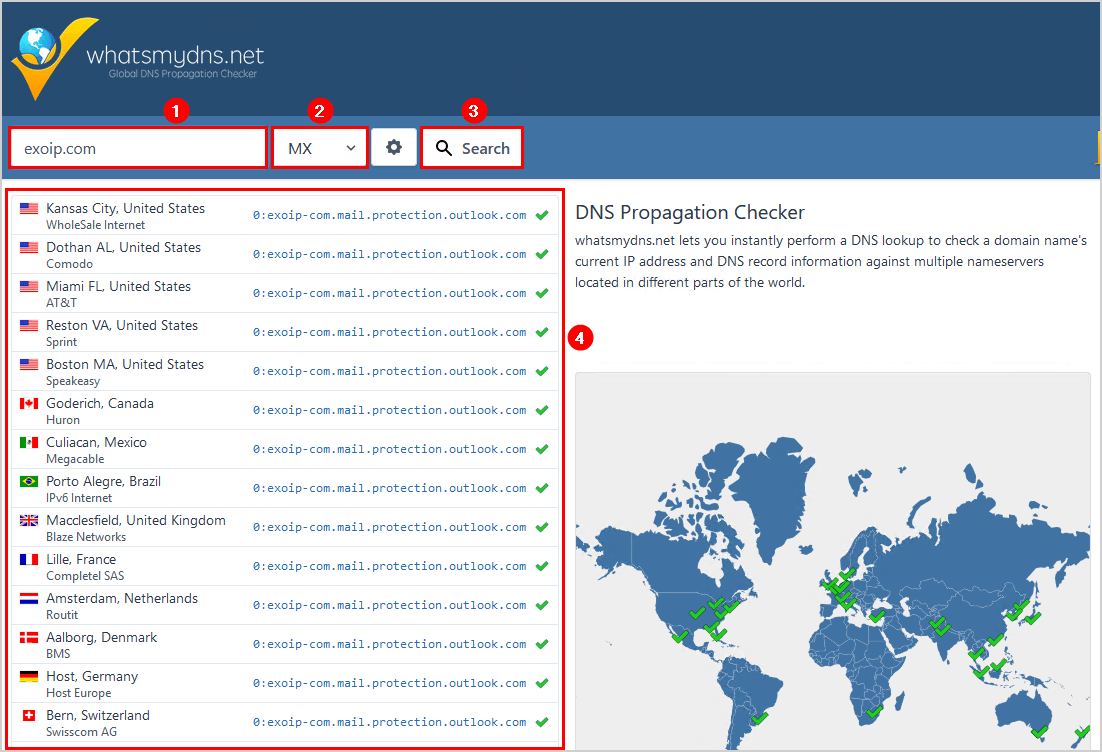
Option 2: WhatsMyDNS
We can use WhatsMyDNS to query the DNS record globally and confirm that the update takes effect. Fill in the domain and select the MX type from the dropdown menu. After that, click Search.
Option 3: Message Header Analyzer
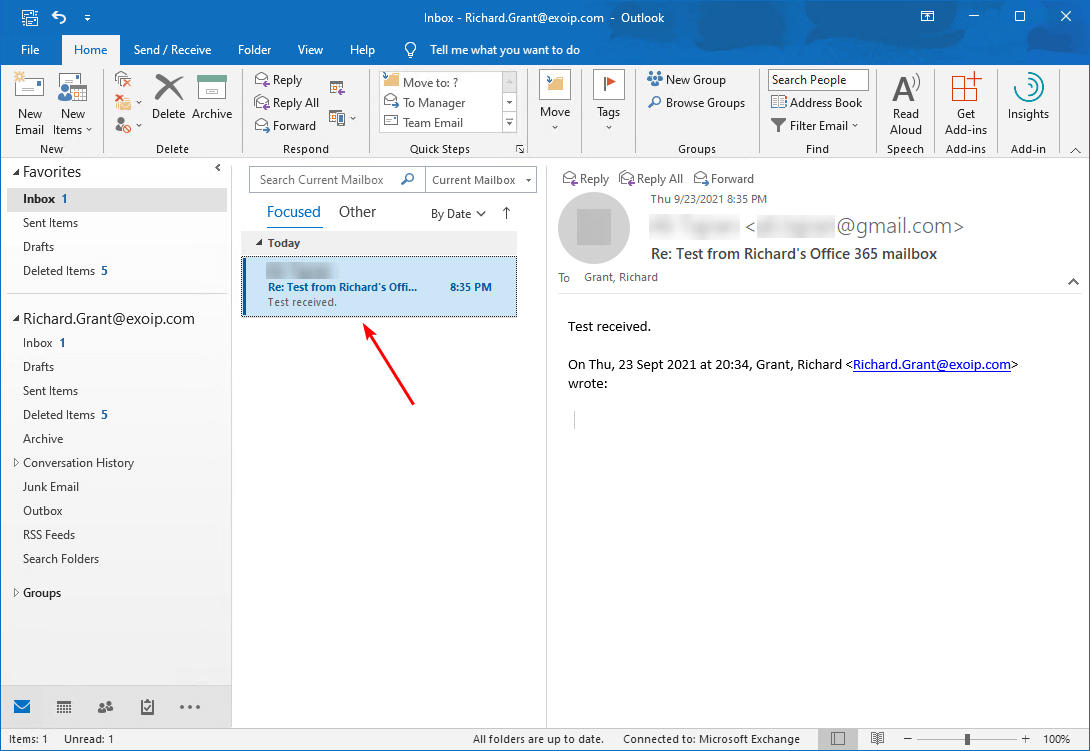
Another way is to send an email from an Exchange Online mailbox to an external recipient. For example, a test user that uses a Gmail account. After the user receives the email, reply to the email.
In our example, we sent an email from Richard’s Exchange Online mailbox to a Gmail account. After the Gmail user received the mail, we did reply from the Gmail account to Richard’s.
If the MX record change is working, that email should deliver directly to Exchange Online and into the user mailbox. If the mailbox has not worked yet, it would still reach the user mailbox, but it will go by the Exchange on-premises server first since that’s where the MX records used to point too.
Check the message header and use the Microsoft Message Header Analyzer to check which path the email did take. Confirm that the email did deliver straight from Google to Exchange Online.
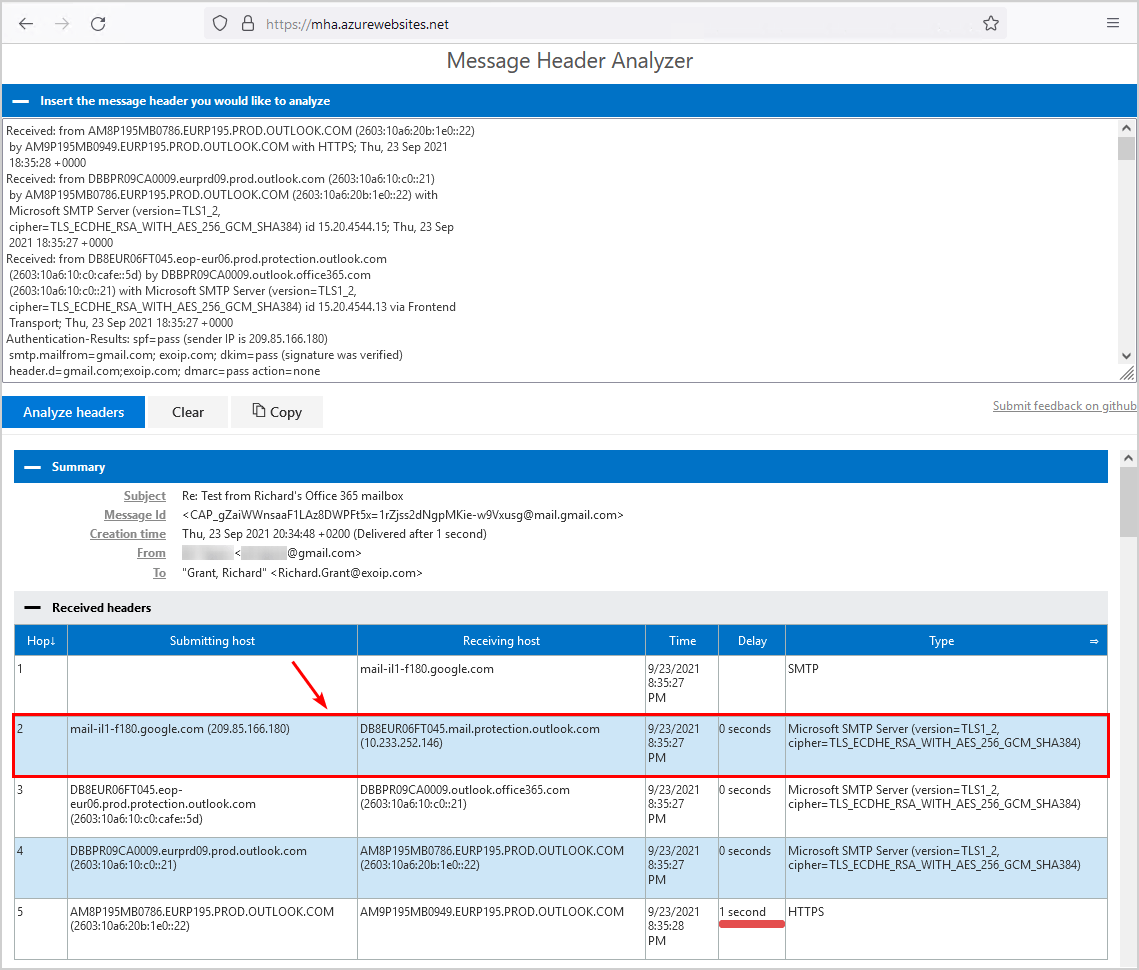
The MX records change has taken effect, and inbound internet email now goes through Office 365 first.
In the next article, we will configure outbound mail via Office 365.
Conclusion
We showed how to update MX records to Office 365. It’s essential to adjust the TTL (Time To Live) to 5 minutes or less a couple of days before changing the MX records to Office 365. It will propagate the DNS changes faster. After that, update the MX records to Office 365. Lastly, verify that the Office 365 MX records are active and that incoming mail flow goes through Office 365 first.
Did you enjoy this article? You may also like Verify DNS SRV records for Office 365. Don’t forget to follow us and share this article.
What Others Are Reading


Hi,
Do you know if it is possible to change the value of the MX record?
Example: domain-comeb01.mail.protection.outlook.com to domain-com.mail.protection.outlook.com
Any idea perhaps?
Cheers,
Marcel
Hi, we’re running a hybrid exchange and looking to fully move over now. When I go to Settings > Domains and select our main domain name (default) it doesn’t show the “Microsoft Exchange” heading with MX TXT & CNAME records and values like it does for some of our other lesser domains. It just shows the headings for “Skype for Business” & Basic Mobility & Security”!? Any thoughts? Thanks in advance.
Thanks!