Active Directory Users and Computers (ADUC) is the Microsoft Management Console snap-in to administer Active…
How to Setup DNS Aging and Scavenging in Active Directory
Stale records should not belong in your Active Directory DNS. Manually going through the DNS records in each zone and deleting the old DNS records is not what you should be doing. Instead, enable DNS aging and scavenging to do it for you automatically. In this article, you will learn how to setup DNS aging and scavenging in Active Directory.
Table of contents
What is DNS aging and scavenging?
DNS aging and scavenging is a Microsoft feature that identifies and removes outdated DNS resources.
The age of the DNS record is the difference between the last time stamp and the current time of the server. DNS scavenging uses this value to check if the record needs to be removed. After identifying the eligible stale resource records, it proceeds to remove them from the DNS server.
Note: The feature DNS aging and scavenging is not enabled by default.
How to configure DNS Aging and Scavenging
To set up DNS Aging and Scavenging in Active Directory, follow these steps:
Important: Set this up only on the primary DNS server. Don’t set it up on all DNS servers. If the primary DNS server goes offline, you have to configure DNS aging and scavenging on another DNS server.
Step 1. Enable advanced view
- Start DNS Manager
- Click in the menu on View
- Enable the Advanced setting
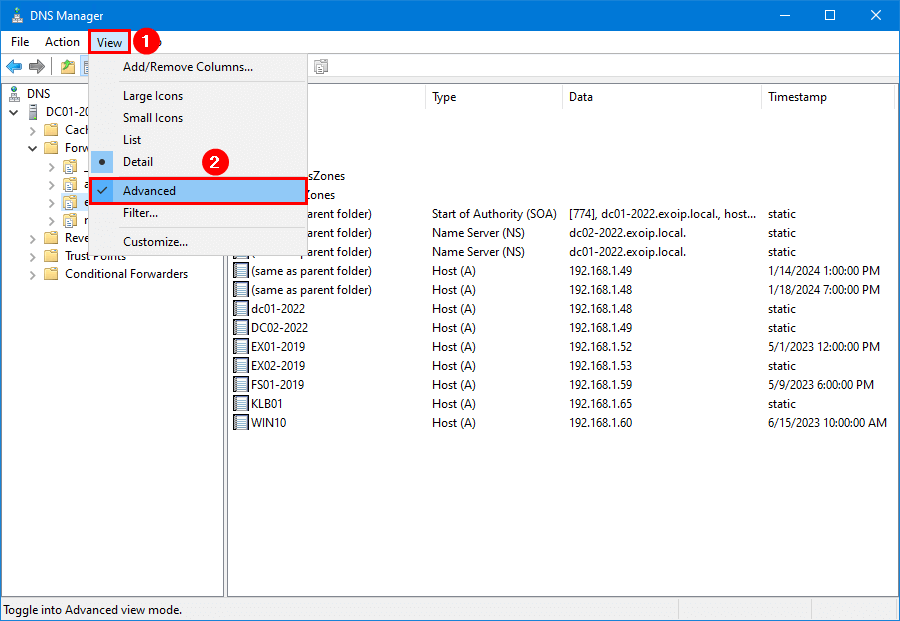
The advanced setting will allow you to access several items that are hidden by default in the next steps.
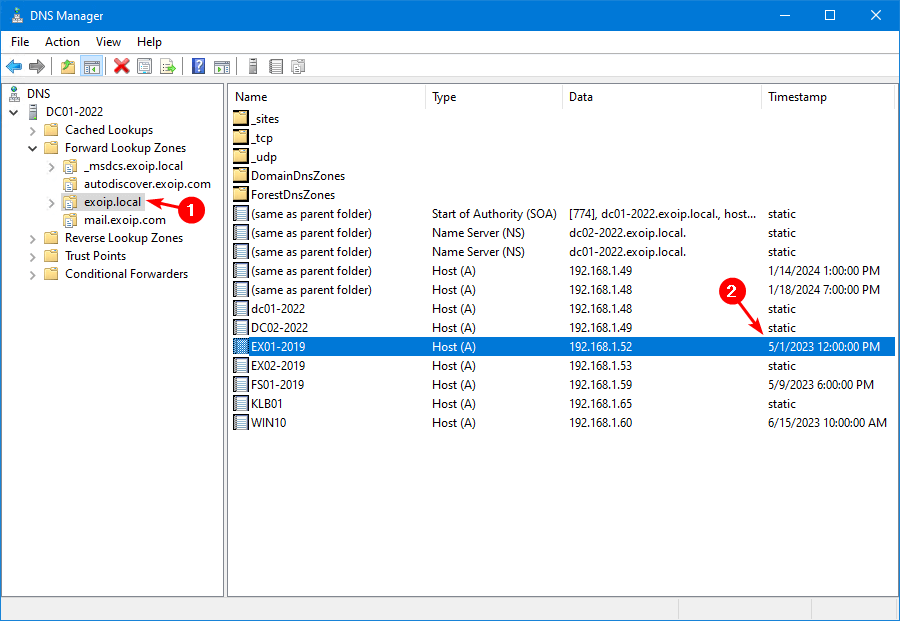
Step 2. Update DNS records
If the DNS record has a static address, it will not be deleted with DNS Aging and Scavenging. Go through the records in DNS Manager and update the timestamp to static where you have to.
Important: Stale static DNS records will NOT scavenge, and only stale dynamic DNS records will automatically scavenge.
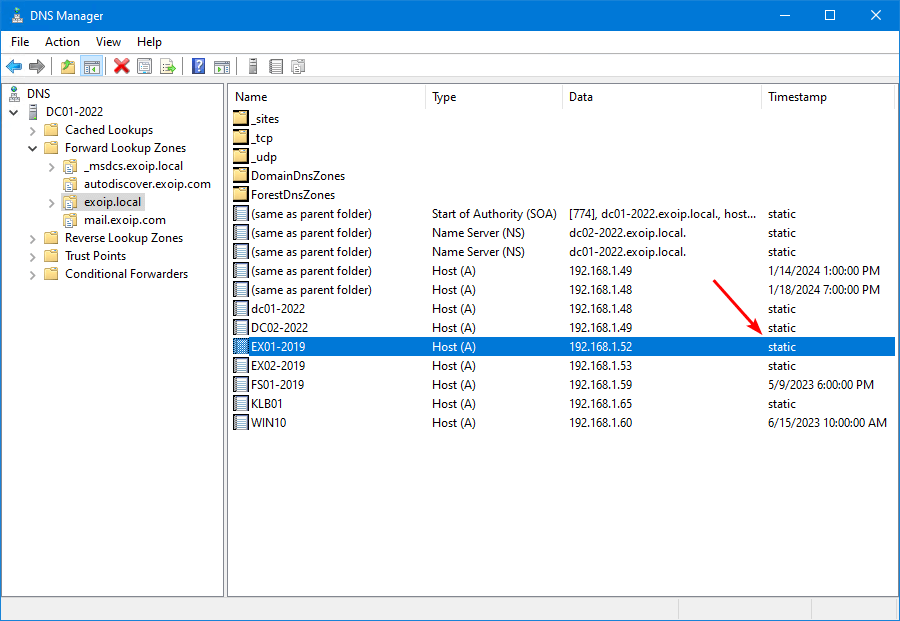
- Click on the zone
- Go through the DNS records
In this example, the EX01-2019 Host (A) record appears as a dynamic address, and it will remove the record once it’s going to scavenge. But we don’t want that, and we have to change it to static.
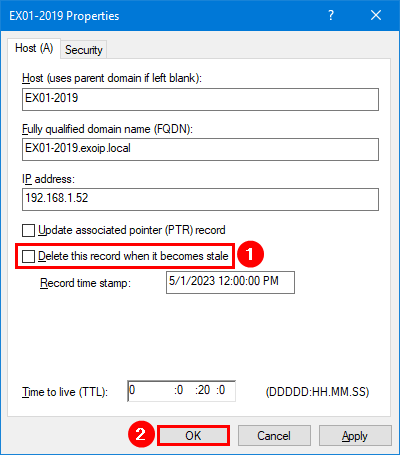
- Right-click on the A record and select Properties.
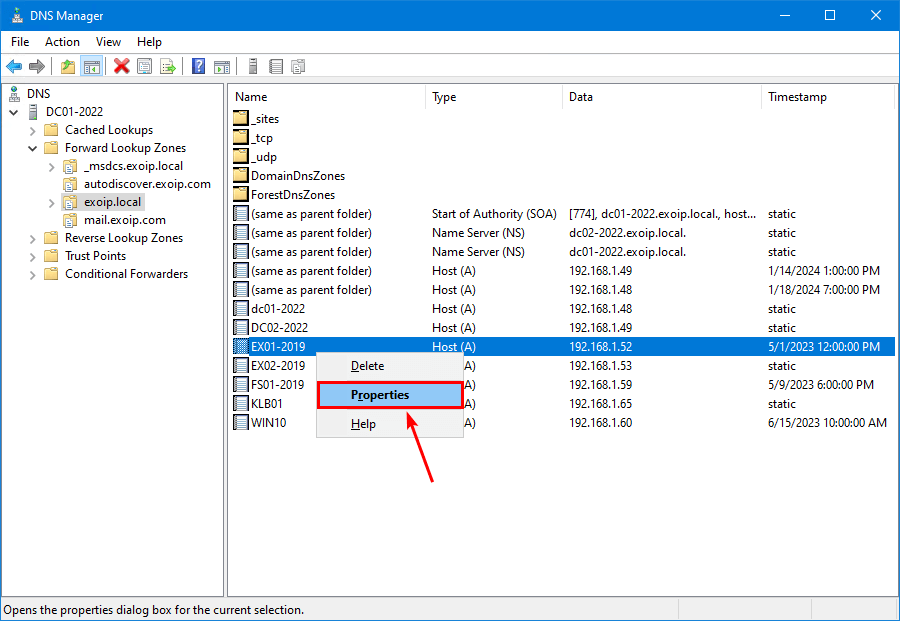
- Clear the Delete this record when it becomes stale
- Click OK
Note: If you don’t see the delete this record when it becomes stale tickbox, it means you didn’t enable the Advanced setting in the previous step.
- Refresh the window and check the timestamp
- Verify that the record changed to static
In our example, the A record for EX01-2019 appears as static.
Now that you have reviewed all the records and edited where needed, everything is set for the next step.
Step 3. Backup DNS records
It’s always good to Export all the DNS records to a CSV file for backup purposes. If a record gets deleted and you have to add a record back in Windows DNS, you can easily look for the record in the CSV file.
Run the below PowerShell script to save all the DNS server zone records to a CSV file.
$dnsRecords = @()
$zones = Get-DnsServerZone
foreach ($zone in $zones) {
    $zoneInfo = Get-DnsServerResourceRecord -ZoneName $zone.ZoneName
    foreach ($info in $zoneInfo) {
        $timestamp = if ($info.Timestamp) { $info.Timestamp } else { "static" }
        $timetolive = $info.TimeToLive.TotalSeconds
        $recordData = switch ($info.RecordType) {
            'A' { $info.RecordData.IPv4Address }
            'CNAME' { $info.RecordData.HostnameAlias }
            'NS' { $info.RecordData.NameServer }
            'SOA' { "[$($info.RecordData.SerialNumber)] $($info.RecordData.PrimaryServer), $($info.RecordData.ResponsiblePerson)" }
            'SRV' { $info.RecordData.DomainName }
            'PTR' { $info.RecordData.PtrDomainName }
            'MX' { $info.RecordData.MailExchange }
            'AAAA' { $info.RecordData.IPv6Address }
            'TXT' { $info.RecordData.DescriptiveText }
            default { $null }
        }
        $dnsRecords += [pscustomobject]@{
            Name       = $zone.ZoneName
            Hostname   = $info.Hostname
            Type       = $info.RecordType
            Data       = $recordData
            Timestamp  = $timestamp
            TimeToLive = $timetolive
        }
    }
}
$dnsRecords | Export-Csv "C:\temp\AllDNSZonesRecords.csv" -NoTypeInformation -Encoding utf8
Step 4. Enable DNS aging
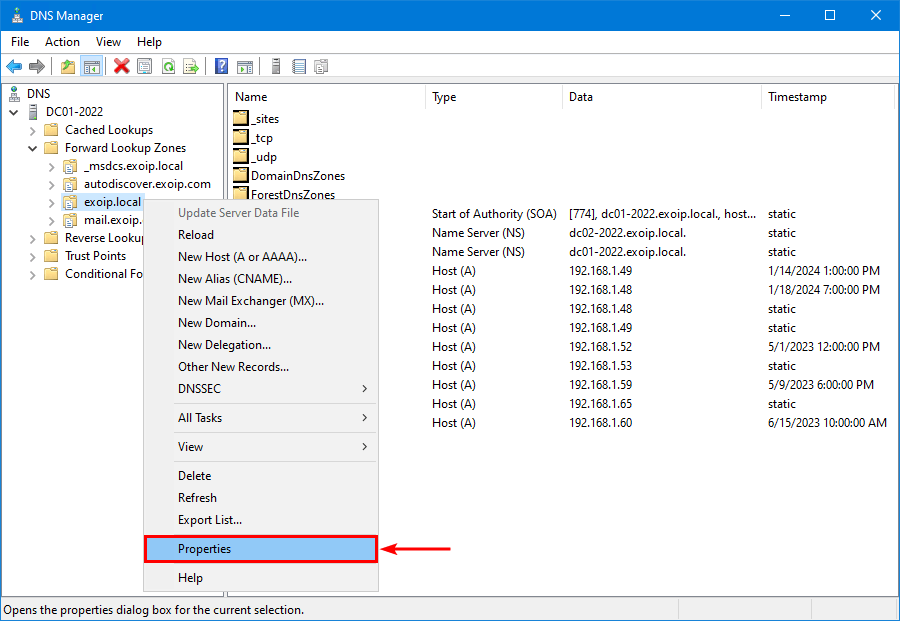
- Go to the zone where you want to enable DNS aging and scavenging
- Right-click the zone
- Click on Properties
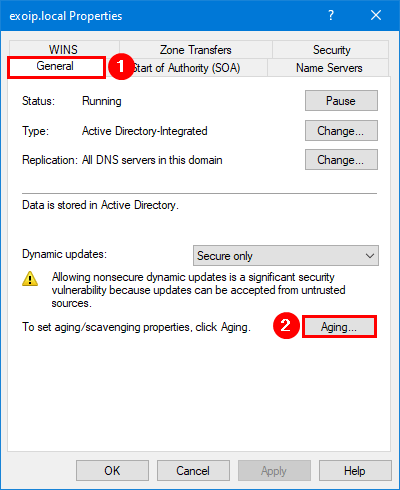
- On the general tab, click on Aging
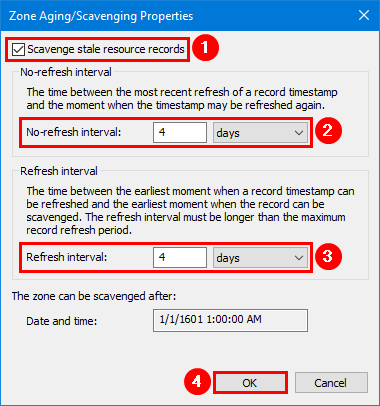
- Enable scavenge stale resource records
- Specify the no-refresh interval
- Specify the refresh interval
Note: To know the time to set for both intervals, check your DHCP lease and divide it by two. If you have an uneven number, set the no-refresh interval lower than the refresh interval.
For example, if your DHCP lease is 8 days, you want to set both the no-refresh interval and refresh interval to 4 days. If your DHCP lease is 7 days, you want to set the no-refresh to 3 days and the refresh interval to 4 days.
- Press OK twice
Step 5. Enable DNS scavenging
- Right-click on the DNS server
- Click Properties
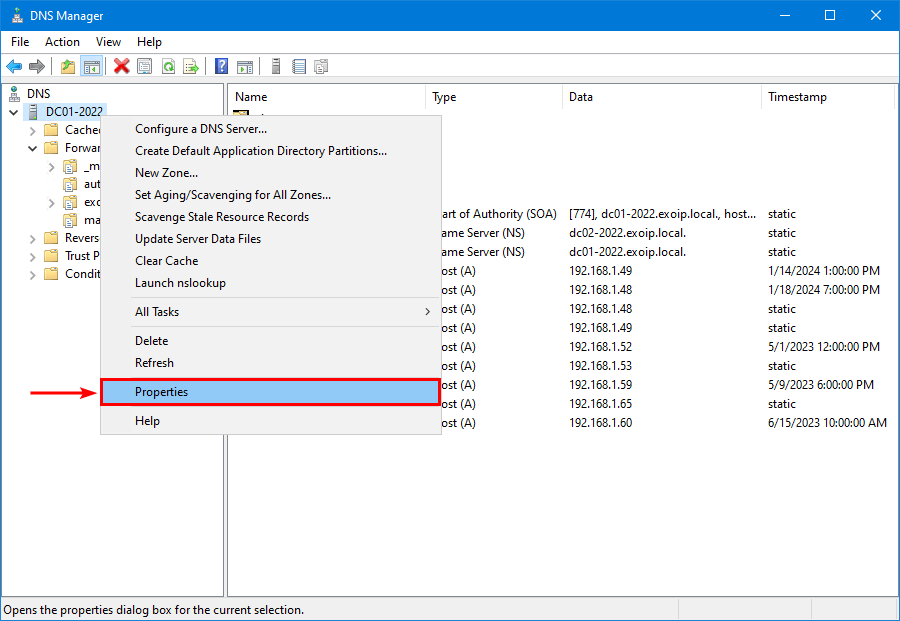
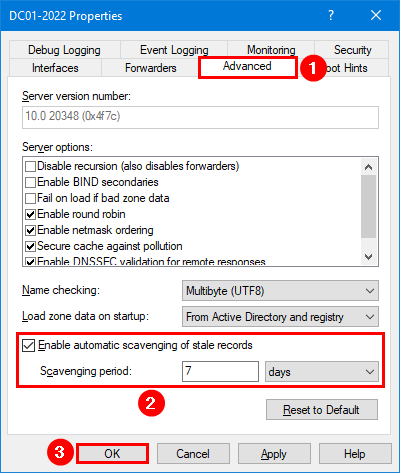
- Go to the Advanced tab
- Select the checkbox Enable automatic scavenging of stale records
- Keep it on for 7 days
- Click OK
That’s it!
Read more: How to Remove (Demote) a Domain Controller »
Conclusion
You learned how to configure DNS aging and scavenging in Active Directory. It’s an excellent DNS feature to set up, so it will clean up old and unused records in DNS. Remember that only dynamic IP addresses get removed if applicable and static IP addresses do not get removed. That’s something you have to do manually or automate your tasks with the Remove-DNSRecords PowerShell script.
Did you enjoy this article? You may also like Change TTL for DNS record in Windows Server. Don’t forget to follow us and share this article.
What Others Are Reading

This Post Has 0 Comments