Azure AD Connect synchronization service hasn't been working for over a week. When we run…
Move from MFA trusted IPs to Conditional Access named locations
You have a subscription for Azure AD Premium, and you want to take full advantage of Conditional Access. One of these features is named locations. If you have not configured MFA trusted IPs, you can directly configure named locations. If you already have MFA trusted IPs set up, you need to move MFA trusted IPs to Conditional Access named locations. Let’s look at how to move from MFA trusted IPs to Conditional Access named locations step by step.
Table of contents
Introduction
Moving from Microsoft 365 MFA to Azure Active Directory Conditional Access can be done in three steps:
- Move from per-user MFA to Conditional Access MFA
- Move from MFA trusted IPs to Conditional Access named locations (this article)
- Move from remember MFA on trusted device to Conditional Access sign-in frequency
Conditional Access named locations
You want to move from MFA trusted IPs to Azure Active Directory Conditional Access named locations. Before you do that, what are the advantages and disadvantages?
Advantages for Azure Active Directory Conditional Access named locations:
- IPv4 and IPV6 ready
- Add description to IP address
- Integrates with Azure AD MFA
Disadvantages for Azure Active Directory Conditional Access named locations:
- Pay for the subscription
Conditional Access requires Azure AD Premium 1 or 2. We recommend explaining to the customer why they should pay (subscribe) for Azure AD premium. Tell them the benefits and how security will improve. Also, managing will be much easier for the administrators, which will save time.
Check Azure AD Premium license
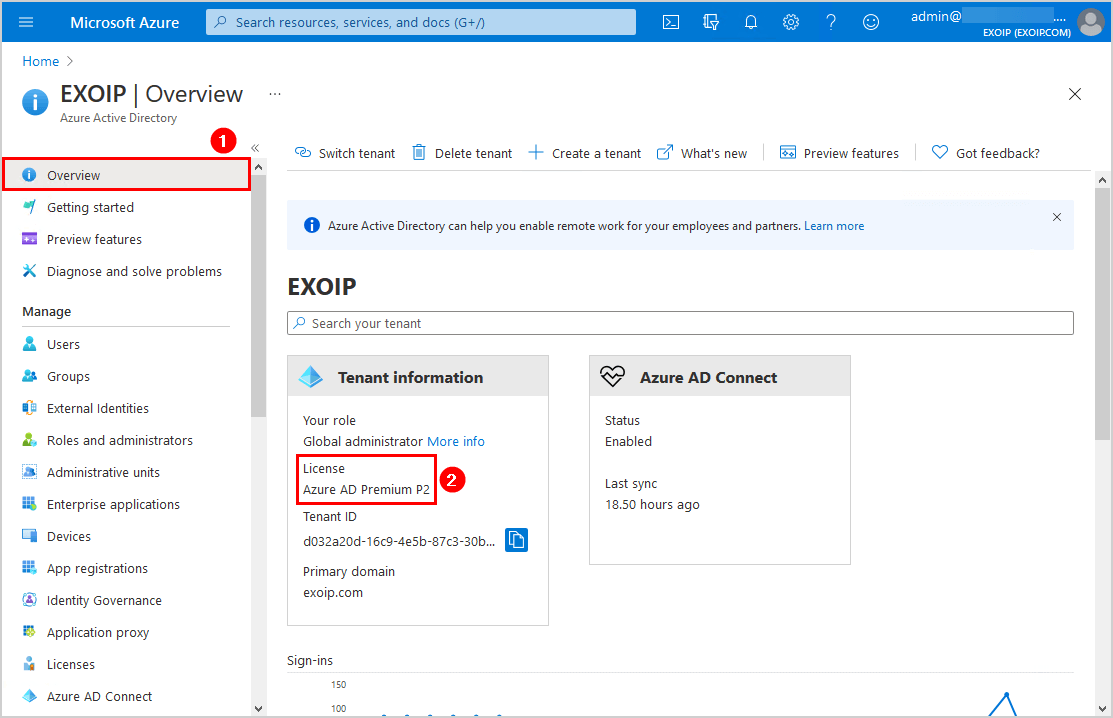
Check that you have Azure AD Premium plan 1 or 2. Sign in to Microsoft Azure. In the portal, navigate to Azure Active Directory > Overview. In the example below, the tenant got the Azure AD Premium P2 license.
MFA trusted IPs
Check MFA trusted IPs
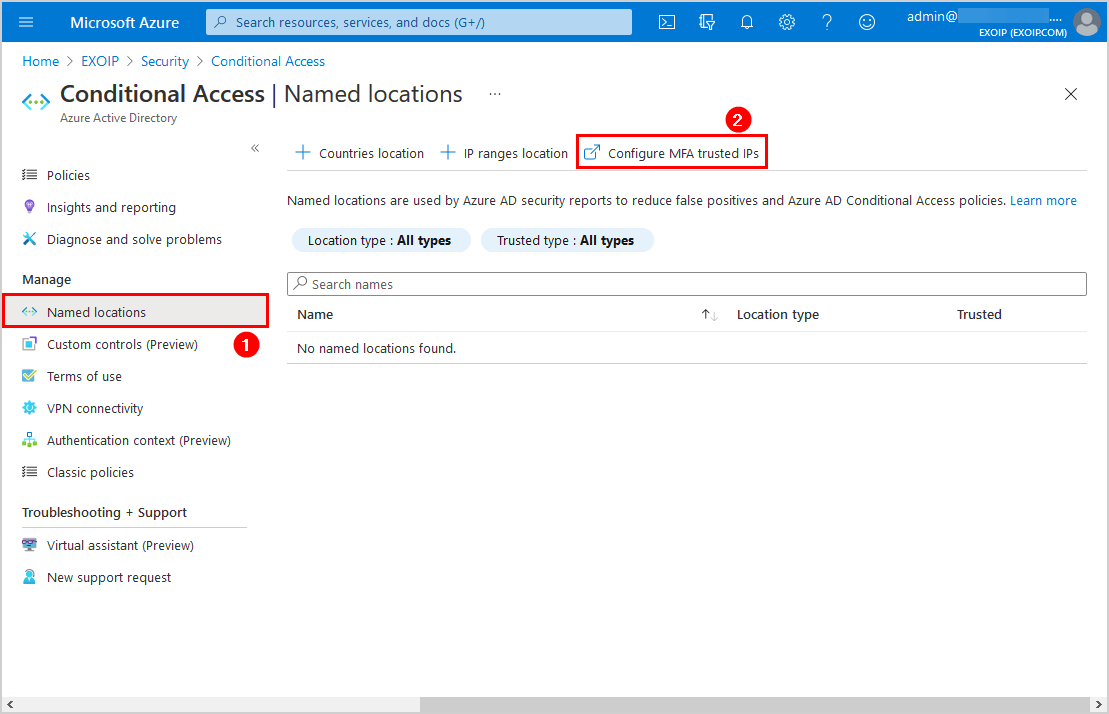
Navigate to Azure Active Directory > Security > Conditional Access > Named locations. Click on Configure MFA trusted IPs.
Another way is to go directly to the MFA trusted IPs page.
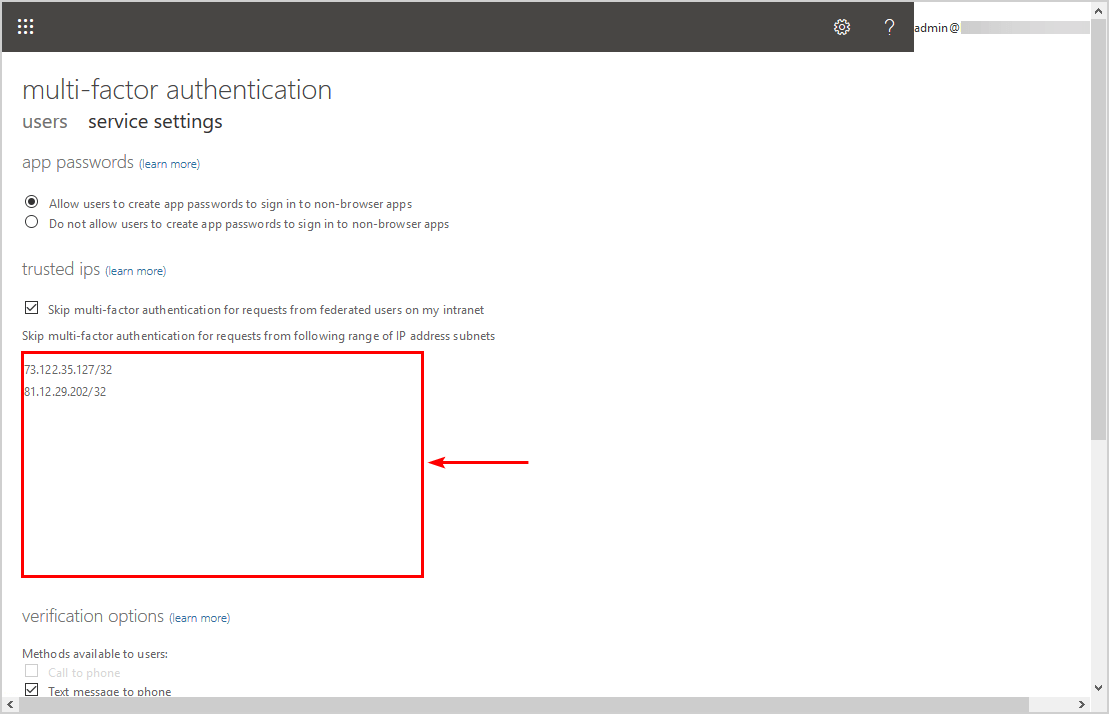
A new page will show up. Check if there are IPs added in the trusted IPs section. If you do not see any trusted IPs, you can skip this step and go to the next step.
In our example, we have two IP addresses. These are the public IPs of the Head Office and Branch Office.
Delete MFA trusted IPs
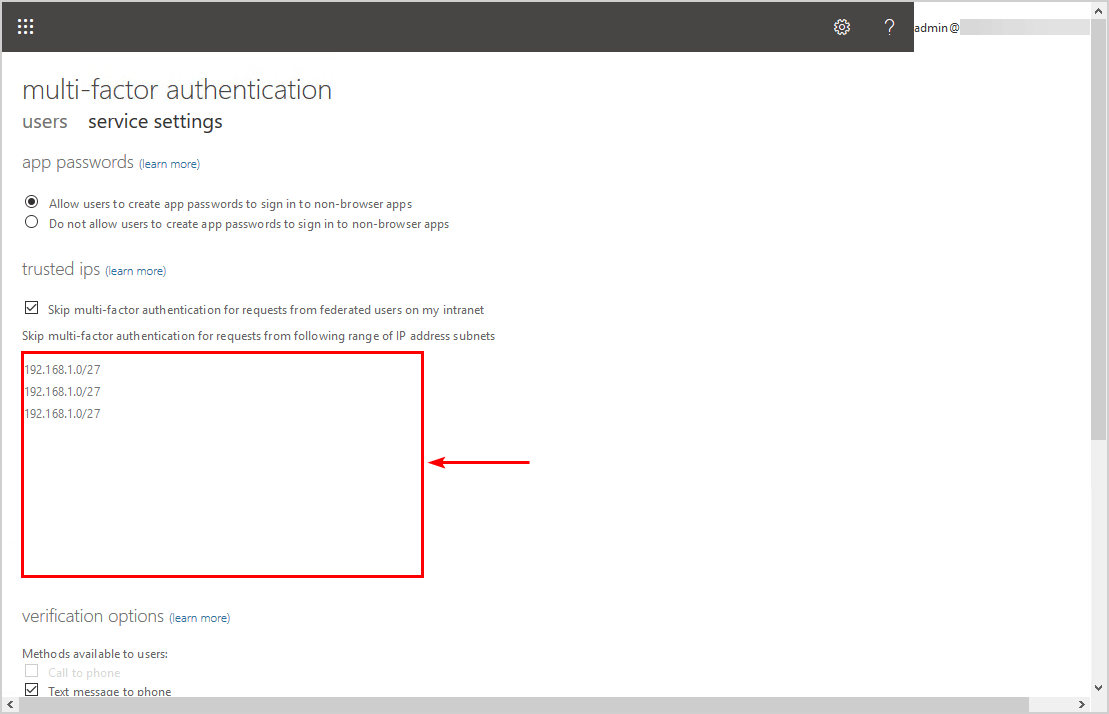
Copy the IP addresses and save them in Notepad. After that, remove the IP addresses. Click on Save (it’s down below).
The empty trusted IPs section will look like this.
Azure Conditional Access
Create Conditional Access named location
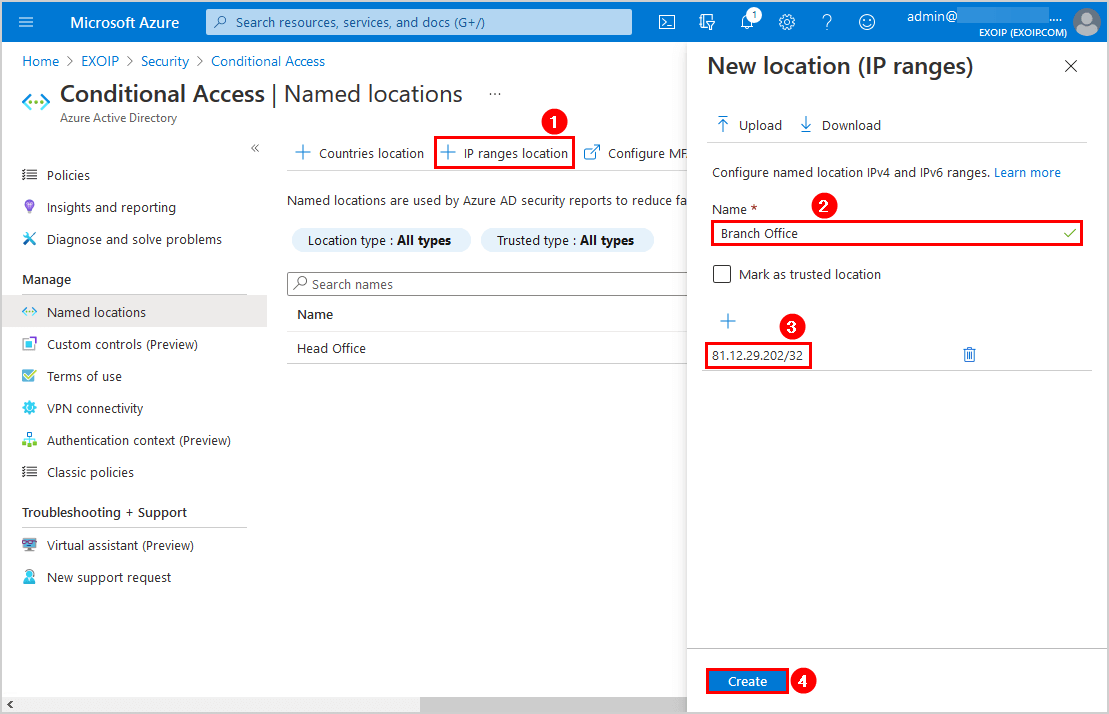
Go back to Named locations. Click on IP ranges location. Add the IP address and give it a name (description). We will add the Head Office IP address.
Make sure to add the public IP of the organization and not the internal IP of a device.
You can select the checkbox Mark as trusted location. We will leave it unchecked.

In our example, we will add the second IP address, which is the Branch Office.
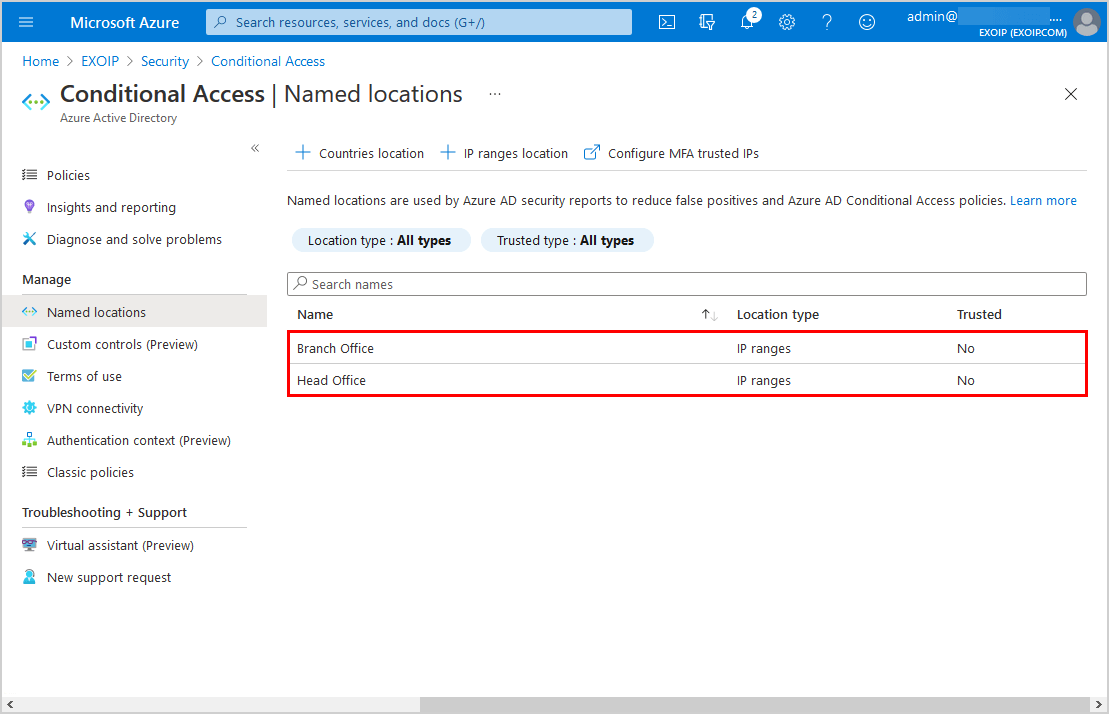
Both the organization’s public IPs are added as named locations.
Exclude named location from MFA policy
Edit the Conditional Access MFA policy and exclude the named location IPs that you added in the previous step.
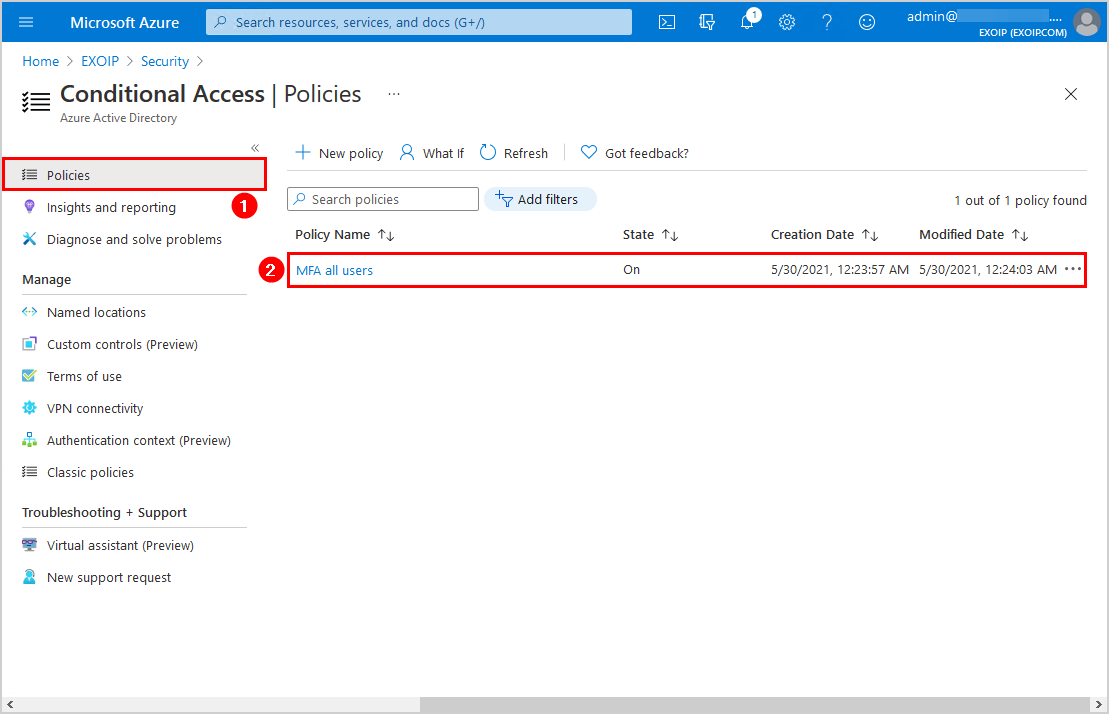
Click on Policies and click on the MFA policy.
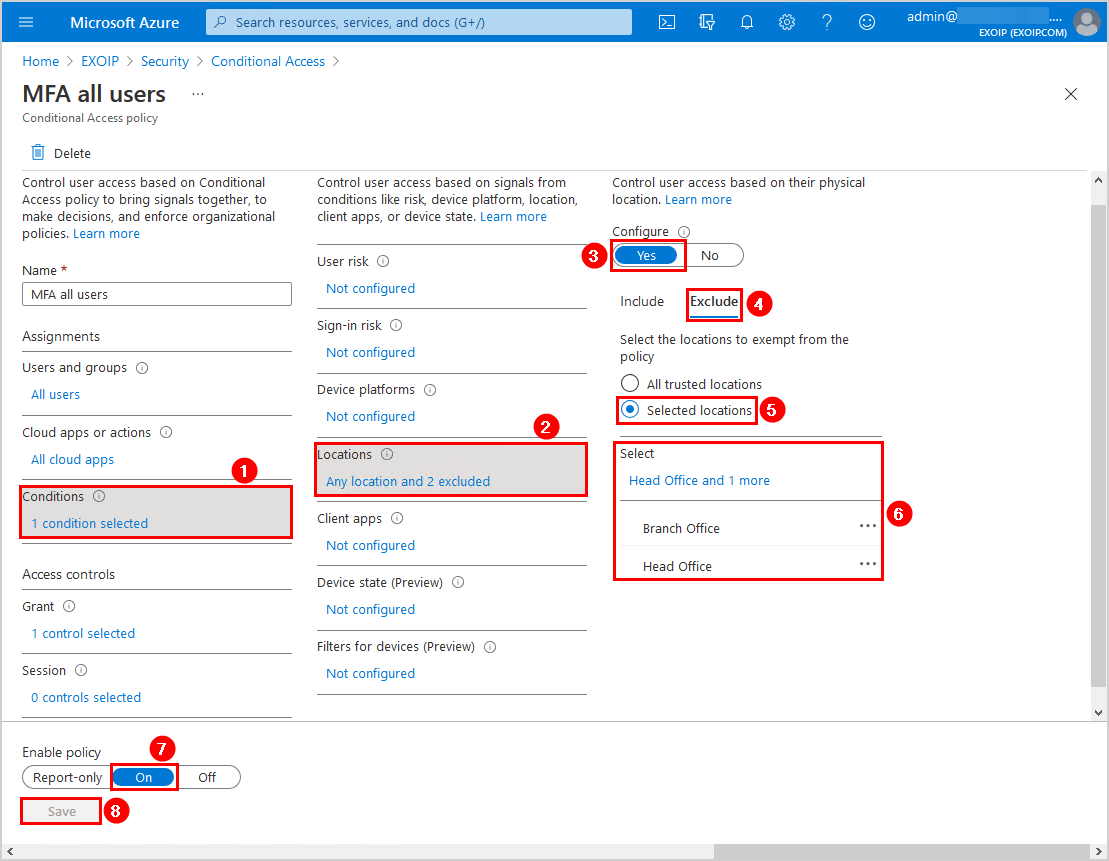
In the policy, navigate to Conditions > Locations > Configure > Yes > Exclude > Selected locations. Select both the locations to exempt from the policy.
Did you enable the checkbox Mark as trusted location in the earlier step? You can now select the All trusted locations instead of choosing the named locations.
Enable the policy and click Save.
In the next step, we will verify our work.
Verify your work
After creating or editing the policy, sign in with a user to the Microsoft 365 portal for testing purposes and check the user experience.
Test from both the excluded public IP (Head Office or Branch Office) and a not excluded public IP.
Trusted location
After entering the password and clicking on Sign in, the user will not get a notification for MFA authorization. That’s because the user is at one of the locations which are excluded from MFA. In this example, the Head Office and the Branch Office.
The user can get the More information required message. It’s because Enable Self-Service Password Reset is configured in the organization. Click Next.

Because the user makes a connection from a trusted IP, it’s possible to Skip setup.

Not trusted location
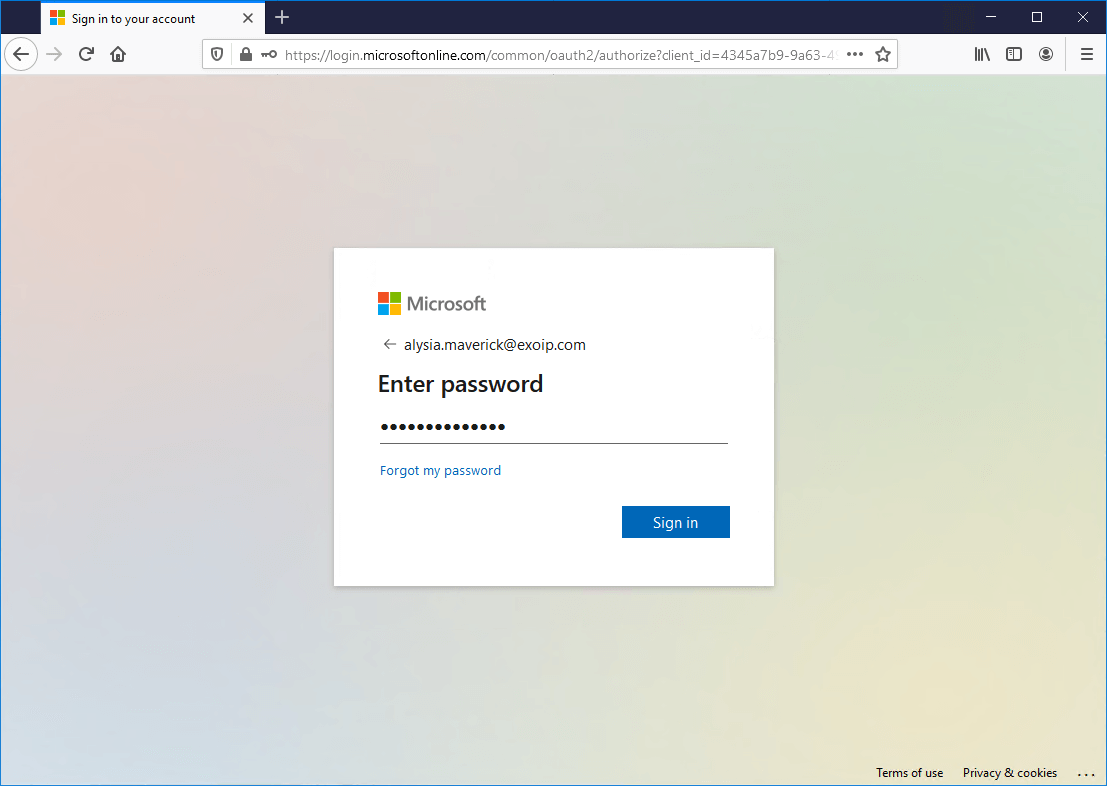
Below is an example of how it looks when a user signs in to Microsoft 365 portal from a not trusted location. Click Sign in.

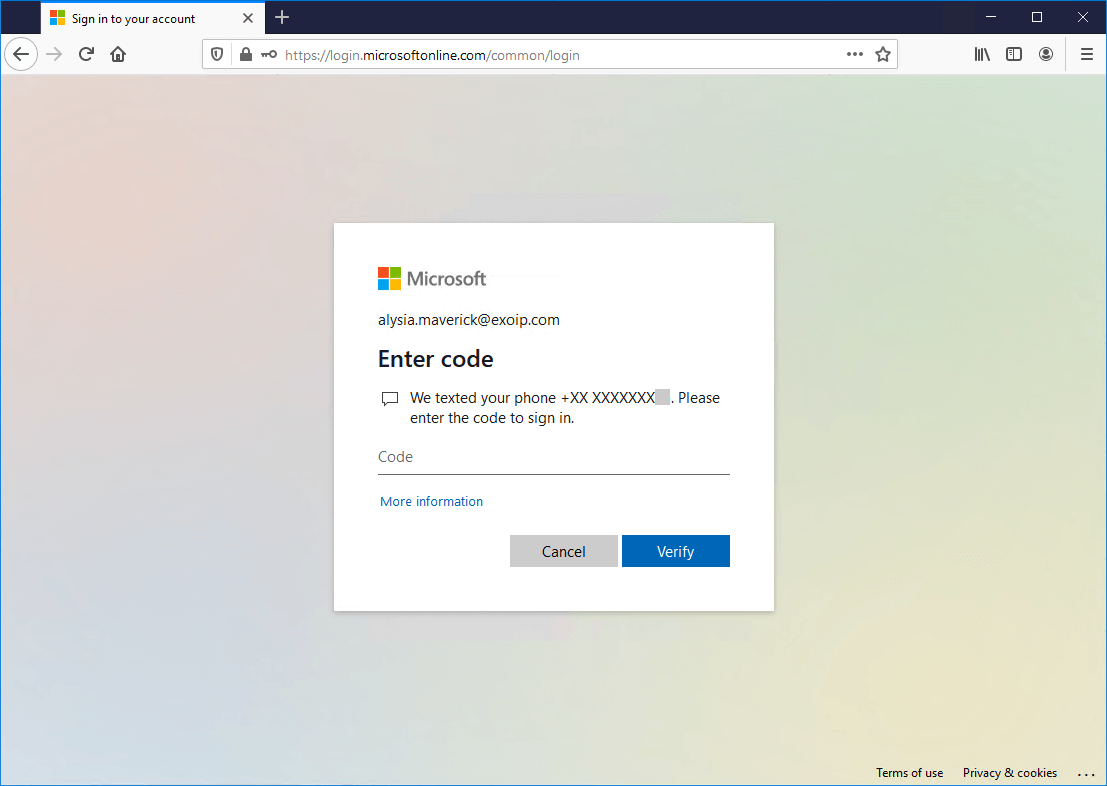
The user needs to verify with MFA.
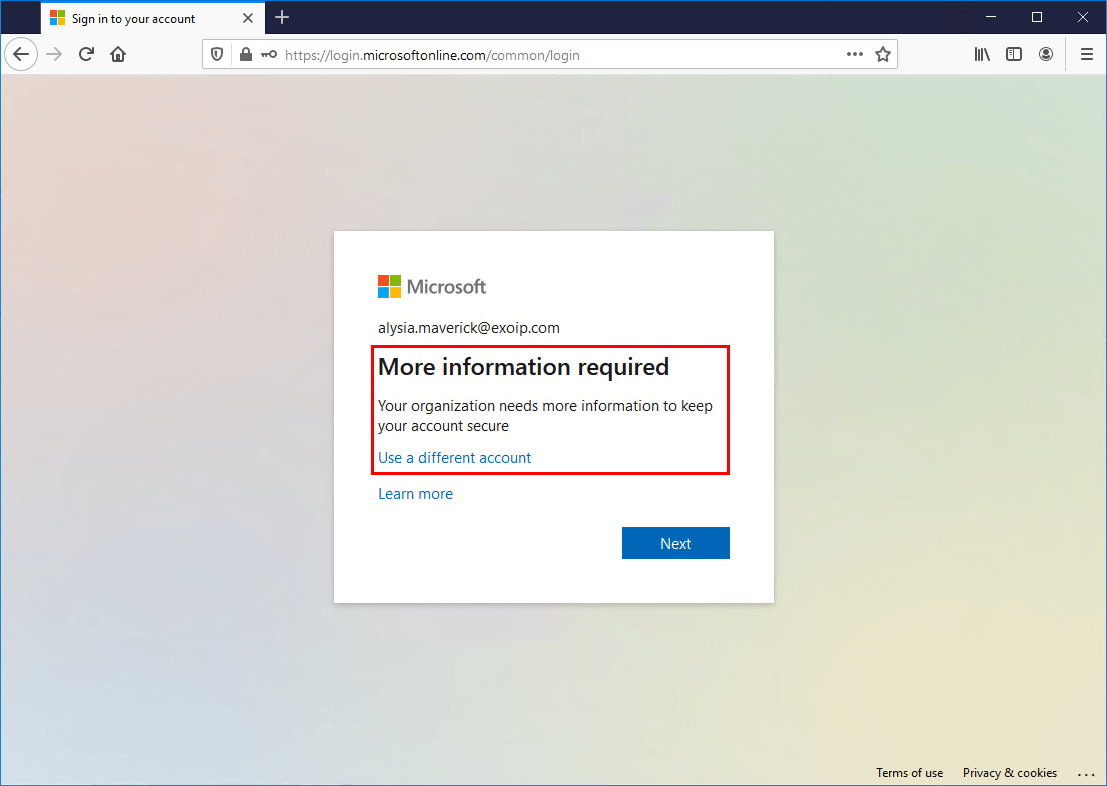
The user can get the More information required message. It’s because Enable Self-Service Password Reset is configured in the organization. Click Next.
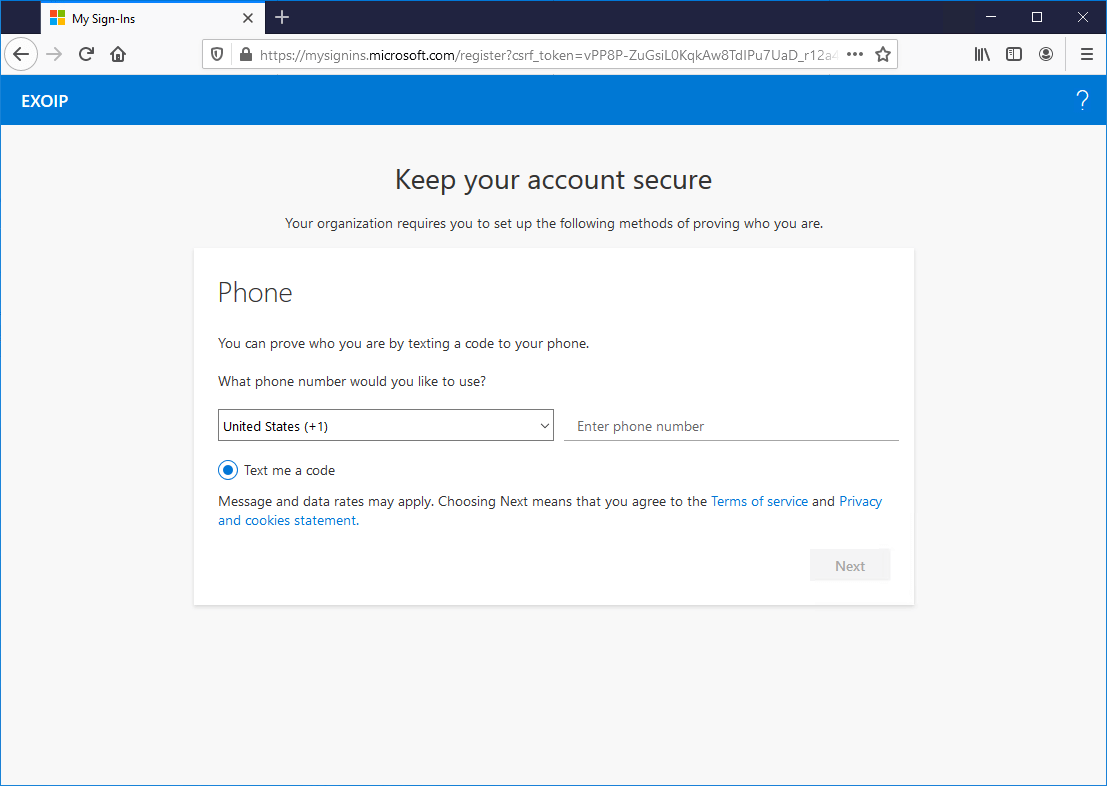
Because the user connects from a not-trusted IP, it’s not possible to skip setup.
Everything looks great!
Read more: Conditional Access MFA breaks Azure AD Connect synchronization »
Conclusion
In this article, you learned how to move from MFA trusted IPs to Conditional Access named locations. Check if MFA trusted IPs are configured and copy the IPs. After that, remove the MFA trusted IPs. Create named locations with the IPs that you copied and exclude them from the Conditional Access MFA policy. As of last, verify your work and sign in with a test account.
Did you enjoy this article? You may also like Export Office 365 users MFA status with PowerShell. Don’t forget to follow us and share this article.
Thanks for the good tutorial.It works for me in the browser too. But with the Windows login on the notebook it does not work. If I am external and log in with the password, it makes no MFA. Only in the Webbrowser.
Great guides Ali – All of your guides are direct, straight to the point and can be read and followed easily.
Thanks for taking the time to create them mate!