How to export Conditional Access policies? A Microsoft Entra tenant has multiple Conditional Access policies,…
Move Azure AD Connect to new tenant
We have an existing Azure AD Connect synchronization with Microsoft 365 tenant. We did create a new Microsoft 365 tenant, and we like to move Azure AD Connect to the new tenant. This means that the existing on-premises organization with Azure AD Connect will sync to the new Microsoft 365 tenant.
Table of contents
- Before you start
- Move Azure AD Connect to new tenant
- Step 1: Stop Azure AD Connect synchronization scheduler
- Step 2: Check Azure AD Connect synchronization stopped
- Step 3: Create OU in Active Directory
- Step 4: Customize synchronization options
- Step 5: Disable Azure AD Connect deletion threshold
- Step 6: Force Azure AD Connect to sync
- Step 7: Check users removal from Microsoft 365
- Step 8: Uninstall Azure AD Connect
- Step 9: Remove custom domain from old tenant
- Step 10: Add custom domain in new tenant
- Step 11: Install and configure Azure AD Connect
- Verify your work
- Conclusion
Before you start
It’s good to check how it looks at the current stage before we disassociate Azure AD Connect from current Office 365/Microsoft 365 tenant and move to new Office 365/Microsoft 365 tenant.
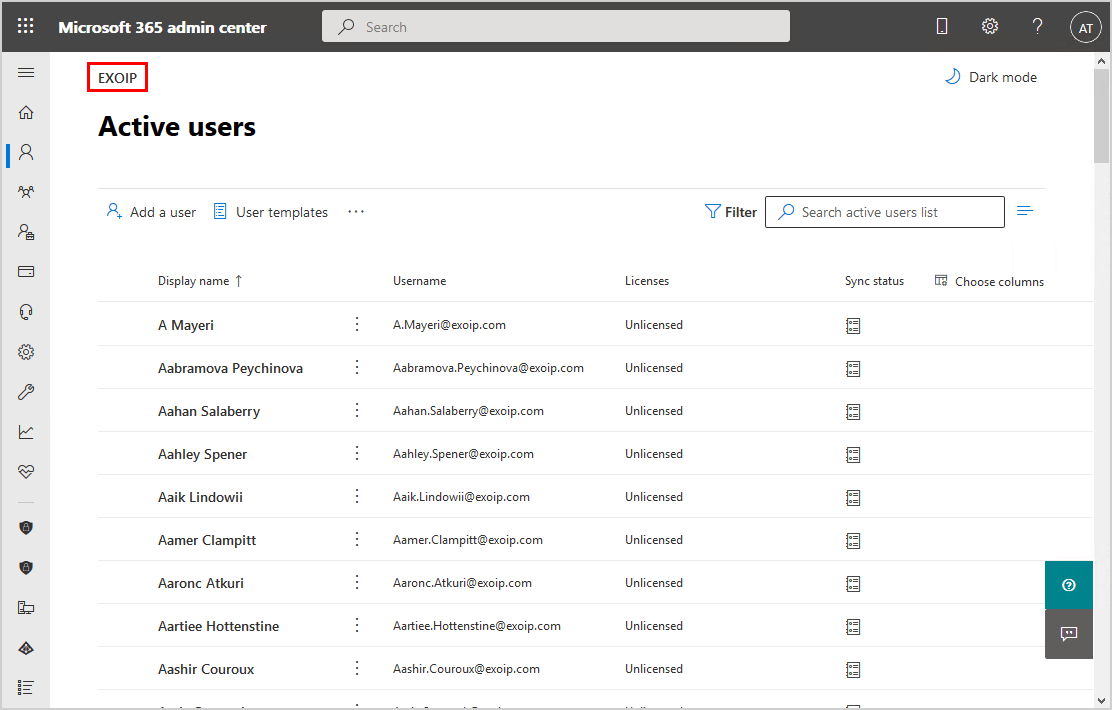
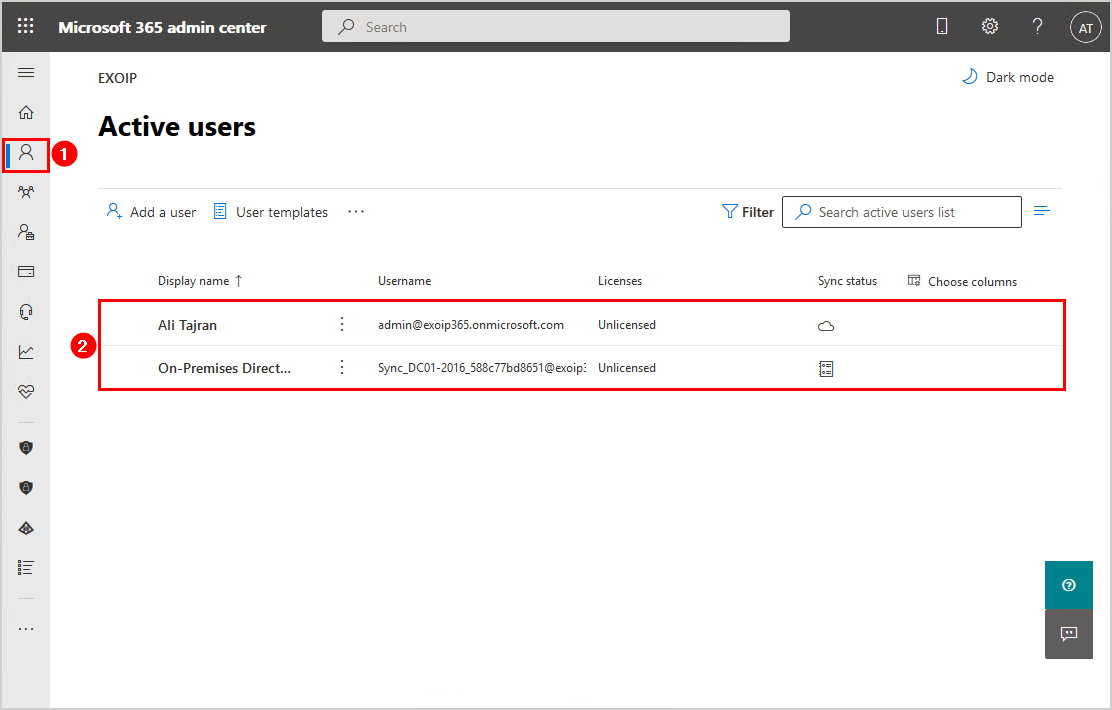
Check Microsoft 365 admin center Active users
Sign in to the existing Microsoft 365 admin center. The existing Microsoft 365 tenant name is EXOIP. All the users in the Microsoft 365 admin center are in sync with on-premises Active Directory.
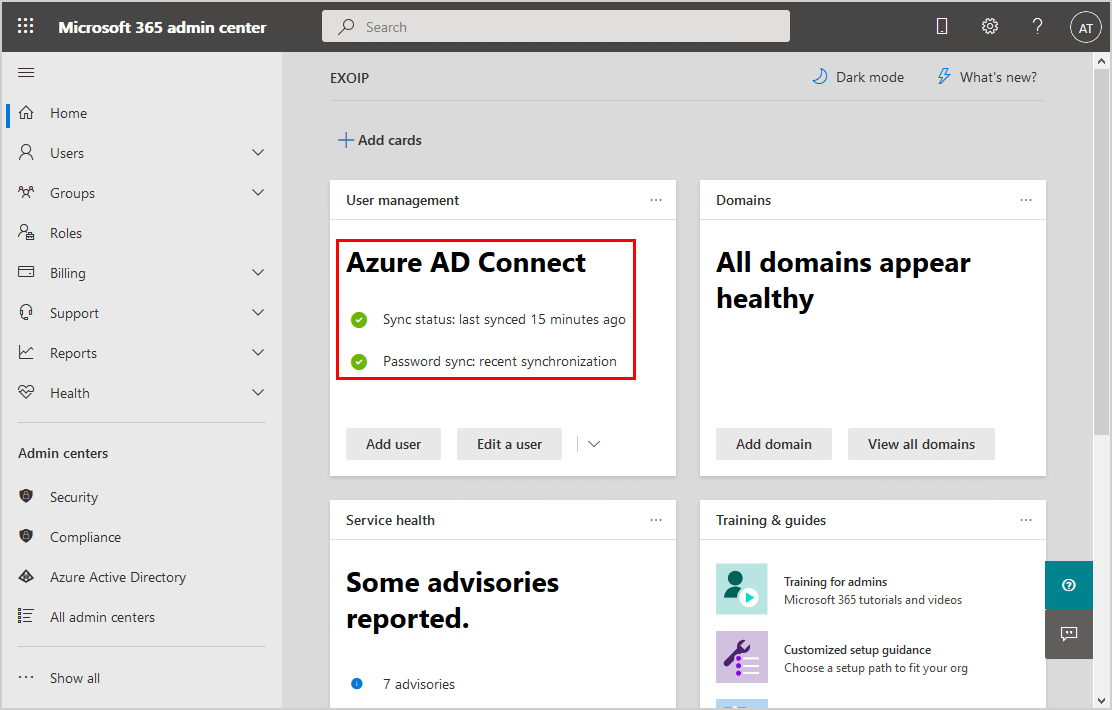
Check Microsoft 365 admin center Azure AD Connect sync status
In the menu, click on Home. We can see the User management tile. Azure AD Connect sync status and password sync both have a green checkmark.
Check Azure AD Synchronization Service Manager status
Sign in to the Azure AD Connect on-premises server. Start Azure AD Synchronization Service Manager. The Synchronization Service Manager shows the status success. The sync is working perfectly fine.

We did check that the sync works from on-premises AD to existing Microsoft 365 tenant. In the next steps, we will move Azure AD Connect to new tenant step by step.
Move Azure AD Connect to new tenant
Follow the step-by-step approach to disconnect from existing Office 365/Microsoft 365 tenant and move to new Office 365/Microsoft 365 tenant.
Step 1: Stop Azure AD Connect synchronization scheduler
Stop Azure AD Connect synchronization scheduler with the Set-ADSyncScheduler cmdlet.
PS C:\> Set-ADSyncScheduler -SyncCycleEnabled $FalseStep 2: Check Azure AD Connect synchronization stopped
Verify that Azure AD Connect synchronization stopped after running the cmdlet in the previous step. Run Get-ADSyncScheduler cmdlet. Look at the object SyncCycleEnabled. It will show the value False.
PS C:\> Get-ADSyncScheduler


AllowedSyncCycleInterval            : 00:30:00
CurrentlyEffectiveSyncCycleInterval : 00:30:00
CustomizedSyncCycleInterval         :
NextSyncCyclePolicyType             : Delta
NextSyncCycleStartTimeInUTC         : 4/28/2021 7:48:01 PM
PurgeRunHistoryInterval             : 7.00:00:00
SyncCycleEnabled                    : False
MaintenanceEnabled                  : True
StagingModeEnabled                  : False
SchedulerSuspended                  : False
SyncCycleInProgress                 : False
Step 3: Create OU in Active Directory
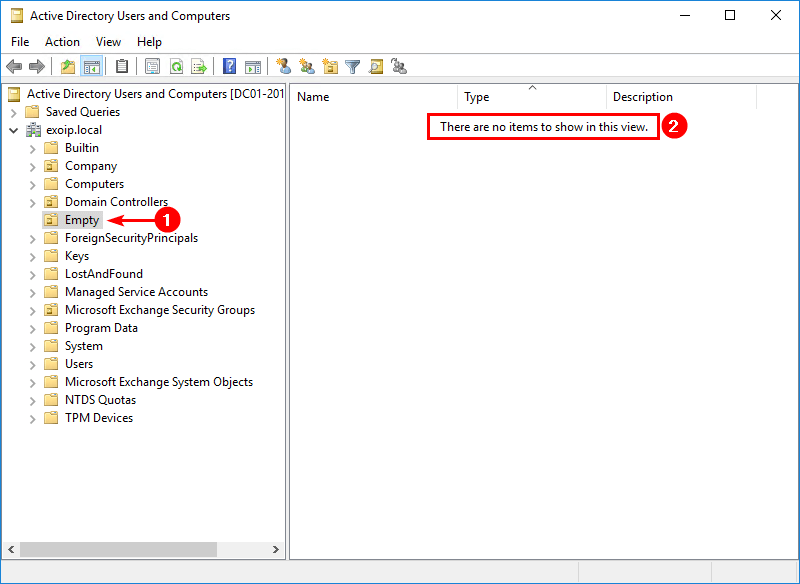
Start Active Directory Users and Computers on-premises. Create an OU and give it the name Empty. Make sure that there are no objects in that OU.
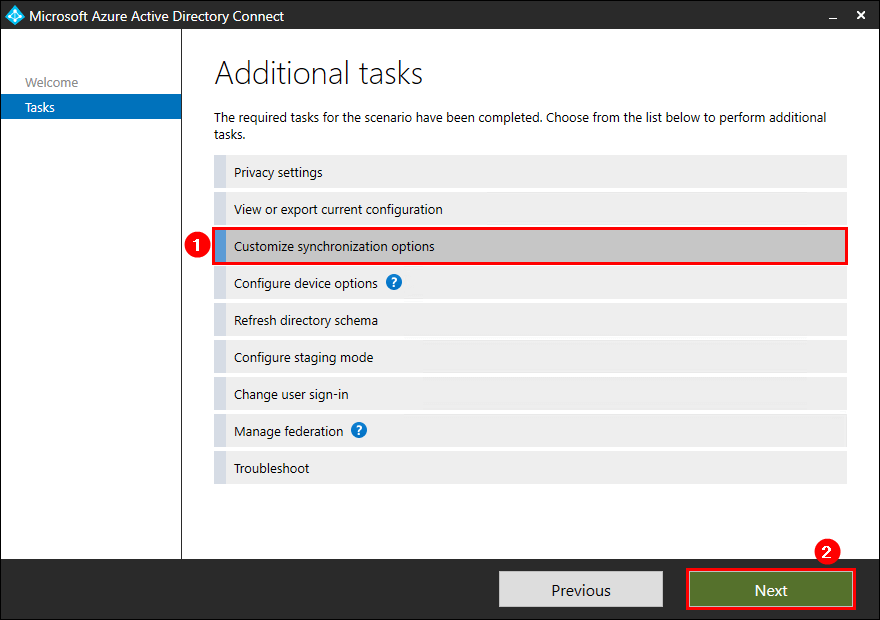
Step 4: Customize synchronization options
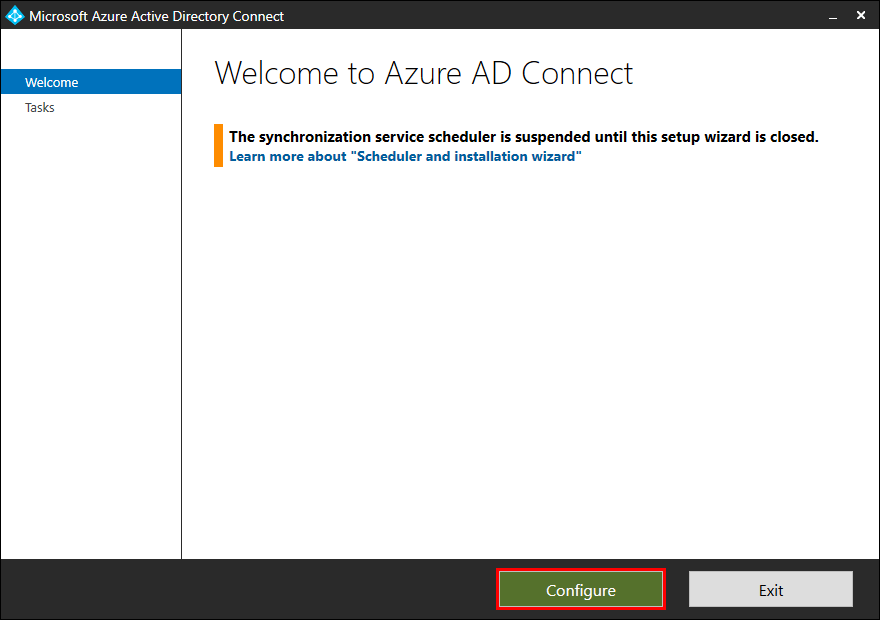
Start Azure AD Connect. Click Configure.
Click Customize synchronization options. Click Next.
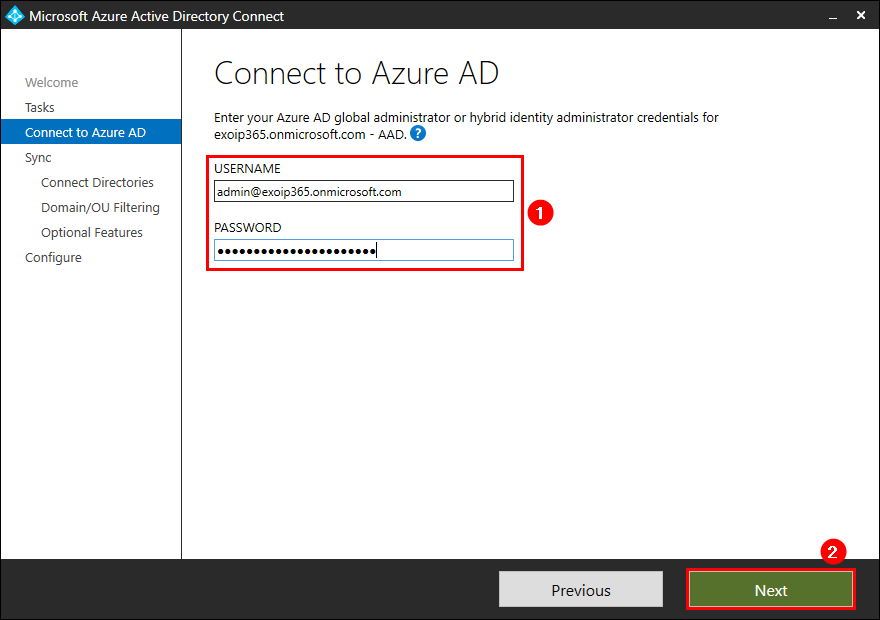
Enter the existing Azure AD global administrator credentials. Click Next.
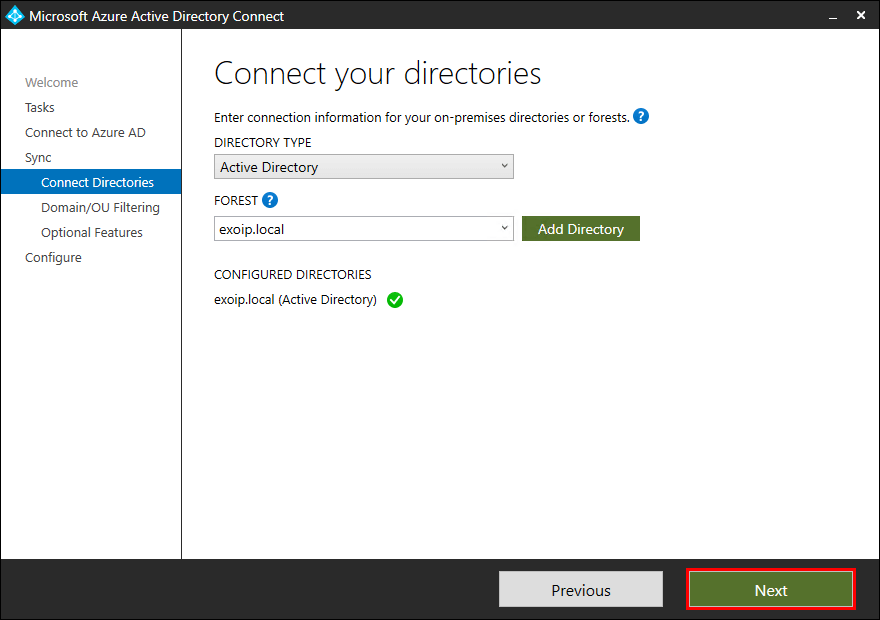
Click Next.
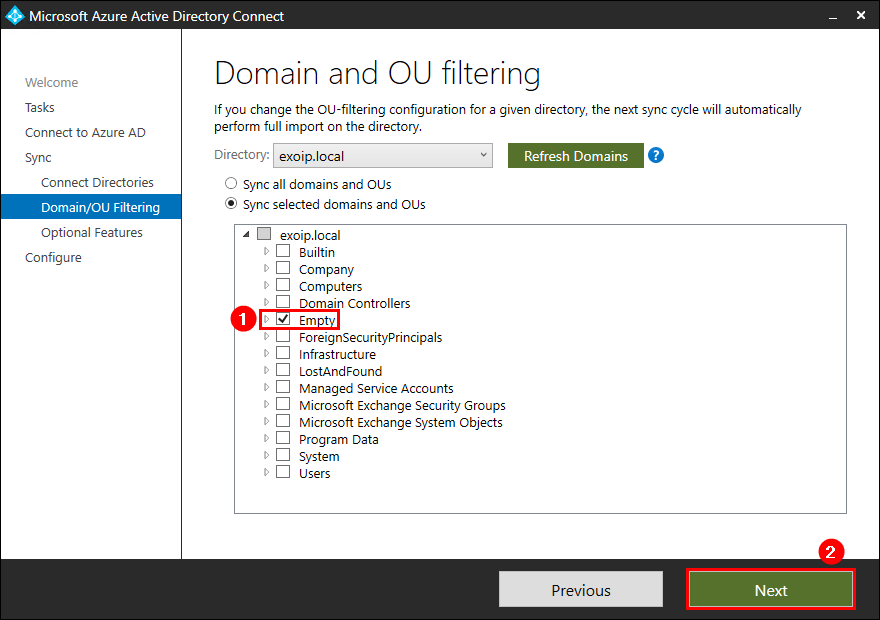
Select ONLY the Empty OU, which you did create in the previous step. Click Next.
If you don’t select an OU, Azure AD Connect will not sync. You have to select an OU.
Click Next.

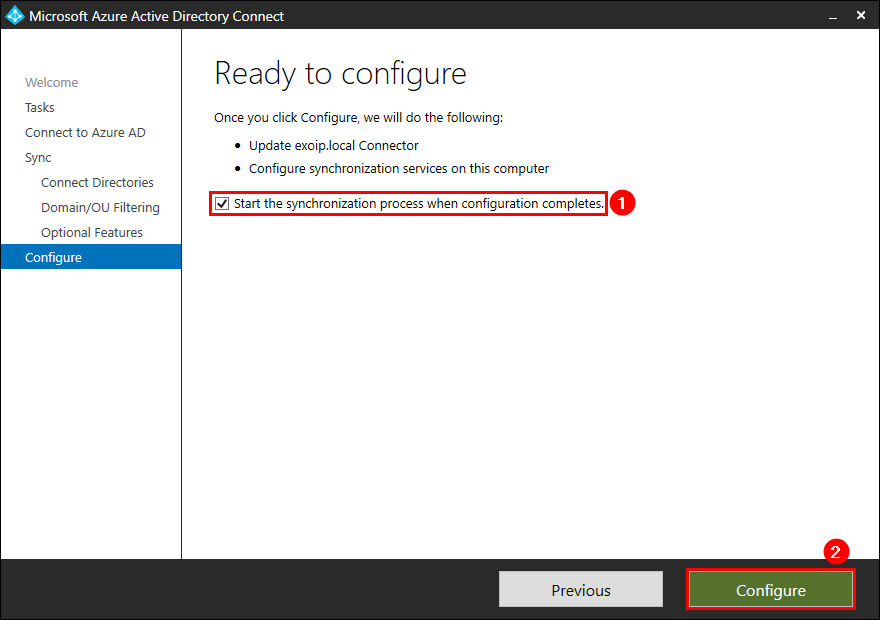
Check the checkbox Start the synchronization process when configuration completes. Click Configure.
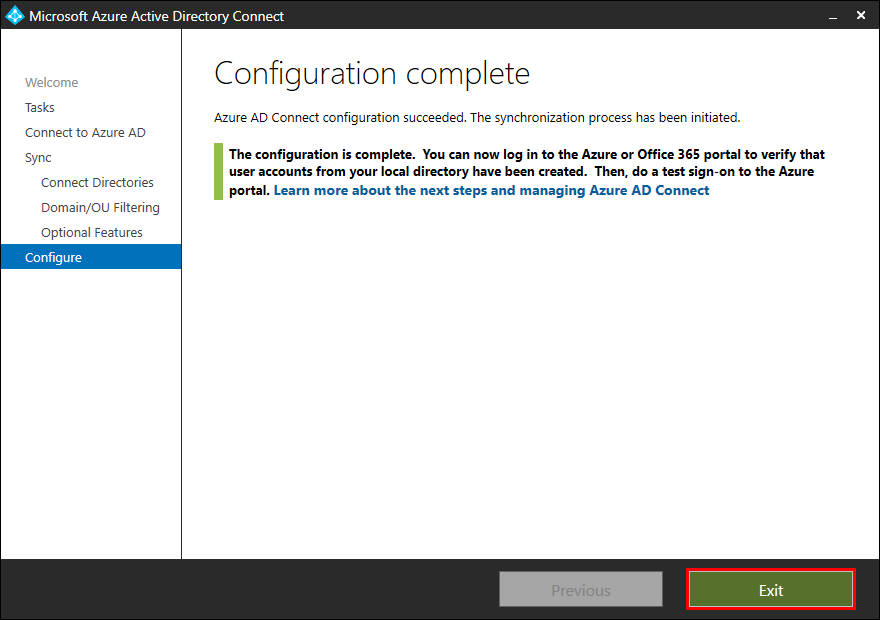
Configuration did complete. Click Exit.
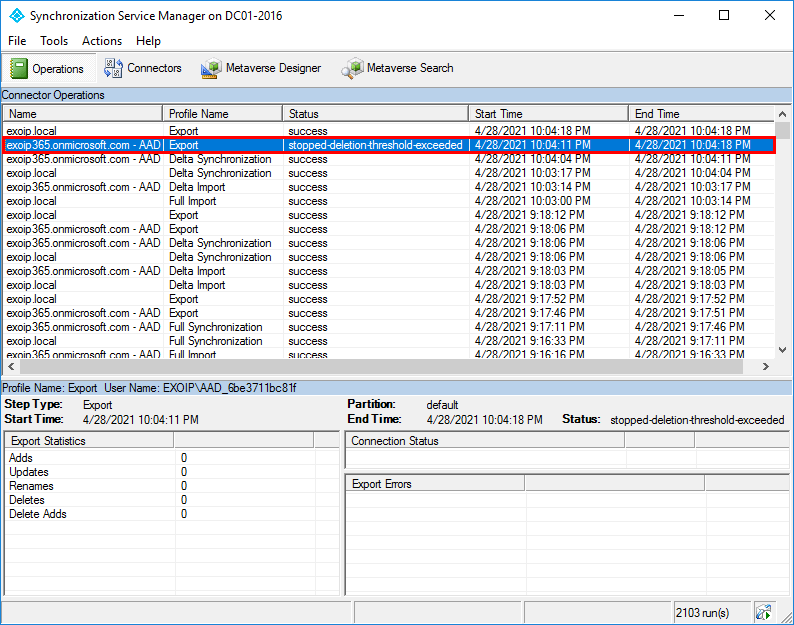
Step 5: Disable Azure AD Connect deletion threshold
Read more in the article: Stopped deletion threshold exceeded – Azure AD Connect.
Look in the Synchronization Service Manager. Do you get the status stopped-deletion-threshold-exceeded? Follow the steps below. If not, go to the next step.
Run PowerShell as administrator. Run the Get-ADSyncExportDeletionThreshold cmdlet to check both the objects DeletionPrevention and TresholdCount.
PS C:\> Get-ADSyncExportDeletionThreshold

DeletionPrevention ThresholdPercentage ThresholdCount
------------------ ------------------- --------------
                 1                   0            500
Disable Azure AD Connect sync export deletion threshold with the Disable-ADSyncExportDeletionThreshold cmdlet.
PS C:\> Disable-ADSyncExportDeletionThreshold

DeletionPrevention ThresholdPercentage ThresholdCount
------------------ ------------------- --------------
                 0                   0            500
Step 6: Force Azure AD Connect to sync
PS C:\> Start-ADSyncSyncCycle -PolicyType Initial
Result
------
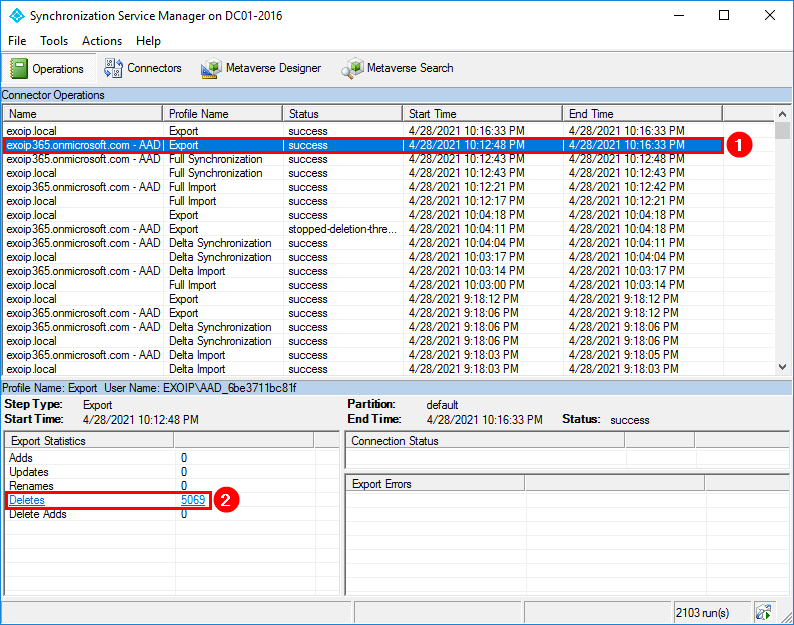
SuccessLook in Azure Synchronization Service Manager that it did run a full sync and the export is successful.
Step 7: Check users removal from Microsoft 365
Only the On-Premises Directory Synchronization Service Account is visible, and the Microsoft 365 account. You will see more objects if you did create them in the cloud.
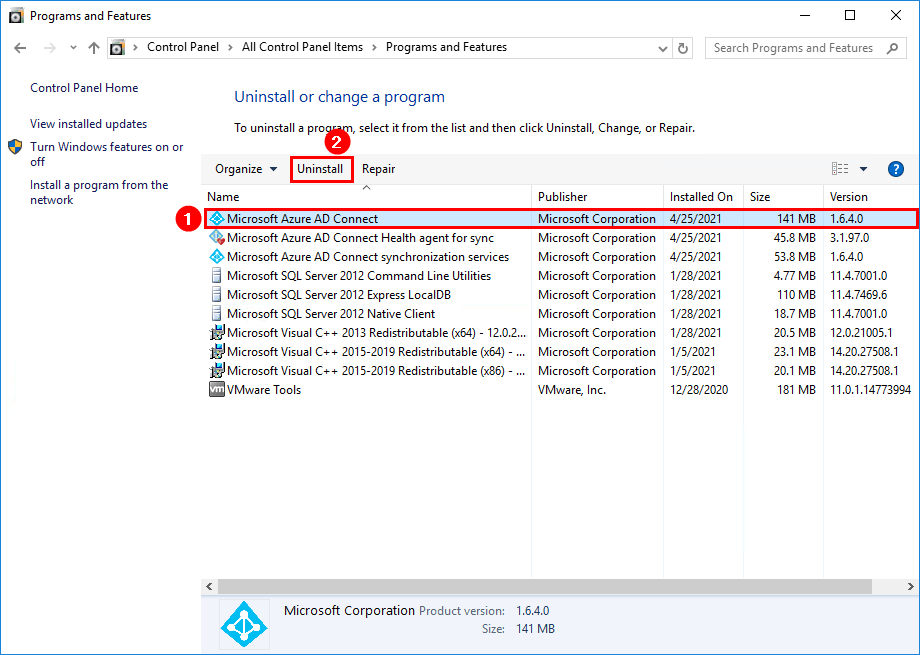
Step 8: Uninstall Azure AD Connect
Read more in the article: Uninstall Azure AD Connect.
On the Azure AD Connect server, click on Start > Control Panel > Programs and Features. Click on Microsoft Azure AD Connect and press on Uninstall.
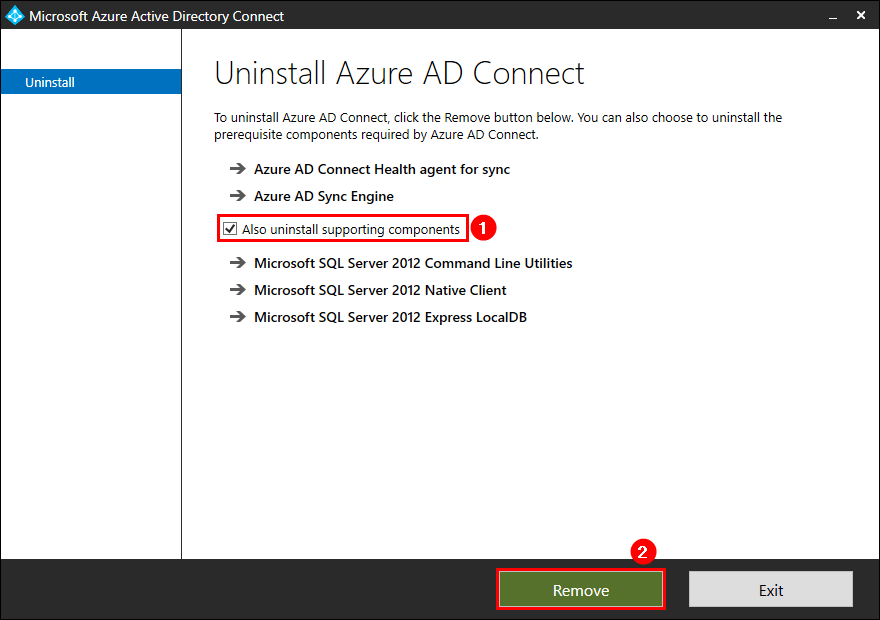
The wizard will uninstall the supporting components: Microsoft Azure AD Connect Health agent for sync, Microsoft Azure AD Connect synchronization services, and Microsoft SQL Server.
The Uninstall Azure AD Connect wizard shows up. Check the checkbox Also uninstall supporting components. Click Remove.
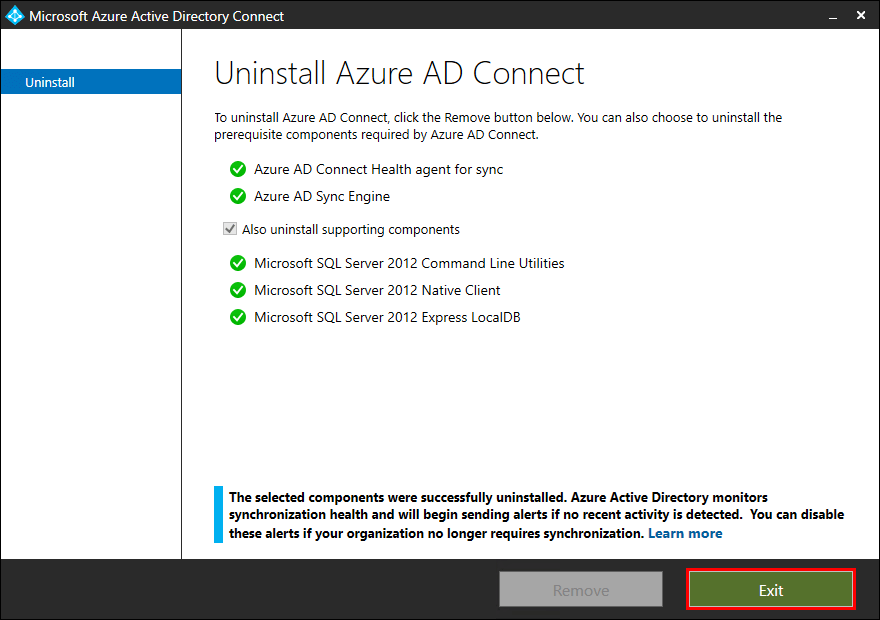
Give it a couple of minutes, and you will see the green checkmarks. Azure AD Connect is successfully uninstalled. Click Exit.
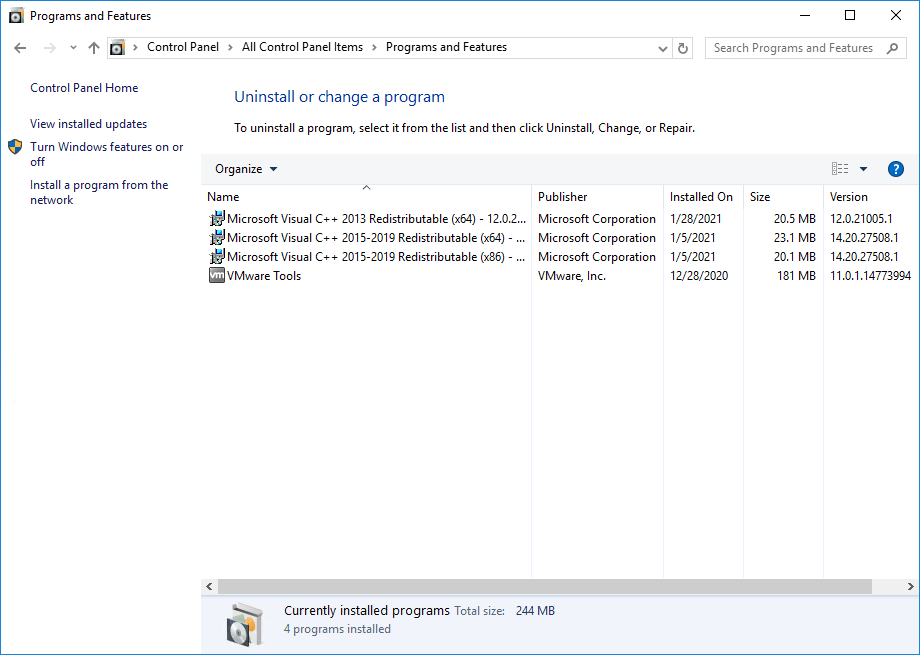
Azure AD Connect is removed from the Programs and Features list.
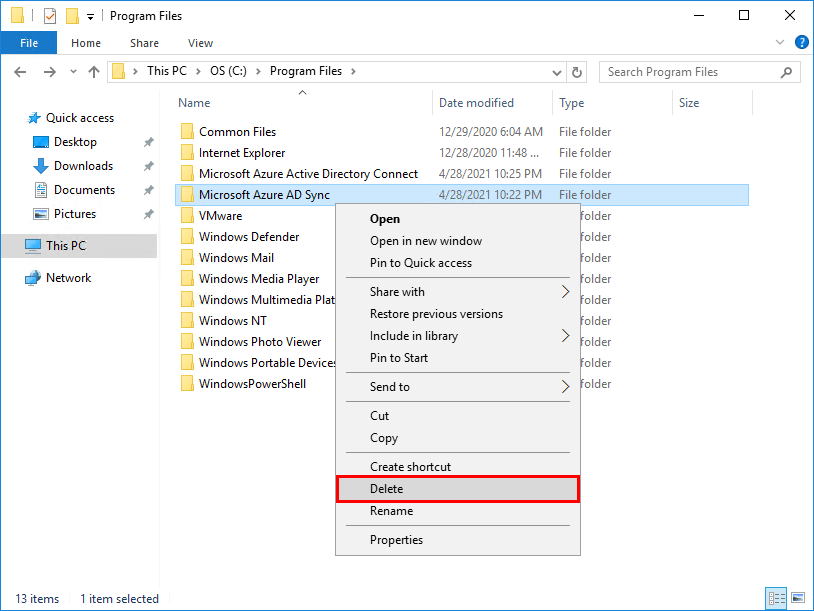
Start File Explorer. Go to C:\Program Files. Right-click Microsoft Azure AD Sync folder and click on Delete to remove Microsoft Azure AD Sync folder.
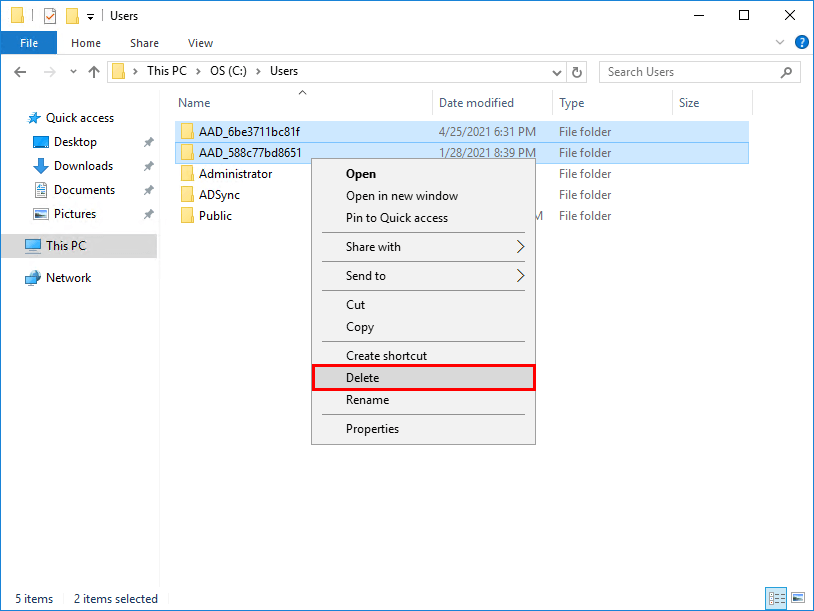
In File Explorer, navigate to the C:\Users folder. Remove the AAD_ folders. You may see folders with the prefix ADSyncMSA_. If so, remove these — more information about the ADSync service account.
Step 9: Remove custom domain from old tenant
Click in Microsoft 365 admin center menu on Setup > Domains. Set the onmicrosoft.com domain as default.
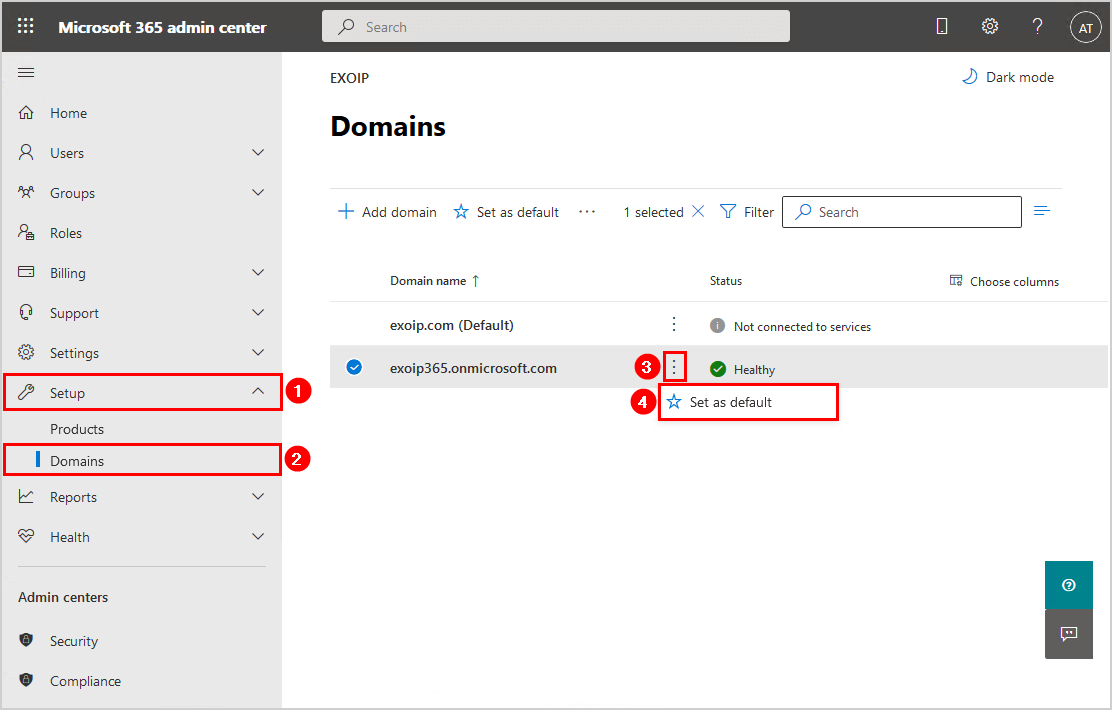
Remove the domain from the existing tenant.
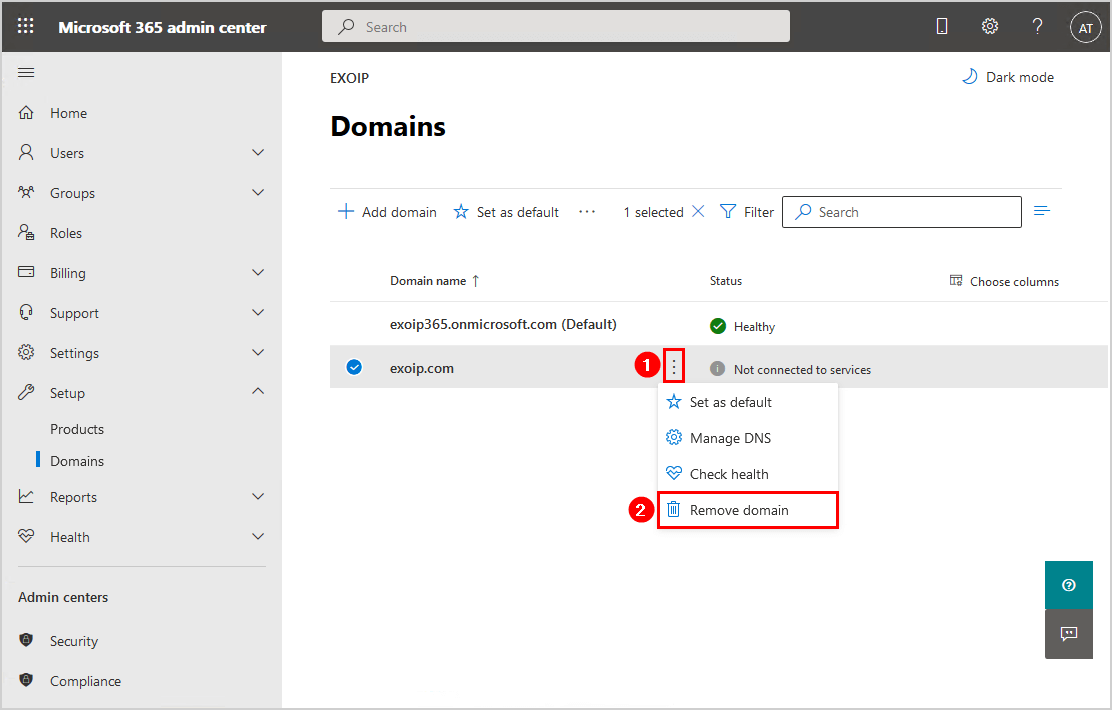
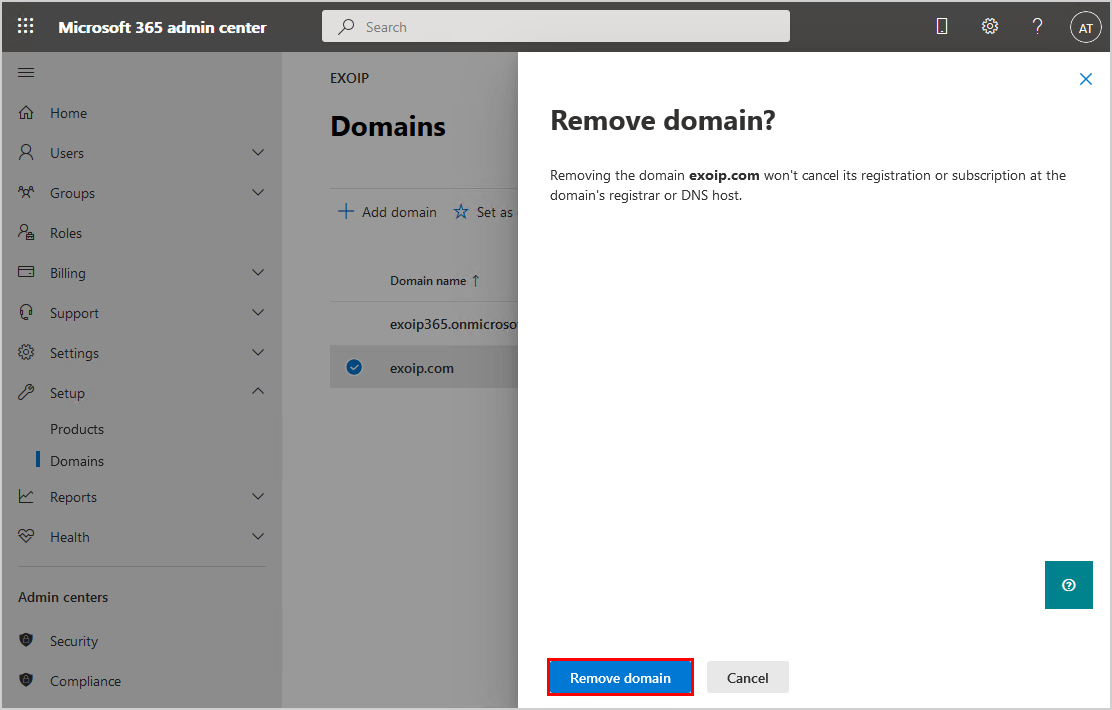
Click on Remove domain.
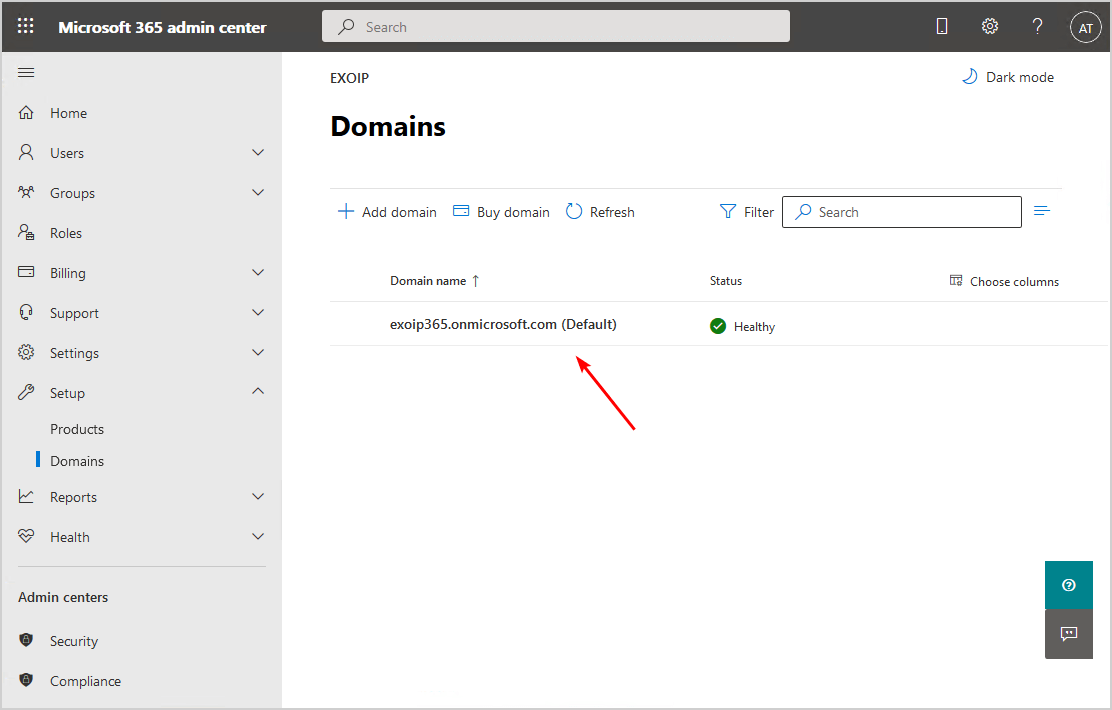
That’s how it will look after you remove the domain.
Step 10: Add custom domain in new tenant
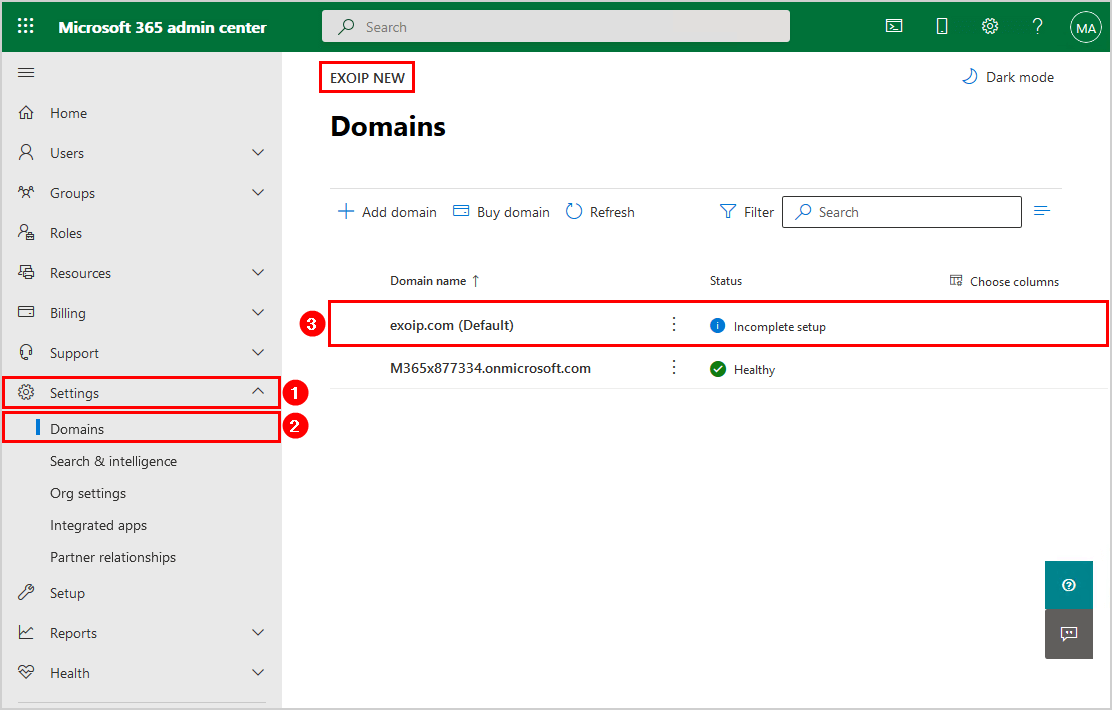
Sign in to the new Microsoft 365 admin center. The new Microsoft 365 tenant name is EXOIP NEW. In the menu, go to Settings > Domains and add the domain to the tenant.
Step 11: Install and configure Azure AD Connect
Read more: Install and configure Azure AD Connect.
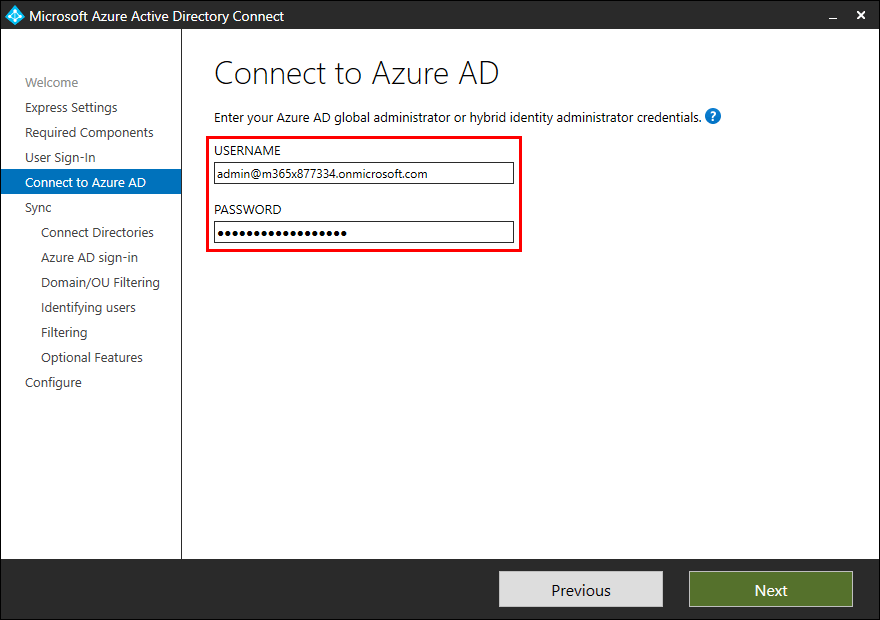
Go to the server where you uninstalled Azure AD Connect. Download the latest Azure AD Connect and run the setup. Make sure to enter the new Azure AD global administrator credentials.
You can sync all domains and OUs. In our example, we will only sync the Company OU and sub-OUs.

Finish the Azure AD Connect installation wizard.
Verify your work
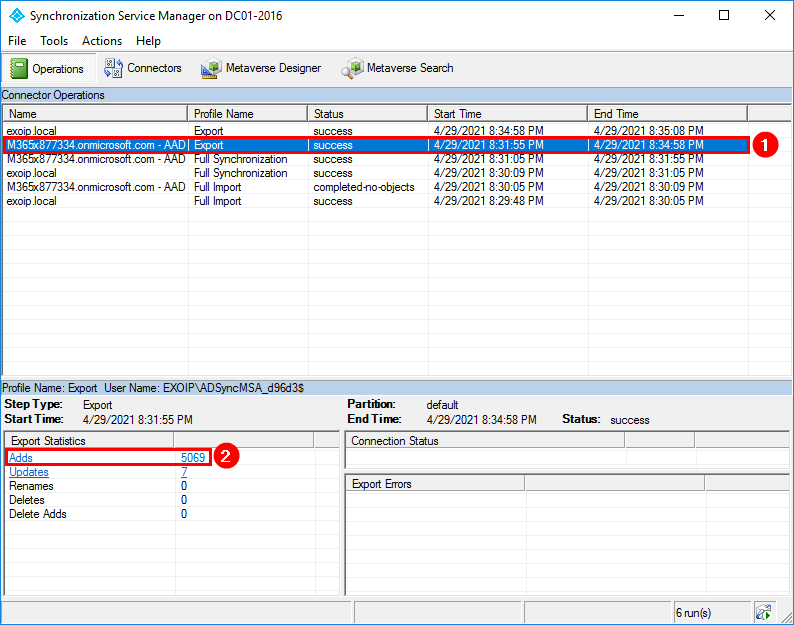
The Synchronization Service Manager shows that the sync did go with success. It did add the on-premises AD objects to Azure AD.
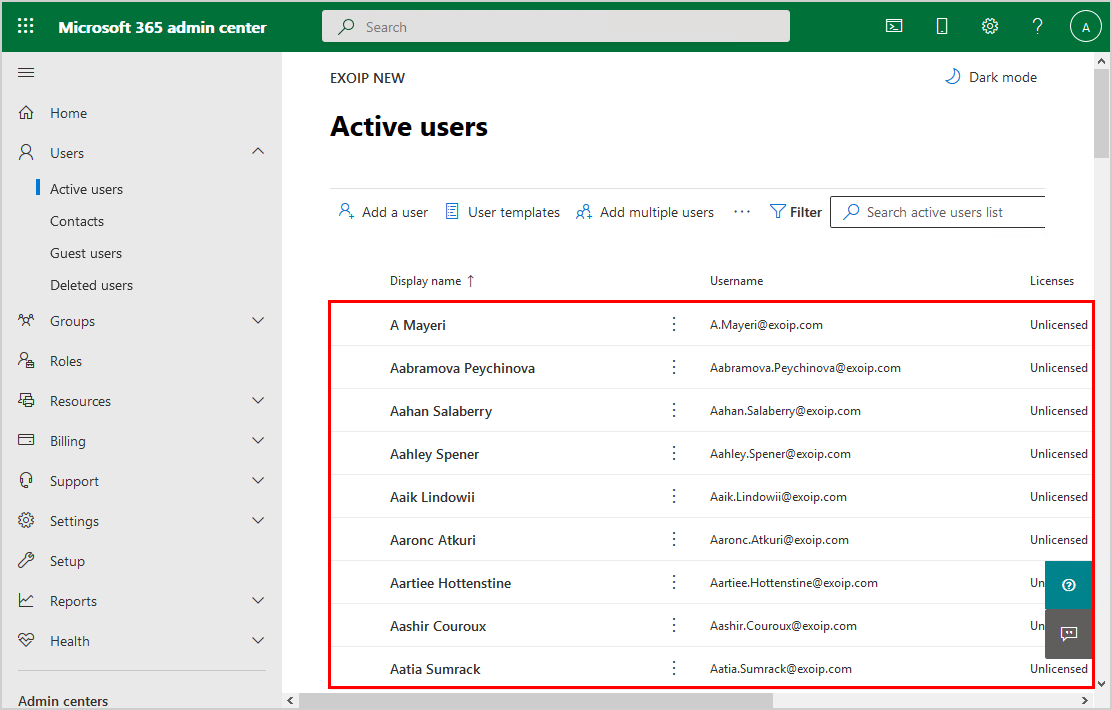
Verify the users in Microsoft 365 admin center.
Everything looks great!
The next step is to Assign Microsoft 365 licenses with group-based licensing.
Conclusion
In this article, you learned how to move Azure AD Connect to new tenant. Follow the step-by-step guide to disconnect Azure AD Connect sync with existing tenant and configure Azure AD Connect with new tenant.
Did you enjoy this article? You may also like Upgrade Azure AD Connect. Don’t forget to follow us and share this article.
What Others Are Reading

Thank you for the detailed instructions. How does it look with the user-impact? Are there problems with the tenant conversion or what must be considered at the point?
Great step-by-step guidance, thanks. My AADC fu was rusty, and this helped me get the task done in record time.
Awesome guide, thanks. One thing I noted was that upon reinstall Azure AD Connect selected ObjectGUID attribute as the source anchor. The source anchor was previously the mS-DS-ConsistencyGuid attribute – I changed it back to mS-DS-ConsistencyGuid