The Microsoft Exchange Server Auth Certificate is installed when you install an Exchange Server, and…
Move mailbox to Exchange Online with PowerShell
After installing the Hybrid Configuration Wizard (HCW), you like to move a mailbox to Exchange Online with PowerShell. The term is also known as onboarding a mailbox to the cloud. So what do you need to fill in PowerShell to start the mailbox migration? In this article, you will learn how to migrate a mailbox to Exchange Online with PowerShell.
Table of contents
- How to move mailbox to Exchange Online with PowerShell
- 1. Connect to Exchange Online PowerShell
- 2. Find migration endpoint remote server URL
- 3. Move mailbox to Exchange Online with PowerShell
- 4. Move multiple mailboxes to Exchange Online with PowerShell
- 5. Move primary mailbox only to Exchange Online with PowerShell
- 6. Move archive mailbox only to Exchange Online with PowerShell
- 7. Get mailbox move status
- Conclusion
How to move mailbox to Exchange Online with PowerShell
To move a mailbox to Exchange Online with PowerShell, follow these steps:
1. Connect to Exchange Online PowerShell
Start PowerShell as administrator and Connect to Exchange Online PowerShell.
Connect-ExchangeOnlineNote: You are not pushing the on-premises mailbox to Exchange Online. In fact, you are pulling the on-premises mailbox from Exchange Online. That’s why you need to connect to Exchange Online and run the commands from Exchange Online PowerShell.
2. Find migration endpoint remote server URL
Get the remote server URL by using the Get-MigrationEndpoint cmdlet. Read more about how to find RemoteHostName URL for mailbox migration. The Hybrid Configuration Wizard created this migration endpoint.
Get-MigrationEndpoint | Format-List Identity, RemoteServerThe below output appears. Copy the RemoteServer URL value as you need it in the next part.
Identity     : Hybrid Migration Endpoint - EWS (Default Web Site)
RemoteServer : mail.exoip.com
3. Move mailbox to Exchange Online with PowerShell
Create a new move request to move the primary mailbox and archive mailbox to Exchange Online. Fill in the following details:
- -Identity: Mailbox name or email address
- -RemoteHostName: The remote server that you copied in the previous step
- -TargetDeliveryDomain: Primary SMTP domain used for the Exchange Online organization mailboxes
- -RemoteCredential: On-premises administrator account with privileges
After running the command, a credential sign-in request will show up. Fill in the password of the on-premises credentials (RemoteCredential).
New-MoveRequest -Identity "Maisha.Lee@exoip.com" -Remote -RemoteHostName "mail.exoip.com" -TargetDeliveryDomain "exoip365.mail.onmicrosoft.com" -RemoteCredential (Get-Credential)4. Move multiple mailboxes to Exchange Online with PowerShell
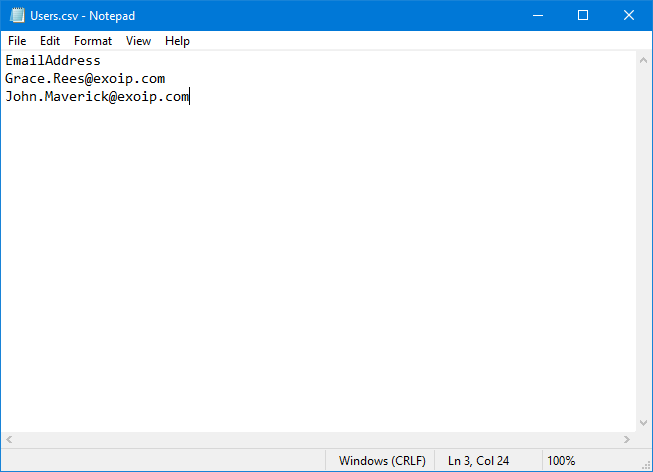
Create a CSV file named Users.csv and place it in the directory C:\migration.
Open the CSV file, name the header column EmailAddress, and fill in all the mailboxes that you like to move to Exchange Online.
Copy the script below and change the first 3 lines. After that, run the script.
$Mailboxes = Import-Csv "C:\Migration\Users.csv"
$RemoteHostName = "mail.exoip.com"
$TargetDeliveryDomain = "exoip365.mail.onmicrosoft.com"
$OnPremCred = (Get-Credential)

# Move mailboxes in CSV file to Exchange Online
foreach ($Mailbox in $Mailboxes) {
    $params = @{
        Identity             = $mailbox.EmailAddress
        Remote               = $true
        RemoteHostName       = $RemoteHostName
        TargetDeliveryDomain = $TargetDeliveryDomain
        RemoteCredential     = $OnPremCred
    }

    New-MoveRequest @params
}
5. Move primary mailbox only to Exchange Online with PowerShell
Suppose the archive mailbox location is in Exchange Online and the primary mailbox location is in Exchange on-premises. When you run the above command, you receive the following error message:
You must specify the PrimaryOnly parameter
Target user ‘Maisha Lee’ already has an archive mailbox.
This is how it looks in the PowerShell console:
PS C:\> New-MoveRequest -Identity "Maisha.Lee@exoip.com" -Remote -RemoteHostName "mail.exoip.com" -TargetDeliveryDomain "exoip365.mail.onmicrosoft.com" -RemoteCredential (Get-Credential)
You must specify the PrimaryOnly parameter.
Target user 'Maisha Lee' already has an archive mailbox.
    + CategoryInfo          : NotSpecified: (:) [New-MoveRequest], MailboxReplicationPermanentException
    + FullyQualifiedErrorId : [Server=PAXP190MB1743,RequestId=3f8179c3-aa93-453f-9e14-d824968f34c4,TimeStamp=5/28/2022
    7:19:13 AM] [FailureCategory=Cmdlet-MailboxReplicationPermanentException] FE8B9422,Microsoft.Exchange.Management.
  Migration.MailboxReplication.MoveRequest.NewModernMoveRequest
    + PSComputerName        : outlook.office365.com
You must add the -PrimaryOnly parameter to the command.
Create a new move request to move the primary mailbox only to Exchange Online. Fill in the following details:
- -Identity: Mailbox name or email address
- -RemoteHostName: The remote server that you copied in the previous step
- -PrimaryOnly: Keep value empty
- -TargetDeliveryDomain: Primary SMTP domain used for the Exchange Online organization mailboxes
- -RemoteCredential: On-premises administrator account with privileges
After running the command, a credential sign-in request will show up. Fill in the password of the on-premises credentials (RemoteCredential).
New-MoveRequest -Identity "Maisha.Lee@exoip.com" -Remote -RemoteHostName "mail.exoip.com" -PrimaryOnly -TargetDeliveryDomain "exoip365.mail.onmicrosoft.com" -RemoteCredential (Get-Credential)6. Move archive mailbox only to Exchange Online with PowerShell
You must add the -ArchiveOnly parameter to the command.
Create a new move request to move the archive mailbox only to Exchange Online. Fill in the following details:
- -Identity: Mailbox name or email address
- -RemoteHostName: The remote server that you copied in the previous step
- -ArchiveOnly: Keep value empty
- -TargetDeliveryDomain: Primary SMTP domain used for the Exchange Online organization mailboxes
- -RemoteCredential: On-premises administrator account with privileges
After running the command, a credential sign-in request will show up. Fill in the password of the on-premises credentials (RemoteCredential).
New-MoveRequest -Identity "Maisha.Lee@exoip.com" -Remote -RemoteHostName "mail.exoip.com" -ArchiveOnly -TargetDeliveryDomain "exoip365.mail.onmicrosoft.com" -RemoteCredential (Get-Credential)7. Get mailbox move status
Get the status of the mailbox move request by using the Get-MoveRequest cmdlet.
Get-MoveRequest -Identity "Maisha.Lee@exoip.com" | Get-MoveRequestStatisticsRun the below command to get all the mailbox move requests.
Get-MoveRequest | Get-MoveRequestStatisticsThe output shows the mailbox move status and shows the completed status.
DisplayName StatusDetail TotalMailboxSize            TotalArchiveSize PercentComplete
----------- ------------ ----------------            ---------------- ---------------
Maisha Lee  Completed    32.11 MB (33,670,771 bytes) 0 B (0 bytes)    100
If that is not the case and you can’t complete the mailbox move request, you can suspend and resume the move request. It helps in most situations when you get a failed status. For example, the status detail TransientFailure.
Did this article help you to migrate the mailbox to Exchange Online with PowerShell? I hope it did.
Read more: Complete migration batch with PowerShell »
Conclusion
You learned how to move a mailbox to Exchange Online with PowerShell. Connect to Exchange Online PowerShell and run the commands as shown in the article. Remember to monitor the mailbox move to Exchange Online until it’s successfully completed.
Did you enjoy this article? You may also like Target mailbox doesn’t have an SMTP proxy matching. Don’t forget to follow us and share this article.
What Others Are Reading


Can you get this to work with a TXT file that contains the e-mail addresses of the mailboxes without the header or EmailAddress???
any idea about moving 145gb mailbox to online
Thank you!