The Microsoft Exchange Server Auth Certificate is installed when you install an Exchange Server, and…
Create mailbox database in Exchange Server
After installing Exchange Server, we like to create a mailbox database. After that, we can create new mailboxes in the database. In this article, you will learn how to create mailbox database in Exchange Server. Follow the course Exchange Server for more informative content.
Table of contents
Before creating Exchange mailbox database
Don’t immediately start creating Exchange mailbox databases. Instead, always check if the disks are configured correctly.
Important: We recommend having a separate database and log file disks. Read the articles Exchange database best practices and configure ReFS volumes before creating a new mailbox database.
Create mailbox database in Exchange Admin Center
To create a mailbox database in Exchange Admin Center, follow these steps:
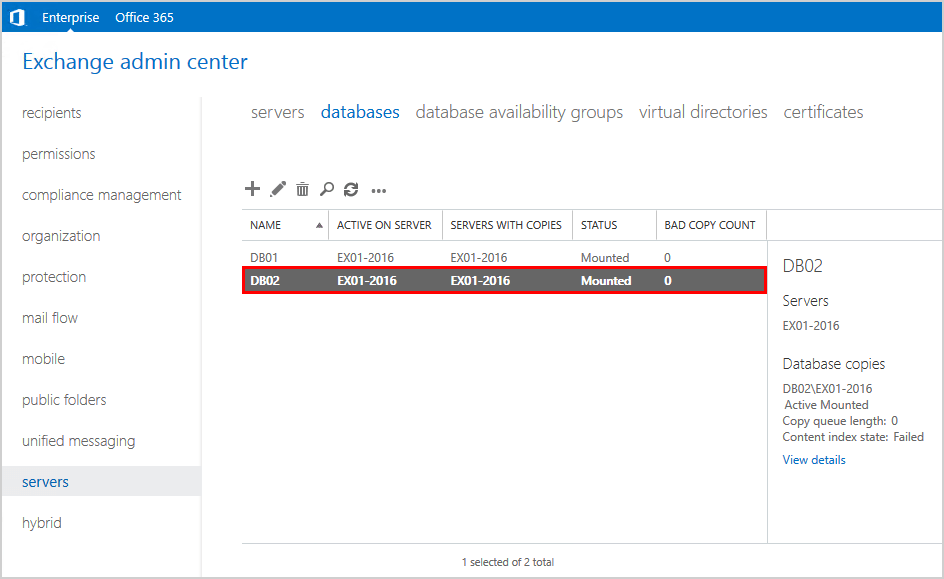
1. Sign in to Exchange Admin Center (EAC).
2. Navigate to servers > databases.
3. Click the + icon to create a new database.
In our example, there is already a database with the name DB01.
4. Fill in the mailbox database name.
5. Click Browse.
In our example, it’s the second database, and therefore we will give it the name DB02.
Read more: Exchange database naming convention »
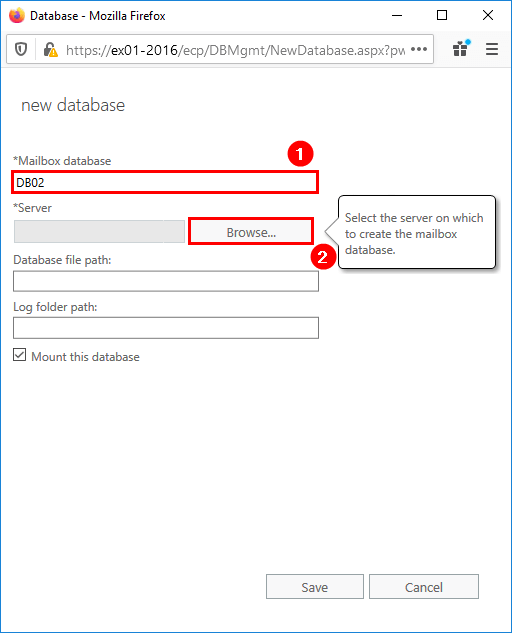
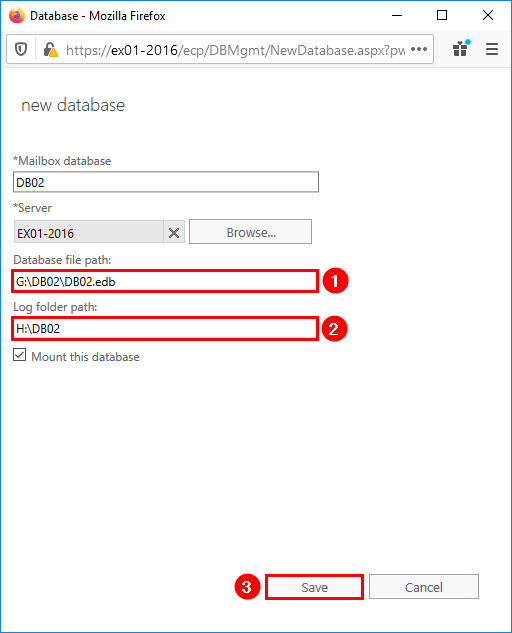
6. Select the Exchange Server where to store the database.
7. Click OK.

We recommend having separate disks for the database and log files. Read the articles Exchange database best practices and configure ReFS volumes for Exchange databases and logs.
8. Change the database file path and log folder path.
9. Click Save.
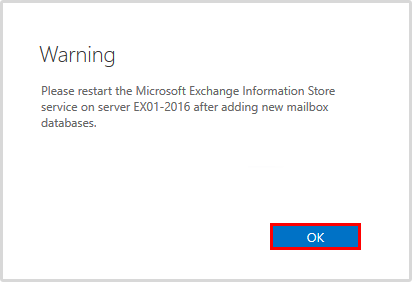
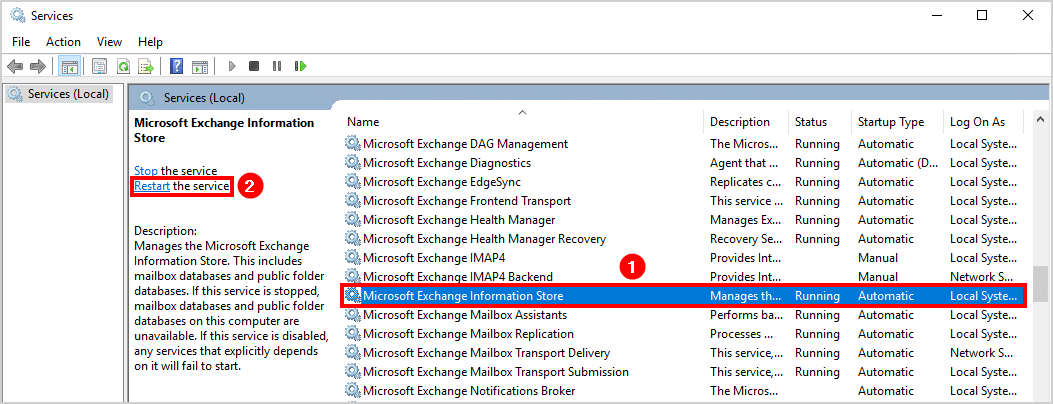
10. A warning will show to restart the Microsoft Exchange Information Store service. Click OK.
11. The mailbox database is created and mounted in Exchange Server.
11. Start Windows Services and select Microsoft Exchange Information Store. Click Restart the service.
Note: If mailboxes are configured on other mailbox databases in the same Exchange Server, restart the service after working hours. All the users with their mailbox on the affected databases will lose their Outlook Connection for a short moment. If the Exchange Server is configured in a DAG, you can perform a server switchover and restart the service.
Create mailbox database with PowerShell
To create a mailbox database with PowerShell, follow the below steps:
1. Run Exchange Management Shell as administrator
2. Run the New-MailboxDatabase cmdlet and fill in the details:
- Name: The database name.
- Server: The Exchange Server that the database will be created on.
- EdbFilePath: The database file path.
- LogFolderPath: The log folder path.
New-MailboxDatabase -Name "DB02" -Server "EX01-2016" -EdbFilePath "G:\DB02\DB02.edb" -LogFolderPath "H:\DB02"3. After the mailbox database is created successfully, it’s time to mount the database.
Mount-Database "DB02" -Confirm:$False4. Restart the Microsoft Exchange Information Store.
Note: If mailboxes are configured on other mailbox databases in the same Exchange Server, restart the service after working hours. All the users with their mailbox on the affected databases will lose their Outlook Connection for a short moment. If the Exchange Server is configured in a DAG, you can perform a server switchover and restart the service.
Restart-Service "MSExchangeIS"Verify database and log folder
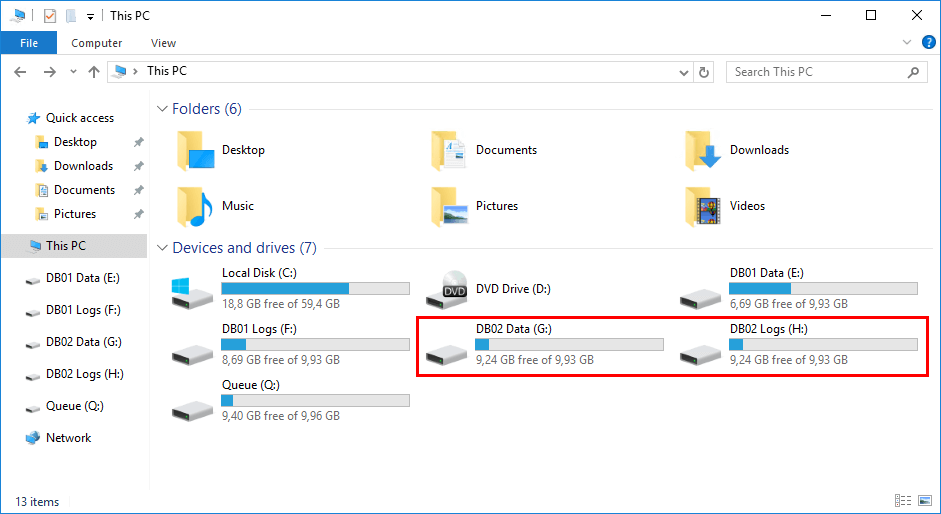
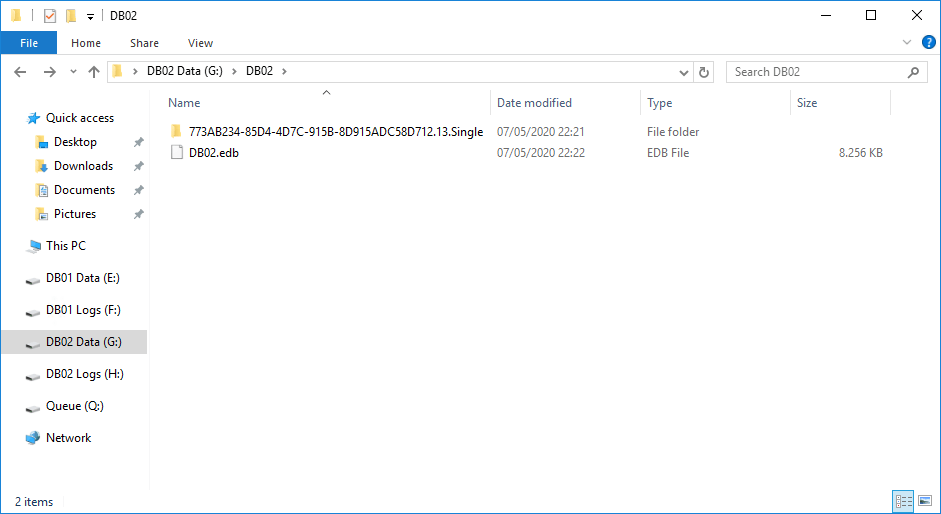
Have a look in File Explorer at the configured database folder.
Let’s have a look at File Explorer in the configured log folder.
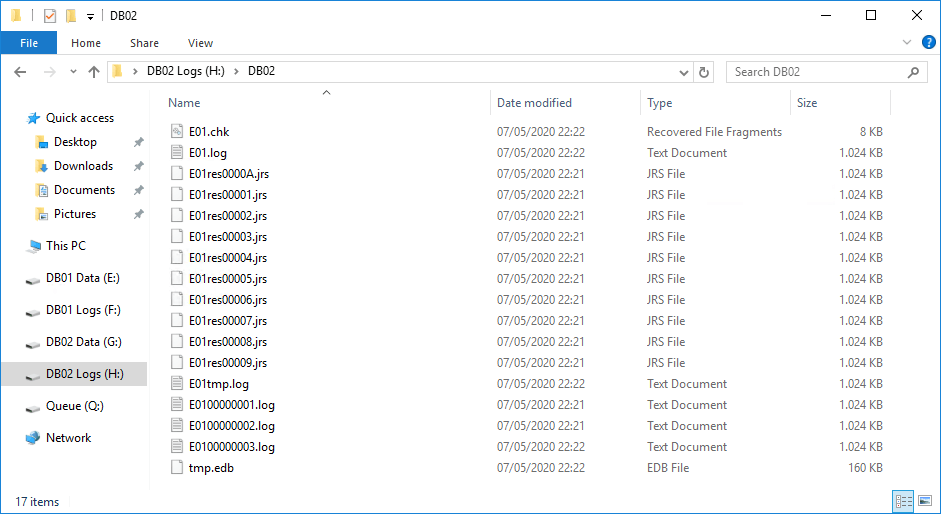
The mailbox database is created successfully, and both folders look great.
Configure mailbox database storage quotas
Don’t immediately create mailboxes or move mailboxes to the new mailbox database without first configuring mailbox database storage quotas on it.
Note: We recommend that the mailbox databases have the same quotas so that no errors occur when you move mailboxes between the mailbox databases.
Once the above is configured, you can now:
- Create user mailboxes in the new mailbox database
- Create mailboxes in bulk in the new mailbox database
- Move mailboxes to the new mailbox database
- Move all mailboxes to the new mailbox database
Did this help you to create a database in Exchange Admin Center?
Conclusion
You learned how to create mailbox database in Exchange Server. First, configure ReFS volumes for the mailbox database and logs. After that, create the mailbox database and select these volumes. As last, verify that the mailbox database appears in the list.
Did you enjoy this article? You may also like Cannot delete mailbox database in Exchange Server. Don’t forget to follow us and share this article.
What Others Are Reading

Hi Ali, appreciate all the info you post, very helpful! For an NTFS mounted volume, I created a new volume and pointed it to the mount point path which is located C (for example C:\MDB01\Database), however exchange placed the database and log file in the default Microsoft location in Program Files. How do you recommend populating with the correct syntax to place the db/log files in the ntfs mount?
Hi Evan,
You can read more in the article Configure mount points for Exchange Server.